

Download Sample Images
Download Assets
Downloads are free with a PHLEARN account.
- Download the sample images and PSDs from every free tutorial on PHLEARN
- New free tutorials published every week
- One free account — sign up once, then download anything
description
The Pen Tool is great at making clean selections and cutouts, but it can be tricky to learn. Follow along as we break down all of the essential features and keyboard shortcuts that will help you create perfect paths and beautiful Bézier curves in Photoshop!
Enjoying This Free Tutorial?
We publish a new free tutorial every week, each one with sample images and PSDs you can download and follow along with. Sign up and they land straight in your inbox, along with early word on sales, events and subscriber-only offers.


Pen Tool Shortcuts in Photoshop
Most people who give up on the Pen Tool give up for the same reason: they can place points, but they cannot fix them. A path goes slightly wrong three points back, and the only apparent option is to undo everything and start again. That is exhausting, and it is why the Pen Tool has a reputation it does not really deserve.
There are two keyboard shortcuts that solve this, and once they are in your hands the tool stops being a test of precision and becomes something you can work with loosely and correct as you go. This tutorial covers those two shortcuts, plus the smaller ones for resuming a path, adding and removing points, and turning the finished path into a mask.
Why the Pen Tool, and Not an Automatic Selection
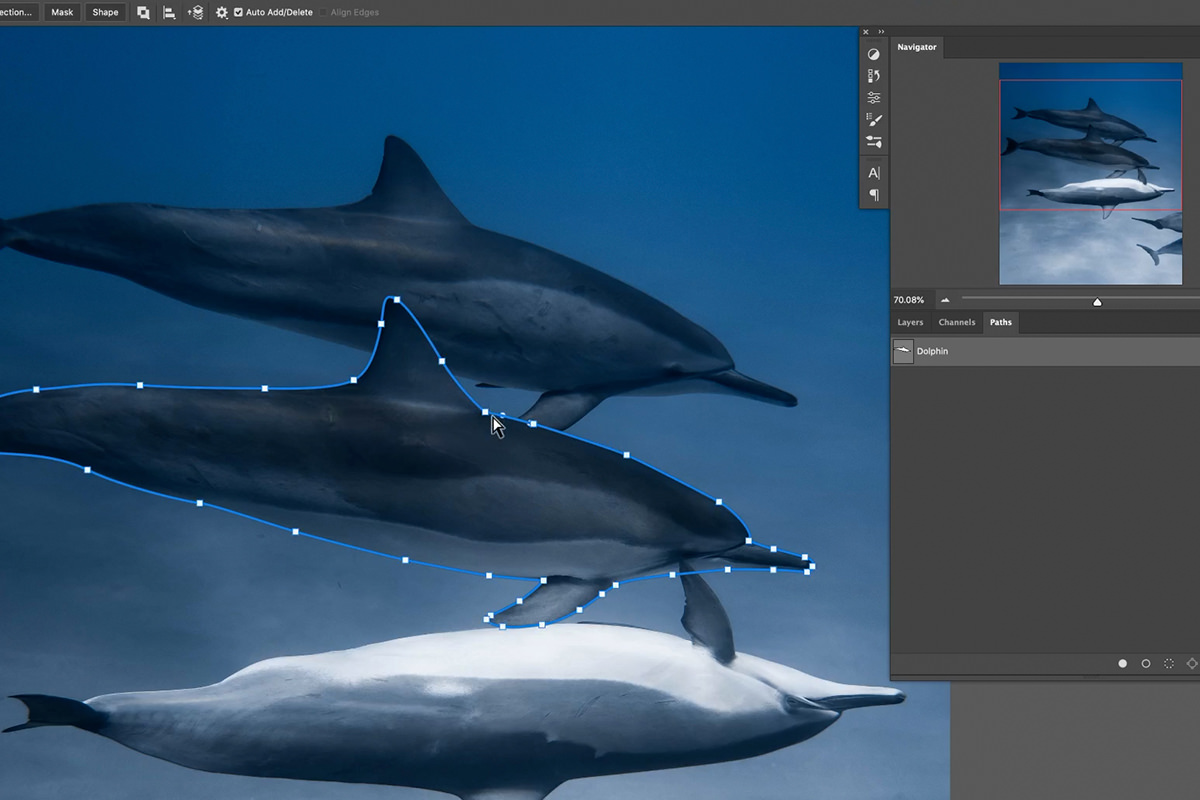
The sample image here is a dolphin with other dolphins overlapping behind it. Select Subject has no way of knowing which dolphin you mean, and it produces a selection that is decent in places and wrong in others. The Magic Wand fares no better against a busy background of similar tones.
This is exactly the situation the Pen Tool exists for. Automatic tools are excellent when the subject is clearly separated from its background. When it is not — overlapping subjects, similar colours, soft edges you need to control precisely — a hand-drawn path is still the only reliable answer, and it produces a cleaner edge than any automatic selection will.
Set the Tool Up Before You Start
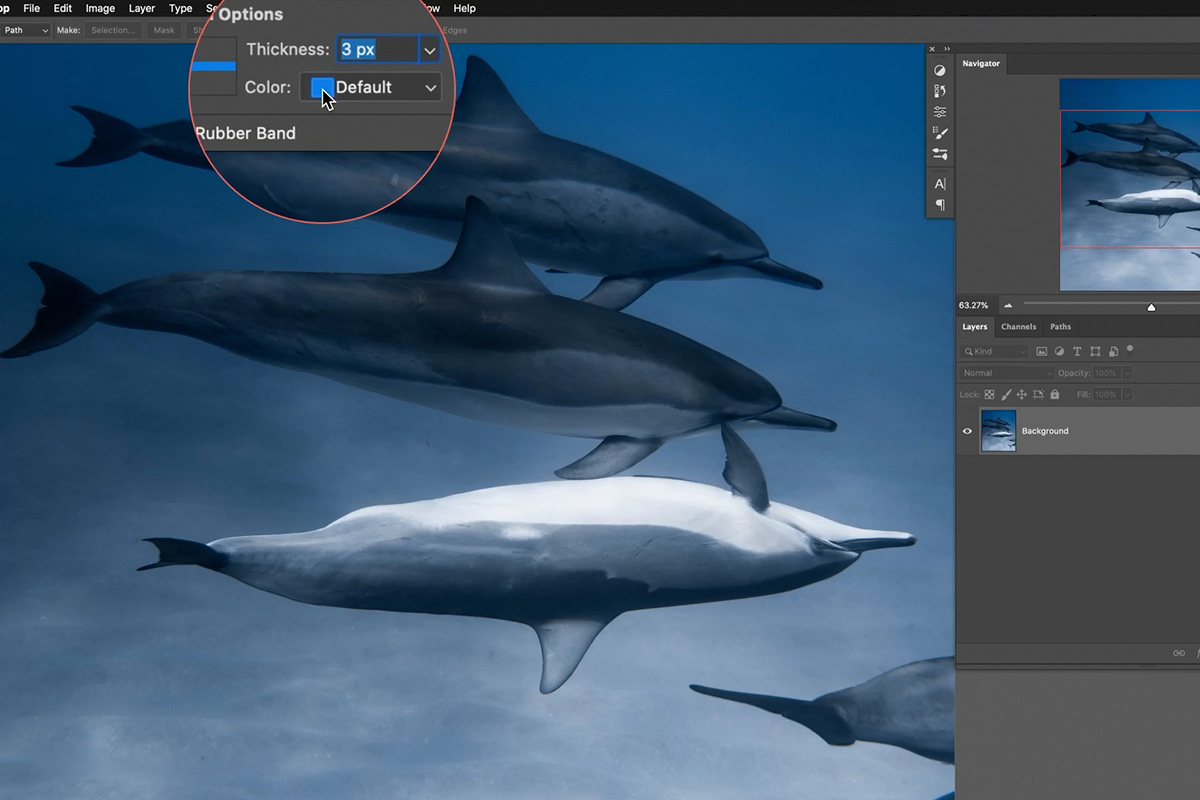
Press P for the Pen Tool, then click the gear icon in the options bar at the top. Two settings are worth changing:
-
Set thickness to 3 pixels
The default path line is thin enough to be hard to see against a detailed image. Three pixels is much easier to follow. Colour is a matter of preference — pick something that contrasts with your subject.
-
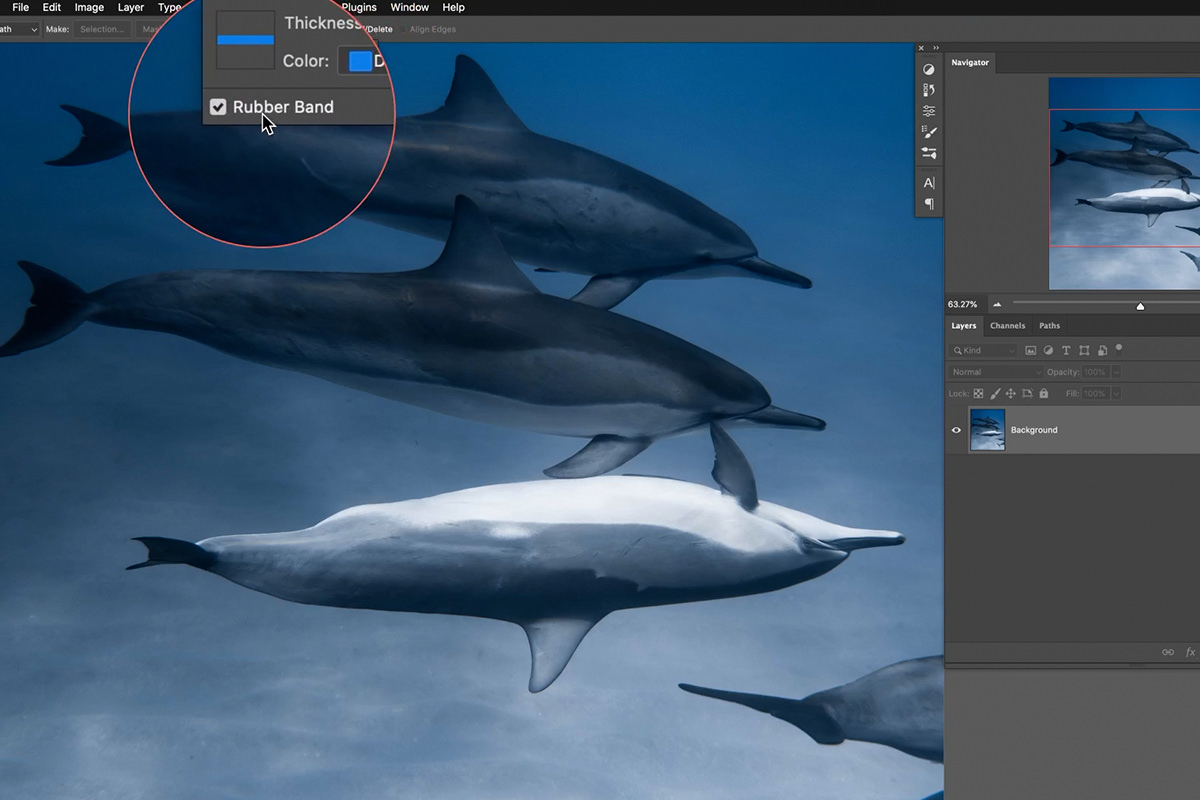
Turn on Rubber Band
This is the important one. With Rubber Band on, Photoshop previews the curve you are about to create as you move the cursor, before you click. Without it you are placing points blind and correcting afterward.
Where to Start the Path
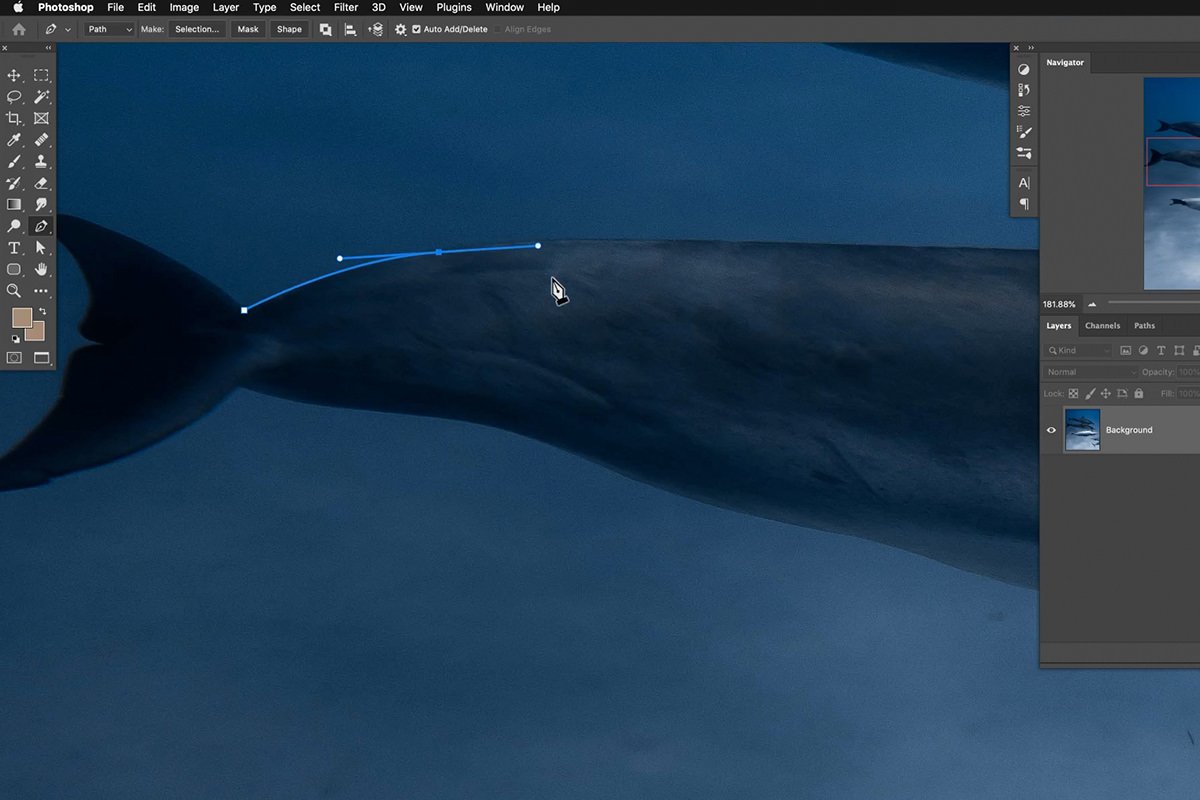
Start at a corner, not in the middle of a smooth edge. On this image that means the point where the tail meets the body — somewhere the outline changes direction sharply.
The reason is what happens at the end. When you come back around and close the path, the join has to land on the point where you began. If that point sits in the middle of a smooth curve, any small mismatch shows as a visible kink in an edge that should be seamless. On a corner, the join is hidden by the corner itself.
The Basic Move: Click and Drag
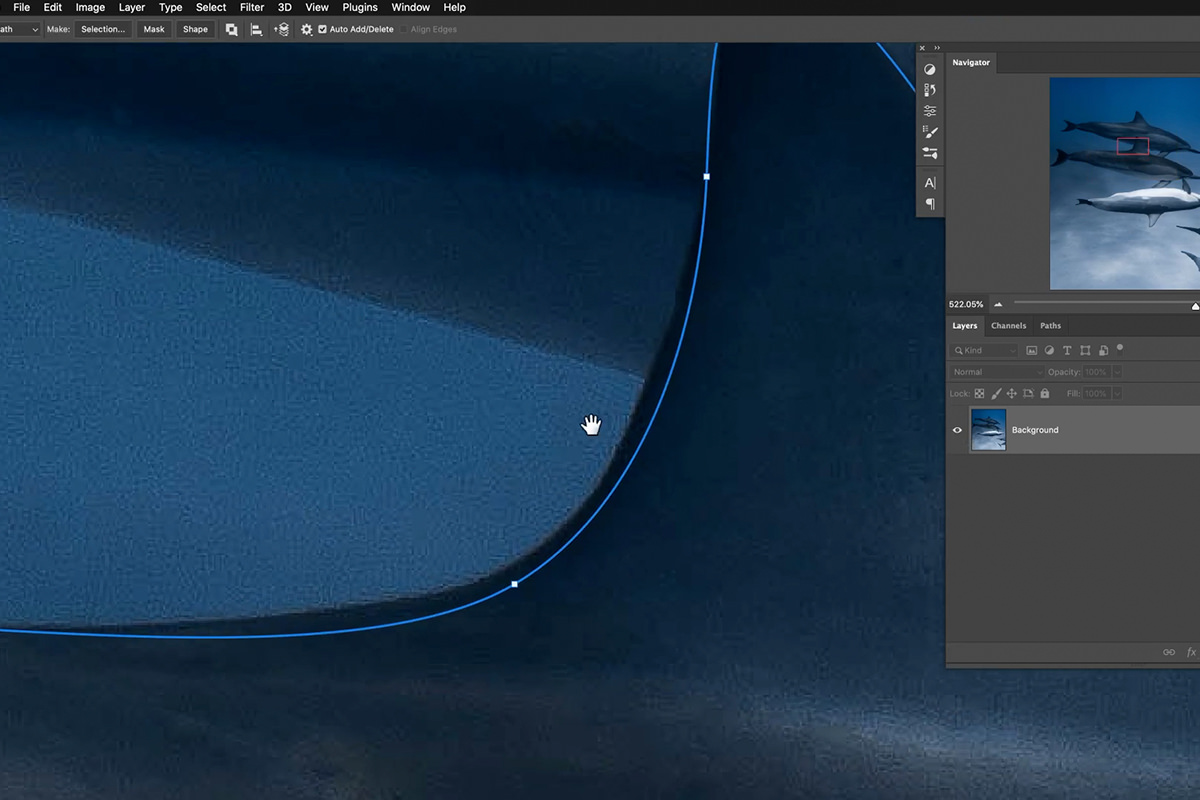
Click to place a point, and drag before releasing to pull out the handles that define the curve. Two handles appear: the one ahead of your cursor controls where the path travels next, and the one behind controls the curve you just drew.
With Rubber Band on you can see the result while you drag, which makes this far more intuitive than it sounds written down. Most of the Pen Tool is nothing more than this — click, drag, click, drag — following the edge of your subject.
If you placed every point perfectly on the first attempt you would not need any shortcuts. Nobody does. The shortcuts are for the correcting.
Shortcut One: Hold Ctrl or Cmd to Fix Anything
This is the single most useful key in the entire tool. Hold Ctrl on Windows or Cmd on Mac and the Pen Tool temporarily becomes the Direct Selection Tool. Release, and you are back to drawing — your path is still in progress the whole time.
While holding it, you can do three separate things:
Move an anchor point
Click any point you have already placed and drag it. If a point landed slightly off the edge four clicks ago, this fixes it in a second without disturbing anything else.
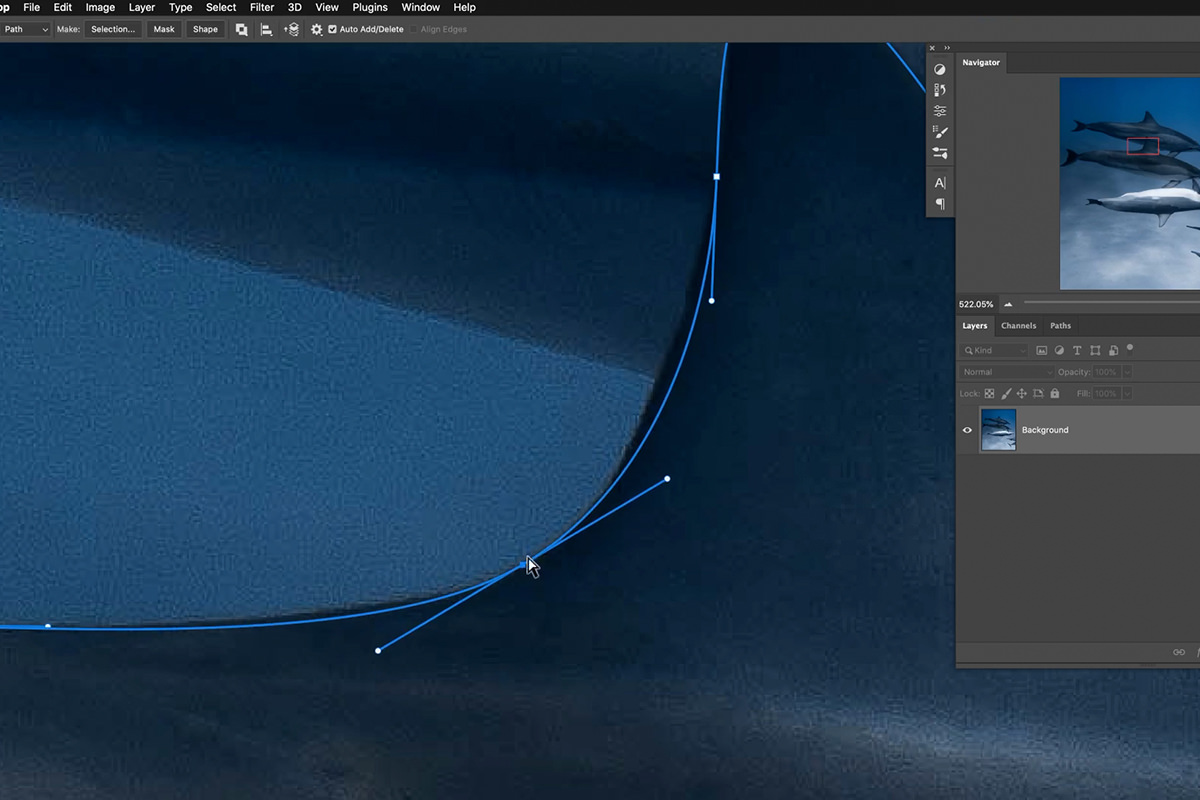
Move a handle
Click the end of one of the control arms extending from a point and drag it. This changes the shape and depth of the curve without moving the point itself — the fine adjustment that makes a path hug an edge properly.
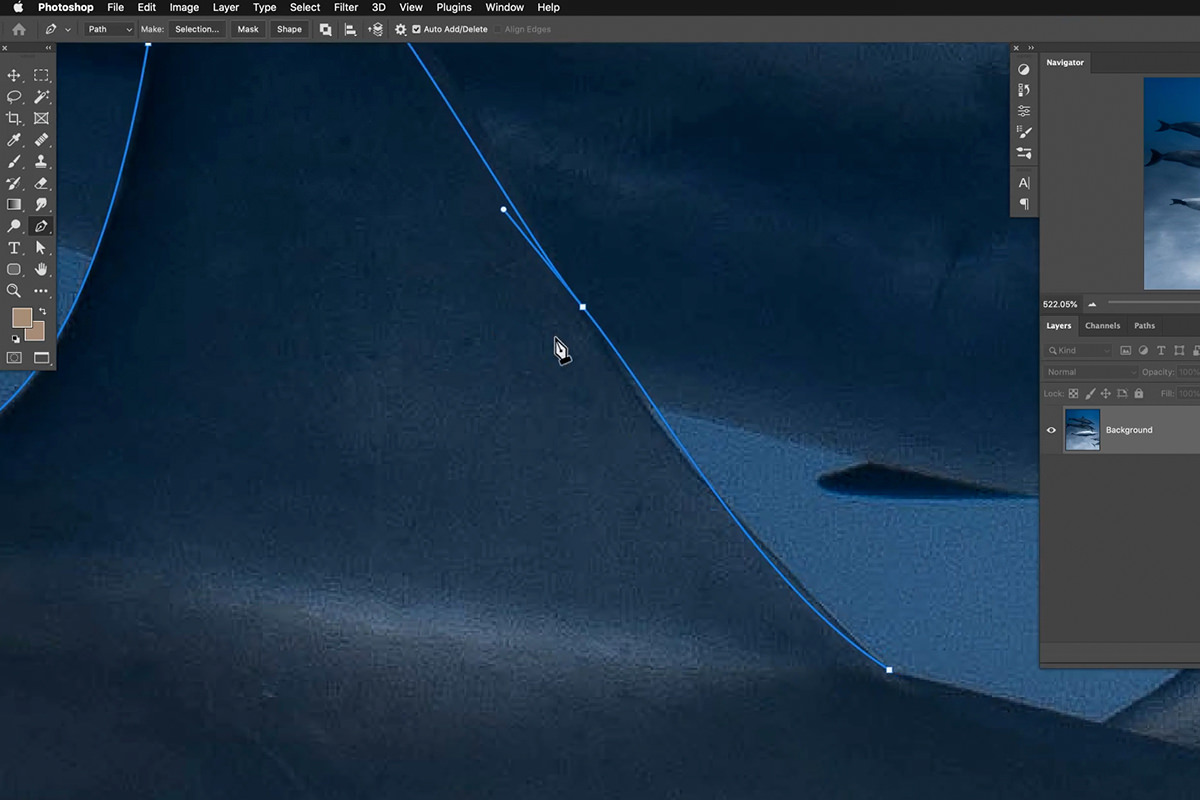
Drag the curve itself
This is the one most people never discover, and it is the best of the three. Still holding Ctrl or Cmd, click directly on the curved segment between two points and drag it. Photoshop adjusts the handles on both sides to make the curve pass through where you put it.
If anchor points and handles have not clicked for you yet, this is the shortcut to lean on. You do not have to think about the geometry at all — you just push the line onto the edge where it belongs and Photoshop works out the maths.
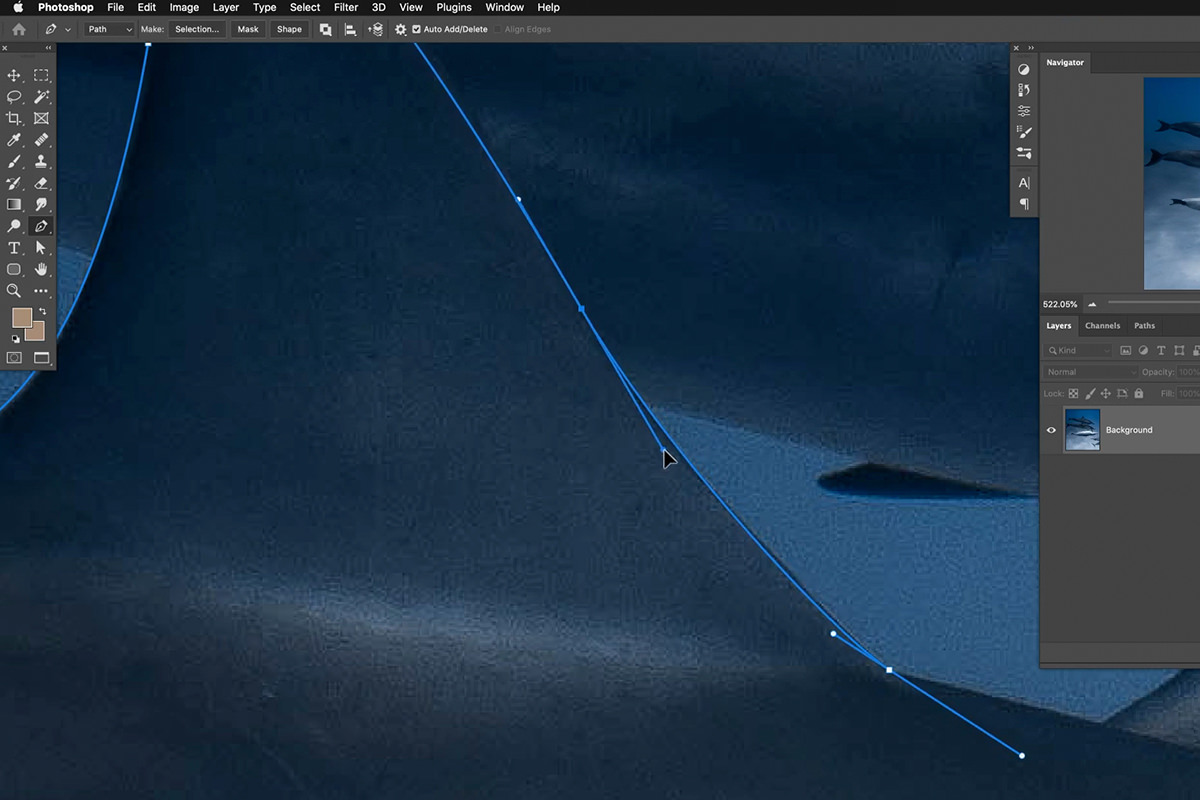
Spacebar to pan
Worth mentioning alongside it: hold the spacebar and drag to move around the image while zoomed in, without leaving the Pen Tool or losing your path. Zoomed-in accuracy plus the ability to move around freely is most of what makes a clean path possible.
Shortcut Two: Hold Alt or Option for Corners
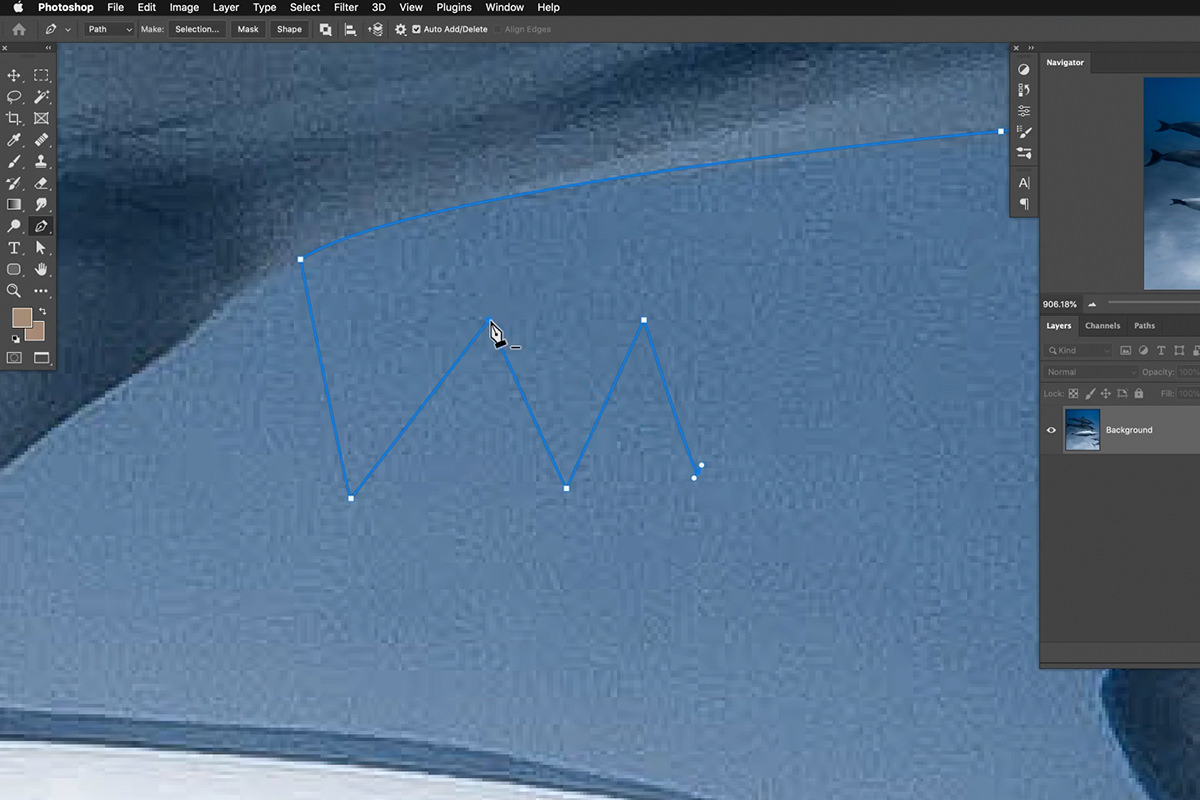
Ctrl or Cmd handles everything as long as your path is a continuous flowing curve. The moment you need a sharp corner — the path comes up to a point and then heads back down — you need Alt on Windows or Option on Mac.
By default, the handle leading out of a point mirrors the handle coming in, which is what produces a smooth curve through it. At a corner you want to break that relationship so the outgoing direction is independent.
Breaking a handle as you draw
Hold Alt or Option and the cursor becomes an inverted V. Click the point you just placed and drag the outgoing handle in the new direction you want the path to travel. The incoming curve stays exactly as it was.
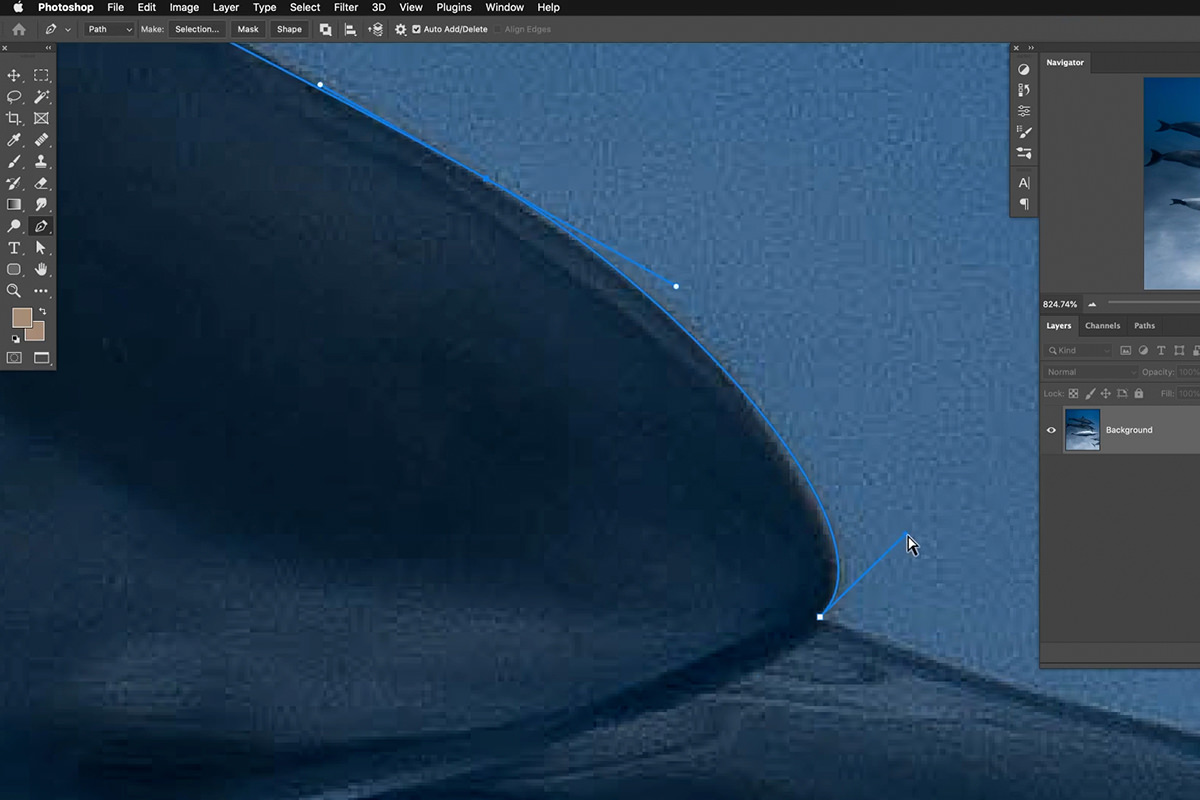
The rhythm becomes automatic quickly: click and drag along smooth edges, and any time the outline turns a corner, Alt or Option before continuing.
Turning existing curves into corners
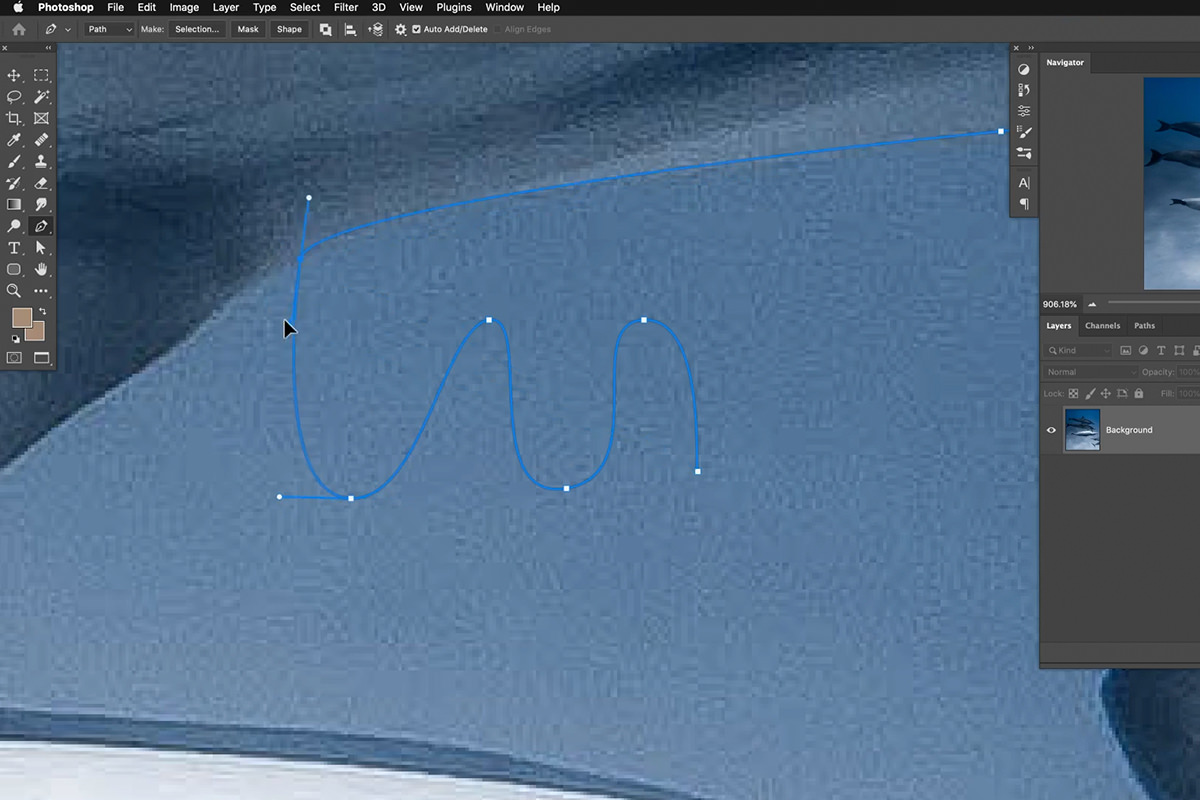
Alt or Option also works retroactively. Hold it and click directly on an anchor point that currently has curve handles, and the handles collapse — that point becomes a hard corner. Useful for cleaning up a path where you dragged out curves you did not actually need.
Turning corners back into curves
The reverse works too. Hold Alt or Option, then click and drag on a corner point, and handles are pulled back out, converting it into a smooth curve. The handles sometimes come out facing the wrong way — just keep dragging until they point where you want.
One key, both directions. Corner to curve, curve to corner.
Saving, Reselecting and Resuming a Path
Click away from a path and it deselects, which is alarming the first time it happens. Nothing is lost.
-
Open the Paths panel
Go to Window, then Paths. Your path is listed as Work Path.
-
Double-click and give it a name
A Work Path is temporary and can be replaced if you start drawing again. Naming it makes it permanent. Do this as soon as you have anything worth keeping.
-
Ctrl or Cmd click the path to make it editable
Clicking the path in the panel selects it, but the points are not editable until you hold Ctrl or Cmd and click on the path itself in the image. Then every point and handle becomes available again.
Continuing an unfinished path
To carry on drawing an existing path rather than starting a new one, hover the Pen Tool over the last point you placed and watch the cursor. When it shows a small square with a line either side, clicking will continue that path instead of beginning a fresh one. Hover over the very first point and the cursor shows a small circle — clicking there closes the path and completes it.
Watching the cursor is the whole trick. Photoshop tells you what your next click will do; it is just easy to miss.
Adding and removing points
Hover over an existing point and the cursor shows a minus sign — click to delete it. Hover over any empty section of the path and it shows a plus sign — click to add a point there. No tool switching required.
From Path to Selection to Mask
With the path finished, right-click anywhere on it (or right-click the path in the Paths panel) and choose Make Selection. Set feather to 0 pixels and click OK — you want the hard edge that the path gives you, not a softened one.
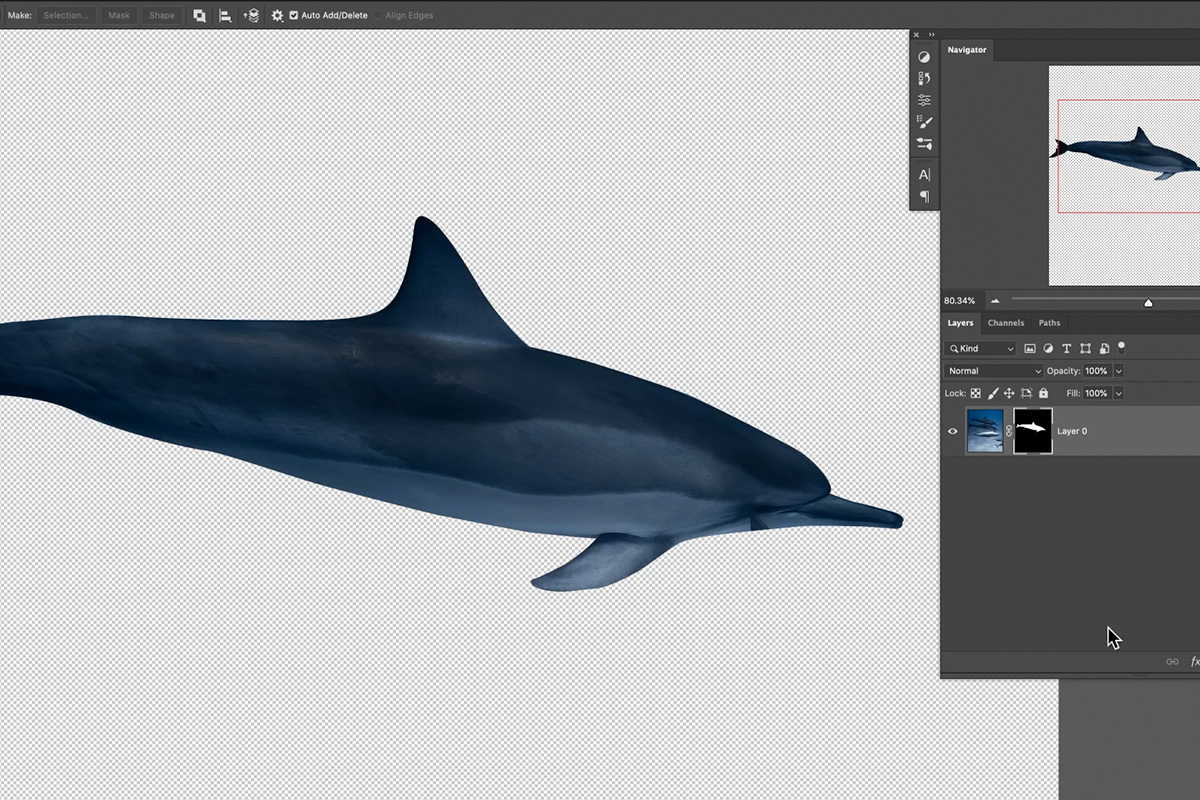
With the selection active, click the layer mask icon at the bottom of the Layers panel. Adding a solid colour fill layer underneath in white makes it easy to see the quality of the cutout.
Cleanup, and One More Shortcut
Cutouts like this usually leave something to fix — here, an overlapping fin from another dolphin that needs painting out.
-
Create a new empty layer above the subject
Keeping retouching on its own layer means you can redo it without touching the cutout.
-
Press S for the Clone Stamp and set Sample to Current and Below
Without this, the Clone Stamp sees nothing on the empty layer and refuses to work.
-
Sample a clean area and paint over the problem
Do not worry about painting past the edge of the subject.
-
Clip the retouching layer with Alt + Ctrl + G, or Option + Cmd + G on Mac
The layer indents with a small down arrow and now only shows where the layer beneath it is visible — inside your cutout. Everything you painted past the edge disappears.
That clipping mask shortcut is worth committing to memory well beyond the Pen Tool. Any time you want an adjustment or a retouch confined to the layer below, it is two keys.
Getting Comfortable With It
The Pen Tool takes a while to feel natural — that is normal, and it is not a sign you are doing it wrong. But the gap between frustrating and indispensable is genuinely just these two keys. Ctrl or Cmd to move anything you have already placed. Alt or Option whenever the edge turns a corner.
Draw roughly and correct as you go, rather than trying to place every point perfectly. That is the working method the shortcuts unlock, and it is much faster than precision on the first pass.
New Free Tutorials View All »











Enjoying This Free Tutorial? Go Further with PRO.
Unlock Full Sample Files, PSDs, and Hundreds of Masterclasses!

Download full project assets, original PSDs, and RAW images for every lesson
Unlimited access to our complete library of PRO Photoshop & Lightroom courses
Instant 4K Ultra HD streaming on all devices, anytime, anywhere
Full access to our entire library of Photoshop Actions, Presets, and LUTs
Flexible monthly and annual membership plans
Cancel anytime with zero hassle or commitments