Download Sample Images
description
Learn how to use the Color Grading Tool in Lightroom Classic to apply a professional color grade to an image, and then apply that same coloring to an entire series of images.
Artist Credit
Images sourced from Pexels.
Share


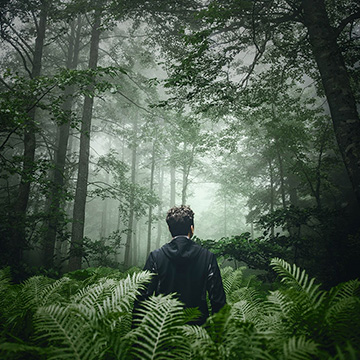
APPLY PROFESSIONAL COLOR GRADE
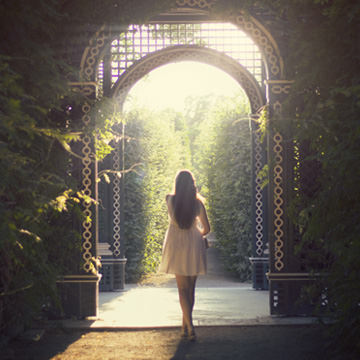
BEFORE
Pro Color Grading in a Few Clicks
The New Color Grading in Lightroom Classic
Released in 2020, the relatively new Color Grading Tool promises to make the process of color grading quicker and easier without losing the control we need for a professional result.
Follow along as we explore the Color Grading Tool in Lightroom Classic, and use it to color grade an entire collection of images in just a few minutes.
Breaking Down the Color Grading Tool
Import the collection of images provided with the link above, or feel free to use a collection of your own.
Once the images are loaded into Lightroom, open the Develop module, and then open the Color Grading tab.
We’ve talked about color and lightness, but what about saturation? If you want to adjust the saturation of a range, hold SHIFT as you move the cursor within a color wheel.
Once opened, the Color Grading Tool gives us a handful of ways that we can target and adjust the colors in an image.
We can choose to make targeted adjustments, focusing specifically on the highlights, midtones, or shadows in the image.
We can make global adjustments, which will affect the entire photo as a whole. This option is faster, but we sacrifice a lot of control. If you’ve got the time, we recommend sticking with the other adjustment options.
Lastly, there’s the 3-Way adjustment option which allows us to make color adjustments across the highlights, midtones, and shadows with control of each. This is our preferred method, so let’s take a closer look at what it can do.
Notice the 3 color controls for the midtones, shadows, and highlights. These allow you to adjust both the color and the lightness for each range.
While you’re experimenting with color options, you can hold ALT or OPTN to toggle reset options for any one of the color wheels, or for the entire Color Grading Tool. This is great, as it allows you to test out a variety of coloring while being able to quickly undo a change at any point.
If you want a little more control as you move your cursor around a color wheel, holding ALT or OPTN as you drag will decrease the sensitivity of the cursor, allowing you to make finer adjustments.
Coloring a Collection with Sync Settings
If you’re working with a series of similar images from a photoshop, you may want to apply a similar look to every photograph.
The Sync Settings feature in Lightroom makes this process quick and easy.
Back in the Library module, select the image that you’ve color graded.
Then, hit CTRL or CMD + A to select all of the other images that you’ve imported.
Near the bottom right of the screen, click on the Sync Settings button. The Sync Settings dialog will open.
This dialog allows us to choose which adjustments that we want to copy from our main image to every other image that we’ve selected.
Click the Check None button to start from scratch.
Since we only used the Color Grading Tool to make our adjustments, we only need to check the box for Color Grading from the list.
Click Synchronize, and Lightroom will copy those exact adjustments from the Color Grading Tool to every other image selected.
Best of all, you can click on any image, open the Develop module, and then make more adjustments using the Color Grading Tool to give each image a more customized look.