
Download Assets
description
Discover the brand new Frame Tool in Photoshop! In this tutorial we’ll show you how to create custom shapes and use them as frames for images.
Go PRO:
New to Photoshop and not sure where to begin? Explore our latest PRO tutorial Photoshop Fundamentals: Aaron’s Top 10 Essential Tools & Techniques . Discover mind-blowing tricks for selecting, removing, retouching, and more!.
Share

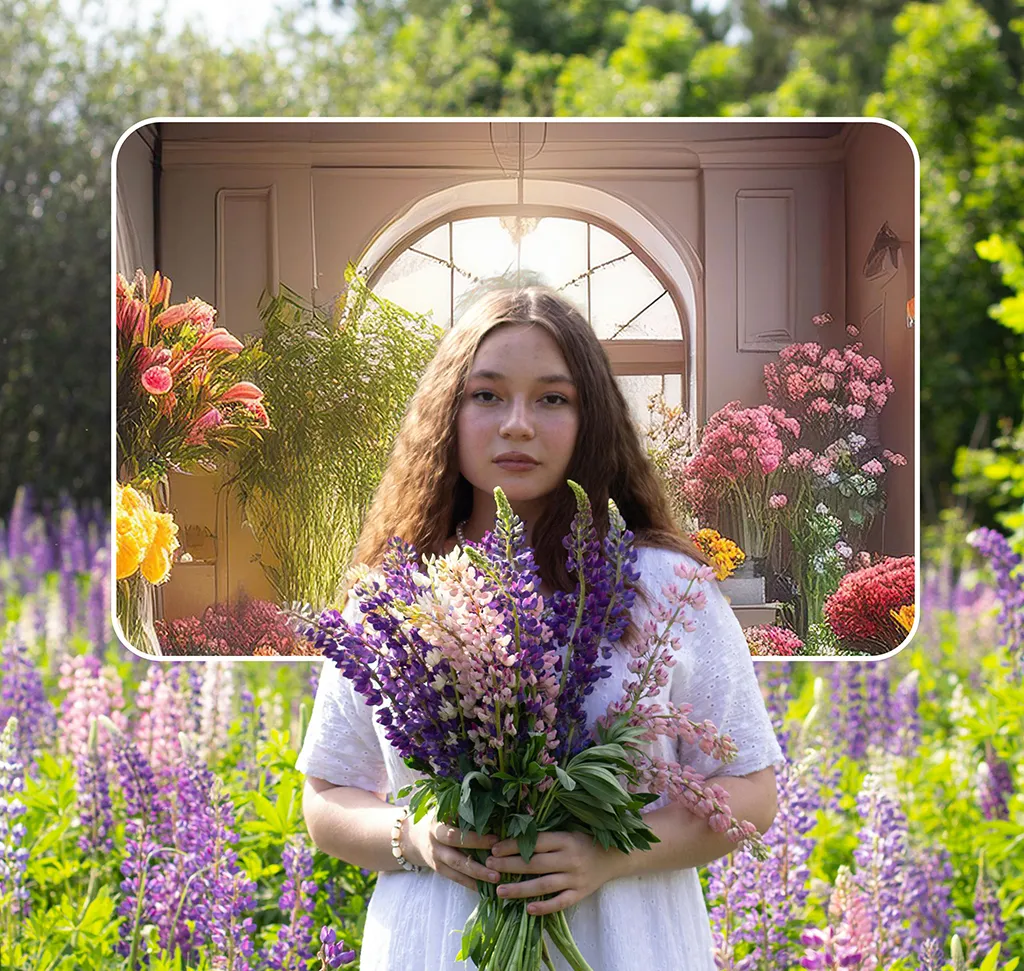
AFTER
BEFORE
Frame Your Images
Photoshop’s Frame Tool got an incredible update! In this guide we’ll show you how to create your own shaped frames and fill them with pictures or AI-generated art, then blend them seamlessly into your images.
Creating Custom Frames
1. Select the Rectangle Tool and draw a shape.
2. Adjust corner roundness as desired.
3. Go to Edit > Define Custom Shape. Name and save the shape.
4. Select the Frame Tool. Choose your saved custom shape from the options.
5. Draw the custom frame on your canvas.
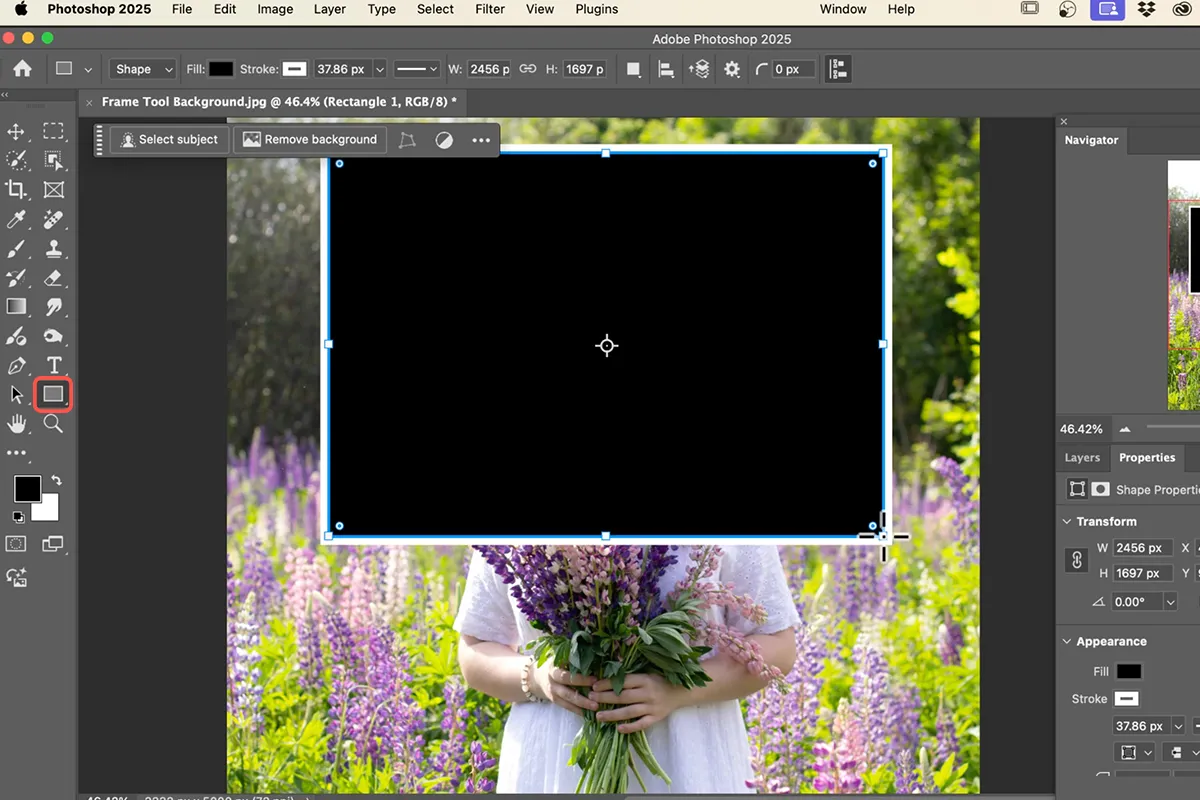
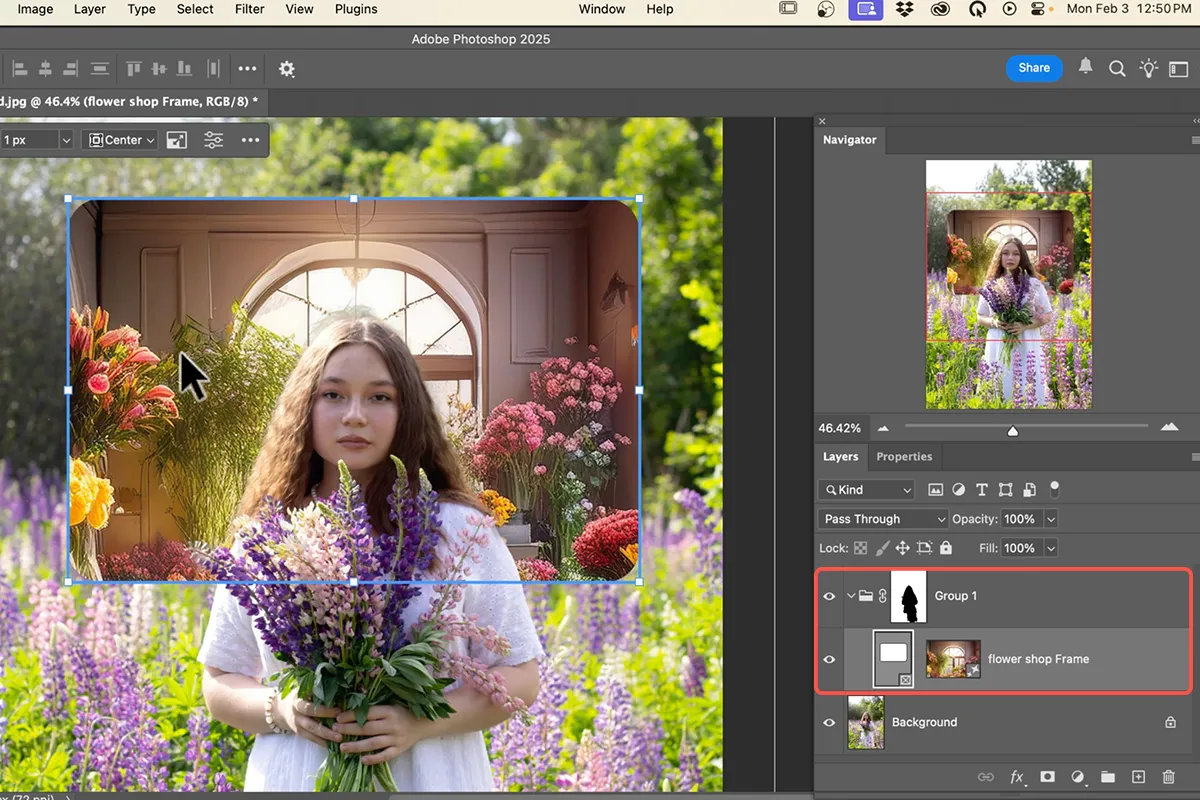
Image Placement
6. With the Frame Tool active and your custom frame selected, choose an image.
7. Click “Import Image” to place an existing image, or “Generate Image” to create one with AI.
8. Adjust the image within the frame by clicking and dragging it. Use Ctrl/Cmd + T to scale.
9. Move the frame itself by clicking and dragging it separately.

Masking and Effects
10. Group the frame layer with itself (Keyboard Shortcut “Ctrl/Cmd + G”).
11. Add a layer mask to the group. Invert the mask (Keyboard Shortcut “Ctrl/Cmd + I”) if needed to control visibility.
12. Use adjustment layers (e.g., Levels) and clipping masks (Alt/Option + click between layers) to affect only the frame content.
13. Add a stroke to the frame if desired.
Additional Tips
Remember that any vector path created in Photoshop (using tools like the Pen Tool) can be defined as a custom shape. This offers a huge range of possibilities for unique frames.
The Frame Tool allows for non-destructive editing. You can always change the image within the frame or adjust the frame itself without affecting other elements of your design.


