Download Assets
description
Discover how to change colors, lighting, and more with the brand new Adjustment Brush Tool in Photoshop. This tutorial will guide you through the process, teaching you to apply adjustments to specific areas of your images and create stunning effects.
Go PRO:
Dive into our exciting PRO Photoshop Learning Path. From the fundamentals to advanced techniques, this comprehensive guide will help you make the most of this powerful software and bring your creative vision to life.
Image Source
- Chevanon Photography
- Ash Valiente
Images sourced from Pexels.
Share
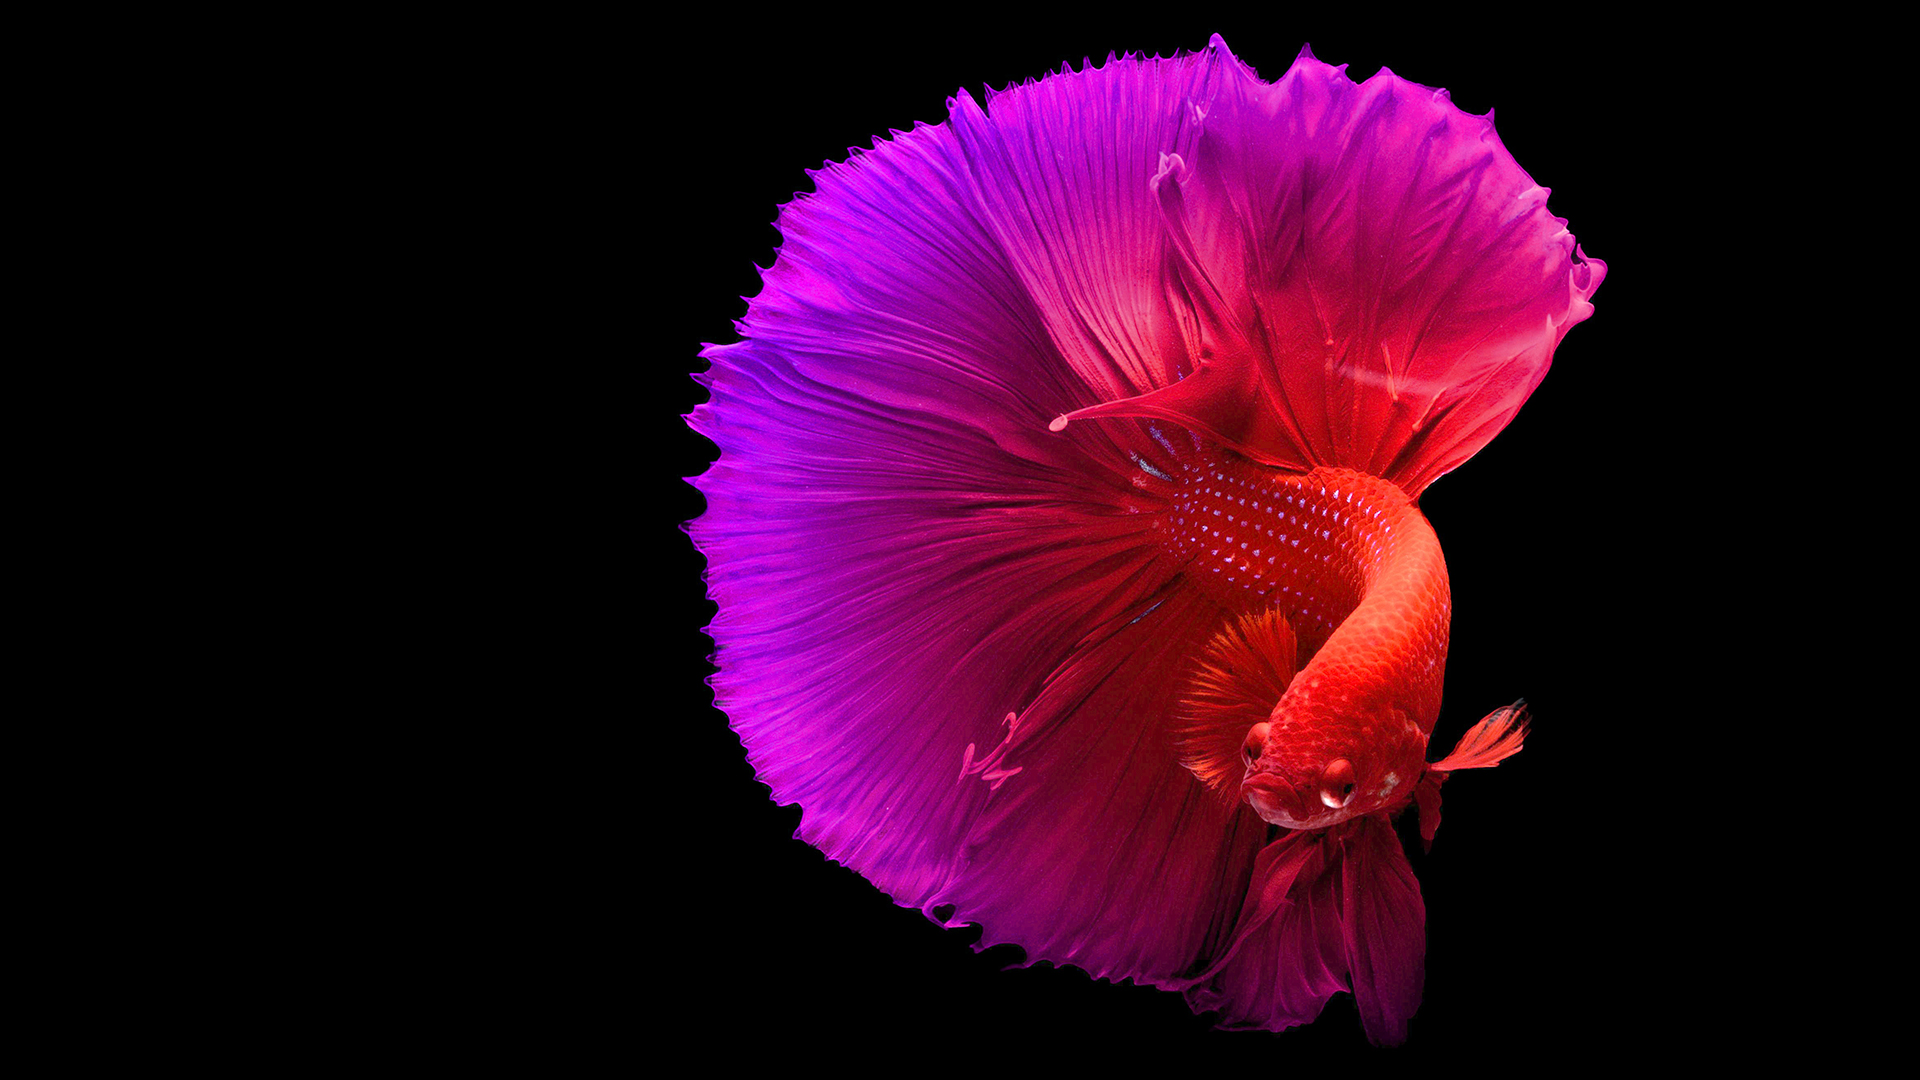
AFTER
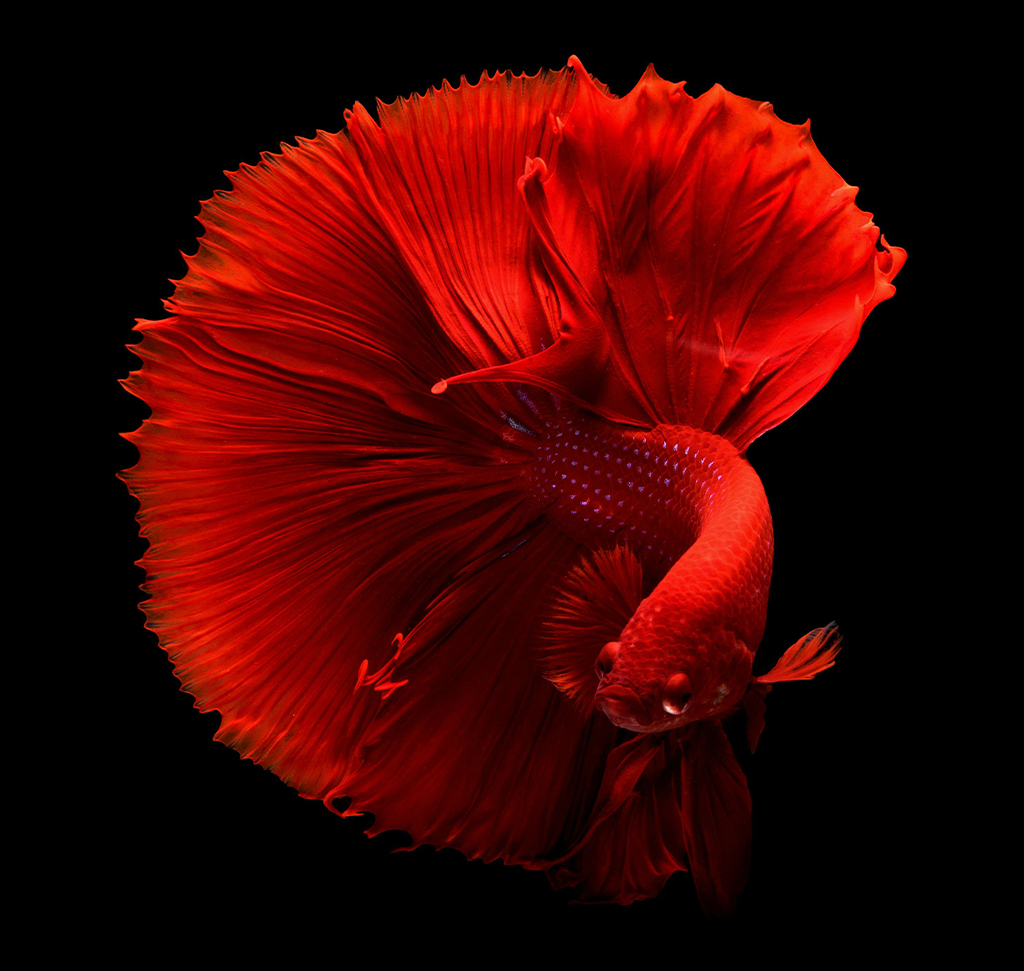
BEFORE
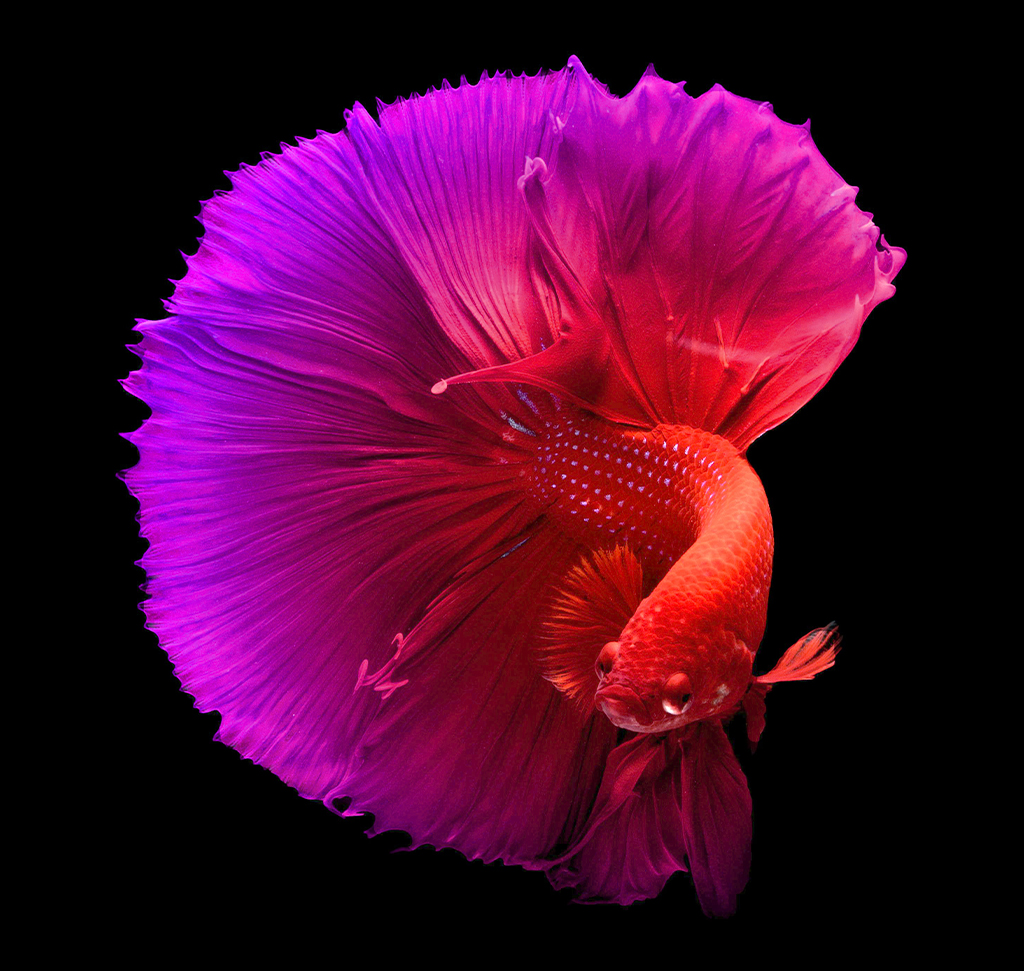
Brush Your Way To Better Images
The new Adjustment Brush Tool in Photoshop 2025 is a versatile tool that allows you to make precise color and lighting adjustments to your images. This powerful tool allows you to make targeted adjustments with ease. Follow our guide to master its techniques and create breathtaking images.
Getting Started
1. Begin by opening the image you want to edit in Photoshop.
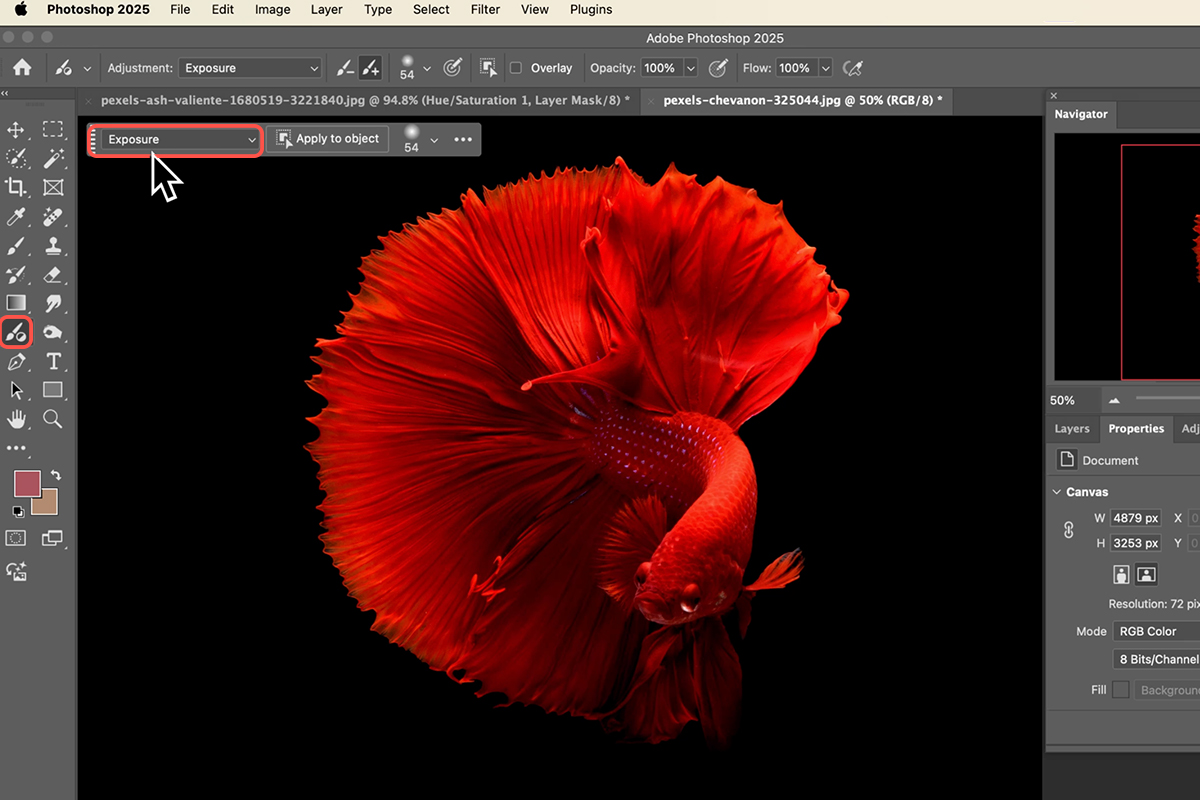
2. Find the Adjustment Brush Tool in the Tools panel. It’s represented by a brush with a small adjustment icon. If you can’t find it, you might need to expand the Tools panel by clicking on the small arrow at the top right.
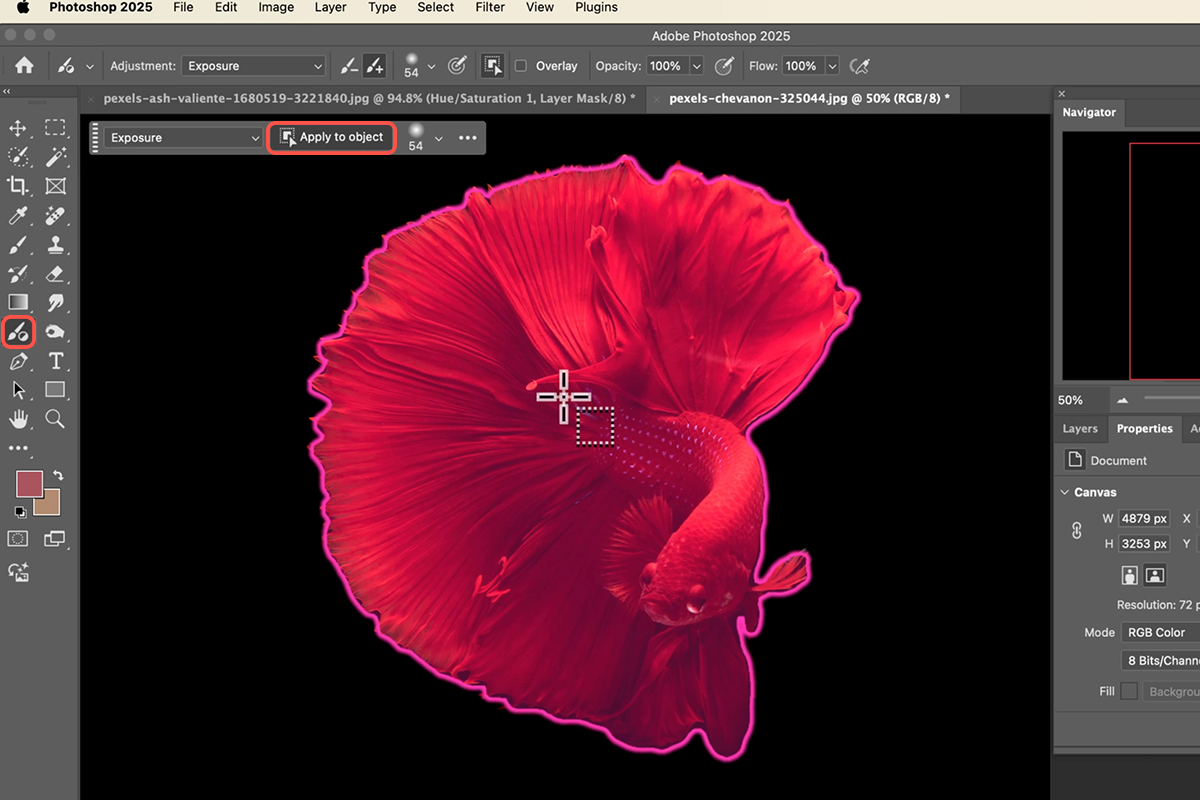
3. Once you’ve selected the Adjustment Brush Tool, click on the small arrow next to the brush icon to reveal a list of adjustments. Select the property you want to modify, such as Hue, Saturation, Brightness, Contrast, or Exposure.
Painting on Your Image
4. Begin painting on the areas of your image where you want to apply the adjustment. The changes will be visible in real-time as you paint.
5. Adjust the strength of the adjustment as needed. You can do so by adjusting the opacity and flow settings in the Options bar. A higher opacity will apply the adjustment more intensely, while a lower flow will allow for more gradual changes.
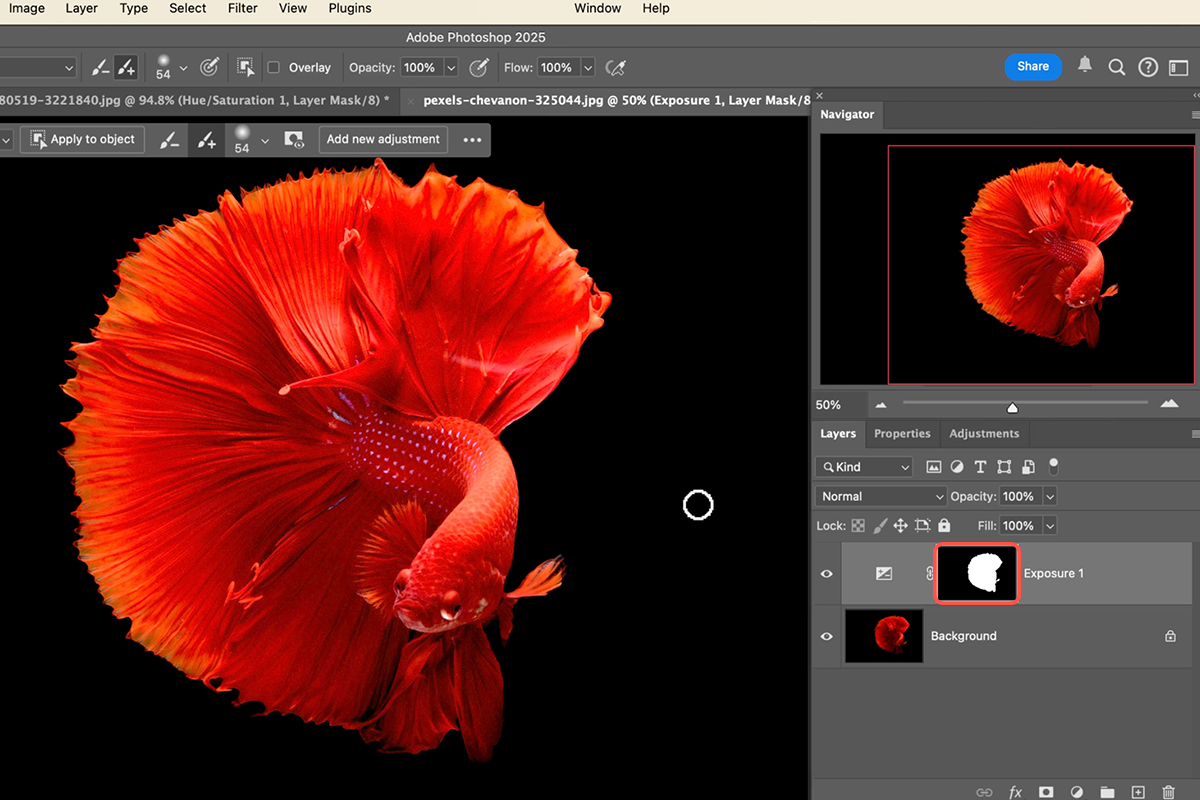
For targeted adjustments to individual objects, activate the “Apply to Object” feature. The Adjustment Brush Tool will then allow you to modify those specific areas.
Using the Adjustment Layer
The Adjustment Brush Tool automatically creates a new adjustment layer for you, allowing you to non-destructively edit your image. This means you can easily turn the adjustment on or off, or adjust its settings at any time. If you need more control over the affected areas, you can paint on the layer mask using a black or white brush. Black will hide the adjustment, while white will reveal it.
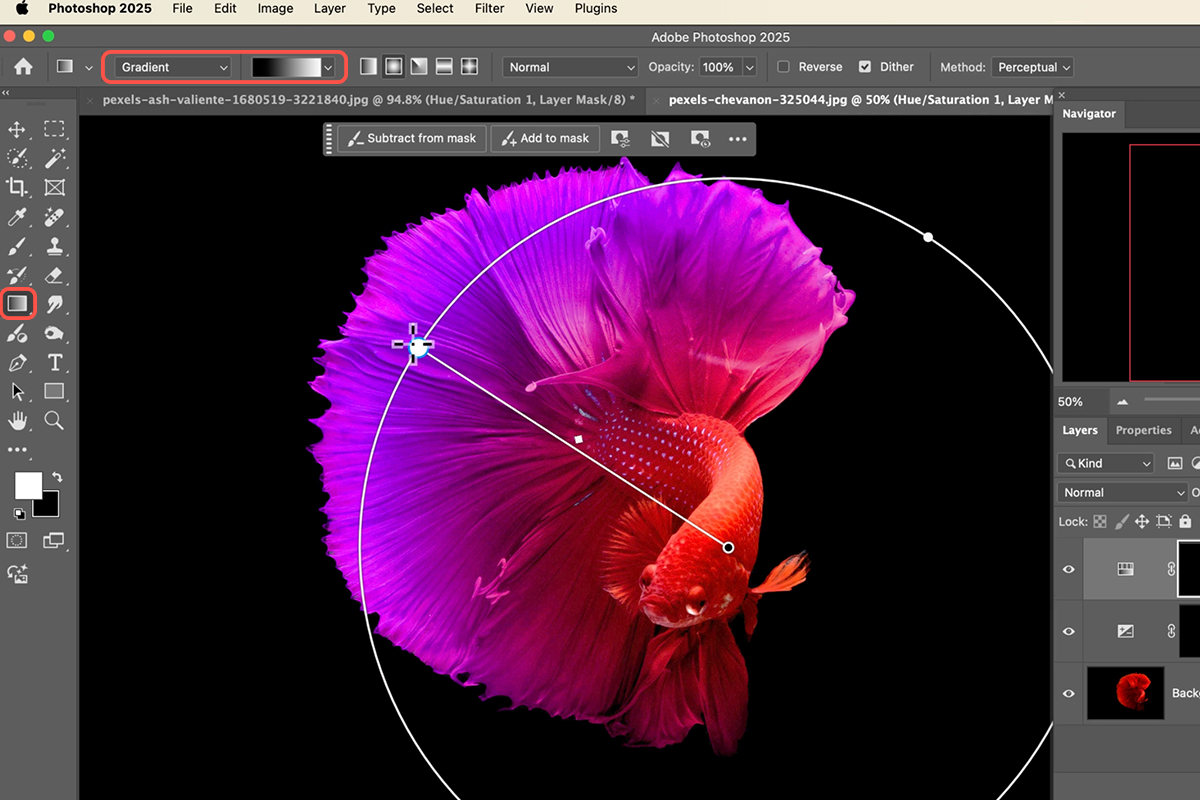
Applying Gradients
To create smooth transitions between adjusted and unadjusted areas, you can use a gradient brush with the Adjustment Brush Tool.
6.Choose a gradient preset from the Gradient Picker. Popular options include black to white, linear, or radial gradients.
7. Click and drag on your image to apply the gradient. The gradient will blend the adjustment from the starting point to the ending point.
8. If necessary, modify the gradient’s angle, shape, or colors by using the Gradient Editor or the Options bar.You can also refine the area affected by the gradient by painting on the layer mask with a black or white brush.
Additional Tips
For more dramatic color changes, enable the “Colorize” option in the Adjustment Brush Tool settings. This will allow you to select a specific color to apply.


