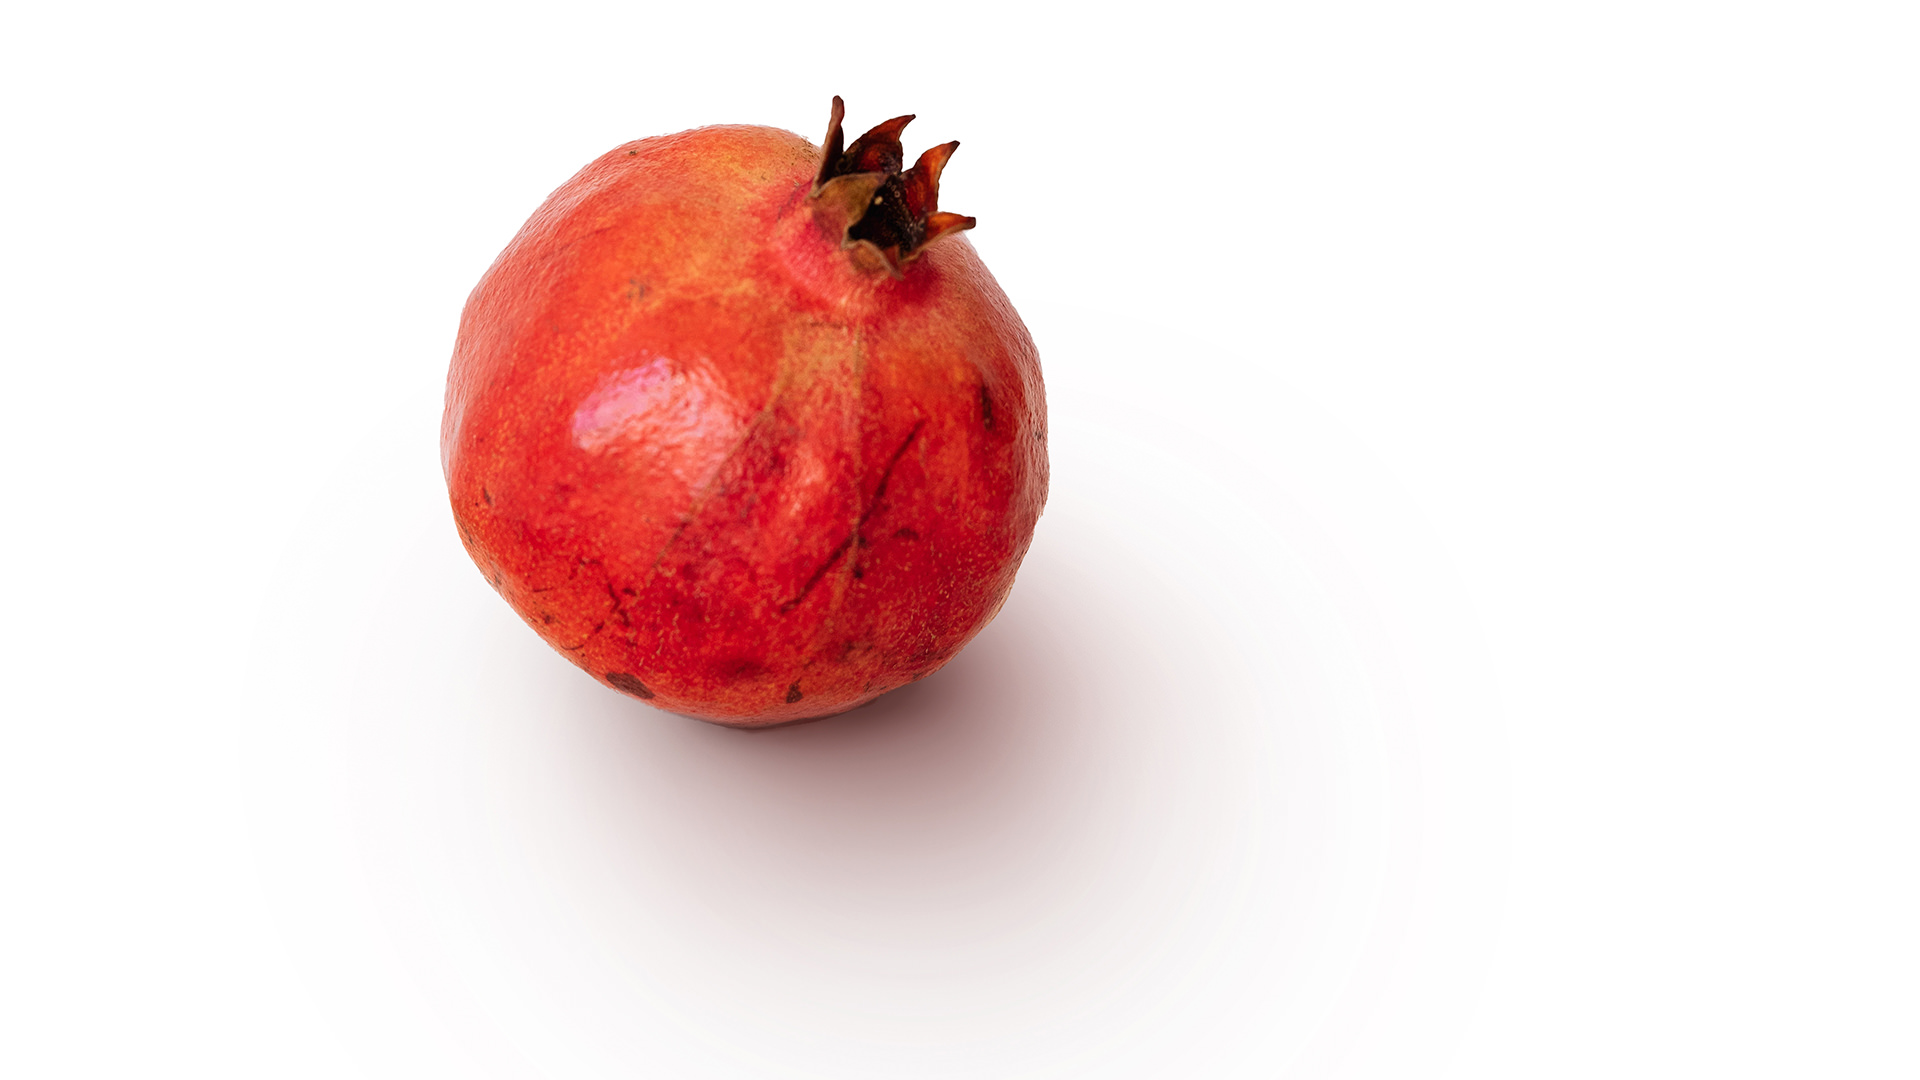

Download Assets
This tutorial includes 1 sample image, 1 sample PSD and 1 PDF guide. Downloads are free with a PHLEARN account.
- Download the sample images and PSDs from every free tutorial on PHLEARN
- New free tutorials published every week
- One free account — sign up once, then download anything
Free PDF Guide · 3 Pages
This Tutorial as a Step-by-Step PDF
The guide walks through Select > Select Subject and a layer mask, a white Solid Color floor, the dark contact shadow sampled from the photo, soft layers at about 10% Flow, a Multiply layer, Gaussian Blur copies, a clipped layer that paints shadow on the object, and the gray-shadow test. Keep it next to your keyboard.
description
Realistic shadows are never one flat shape — they are several layers each doing a different job. Learn how to cut an object out cleanly, then build its shadow up in passes: a sharp, dark contact shadow where it meets the ground, low-flow layers painted with progressively larger soft brushes for the falloff, a Multiply layer with a blurred duplicate for broader darkening, and a clipped layer that paints shadow onto the object itself so the two blend together.
Enjoying This Free Tutorial?
We publish a new free tutorial every week, each one with sample images and PSDs you can download and follow along with. Sign up and they land straight in your inbox, along with early word on sales, events and subscriber-only offers.
Image Source
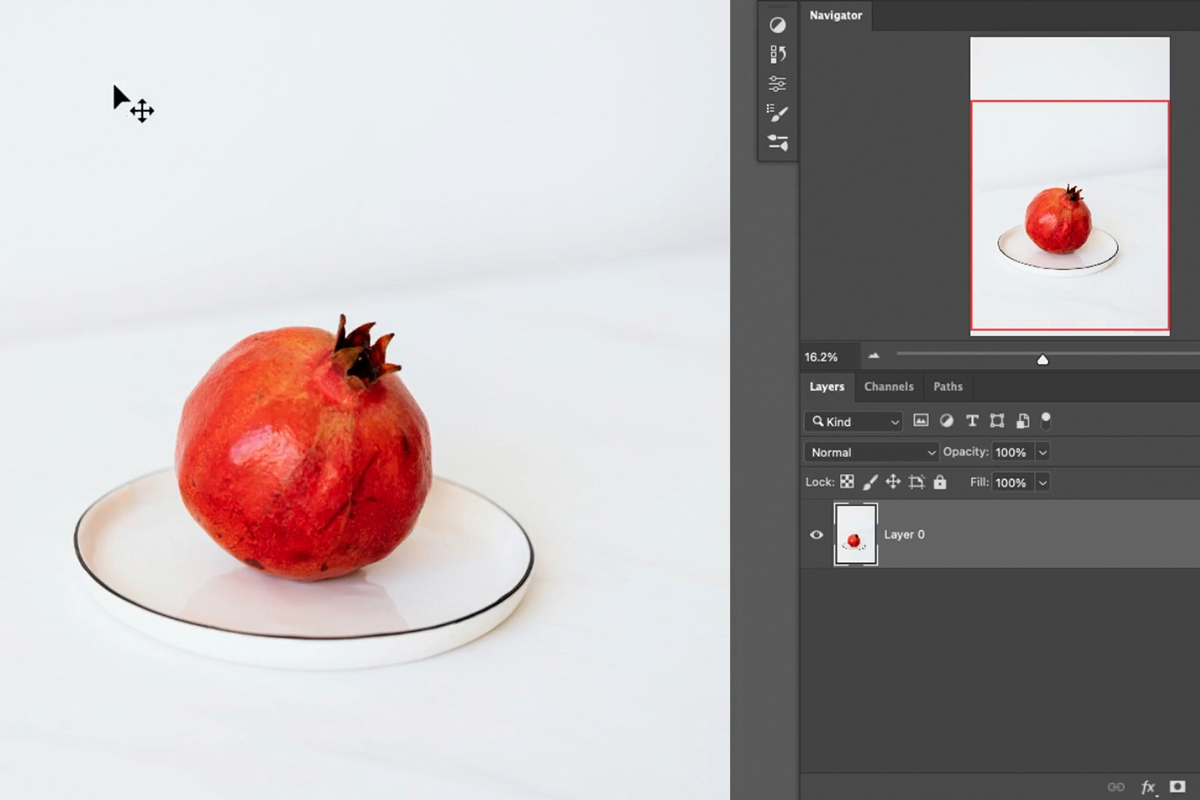
Photo by Karolina Grabowska via Pexels
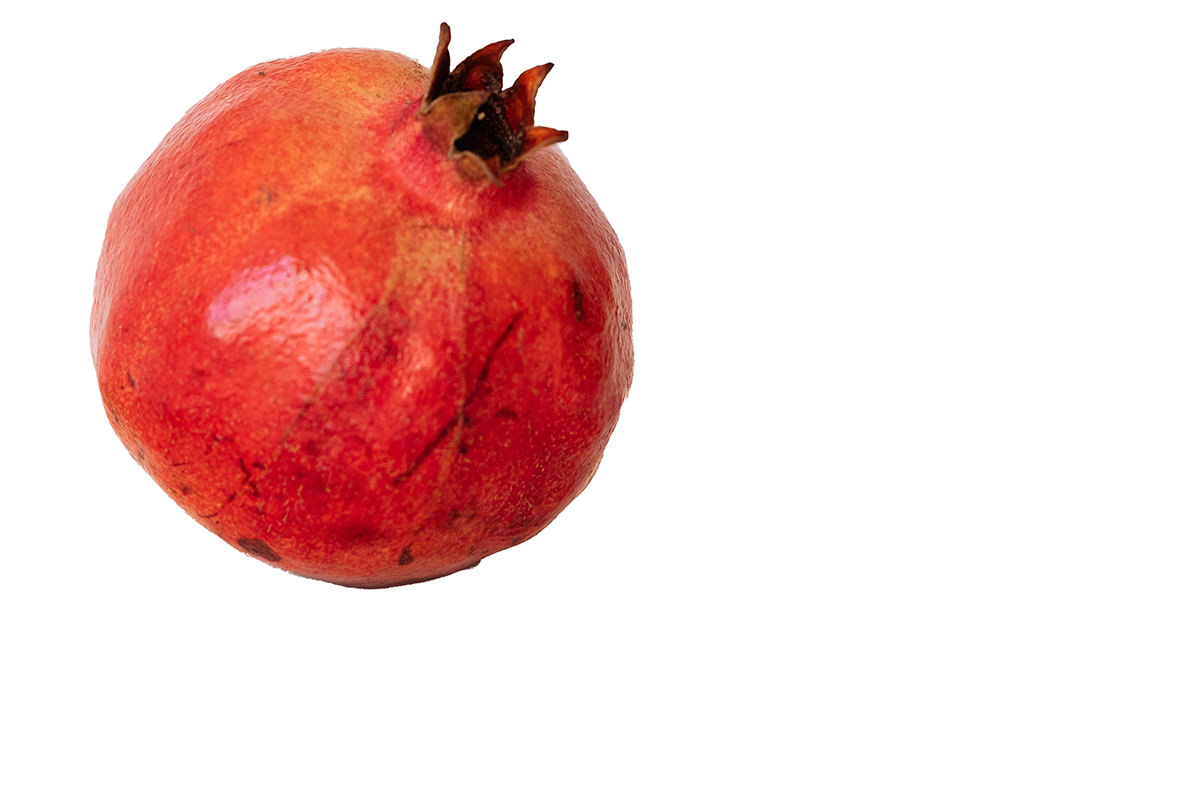
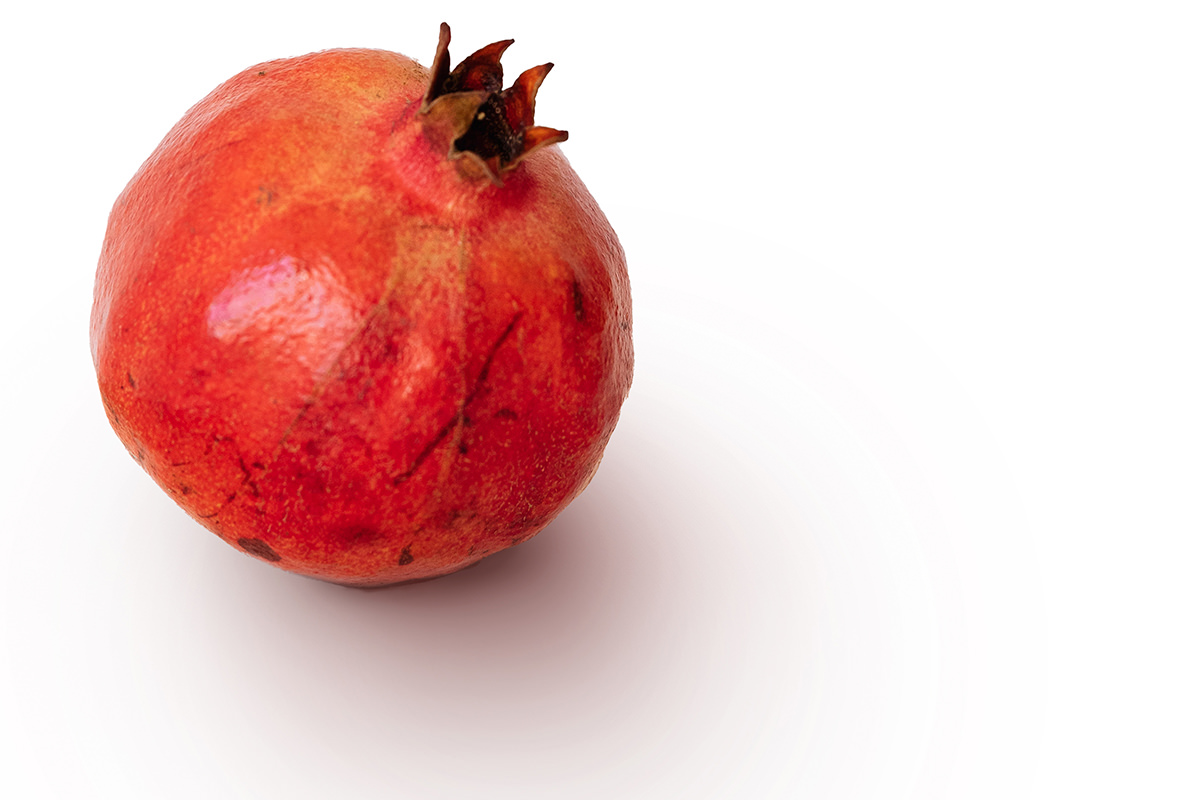
How to Paint Realistic Shadows in Photoshop
A cutout only looks convincing once it has a shadow that matches how it would actually sit in the scene, and a single flat shadow shape almost never gets there. This technique builds a realistic shadow out of several separate layers, each contributing its own bit of darkness, softness, or color, so the final result reads as one continuous shadow instead of a pasted-on shape.
Cutting Out Your Subject
Before any shadow work can start, the object needs to be cleanly separated from its background.
-
Select and Mask Your Subject
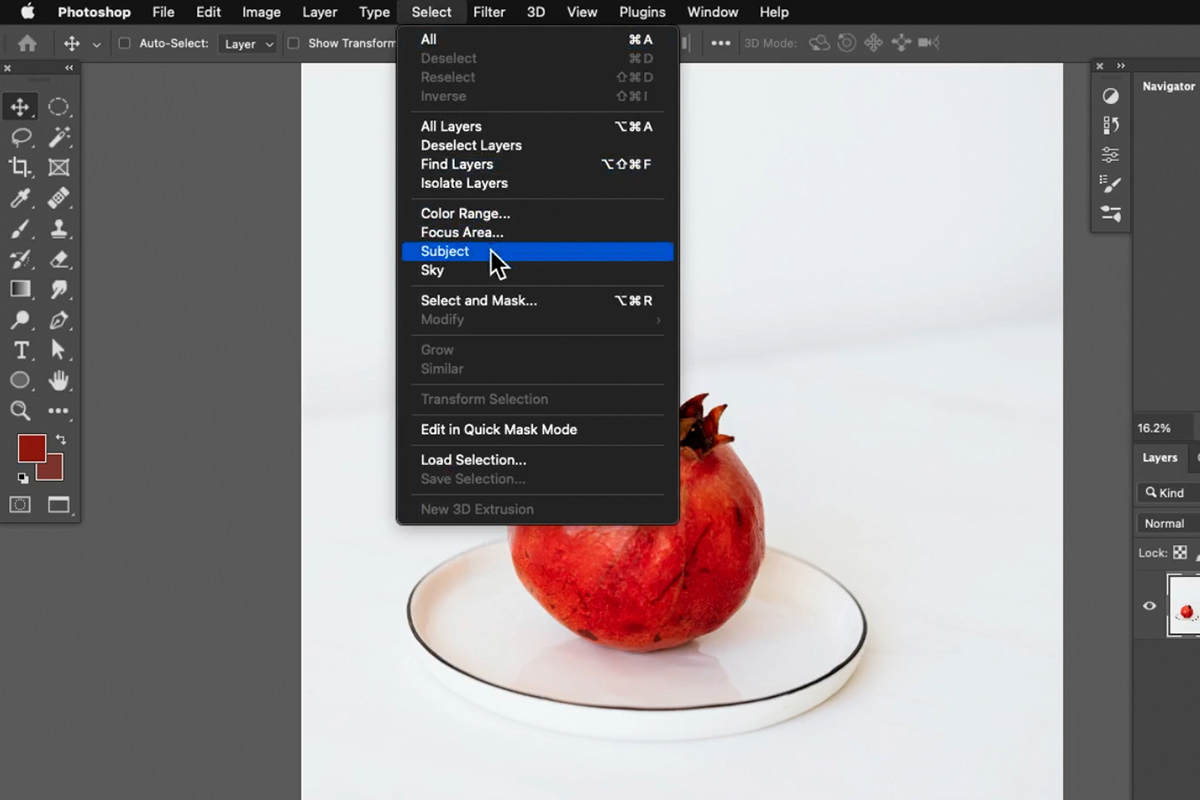
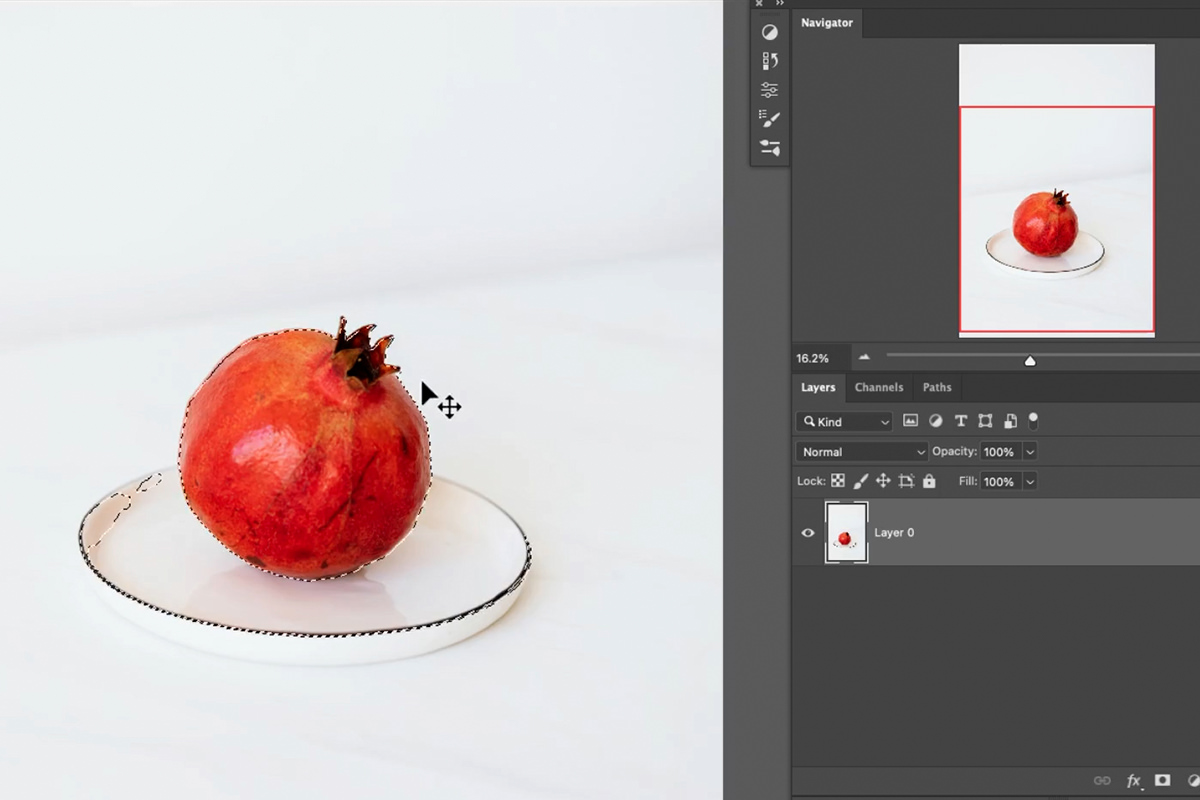
Go to Select > Select Subject to generate an initial selection, then click the Add Layer Mask icon to turn it into a mask. There are countless ways to select and cut out objects from their backgrounds, but Select Subject is a fast starting point for a clean object like this.
-
Clean Up Any Leftover Selection
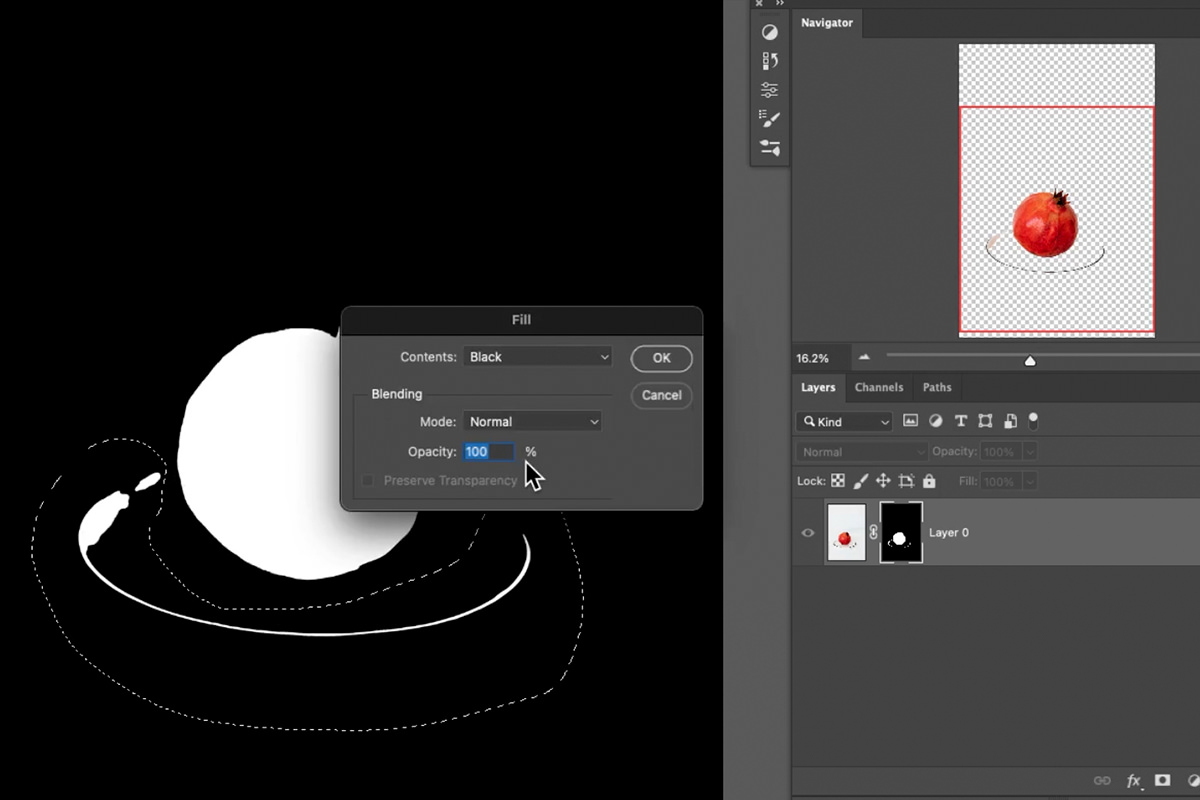
If any unwanted background survives in the mask, grab the Lasso tool (L), select the leftover area, and press Shift + Delete to fill it with black on the mask, hiding it.
Adding a Background Fill Layer
With the object isolated, a simple solid-color layer underneath it gives you a clean surface to build the shadow on.
-
Add a Solid Color Fill Layer
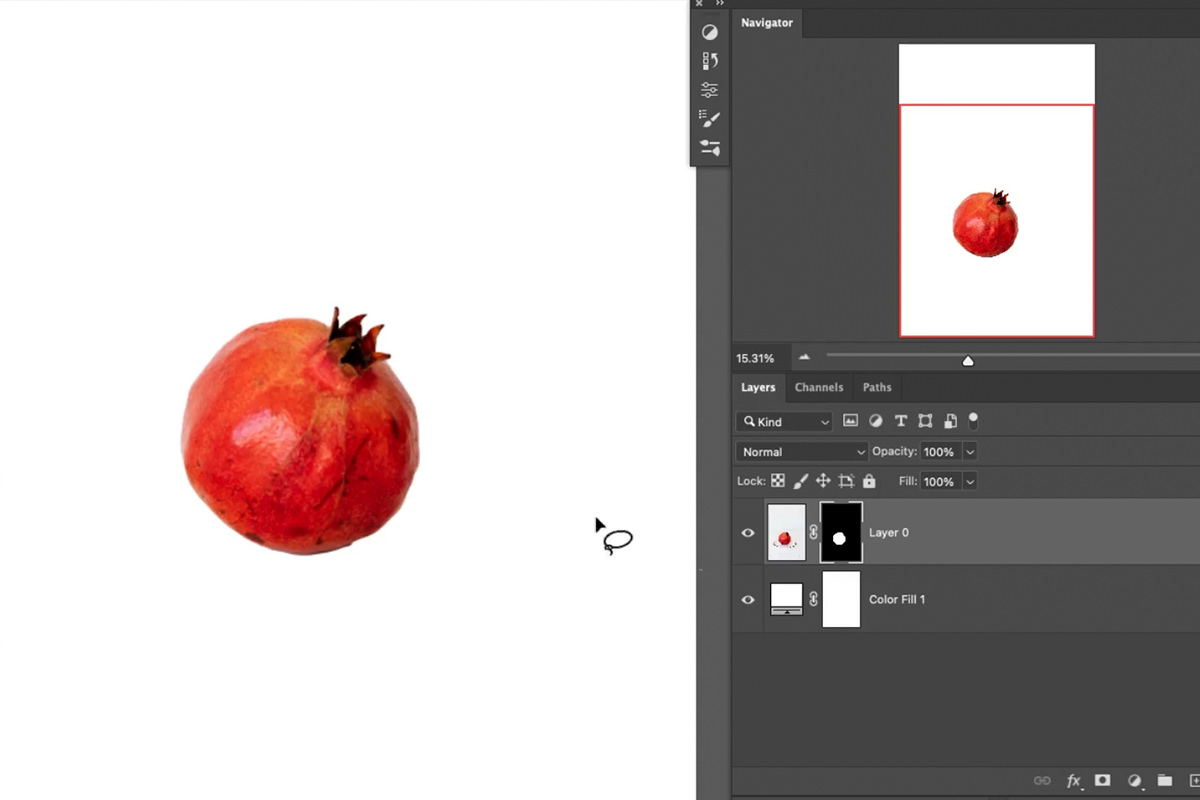
Create a Solid Color fill layer set to white, and place it directly beneath your cut-out object layer. This becomes the ground your shadow will be painted onto.
Painting the Core Contact Shadow
The darkest, most defined part of a shadow sits directly under the object, right where it contacts the ground, so that’s where the shadow painting starts.
-
Create a New Layer Below the Object
Add a new layer between the object and the white fill layer, above the fill and below the object, for your first, darkest shadow pass. That way the paint shows on the floor but hides behind the object.
-
Sample and Paint the Contact Shadow
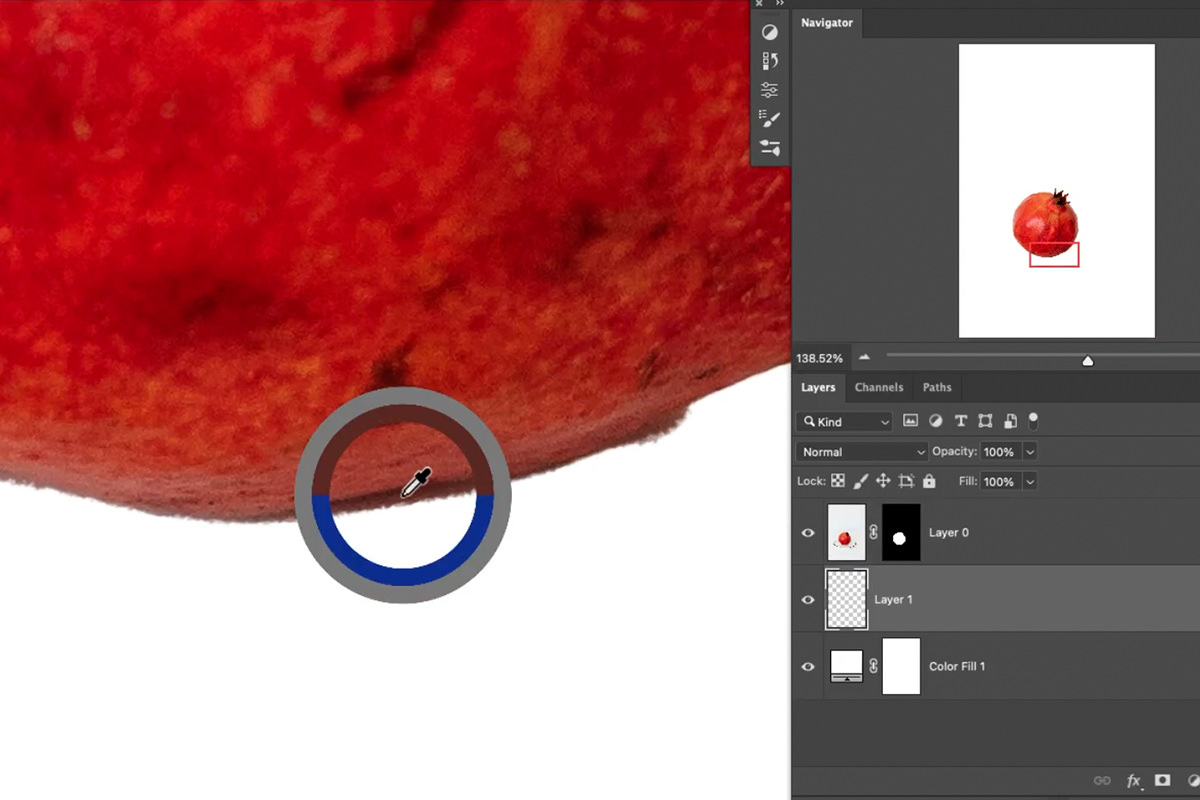
Zoom in and sample a color from any existing shadow tone near the object with the eyedropper, or pick a darker version of the object’s own color if there’s no shadow to sample. Paint with the Brush tool directly under the object where it meets the ground, using a slightly larger brush for the solid contact area.
Why the Shadow Color Isn’t Gray
A shadow that’s just gray or black reads as flat and artificial. Real shadows pick up a little of the color of the object casting them, since light bounces off the object and reflects into the shadow area — so sampling the object’s own tones, rather than reaching for pure black, is what makes the shadow feel physically connected to the object above it.
Building Up Shadow Layers with Low Flow
One shadow layer is never enough on its own — the softer, farther-reaching part of the shadow needs its own layer, painted differently from the sharp contact shadow.
-
Create a Second Shadow Layer
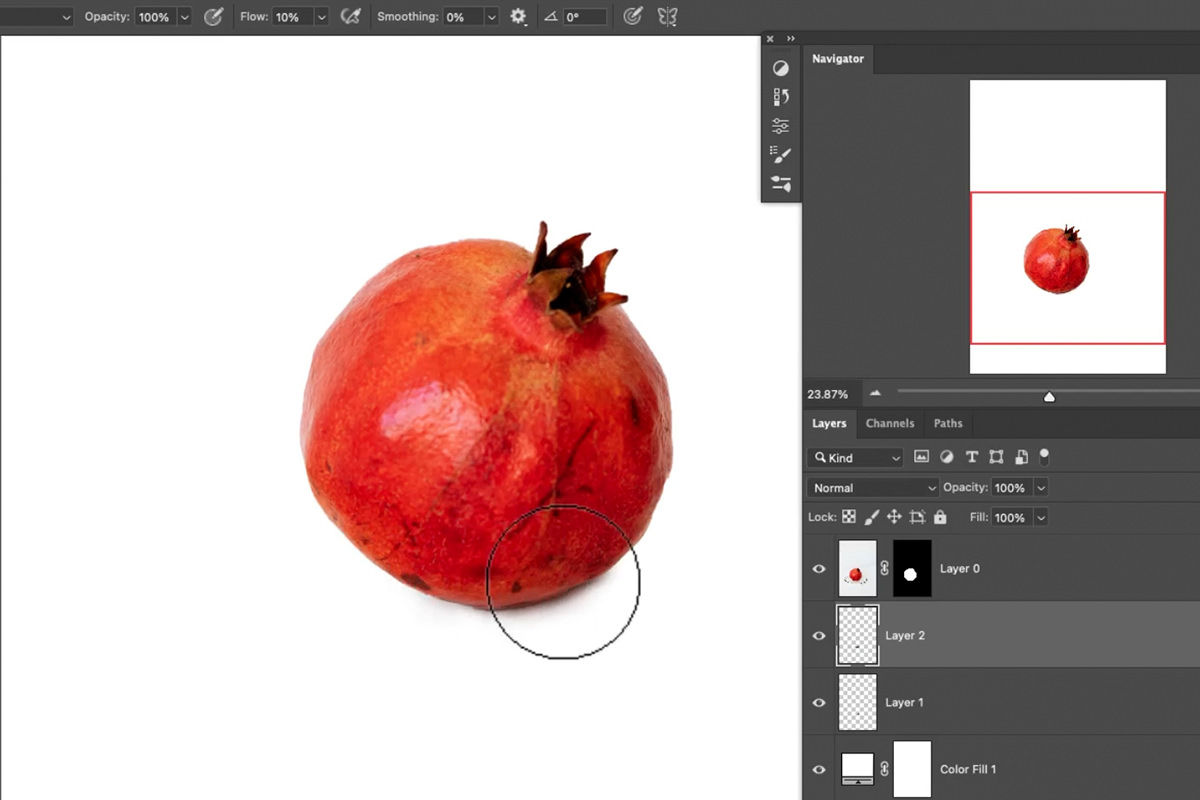
Add another new layer above your first shadow. Switch to a larger, softer brush and lower the brush’s Flow to around 10%.
-
Paint with Low Flow, Mostly Under the Object
Paint mostly where the object itself sits, letting the low flow allow a small amount of shadow to seep out past the object’s edges rather than stopping abruptly at the silhouette. Favor the side of the object where it appears to be resting more heavily on the ground.
-
Repeat with Progressively Larger, Softer Brushes
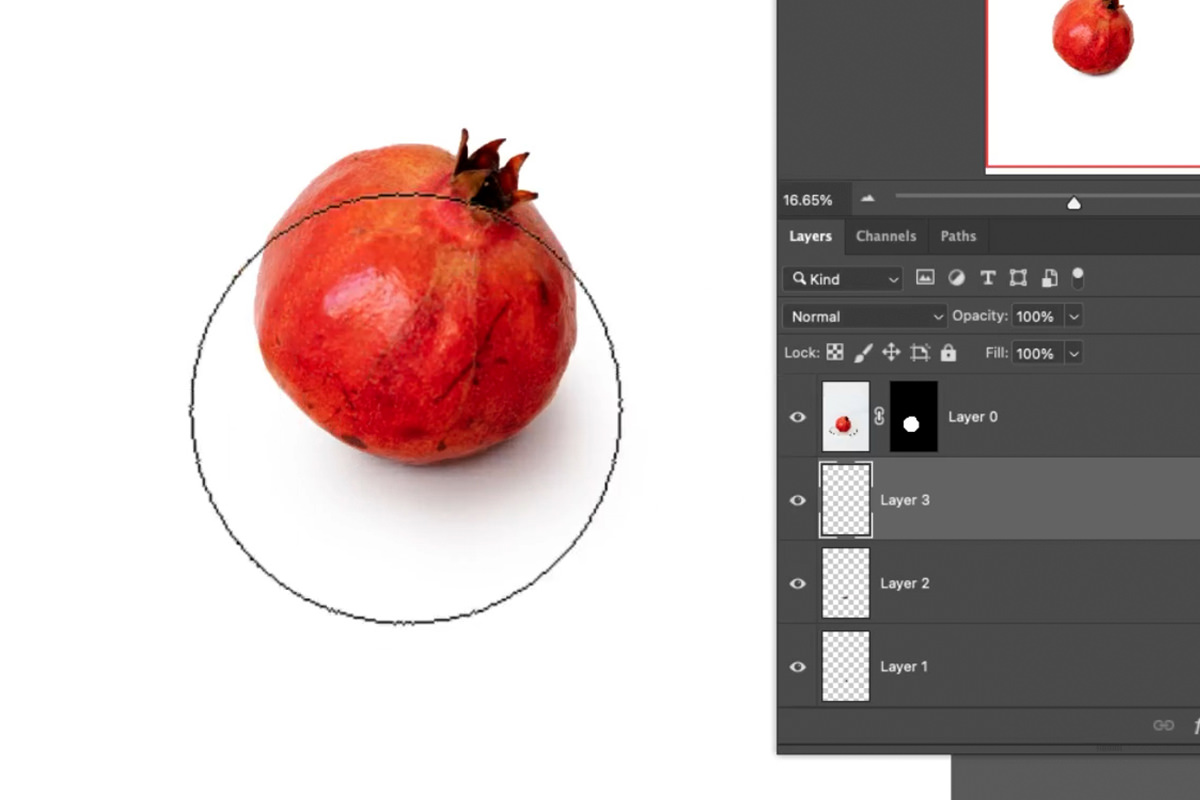
Add a third layer using an even larger, softer brush, again with low flow, to extend the shadow further out and fade it further from the object. If any area looks wrong, press E for the Eraser tool with a large soft-edged brush and erase it away rather than trying to paint over the mistake.
Why Multiple Layers Beat One
Turning any single one of these shadow layers off noticeably weakens the overall effect, which is the point: each layer is doing a specific, limited job — the sharp contact shadow, the mid-range falloff, the soft distant edge — and it’s the sum of several simple layers, not one complicated one, that reads as a single, realistic shadow.
Adding a Multiply Shadow and a Soft Blur
A Multiply-blend shadow layer, plus a blurred duplicate, adds one more level of depth for areas where the object would be blocking a broader amount of light.
-
Paint a Multiply Shadow Layer
Create another new layer, choose a slightly lighter shadow color, and set the layer’s blending mode to Multiply so it darkens whatever is beneath it. Paint with a large, soft-edged brush across the broader area the object would be shading.
-
Desaturate and Adjust Opacity if Needed
If the color reads too saturated or too visible, press Ctrl + U on PC (Cmd + U on Mac) to open Hue/Saturation and pull back the saturation, then lower the layer’s opacity until it blends in rather than standing out.
-
Duplicate and Blur for an Extra Soft Layer
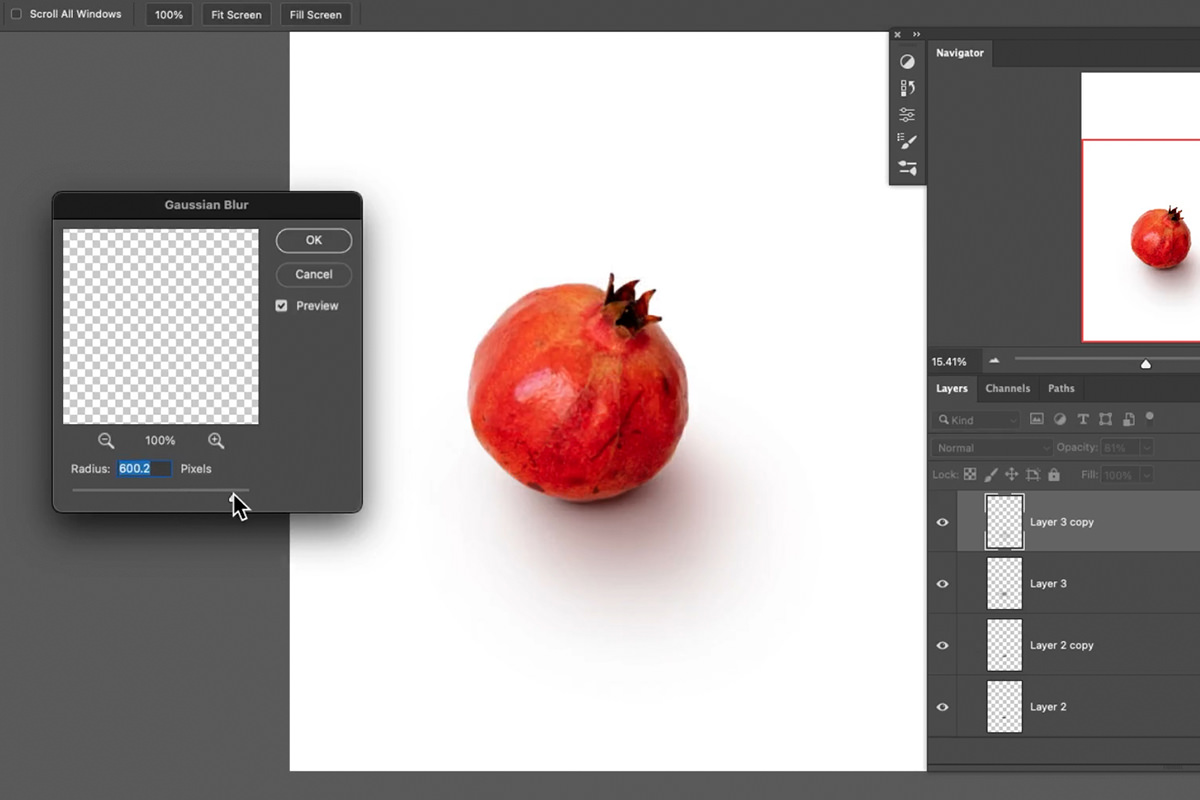
Duplicate a shadow layer you like with Ctrl + J on PC (Cmd + J on Mac), then go to Filter > Blur > Gaussian Blur and apply a soft blur. Lower that duplicate’s opacity until the extra blur reads as a subtle addition rather than an obvious blur.
Painting on the Object with a Clipping Mask
Shadows don’t only fall on the ground around an object — the object’s own surface, especially near where it contacts the ground, often needs a touch of shadow painted directly onto it. A clipping mask makes that possible without painting outside the object’s edges.
-
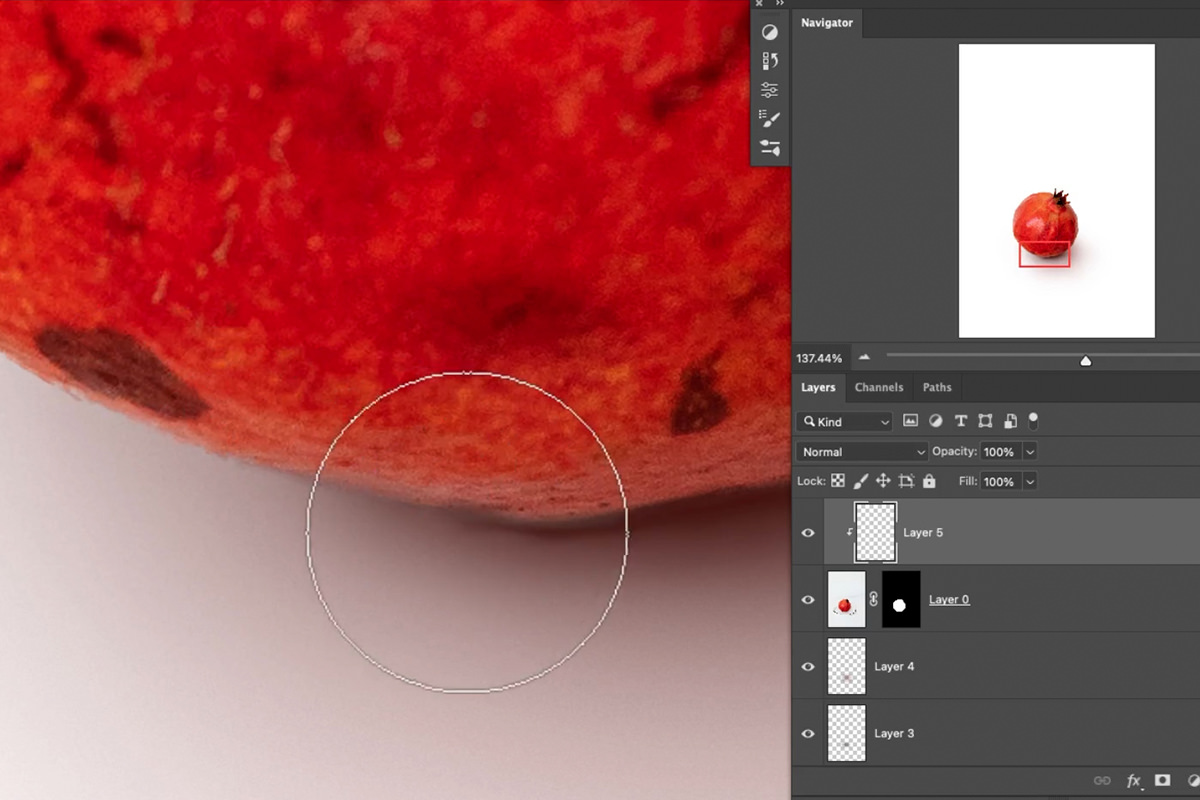
Create a New Layer Above the Object
Add a new layer directly above your cut-out object layer.
-
Create a Clipping Mask
Right-click the new layer in the Layers panel and choose Create Clipping Mask. Anything painted on this layer will now only be visible where the object layer beneath it is visible.
-
Sample and Paint Shadow onto the Object
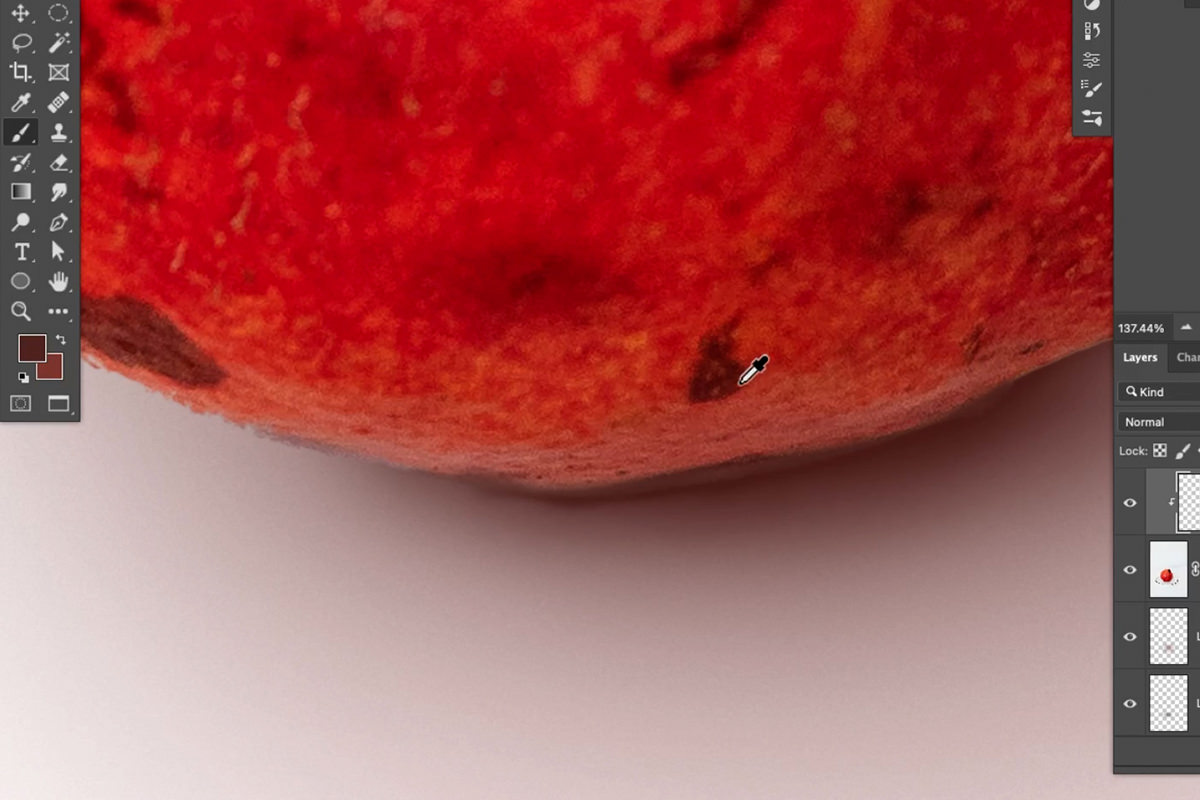
Hold Alt on PC (Option on Mac) to sample your shadow color directly from the paint you’ve already applied, then paint that color onto the object itself, especially right along the edge where it meets its own shadow, so the transition between object and shadow blends smoothly.
What a Clipping Mask Actually Restricts
A regular layer shows its paint everywhere; right-clicking and choosing Create Clipping Mask locks that layer’s visibility to the exact shape of the layer directly beneath it. Paint outside the object’s silhouette on a clipped layer and it simply won’t show — which means you can paint freely and quickly without worrying about spilling shadow color past the object’s edge. Right-clicking and choosing Release Clipping Mask undoes the restriction at any time.
Cleaning Up Fringing Along the Object’s Edge
Even a good cutout can leave a thin, lighter-colored fringe around the object’s bottom edge, and that fringe is worth cleaning up on the same clipped shadow layer.
-
Erase Where the Shadow Color Isn’t Needed
Use the Eraser tool to remove shadow color painted anywhere it isn’t helping, keeping the effect concentrated where the object actually needs darkening.
-
Darken Any Light-Colored Fringing
Sample a darker shadow tone and paint it over any thin, light-colored border along the object’s bottom edge to prevent stray fringing from breaking the illusion that the object and its shadow belong together.
Testing and Refining Your Shadow Layers
Once every shadow layer is in place, the last stage is comparing them against each other and adjusting until the whole stack works together.
-
Toggle Each Layer On and Off
Turn each shadow layer’s visibility off one at a time and compare the result — if the shadow looks noticeably worse without a layer, that layer is pulling real weight; if not, its opacity may need adjusting or the layer may not be necessary at all.
If you want more of one layer, press Ctrl or Cmd + J to duplicate it, move the copy over and give it a bigger Gaussian Blur for the area where the object blocks light from the table. Keep the blur reasonable: in the video the first try was far too large and was undone. Then change the copy’s opacity and press Ctrl or Cmd + T to stretch it into place.
-
Compare the Full Before and After
Hide the entire shadow group to see the plain cutout, then show it again to check the complete effect side by side.
To see why the shadow color matters, temporarily add a Hue/Saturation adjustment layer, clip it to the shadow group so it only affects the shadow, and take Saturation down to zero. The completely gray shadow doesn’t look right; the object’s color bouncing onto the floor is what makes it belong.
-
Group Your Layers
Once you’re happy with the result, select all of your shadow layers and press Ctrl + G on PC (Cmd + G on Mac) to group them together, and do the same for the clipped object-cleanup layers, keeping the file organized.
Why You Should Toggle Layers While You Work
It’s easy to lose perspective on a shadow effect while you’re deep in painting it, since your eye adjusts to whatever is currently on screen. Regularly hiding and showing individual layers forces a fresh comparison and makes it obvious which layers are actually contributing to the realism versus which ones could be toned down, removed, or need more presence.
Common Mistakes to Avoid When Painting Shadows
The most common mistake is trying to build the entire shadow on one layer with one brush setting — without separate layers for the sharp contact shadow, the mid-range falloff, and the soft outer edge, the shadow tends to look like a single flat shape rather than something with real depth. The second is defaulting to a pure gray or black shadow color instead of sampling color from the object itself, which is what keeps a shadow from looking pasted on. And it’s worth remembering that the object’s own surface, not just the ground around it, often needs a small amount of shadow painted onto it with a clipping mask to fully sell the effect.
Why This Effect Works
What makes this shadow convincing isn’t any one layer — it’s the accumulation of several separate, deliberately different passes: a sharp, dark contact shadow right where the object meets the ground, a low-flow mid-range layer that softens and spreads, a Multiply layer with its own blurred duplicate for broader ambient darkening, and a final clipped layer that paints shadow directly onto the object’s own surface. Each layer is simple in isolation, but stacked together they build the same kind of gradual, uneven falloff a real shadow has, rather than the sharp, uniform edge of a single painted or filtered shape. Sampling the shadow color from the object itself, instead of reaching for gray or black, is what keeps the whole stack looking like it belongs to that specific object rather than a generic drop shadow pasted underneath it.
Final Thoughts
Realistic shadow painting is less about any single trick and more about patience — building the effect in layers, comparing them against each other, and adjusting opacity and color until the whole thing reads as one continuous shadow rather than a stack of separate brushstrokes. The clipping mask technique for painting directly onto the object is worth remembering on its own, since it comes up constantly any time you need to add detail that should only show within an existing shape. Once this layered approach feels familiar, it applies to virtually any composited object, whether it’s a piece of fruit, a person, or a product shot dropped onto a new background.
Quick Reference: Keys, Menus and Settings
- Cut out the objectSelect > Select Subject, Add Layer Mask; L for the Lasso and Shift + Delete to fill leftovers with black
- Floor and orderWhite Solid Color fill layer under the object; shadow layers between the fill and the object
- Contact shadowAlt/Option-click to sample the existing shadow, paint where the object touches the ground
- Soft layersNew layer, larger soft brush, Flow about 10%; E for the Eraser to fix an area
- Multiply passBlend mode Multiply, slightly lighter color; Cmd/Ctrl + U to lower Saturation
- Blurred copiesCmd/Ctrl + J, Filter > Blur > Gaussian Blur, lower Opacity; Cmd/Ctrl + T to stretch
- Shadow on the objectNew layer above it, right-click > Create Clipping Mask; Cmd/Ctrl + G to group

Free Downloads
Follow Along on the Same Photo
Get the pomegranate photo, the finished PSD with every shadow layer and the 3-page PDF guide. Free with a PHLEARN account.
Realistic Shadows in Photoshop: Common Questions
Why does my shadow look fake?
Usually it is one flat shape. Shadows are darker and more defined close to the object and lighter and softer farther away, so build them on several layers: a dark contact shadow, then softer, larger passes.
Where does the shadow layer go in the Layers panel?
Between the object and the white fill layer. The paint shows on the floor but stays hidden behind the object.
What color should a shadow be?
Not gray. Sample the shadow that is already along the bottom of the object, or pick a darker version of the object’s own color. For the pomegranate that is a dark red.
What happens if the shadow is completely gray?
It doesn’t look right. Aaron tests it with a Hue/Saturation adjustment layer clipped to the shadow group and Saturation at zero. A real shadow picks up color bouncing off the object.
What brush settings work for soft shadows?
A larger soft brush with Flow at about 10%, painted mostly where the object sits so only a little seeps out. On each new layer, use an even larger, softer brush.
Why add a Multiply shadow layer?
Multiply makes things a little darker, which suits the light the whole object blocks. Paint it with a slightly lighter color, and if it is too saturated press Cmd/Ctrl + U and pull Saturation down part of the way.
Should I blur the shadow?
Blur copies, not the whole thing. Duplicate a layer you like with Cmd/Ctrl + J, add Filter > Blur > Gaussian Blur and lower its opacity. The blur does not need to be big.
How do I paint shadow on the object without going past its edges?
Create a new layer right above the object, right-click it and choose Create Clipping Mask. Hold Alt/Option to sample your shadow color and paint along the base; the paint only shows where the object is.
How do I fix a light edge at the bottom of my cutout?
On the clipped layer, sample a dark shadow tone and paint over the light-colored border at the base so there is no fringing. Zoom out and darken any spot that still looks too light.
Are the sample files free?
Yes, with a free PHLEARN account. You get 1 sample image, 1 sample PSD and 1 PDF guide: the pomegranate photo, the finished file with every shadow layer and the 3-page step-by-step guide.
Master Photoshop, Lightroom and Photography
Join PHLEARN PRO for $12.99 a month or $99.99 a year. Cancel anytime, with a 100% money-back guarantee.





