
Download Sample Images
Click the link below to download the sample images and follow along with this tutorial.
DownloadTutorial Description
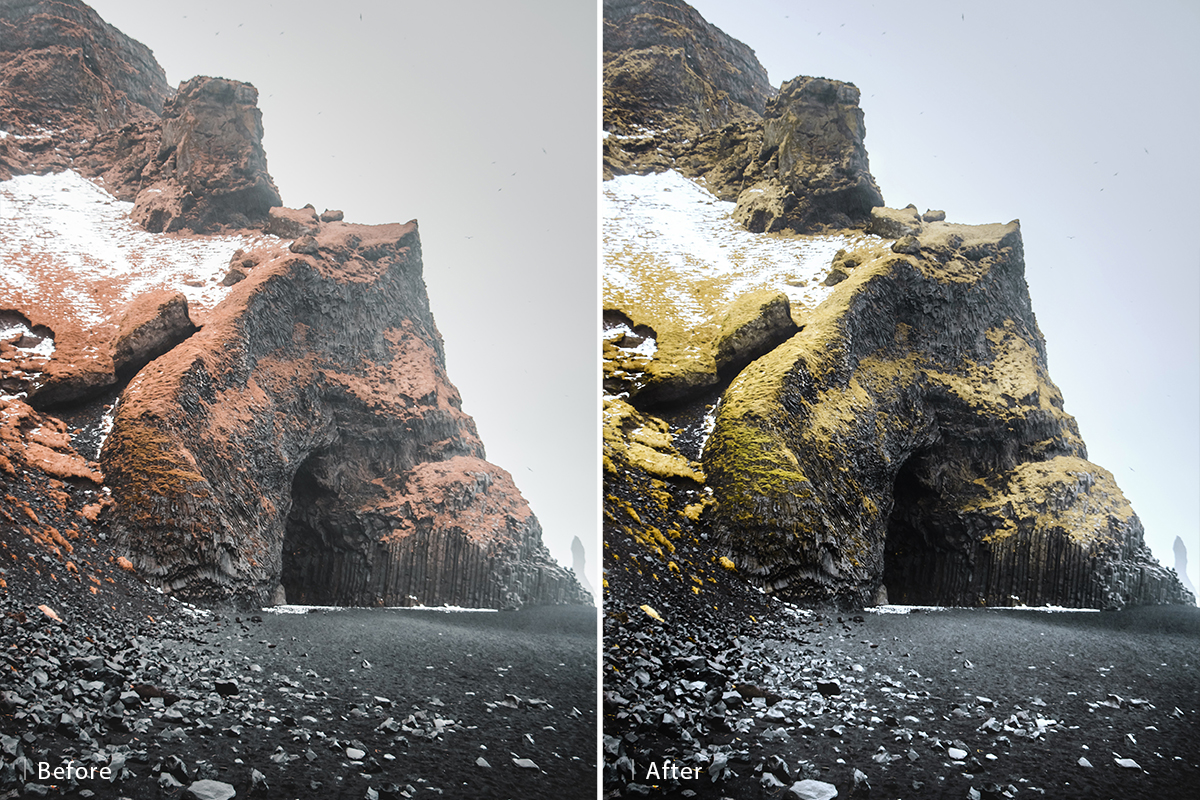
Enhance definition and recover lost details in your landscapes with dodge and burn in Photoshop! If you’ve used dodging and burning before (or if you’ve taken one of our PRO tutorials), you already know what a powerful tool it is for adding shape and dimension to any photo. Learn how to use classic dodge and burn techniques to help your landscape images look their very best!
Highlights & Shadows
Before starting the dodge and burn process, it’s important to identify the natural highlights and shadows in an image. We recommend creating a new Layer above the background Layer and using the Brush Tool to circle all of the areas of light and dark that you want to enhance.
You can show and hide this Layer at any time, it’s just there for you to use as a reference later as you decide which areas you want to brighten and which you want to darken.
Using Levels
Levels Adjustment Layers are one of the easiest and most effective tools for dodging and burning in Photoshop, allowing you to lighten or darken an image in just a few clicks. Simply add a Levels Adjustment Layer above any Layers you want to adjust. Then, using the Levels dialog, you can move the white slider to the left to darken the image and the black slider to the right to lighten it.
This is great! But what if we only want to make changes to specific parts of a photo? Since our goal is to only enhance the main areas of highlight and shadow, we’ll need a way to precisely apply our Levels adjustments. Layer Masks and Blend If make it possible.
Blend If ya do, Blend if ya don’t
Blend If is an extremely powerful tool that allows you to blend Layers and effects into the highlights, midtones, and shadows of an image. Using it, we can tell our Levels Adjustment Layers to only affect the lights or darks in a landscape.
To access Blend If, double-click on the Levels Adjustment Layer. This will open the Layer Style window. Select the Blending Options menu near the top of the navigation list, here you’ll find the Blend If sliders.
For the purposes of dodging and burning, we’ll only be using the bottom slider labeled ‘Underlying Layers’. If you drag the white slider from the right to the left, you’ll notice the Levels Adjustment Layer will start to disappear from the brighter areas of the image. If you drag the black slider from the left to the right, you’ll notice the Levels Adjustment Layer disappears from the shadows of the image.
We’re getting closer! But the effect is a little too harsh. Fortunately, we can add feathering to seamlessly blend the Levels effect. To do this, simply hold ALT or OPTN while moving a slider. This will split the slider into two halves, allowing you to create a seamless transition.
Now that we know how to target the lights and darks of our images with Levels, how do we use this for dodging and burning?
You’ll want to start with two Levels Adjustment Layers. One that darkens the image, using Blend If to make it appear only in the darks. And one that lightens the image, using Blend If to make it appear only in the highlights.
We’re getting closer, but we can get even more precise with our dodging and burning using Layer Masks.
Layer Masks
You’ll notice that each Levels Adjustment Layer already has a Layer Mask filled with white. This means each Levels Layer will be completely visible over the entire image. Select each Layer Mask and hit CTRL or CMD + I. This will invert the masks, making each Levels Adjustment Layer completely invisible.
Now take the Brush Tool and select white as the foreground color. Using a soft brush and a low flow, you can paint the highlights and shadow adjustments in exactly where you want them. Remember, the goal is to make the darks a little bit darker and the highlights a little bit brighter. This will increase the overall contrast in the image, helping details stand out and adding more definition to any shapes or structures.


