How to Master Dodging & Burning in Photoshop
-

-
Add to
favorites
-
DifficultyMedium
-
Length5 hours
-
Software
Description
Dodging and burning in Photoshop is a staple technique for professional photographers and retouchers. In this tutorial, you will learn how to sculpt highlights and shadows to add dimension, remove blemishes, and guide the eyes of the viewer to the most important parts of a photo.
THIS COURSE INCLUDES
- 16 Sample Images
- 1 Photoshop Brush
Share
Table of Contents
-
01 - Brush Techniques14:56m
-
02 - The Dodge & Burn Tool5:27m
-
03 - Soft Light Layer16:26m
-
04 - Curves & Levels16:33m
-
05 - Luminosity Dodge & Burn with Luminance Blending31:43m
-
06 - Luminosity Dodge & Burn with Apply Image19:42m
-
07 - Dodge & Burn RAW in Lightroom17:57m
-
08 - Dodge & Burn RAW in Photoshop14:59m
-
01 - Correct Highlights & Shadows13:45m
-
02 - Retouch Small Details20:00m
-
03 - Retouch Large Details22:37m
-
04 - Clothing & Environments35:32m
Course Downloads
Master Dodging & Burning
IMPROVE YOUR ENTIRE PHOTO
ORIGINAL
What is Dodging & Burning?
Dodging and burning is the art of sculpting and enhancing the highlights and shadows that wrap around your subject. The techniques in this tutorial will help you accentuate shape and add dimension so that your photos pop off the page (or the screen).
How to Dodge & Burn in Photoshop
In the early days of photography, dodging and burning was done by hand in the darkroom. Now with Photoshop, we have the ability to paint with light, brightening highlights or darkening shadows with a few precision brush strokes.
Portraits & Landscapes
Whether you’re shooting sweeping landscapes or intimate portraits, we’re certain that our dodging and burning workflow will help bring your vision to life. Learn how to use highlights to keep the attention on your subject and use shadows to add depth and detail to landscapes and environments.
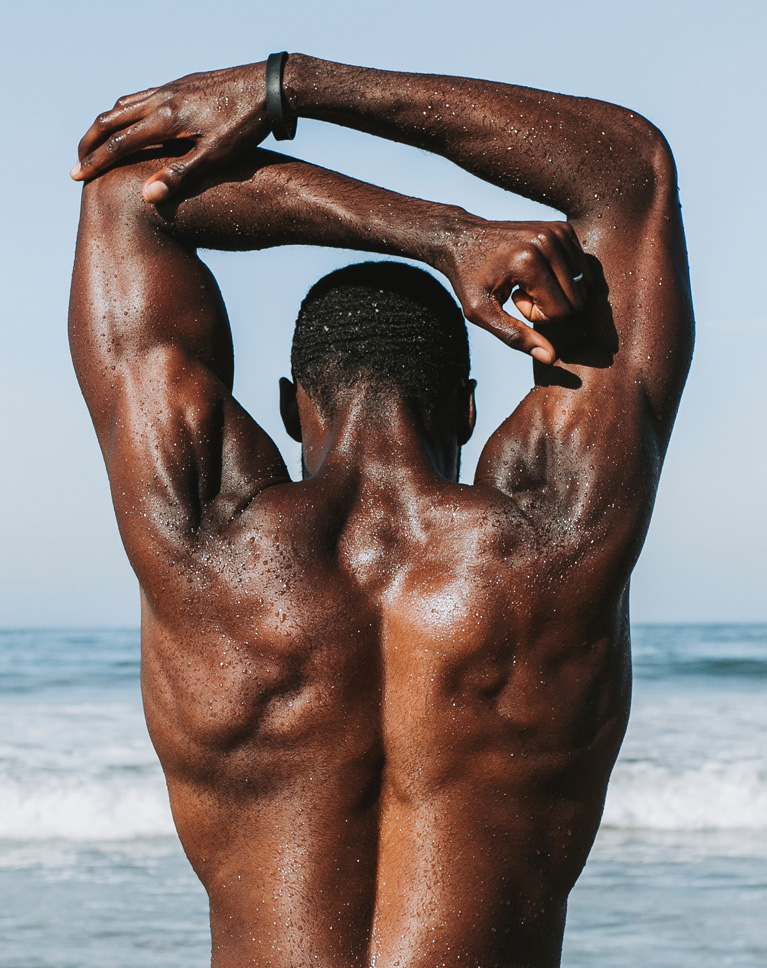
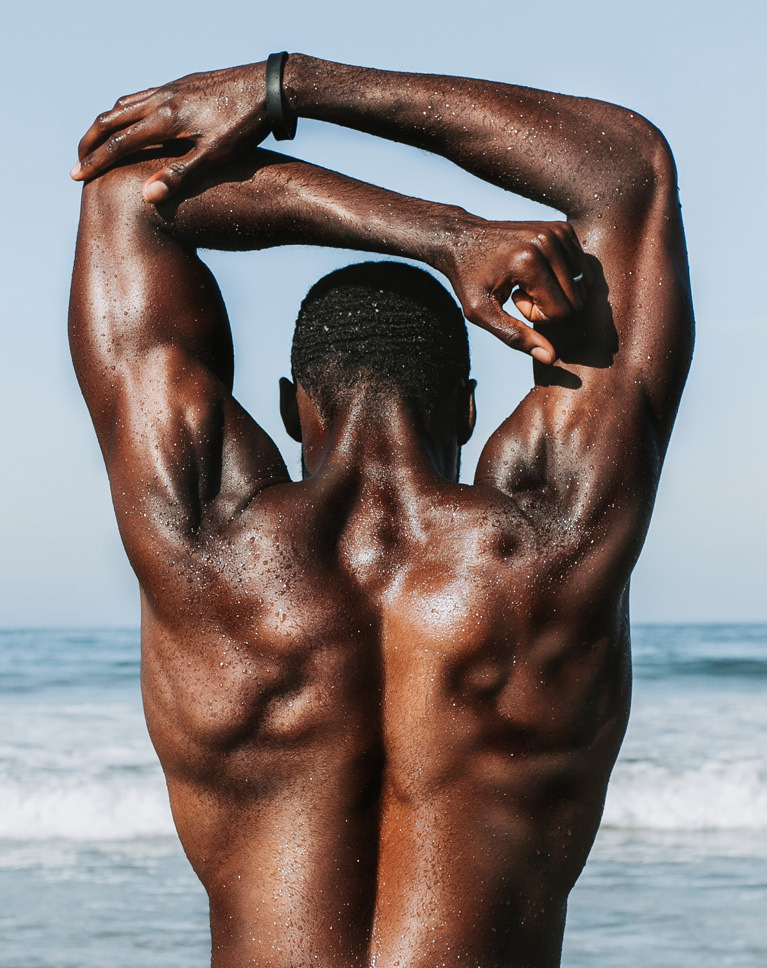
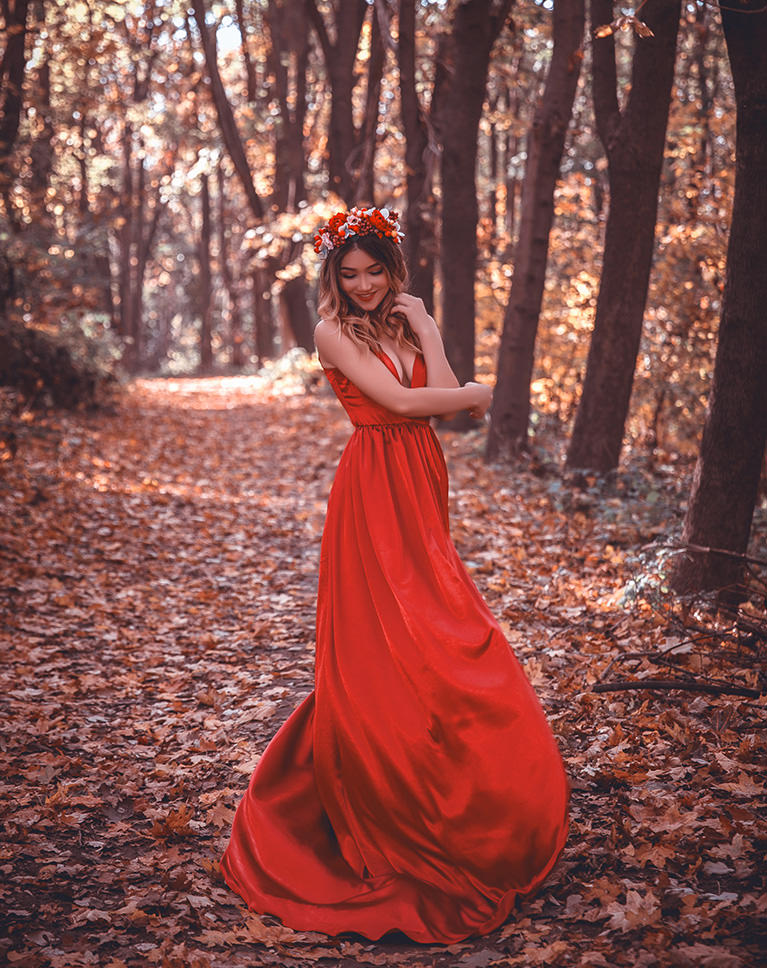
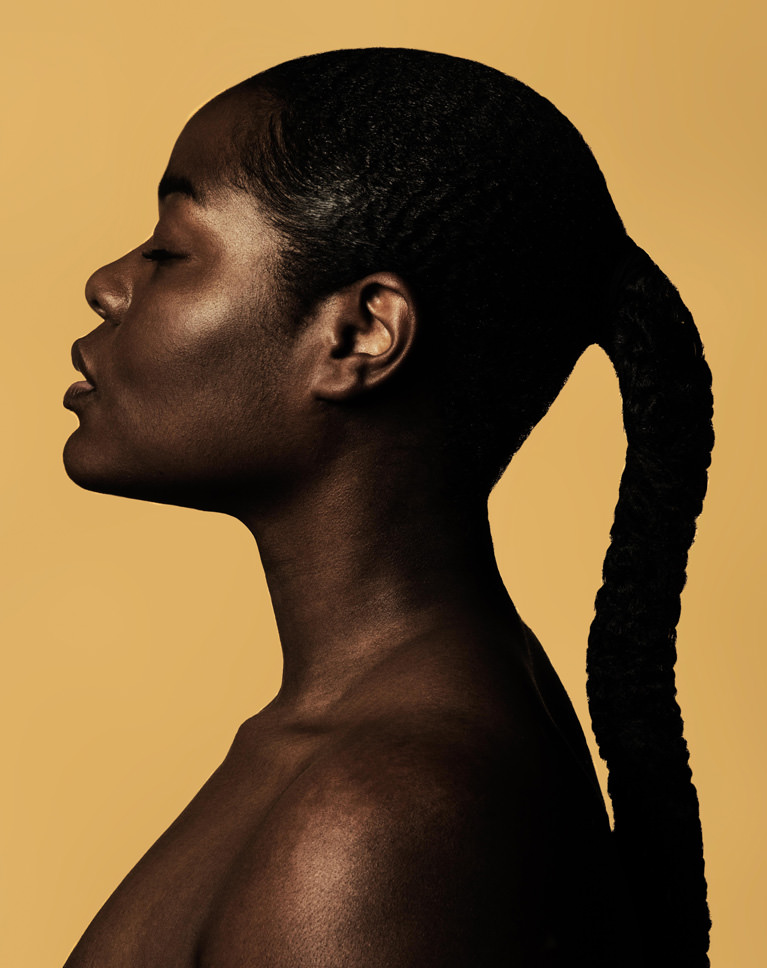
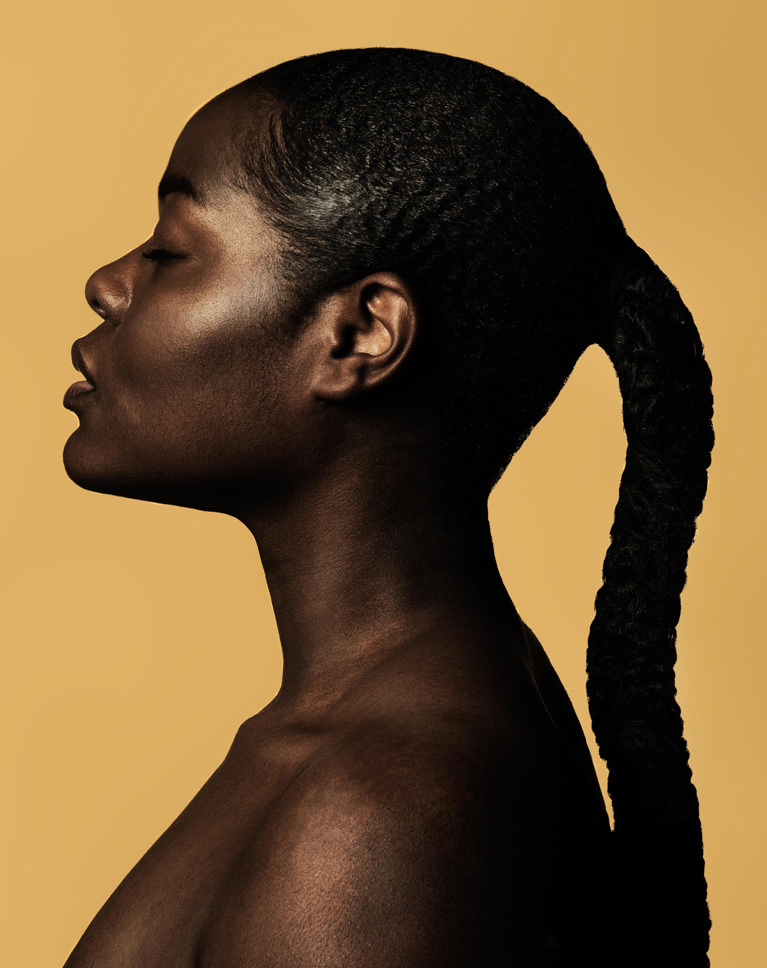
ADD SHAPE & DEFINITION
ORIGINAL
Add Shape & Definition
Whether you’re taking an athletic portrait and want to emphasize a person’s form and musculature, or you’re a product photographer that needs to accurately represent how a product would look and feel in real life, this tutorial will help you add shape and definition to nearly anything.
Small Details
We take you down to the pixel level to remove small blemishes and distractions while keeping the original textures in tact. Most blemishes can be fixed by simply reducing or removing some of the harsh shadows that they create. Learn to zoom in and retouch these delicate areas with powerful dodge and burn techniques.
Large Details
Learn how to look at the big picture, tackling larger areas of highlight and shadow so that your images look great on mobile devices, Instagram, and other social media. Learn to enhance facial structure, body shape, and tackle harsh transitions between highlight and shadow.

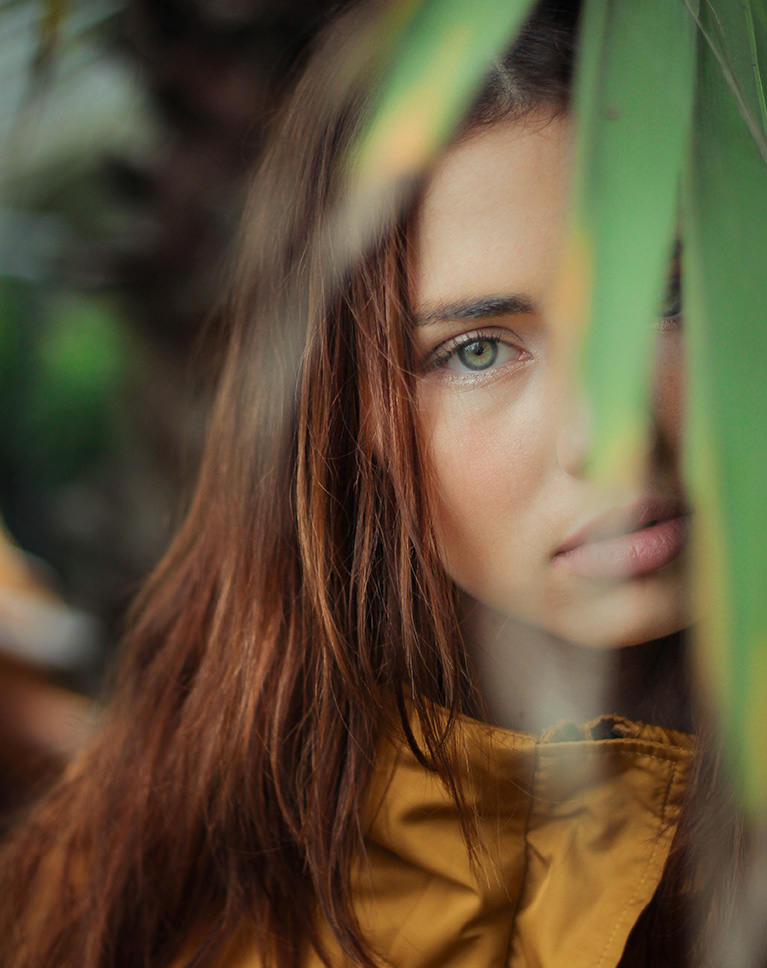
IMPROVE LIGHTING
ORIGINAL
Draw Attention
Have you ever looked at a photo and were unsure of where your eyes were supposed to focus? Dodging and burning can help the important parts of an image stand out. Learn how to use highlight and shadow to draw more attention to your subject for a more powerful image.
Correct Highlights & Shadows
Things don’t always turn out perfect after a photoshoot. Even with great lighting, your shots still might have some exposure issues that need fixing in Photoshop. Dodging and burning can help bring back detail, balance exposure, and create more dimension in your subject.
Clothing & Environments
Dodging and burning is traditionally done on people and portraits, but it can make a huge difference in a variety of other photos. We show you how to apply dodging and burning techniques to a number of situations like adding beautiful detail to folds in fabric and adding depth to a landscape.
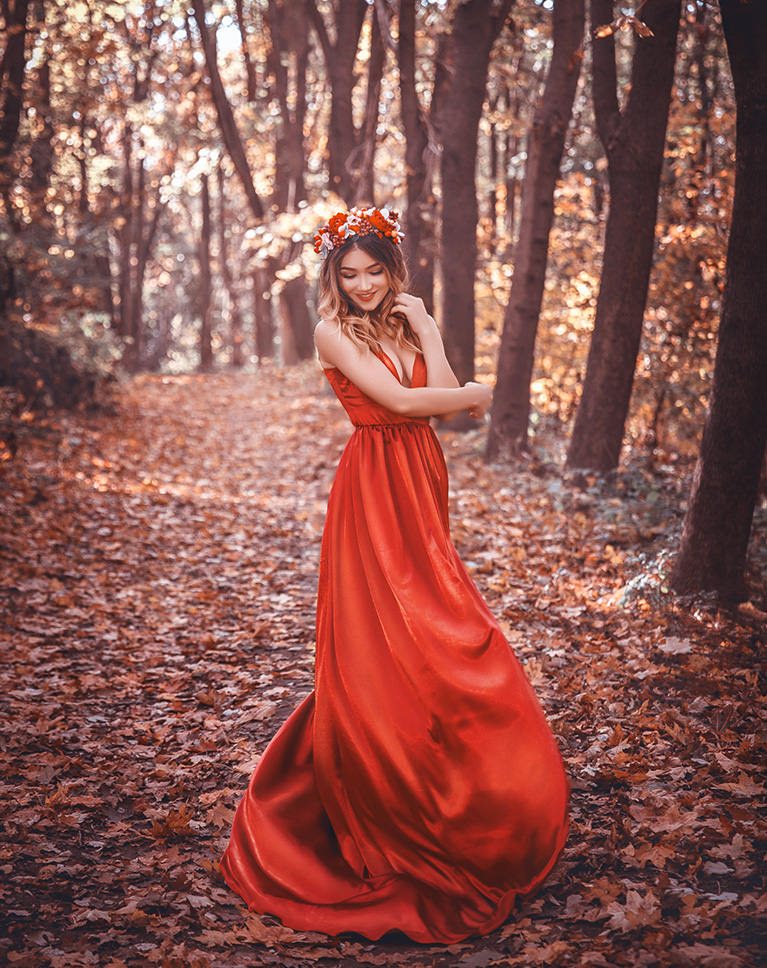
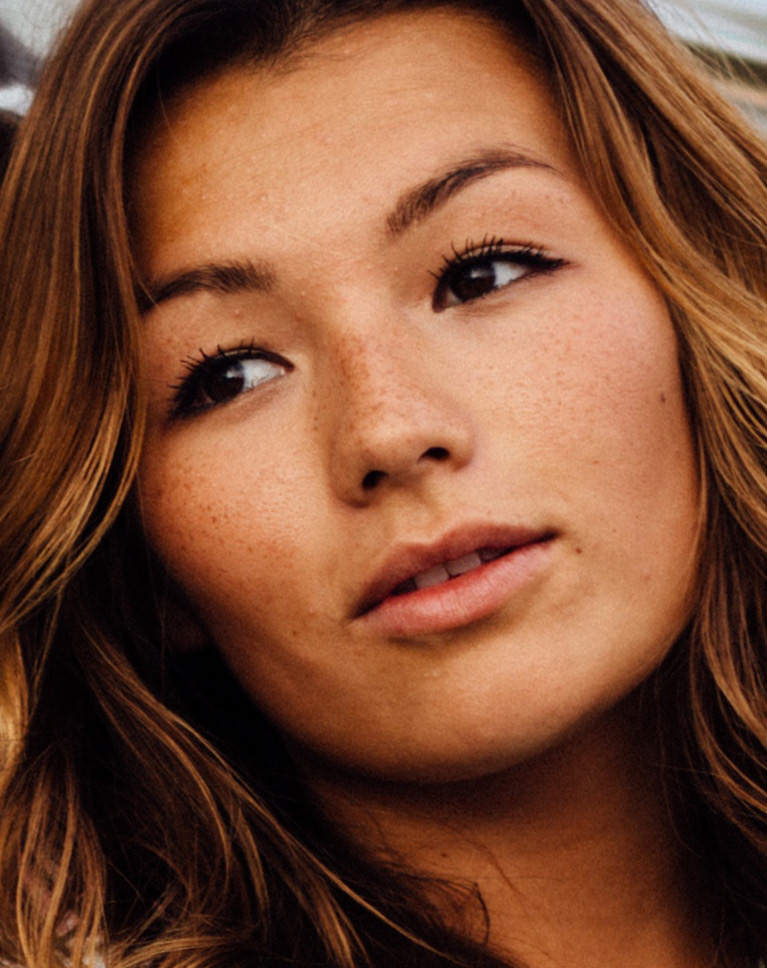
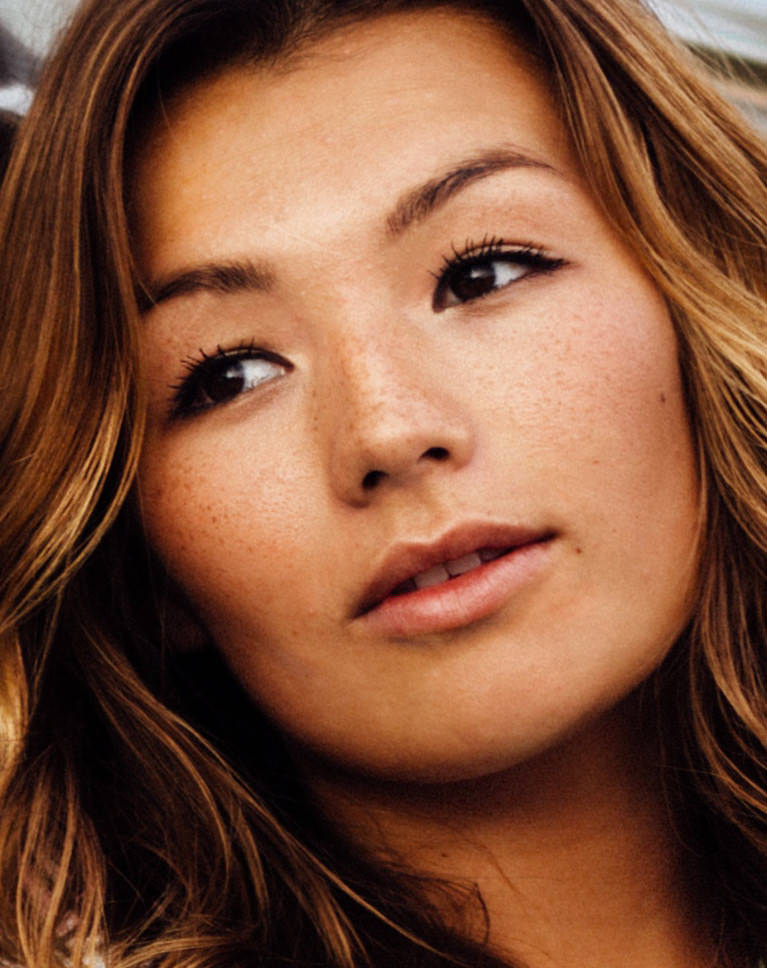
Sculpt Highlights & Shadows
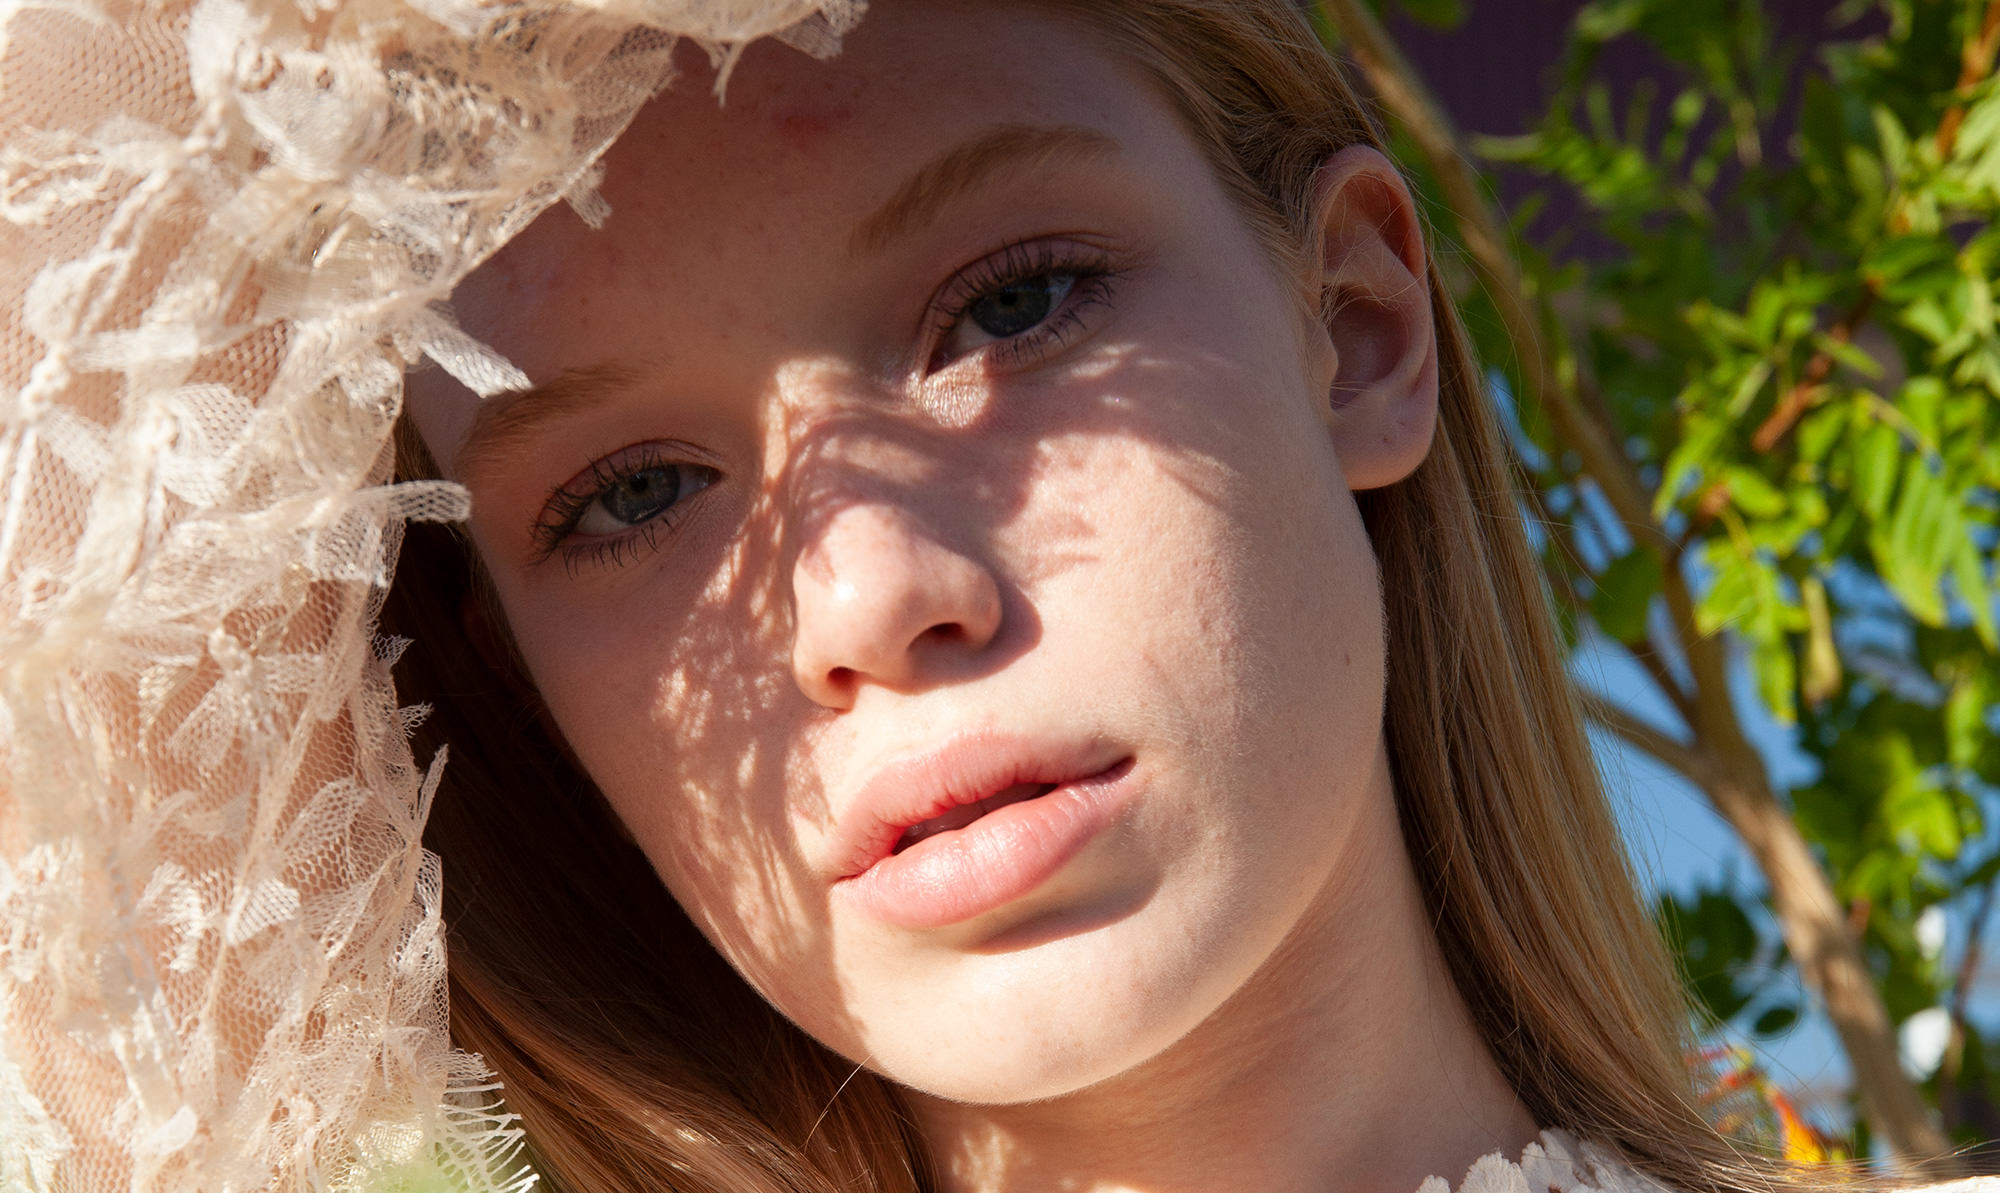
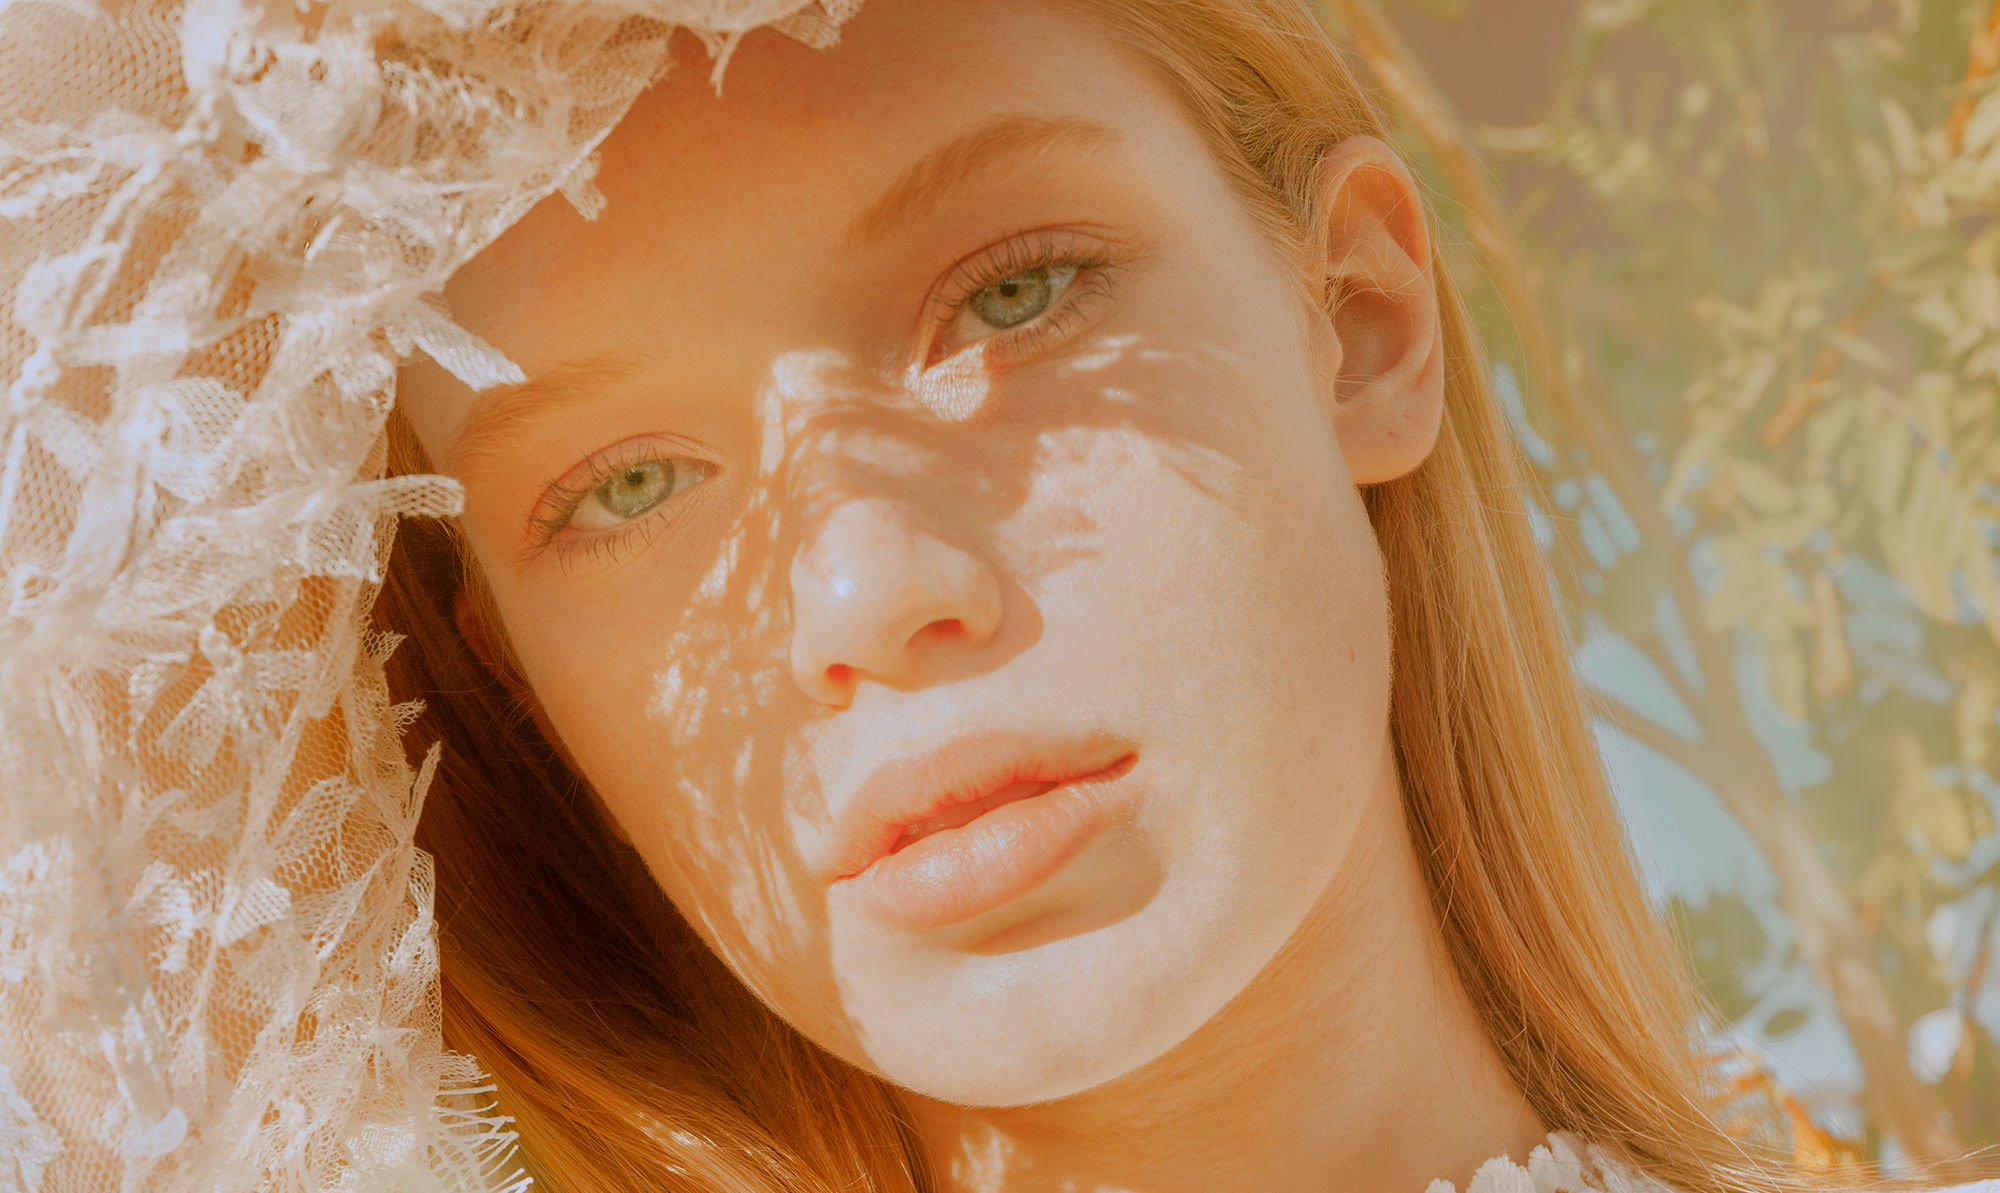
AFTER
BEFORE
Learn to Enhance any Photo
Add shape, add definition, and keep the viewer’s eyes locked on to your subject.
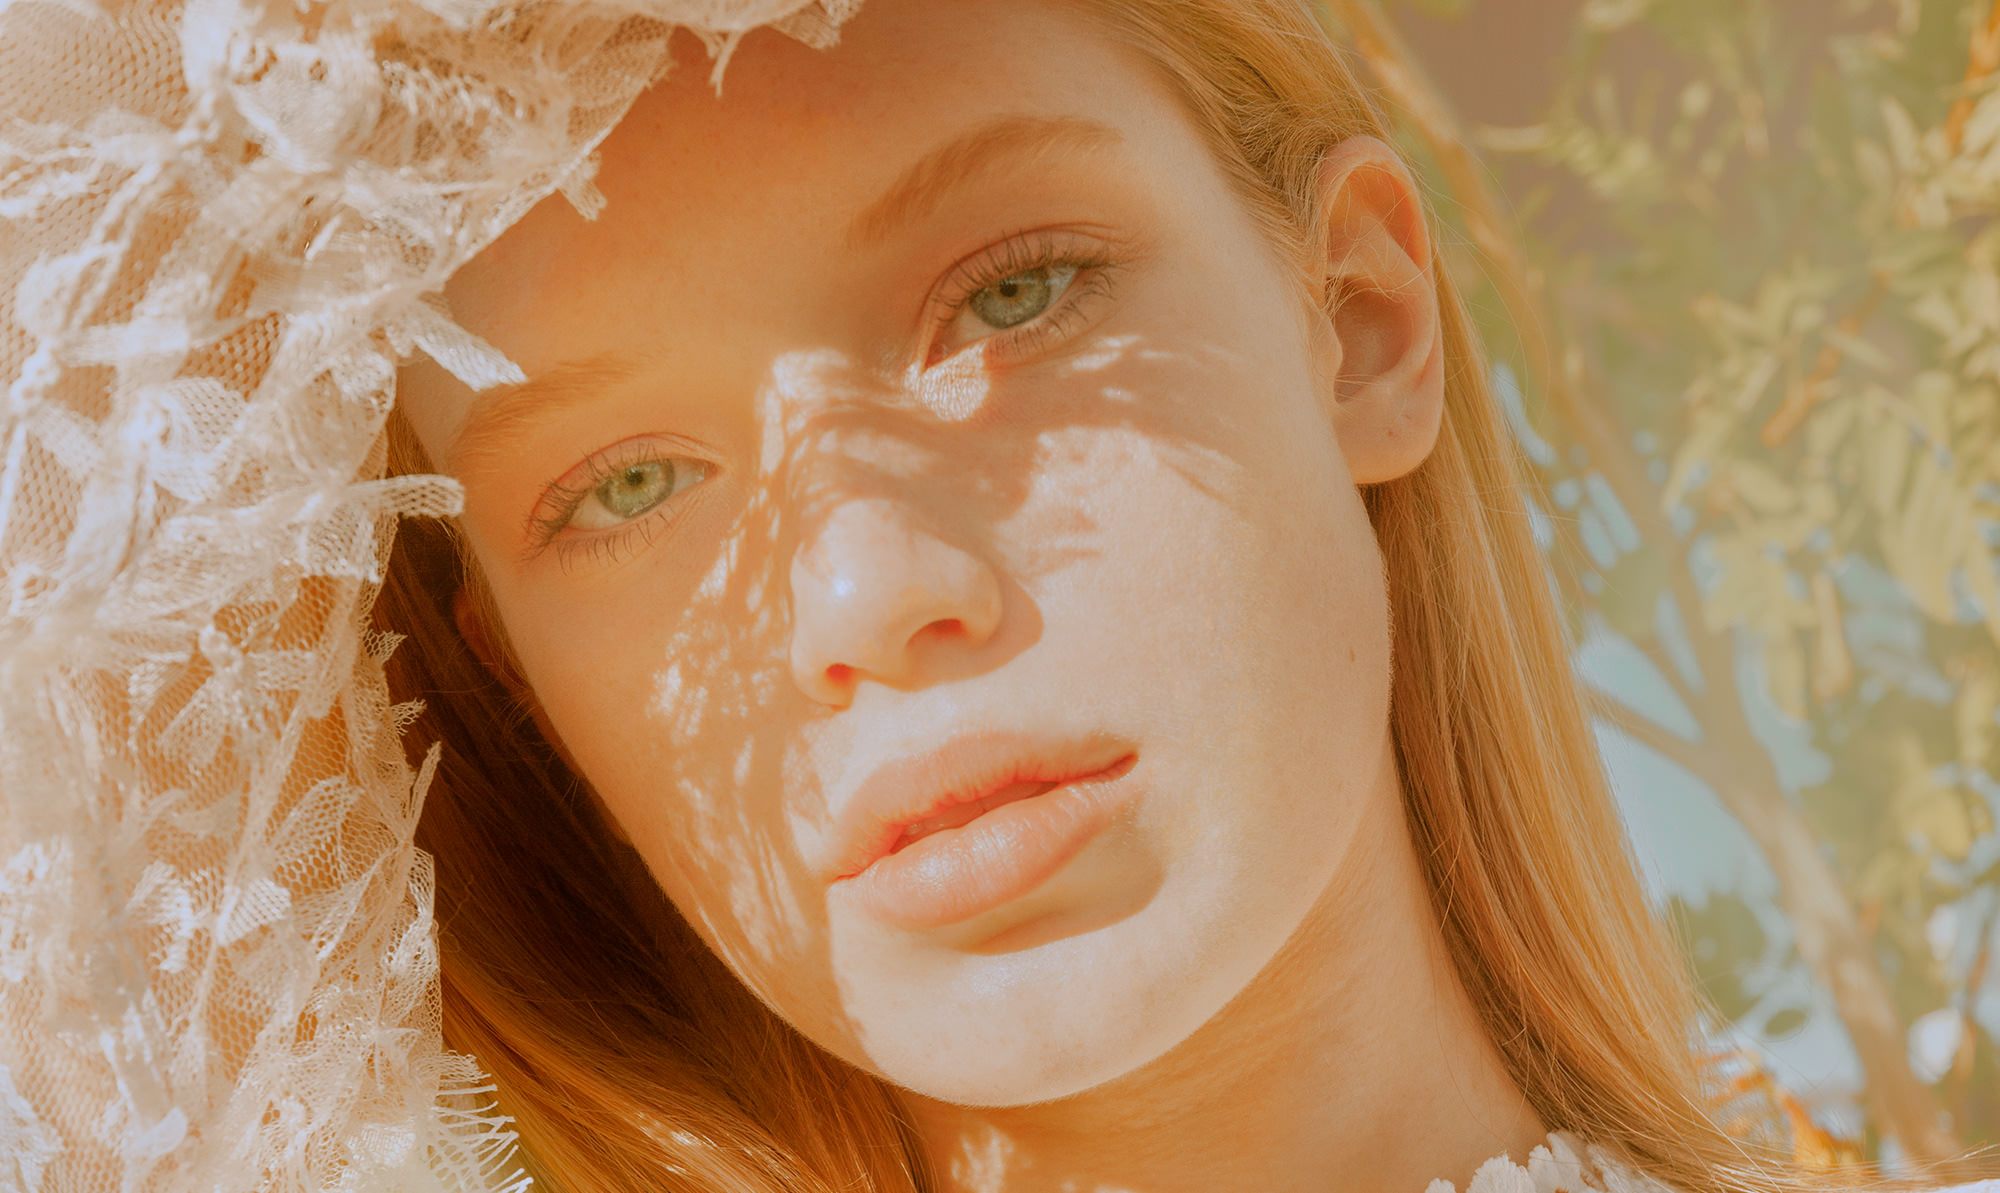
SMOOTH SKIN
ORIGINAL
Remove Blemishes
When people hear ‘blemish removal’ they often think of the Healing Brush Tool or the Clone Stamp Tool as the go-to methods for retouching. There’s a better way! In this tutorial, we break down how to use dodging and burning and RAW processing to remove blemishes by simply adjusting only the light levels in a photo.
Highlights & Shadows
Dodging and burning starts by analyzing how the light is interacting with your subject in an image. Where are the brighter areas? How about the darker areas? We show you what to look for when identifying where to dodge and burn. Then you can follow along as we plan our edits for each image and take you through the process, step-by-step.
Tools & Techniques
Follow along as we cover all of the tools that you’ll need to master for effective dodging and burning. Learn how to use the Brush Tool, Dodge & Burn Tool, Adjustment Layers, Blending Modes, and learn how to process RAW images in both Photoshop and Lightroom.
ADD HIGHLIGHTS & SHADOWS
ORIGINAL
Preserve the Original Details
Learn how to dodge and burn down to the pixel level, adjusting areas of light and dark to reduce and remove small blemishes while keeping the natural skin texture in tact.
Dodge vs. Burn
Dodging is all about the highlights. Looking for brighter areas of your subject and making them slightly brighter. Burning is all about the shadows, which involves darkening the dark areas. Combining both methods creates increased contrast around the edges and curves in an image, adding a whole new dimension to your photos.
RAW & JPEG
Learn how to get the most out of your photos, whether you’re working with an 8-bit JPEG or in 16-bit RAW. We even show you a professional RAW processing workflow in both Photoshop and Lightroom.

Aaron Nace
PHLEARN Founder – Class Instructor
Aaron Nace is a photographer, Photoshop artist and founder of PHLEARN. He is the #1 Photoshop instructor in the world with millions of YouTube subscribers.
Lydz Leow
Photographer//Designer – Featured Artist
Lydz’s body of work explores the expressions in masculunity and femininity through her funky perspective with light. Fascinated by the architecture of human form, her images often present a subtle touch of delicacy while discovering the beauty within flaws
View Lydz’s Portfolio


Reviews
New & Popular Tutorials


Training Site in
the World
Tutorials!
Ratings
and Counting
Subscribers
I love Phlearn’s tutorials. They are easy to follow. He is so knowledgeable and fun to listen to. Thank you very much.. Angie
I am not a professional photographer but I take a lot of photographs mostly outdoors. By profession, I am a Clinical Nurse Specialist in Cardiology and CV Surgery. However, I have always been involved in various creative art media. I was in a very bad car accident (driver left the scene). The recovery was long and tedious and I am very grateful to be alive! I was not able to go back to work so I do volunteer patient advocacy. I am a watercolor artist. I started doing scientific illustrations and botanical painting. I’ve evolved in botanical painting to a style that remains botanically correct but my compositions reflect the light and reflection, the hue transitions go through a greater variety of tonal changes. I use a limited palette so mixing color takes quite a bit of time to get the tonal changes I need. I just prefer to mix as many as I need so the composition will be cohesive. How did I find out about Aaron and PHLEARN? I have a pass to the Creative Live website and I took Aaron’s classes. I love working with color and his composites blew me away! I started thinking about ways I could bring compositing into my painting. So I joined PHLEARN to learn more. I have worked with a lot of very smart people over my career so I do not say this lightly – I think Aaron is a genius. The way he has all of the tech knowledge, the left brain work and the immense right brain creativity – he meshes it all together to create a body of work that truly tells a story in each piece of art. And… he is the best tutor (professor) I’ve had in the many online courses I have taken. I apologize for the length of this review. It is the first one I’ve written and I will write more specifically for each tutorial in the future. Mastering Dodging and Burning is a class I think we all need. The play of light and shadow is so important and getting away from the dodge and burn tool and learning this method has improved my work in PS . An important note: no matter which version of PS used in the tutorials whether it was a few years ago or the present – you will learn something new you probably missed before these tutorials. BTW, I don’t think Aaron charges enough! I am a forever student.
Molto utile 🙂
but you can just duplicate the background to create a new layer and then use the dodge and burn…
Aaron I love your courses but this one highlights the need for update notes e.g it appears that the method you set out to load a new brush does not apply to the most recent versions of Photoshop
Outstanding tutorial, it was explained with great details and examples. Learned many new things which will come in handy with my edits Your awesome Aaron
Amazing tutorial!?!
I began Phlearn via the 30 day course and quickly moved on to a Pro account. ‘Master Dodge Burn’ is the first complete course I have completed and it was fantastic. I have taken 2 pages worth of notes and it has been a game changer for my photography. ‘Apply image’, ‘blend if’ are amazing – I love the wrinkle dodge/burn technique too: so much less invasive than ‘heal’. The skills in this course alone have had a greater impact than any new lens I could buy.
I love it! soo many informations in a couple of hours.
amazing tutorial, I’m French But Aaron speaks so clearly it was easy to follow all the video. It’s very good to improve his own D&B technics with the different approches. The ultimate video is very useful to understand the process of creation with only D6B technics. Thanks
once again a perfect tutorial, there is not a subject you touch on that noes not advance my skill to an other level,.. I would have love to see the total of dodge / burning techniques and then the frequency seperation, it almost seems unnecessary, I would have like to see how you applied here. thank you again!!!
Love learning from you, my 2020 has mostly been me in my room listening to your voice and learning PH 😀 thank you so much.
This tutorial, like all others I have taken on Phlearn, has helped me so much….A lot has already been shared, but I wanted to add how it’s been a game-changer for me. Although the tutorial focuses a lot on portraits, its applications are far-reaching. My focus is street photography and lately I have been concentrating a lot on night shooting, often in back alleys where light conditions are far from ideal. Since I do not use a flash and never composite any of my street photographs, I was further constrained. Before this tutorial, I was unable to manage the light effects to my satisfaction, but once learning the methods Aaron shared here (like apply image with curves), I was blown away by the impact that dodging and burning has. I am now able to place the focus on the part of the image that I want, to bring the story to life the way I envisioned it in a very natural way. And natural to me means everything in editing. To anyone considering any Phlearn tutorial in general – I really struggled with Ps before I found Phlearn. I felt overwhelmed and frustrated. But its so true what they say – if you have the right teacher, you have everything you need. I think back to another site I used previously where the guy was like “why would you ever group a layer with itself, that’s just stupid” and can’t help but lol every time I group a layer now 🙂 Someone should really gift him a subscription! Using Ps is something I actually enjoy and I can’t thank Phlearn enough for that, for taking the fear away and enabling me to continue my creative pursuits.
arron love your teaching methods. thanks a lot. even though I cant remember half of the info.
As always, Aaron’s desire to be complete in doing something comes through. I appreciate not finding myself with a lot of open questions when I come to the end of a tutorial. I particularly appreciated three things in this one. First, I’d say it’s the first time I feel like I really “get” blend-if. I’ve watched a lot of things about it but this seemed to be the first time that I really understood, and could anticipate, what changes its use would effect. Second, the use of apply image with curves was demonstrated to be tremendously powerful. I would never have stumbled onto this technique on my own and I was immediately able to apply it to some… call them problem images, to great effect. Third, the demonstration of using the brush tool with applied curves as a means to smooth lights and darks in a portrait without affecting texture is potentially very powerful. Need to tame a few blemishes? Definitely the way to go; much less of a blunt instrument compared to frequency separation. As a bonus, which happens a lot in Aaron’s tutorials, I picked up something about copying smart objects that I never knew, that is, the difference between just copying the layer and ‘new smart object via copy’– something definitely worth knowing.
Arron Nace ROCKS Arron is truly great and makes learning photo shop fun… he does, and i enjoy learning from him. i like many others as well but Arron has a way to bring it home in a kinder more gentler way that has me learning instead o f tolerating his ego like Blake Rudis who i also love. But Blake Rudis ego is right there and gets in the way of learning were AAron makes you laugh via silliness. I’m a pro member of Phlearn and a f64 elite member with Blake Rudis. i”m not trying to say anything negative about Blake thought it may come across that way. BLAKE AIN’T FAKE AND IS THE REAL THING. I’ve emailed Blake many times with questions and Blake personalty has gotten back quickly every time . Blake’s zone system is a bit baffling to me at times . But the more i learn about the zone system and palette effects the more i use and enjoy there no-nonsense direct approach. Phlearn tutorials are top notch and the photo shop learning channel gives Aaron a run for his money . These guys are at the top of there game and i appreciate that. BUT ARRON ONE SMALL THING: The play/stop/pause time line moves just when i try to click on it . i can see how when you made it you thought it might be a good idea. But i’m always trying to go back to hear something several times and it has become annoying thank you and ‘ I’LL PHLEARN YOU LATER
Just a great tutorial, so easily explained and I learned heaps. One question though Aaron, you sometimes use ‘Normal’ blend mode then, on other occasions, ‘Luminosity’. What determines which blend mode you use?
Absolutely the BEST D&B tutorial set I have seen. Great work.
Great tutorial Aaron! Found it really helpful to demystify some aspects of D&B.
Perfect tutorial Aaron. I can’t thank you enough – Lucid explanations and so many examples. My skills just went a up and I used them to a great effect on a macro image. I couldn’t find any pro tutorial on handling noise. My goal is not only to learn to handle high ISO noise but also the noise introduced by processes such as sharpening and how one can avoid. A pro tutorial than can show the complete workflow to handle noise would be much appreciated! Kind Regards Yugal
Just the way tutorial should be, really great instructing there Aaron, finding Phlearn was like finding El Dorado of photoshop! Keep the great work!
Great Tutorial!! Learned a lot! I have a question regarding editing in Camera RAW: If i open my raw file as smart object and start dodging and burning with curve adjustment layers, does my smart object contain as much information as doding and burning in camera raw?
Super Cool tutorial , Thank you Aaron so much 🙂
So many ways to dodge and burn included with this excellent tutorial. In Aaron’s usual easy to follow teaching method, it is simple to follow along. Highly recommended.
This is one of the best tutorial on learning how to effectively use dodge and burning in any kind of a photo. Aaron did a great job in explaining the ‘apply image’ and ‘luminance control’ technique. Absolutely loved it! 🙂
Love this tutorial. It took my dodge and burning to a whole new level in Lightroom, Camera Raw, and Photoshop. I loved when Aaron discussed walking away from your edit for a while and returning with a fresh pair of eyes. I have done that often and am amazed at how I over edit sometimes. I use the blend if and apply image methods now, two things I didn’t do before. Thank you so much for another great tutorial.
As usually- perfect tutorial. Well organised, easy to follow and nicely explained.
Most excellent Aaron! I love what can be done with apply image. Great tutorial. Will watch again.
What an absolute fantastic tutorial. Who would have thought that there were so many techniques to dodge and burn an image!! I was blown away by the Apply Image technique. A must do tutorial for any photoshopper.
Great tutorial!
Well worth the time spent watching. Great class!!!
Great tutorial as always!!! You keep moving the level up !!! Let me ask you something Aaron, i know that if i open my raw in camera, well… i’m editing directly in raw. But, if i open my image photoshop (after ACR, and using the 16 bit option), then a add a adjustment layer, i’m still editing in raw?
With this tutorial you made my entire life! That’s so AMAZING! Thank you so much!
I learned so much with this! So many things I thought I already knew, but didn’t. Very easy to follow, very clear and fun!
Fantastic!!!!!
Great professional work Aaron. I am literally hooked up on your tutorials and taking notes all the time!! I am a paid up PHLEARN Pro subscriber meaning I watch your tutorials via online streaming since I cannot download them. May I ask if these tutorials will be removed at some point in time or will they be archived for reference purposes if I need to refer back to the video? Thanks coming all the way from MALTA, EUROPE…..
the best tutorials I have come across. so much good content it is a must for anyone wanting to learn more about photoshop and Lightroom
I was quite excited to see when this tutorial came out, and was really looking forward to it. However, I have to say that this is the FIRST Phlearn tutorial (or even a single video) that left me disappointed. Aaron is a brilliant instructor, definitely the best in the business, and he does a great job explaining the tools, techniques and the method behind all that’s happening on the screen. It’s just that I found this tutorial to be a lot more about “Retouching” rather than specifically focused on “Dodging & Burning”, which is a smaller subset of overall Retouching subject. As I understand it, the vast majority of D&B technique focuses on the contouring and sculpting of light & shadows. This includes either adding shadows & highlights in areas where they weren’t present originally, as well as enhancing the existing ones artistically to accentuate the shape of a given subject. However, this is completely missing from this tutorial. Aaron mentions a few times about watching make-up videos to learn more about how to add contours to the face, but I feel that’s more of a cop-out than advice. It would hardly take 10-15 more min to explain the theory & concepts of contouring, but that would be the most important bit of this tutorial, and it’s sorely missed in this particular tutorial. Besides, what if I want to dodge & burn a car? Or a bottle of wine? Or a chair? Overall I feel that the content focuses too much on retouching rather than D&B, and although techniques & tools are different, it’s too similar to the Frequency Separation tutorial in terms of intended outcome. It’s focused on flattening & balancing of light rather than adding more contrast to sculpt the given shape of a subject. For a tutorial claiming to help me MASTER the art of D&B, this is a pretty big thing to miss out. My suggestion would be to either add a chapter focusing on the sculpting & contouring strategies or at the very least, replace one of the edits with a proper dodge & burn to add dimension & accentuate the shape of a subject.
Again Aaron uses many methods to get the result desired. Good to have these tools for every type of image to edit!
Aaron shows just how strong his knowledge of Photoshop is in this fantastic tutorial. He provides such a vast range of information in an easy to understand format. Following along with the tutorial videos is always a great advantage and really helps to solidify the understanding of the tools and techniques shown. This tutorial gave me a deeper understanding of the value of dodging and burning.
One-stop shopping for the ultimate dodge & burn tutorial. Greatly appreciated, along with the special brush.
🙂 Aww man! Every time I finish a chapter I get so excited to try all these amazing new techniques that I’m learning. You make it super easy to understand and I’m very grateful for that. Hope you’re having a great day. 🙂
Aaron, Very nice to have gone through this technical review, certainly with presentation of new techniques and usage tips. Always with your unique didactics and your ability to share experiences, even those that are new to you as well. Congratulations! “PHLEARNing” with you always!
Dodge and burn using apply image is the way to go such a natural final images when applied correctly. Thanks Aaron
Wow. Another great tutorial. Thank you
Not enough stars to rank this one. The trick of applying an image to a layer mask opens up a whole new world. I simply assigned a function key that I don’t use as a keyboard shortcut. Easier to remember and use than hitting multiple keys simultaneously .
thank you
Lit
I learned so much thanks for all the wonderful info you are a fantastic teacher
Incredible!!! Complete, more than enough tools, great instructor!! Thank you!!
Muito bom! Great!
I thought I knew everything about Dodging and Burning……… Digging this tutorial. I really enjoyed learning from the video on D&B a raw image in Photoshop
Los contenidos de este tutorial son fantásticos, el aprendizaje es sencillo de entender gracias ha Aaron, genial instructor, estoy encantado con la suscripción PHLEARN pro
absolutely AMAZING!!!! great and simple ways of explaining everything, so glad i saw these!!!!!
Another great tutorial from the Master! Thanks for not only showing me techniques I didn’t know, but also for helping me better understand the ones that I do know. I appreciate your patience and thoroughness, Aaron!!
Another excellent, knowledge packed Phlearn Tutorial. Plhearn has been instrumental in honing my skills as a photographer and retoucher. Thank You, and keep up the great work.
Great tutorial, Aaron! Thank you! I appreciate everything one is able to do with luminosity.
Loved this tutorial! Aaron is the best instructor, breaks it all down into easy to understand pieces, shows while he talks and knows the fine line between letting us get to know him and being too chatty. This, like all the phlearn tutorials, was perfect! Thanks for continuing to create and share these with us 🙂
Again another great tutorial. I especially loved the Apply Image method and the Lightroom Luminosity mask
Loving the luminosity dodging & burning .. very subtle. Great tutorials as always.
Wow I nearly passed on the D&B as I thought I’d got that squared away. Clearly not. Great tutorial with a great wealth of information. It was very clear information and great images to show Many complexities and variation.
Aaron, I’m an avid fan of your tutorials and have learned a great deal from them. I have noticed a new video technique you’ve incorporated in the last several tutorials that is a little distracting. When you start with the overall view of you talking to the camera that’s great. I feel you’re talking directly to me and your animated facial expressions make your point very well. However, when you cut to the 3/4 view, you are still talking to the camera in front of you and there is no eye contact from this second view. It’s distracting to watch your videos this way. May I suggest if you feel the need to “mix it up,” that you actually record the 3/4 view separately with eye contact to the viewer. I actually don’t mind seeing the entire video(s) from the one straight on vantage point. For me, when I see the angle of view switch and you’re still looking forward, it throws me off and I find myself concentrating less on what you’re saying and more on the distraction and disconnect of the alternate camera angle.
Wow! I just had a thousand questions answered with this tutorial. It’s worth the price of PRO just to get this alone, but happily I get it all! LOVE LOVE LOVE your tutorials.
Another great tutorial Aaron. You’re a mine of information. Particularly like adding the more advanced D&B tools to my arsenal as I was unaware of them. Thanks again for a great tutorial on a hugely important subject. PS Small point (and open to correction), but you say when using the dedicated dodge and burn tools that you cannot use them on a new layer so they are destructive but I’m pretty sure you can use the ‘50% gray layer with a soft light blending mode’ method and use them non-destructively.
Good tutorial I use Dodge and Burn on some of my landscape photos it makes the photos more interesting.