Download Sample Images
Sample PSD
Download the sample PSD for this tutorial!
description
Shooting images for a client? Submitting photos to a stock image website? Just need to get some pesky distractions out of a scene? Learn a valuable skill as we show you how to remove text, logos, and branding from any photo in Photoshop!
Follow along as we use the Spot Healing Brush, Clone Stamp Tool, Brush Tool, and more to seamlessly remove unwanted elements from a scene. We even show you how to recreate important details like light rays, texture, and noise for an ultra-realistic final image.
Share


SEAMLESSLY REMOVE TEXT, LOGOS & BRANDING
Seamless Logo Removal
Removing Logos and Branding in Photoshop
In truth, removing text, logos, and branding is a similar process to removing any sort of object and distraction in a photo. Some removal is relatively simple; such as a small amount of text on a plain, single-colored background. And some removal can get extremely complex; such as logos over top of detailed backgrounds containing lines, edges, different colors, and lighting. The most important thing to remember is that any removal will usually require a couple of different tools to get the job done right. Knowing what tools to use and how to combine them will not only help you take care of these issues faster, but will also end in a much more realistic result.
Removing objects is so in-depth that we have entire PRO course dedicated to mastering all of the necessary tools and techniques. Check out How to Remove Anything in Photoshop to learn more!
The Tools of the Trade
There are a wide variety of tools that help us remove objects in Photoshop. There are also a handful of tools that aren’t directly related to object removal, but can help a great deal when it comes to improving precision and recreating texture and details. We’ll be taking a look at these tools today:
Object Removal Tools
- Spot Healing Brush Tool
- Healing Brush Tool
- Clone Stamp Tool
- Brush Tool
Other Helpful Tools
- Pen Tool/Selections
- Noise Filter
Let’s get started!
The Spot Healing Brush & Healing Brush
Whenever you first try to remove text, logos, or branding from an image, one tool should be your go-to before all others: the Spot Healing Brush Tool. Why? Simply put, it is the fastest way to get the job done. If it can’t do it alone, it’s also the best way to get object removal started before finishing it off with tools that might be a little more manual or precise.
Before we go any further, it’s extremely important to keep a non-destructive workflow in mind throughout the entire process and no matter what tool you’re using. That means creating new Layers and making sure certain options are selected that will allow you to work on a blank Layer using information from other Layers in the project. For the Spot Healing Brush Tool, there is a checkbox labeled Sample All Layers. Make sure this is checked! This option allows you to work on a new, blank Layer while still pulling all of the photo information you need from every other Layer.
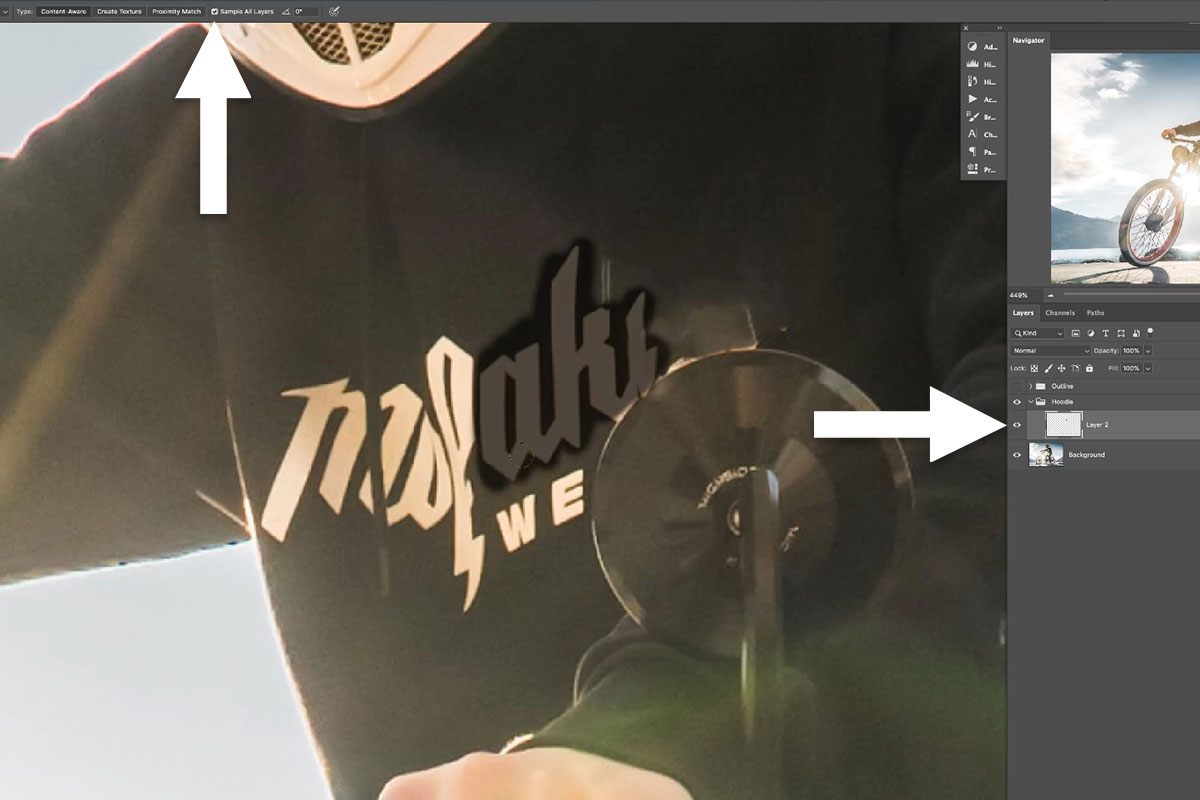
Here you can see that we have the Spot Healing Brush active, a new Layer created and selected, and the Sample All Layers checkbox is checked. Now we can paint over the things we want to remove in the photograph and Photoshop will use the information from the background Layer to make the magic happen. There will be similar settings for every other tool we work with. Just remember to always work on a new Layer for each tool that you use; never work on the background Layer directly!
Once all of that is ready to go, the Spot Healing Brush is very easy to use. Simply paint over the object you want to remove and Photoshop takes care of the rest. We recommend working in small sections at a time, so instead of trying to remove a large area all at once, try painting over portions of it until the entire area has been covered.
Now things may not look great initially, especially if there area has a lot of color variation and detail. You can make multiple passes with the Spot Healing Brush to clean things up, so if it doesn’t look great the first time, try it again and again.
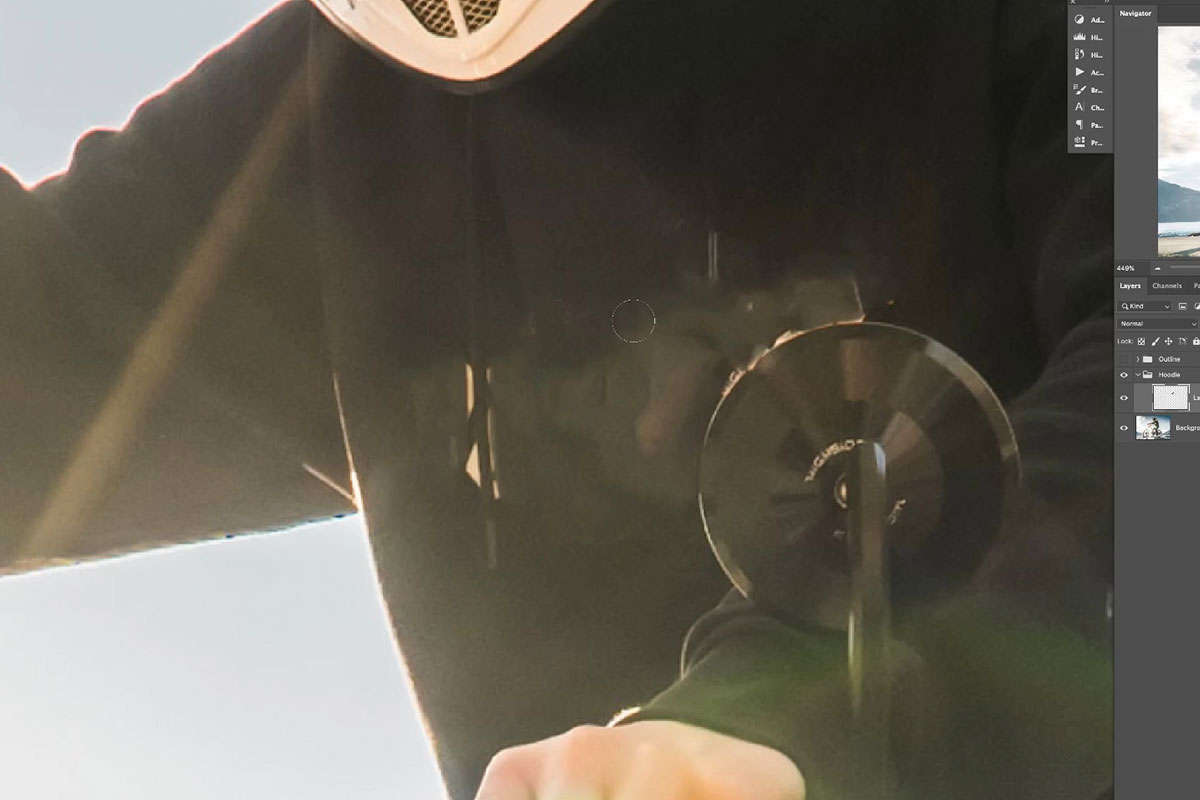
Our initial pass got rid of the logo, but it looks pretty rough. We can make several more passes to clean things up and that will get us most of the way there. But chances are high that we’re going to need a couple of other tools to get it looking seamless. When you need a little bit more control than the Spot Healing Brush offers, try out the standard Healing Brush Tool.
The Healing Brush provides a bit more control. It works by requiring you to first Sample an area that you want to pull texture from. Next, just paint over the area you want to cover up. Photoshop will automatically try to blend the two elements together, taking the texture from where you sampled and blending it with the color from where you paint.
Combing these tools can tackle almost every type of simple object removal you’ll come across. But in our example there are some problem areas that these just can’t handle: lines and edges. For realistic removal, it’s important to maintain perfectly consistent lines and edges with any objects that pass in front of or behind the thing you’re removing. Luckily, Photoshop has a tool perfect for those situations.
The Clone Stamp Tool
The Clone Stamp Tool might be our favorite tool for object removal. The Spot Healing Brush is fast, which we love, but the Clone Stamp Tool is the queen of control and detail. Like the Healing Brush, the Clone Stamp first requires you to Sample an area you want to copy. But instead of trying to blend two areas together, it will create an exact copy of the sampled area wherever you paint.
Say, for example, that you removed part of a logo that overlapped an edge, and now part of that edge is missing. You can use the Clone Stamp Tool to sample an area where that edge is still in tact, and then paint over the area where there is a gap. The Clone Stamp Tool will allow you to fill in the edge so that is continuous.
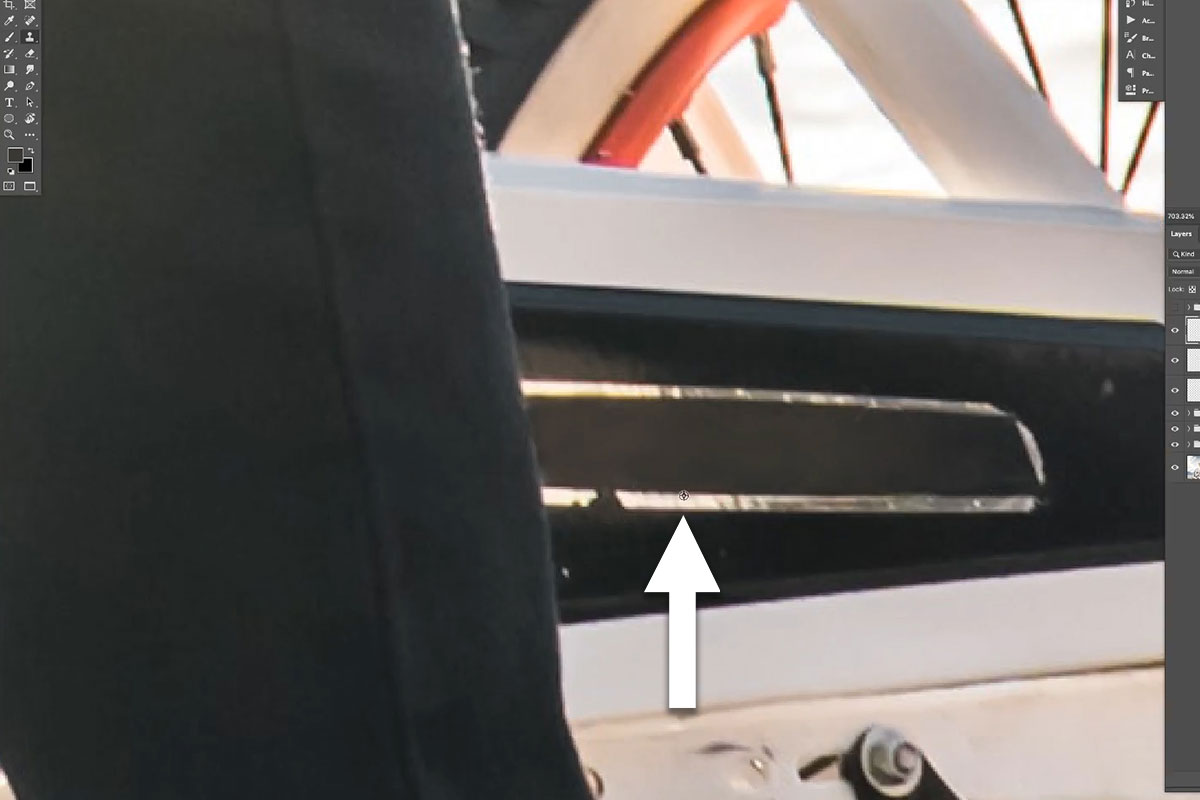
In the picture above you can see one such example. We removed some text inside of the chrome trim, but had to remove some of the trim in the process. With the Clone Stamp Tool we can Sample some of the trim that was unaffected.
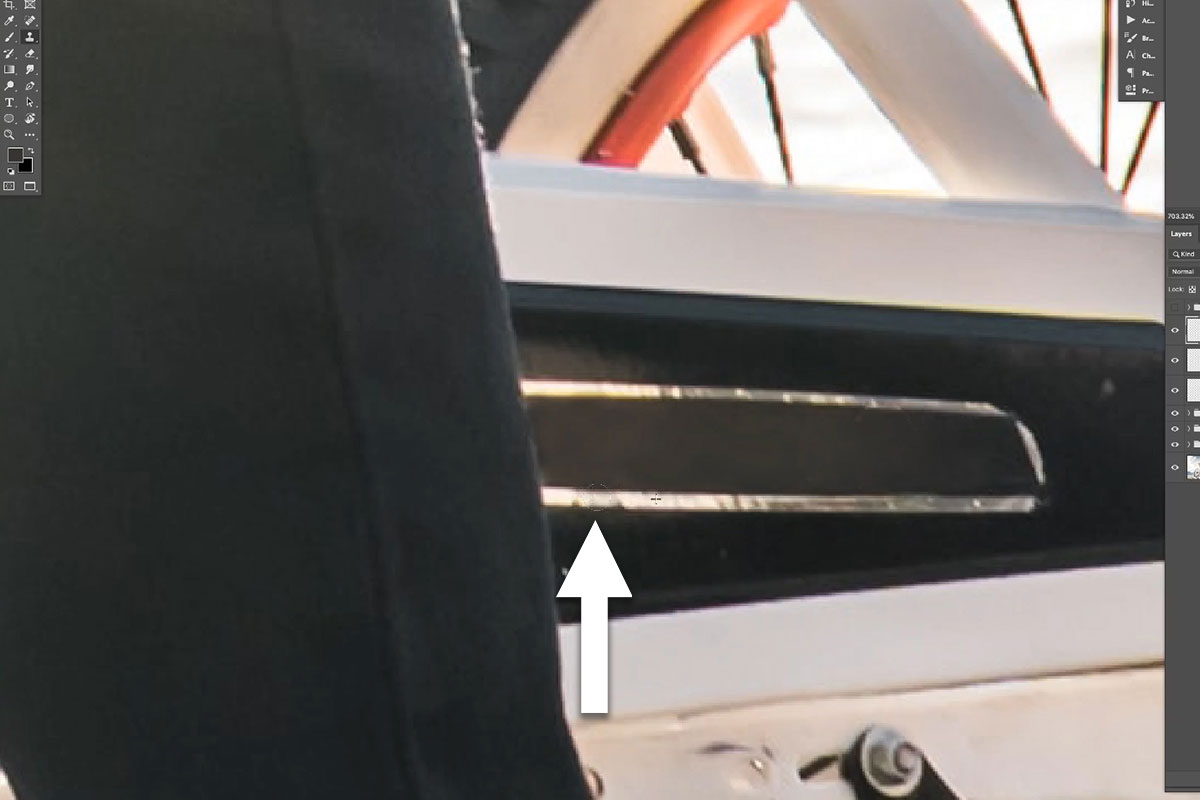
And then paint where the trim was removed, successfully filling the gap and creating a continuous line. Perfect!
So the Clone Stamp Tool is great for lines and edges, but it’s also extremely powerful for standard removal as well. It can be extremely useful when you need to recreate areas of fine detail and texture. Since it’s a 1-for-1 copy, it can create perfect detail where the Spot Healing Brush or Healing Brush might look too muddy or unrefined. Just keep in mind that since it’s an exact copy, you’ll want to take extra care in making sure that there isn’t obvious repetition of patterns and textures.
The Brush Tool
We’ve said it many times before; the Brush Tool can do just about anything. And when it comes to object removal, there is no better option to create soft, seamless areas of blending and gradients. Best suited for relatively plain backgrounds, the Brush Tool excels when you need to recreate colors and gradients, highlights and shadows.
As with the other tools, you just need to Sample the color you want to paint with, and then paint over the area you want to cover up (using a new Layer, of course). For the absolute most control, make sure to use a soft brush set to a low Flow. This allows you to build up the paint effect gradually, helping everything blend together.
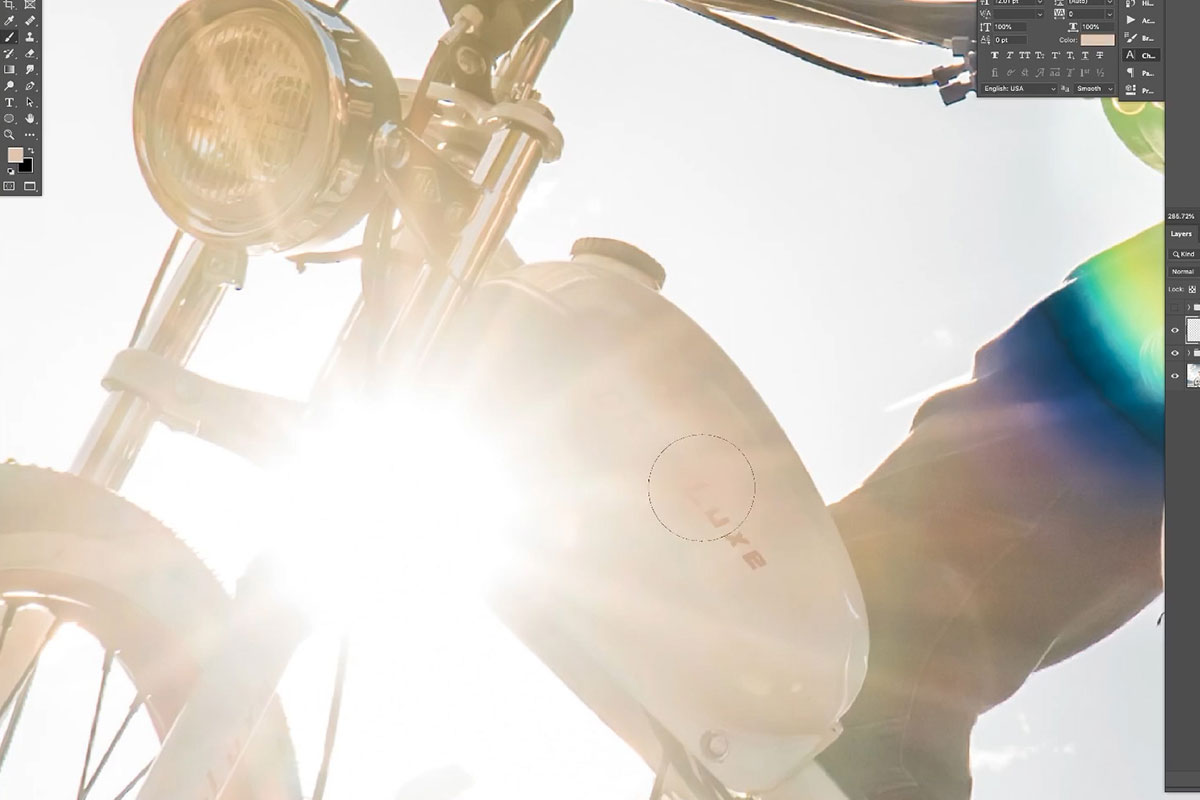
Also, make sure that you’re constantly sampling colors from the areas surrounding wherever you paint. In our example above, we’re working with quite a bit of variation in light and color due to the sun rays. To compensate for that, we need to constantly Sample colors and paint them in patterns and shapes that fit with the surrounding environment.
Add Noise & Texture
As much as we try not to, we’re going to lose some of the original texture and detail as we continue to cover up areas of the image using the tools above. But there’s one simple and effective trick to recreate some of that original detail: add noise! Every photograph has some amount of noise present, no matter how low of an ISO it might have been captured at. This noise is often lost when using tools like the Brush Tool or Spot Healing Brush. Creating artificial noise over those areas is a powerful way to blend of all of the object removal Layers with the original background Layer below.
To start, you’ll need a new blank Layer. But unlike the other tools we’ve used, a Noise Filter cannot be applied to a blank Layer, so we need to fill the Layer in with something that can be easily removed after the noise has been applied. An area filled with 50% gray is the perfect option. Why? If we set the Blending Mode of the 50% gray Layer to Overlay, Photoshop will automatically hide any areas that are 50% gray. Thus, we can create a 50% gray block, use an Overlay Blending Mode to hide the color, and then apply a Noise Filter to that area.
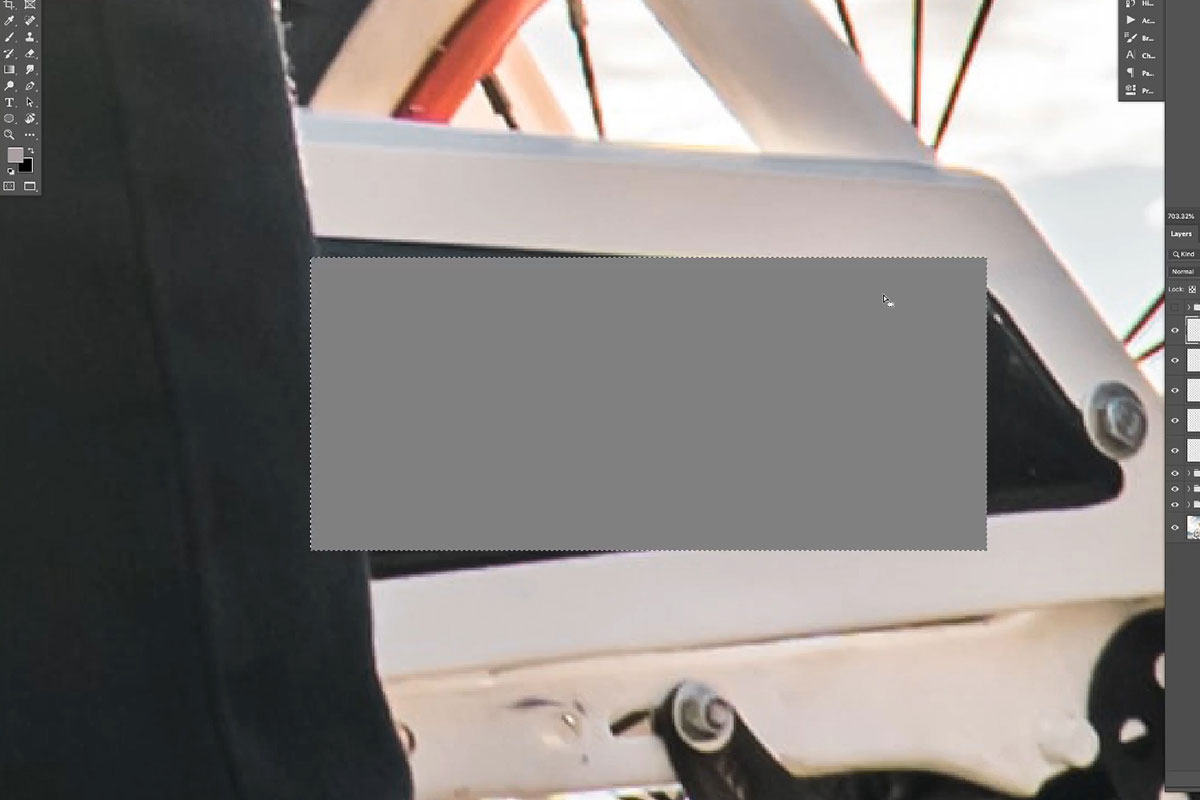
In the example above, we did just that. We created a new Layer, used the Rectangular Marquee Tool to create a box around the area we want to add noise to, and then filled that area with 50% gray.
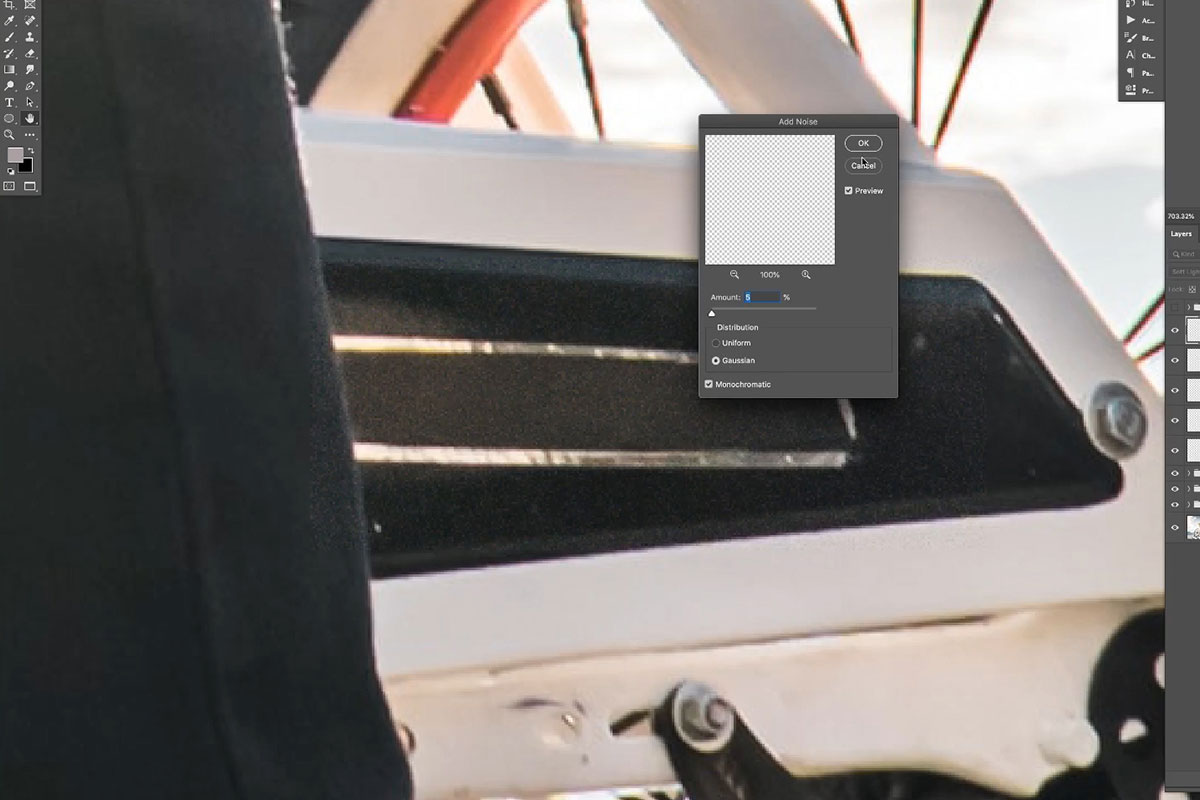
With the gray hidden, go to Filter, Noise, and Add Noise. Set the amount of noise you want, just make sure it closely matches the noise present in the original photograph.
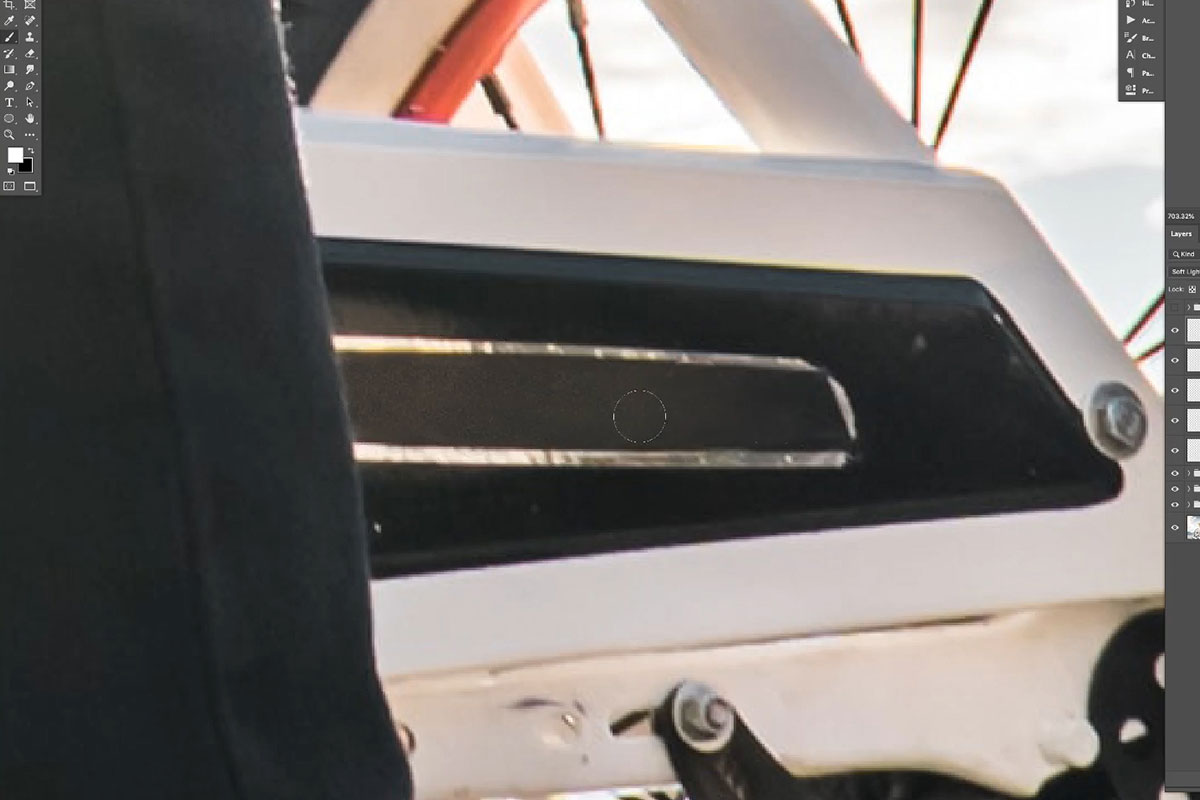
Now let’s blend the noise in so it doesn’t look so obvious and so it is only appears where we removed a logo. Invert the Layer Mask to make the entire noise Layer invisible, then, using a soft brush, paint white on the Layer Mask over the parts of the image where you used the Spot Healing Brush or Brush Tool.
Using Selections for more Control
At this point, you know almost every trick in the book. Almost! There’s one final set of tools that can take our precision and control to a whole new level. Using Photoshops wide array of selection tools, we can carefully define areas that we want to cover and don’t want to cover up. This helps us preserve lines and edges, highlights and shadows, and protect objects and areas that we don’t want to cover up.
When it comes to making selections, there’s no better tool than the Pen Tool. While it takes some practice to learn (which we can certainly help you out with), it is the best way to get clean lines, edges, and curves as you trace around objects in a photo.
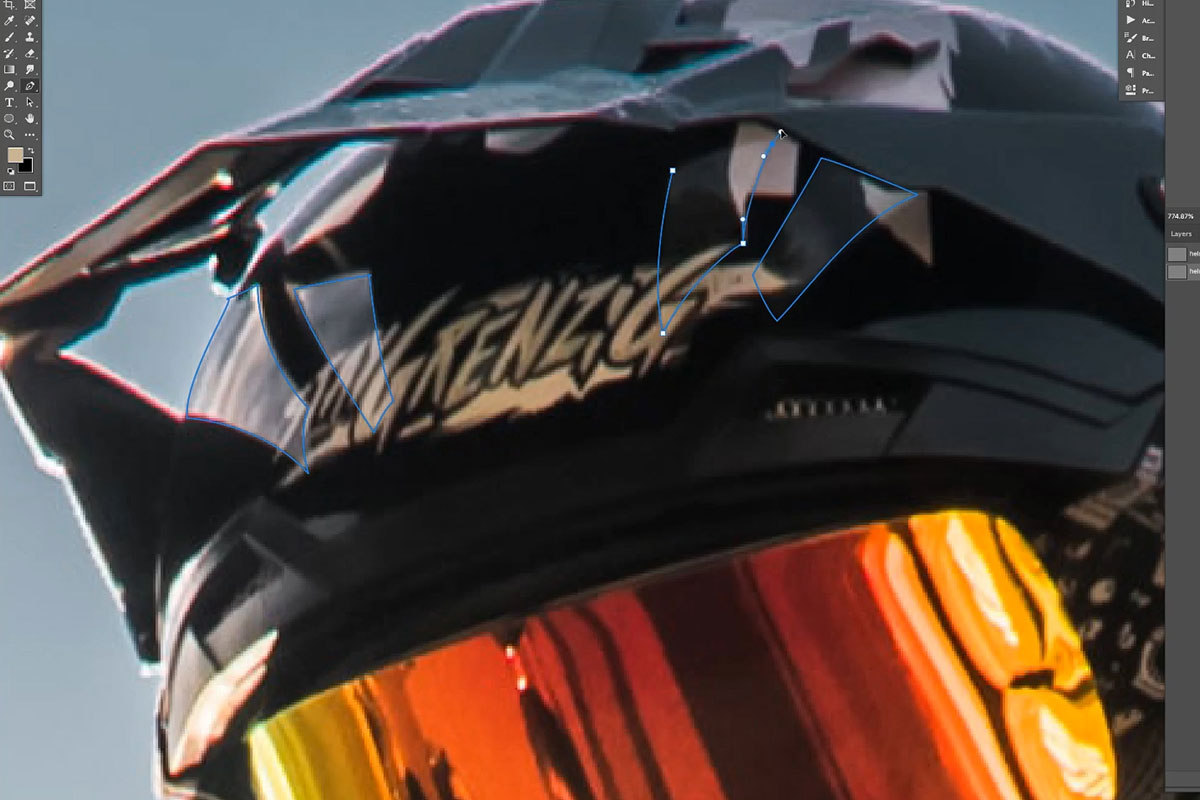
In the example above, we have a unique situation where we want to preserve the natural highlights on the helmet so that when we cover up the logo with the Brush Tool, the real reflections of light remain. Use the Pen Tool to trace around each area of highlight, trying to use as few points as possible while maintaining nice, clean curves.

Once you’ve traced each, right-click and click and select Make Selection. This will turn the Pen Tool Paths into selections that will help us define areas where we want and don’t want to paint. By default, this process will select the areas inside of the Paths we made. Since we don’t want to paint over the logo on the helmet, and not over the highlights, we need to Inverse the selection. You can do this by hitting CTRL or CMD + SHIFT + I.
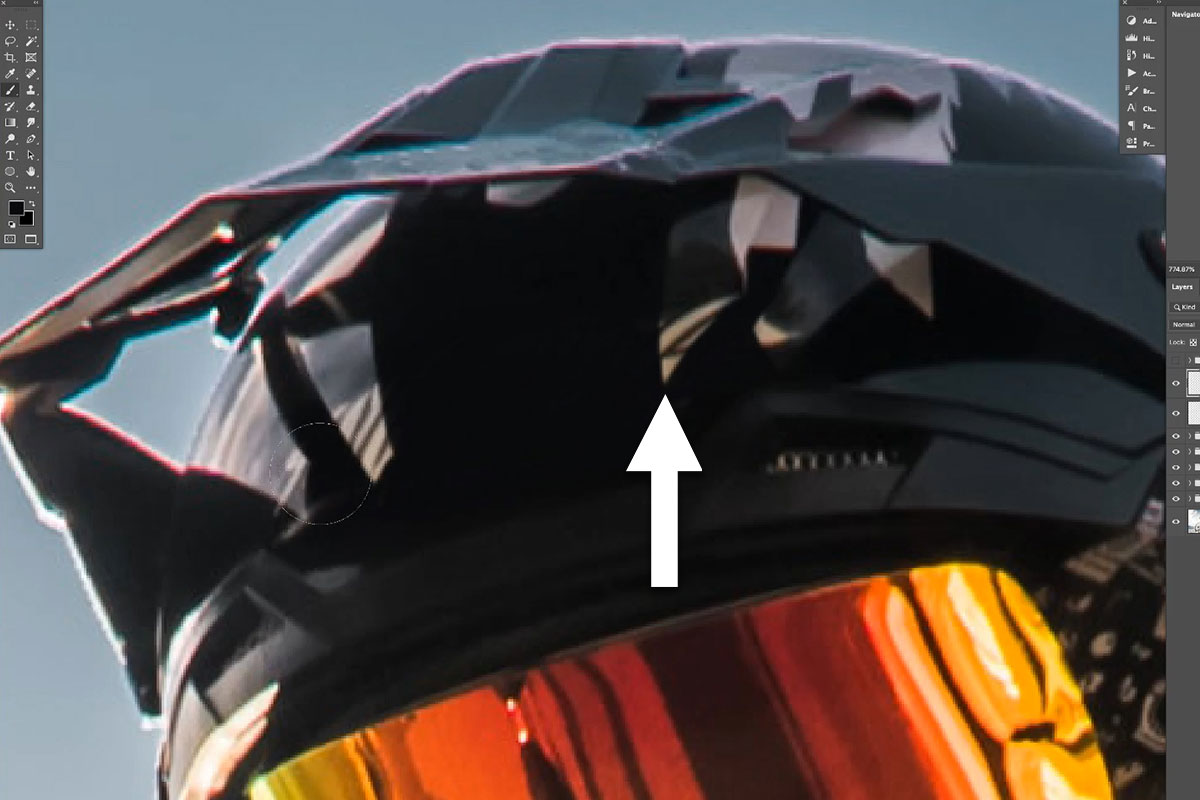
With the highlights protected and helmet area selected, we can use the Brush Tool to Sample the helmet color and then paint over the logo. Notice that the areas of reflection remain in tact! Since some of the logo is still visible in those highlight areas, you can Inverse the selection again and use some of the tools you’ve learned to remove those spots while maintaining the natural color and gradient of the highlights.