
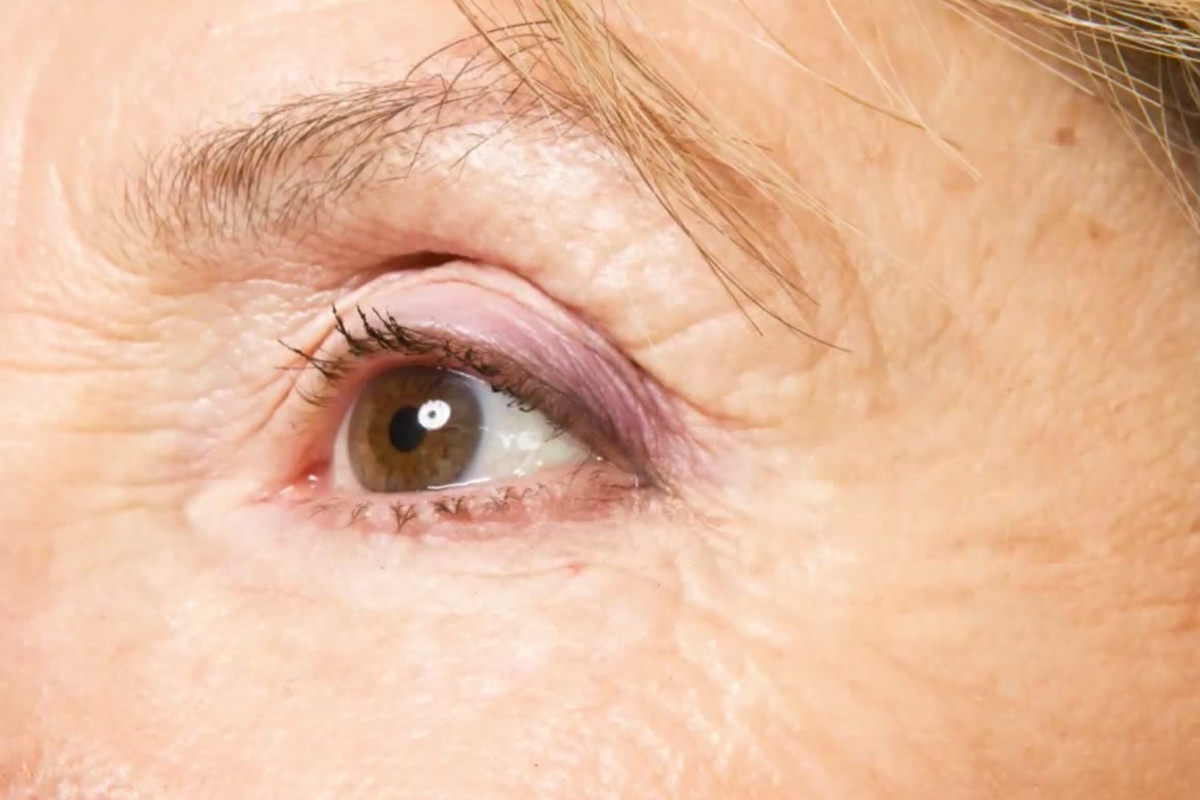

description
Wrinkle removal in Photoshop is easy to overdo, and an older subject whose skin suddenly looks flawless rarely reads as believable. This tutorial covers two techniques and when each one fits: the Healing Brush, which blends sampled texture with existing color to remove a wrinkle outright, and the preferred alternative, a Clone Stamp set to Lighten mode that brightens only the dark shadow of a wrinkle and leaves the real skin texture intact.
Enjoying This Free Tutorial?
We publish a new free tutorial every week, each one with sample images and PSDs you can download and follow along with. Sign up and they land straight in your inbox, along with early word on sales, events and subscriber-only offers.
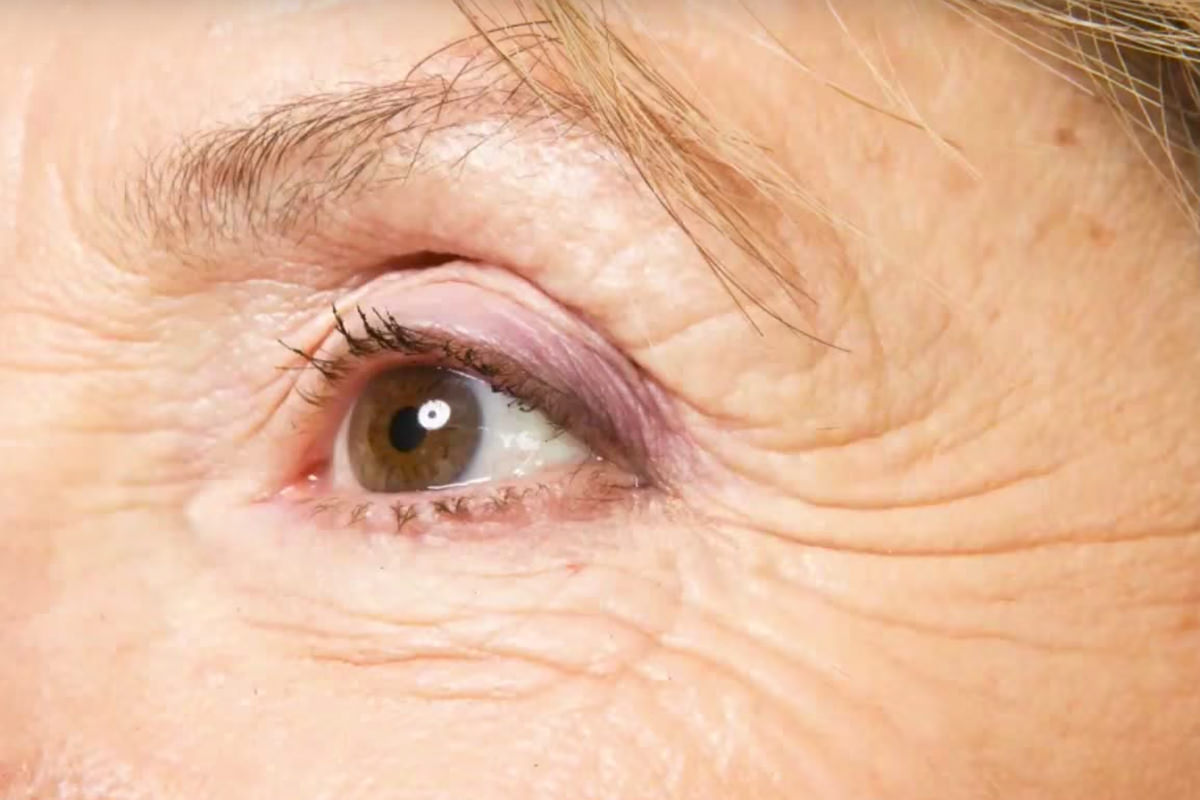
How to Remove Wrinkles in Photoshop
Wrinkle removal in Photoshop is easy to overdo, and an older subject with skin that suddenly looks flawless and wrinkle-free rarely looks believable. This tutorial covers two different techniques, one that removes wrinkles completely with the Healing Brush tool, and a preferred alternative that reduces them while keeping the skin looking natural, using the Clone Stamp tool in Lighten mode.
Removing Wrinkles Completely With the Healing Brush Tool
The Healing Brush tool blends sampled texture and color together, making it a strong choice for fully removing a wrinkle rather than just cloning over it.
-
Select the Healing Brush Tool
Choose either the Spot Healing Brush tool or the regular Healing Brush tool, with the mode set to Normal.
-
Set Sampling to Current and Below
On a new layer, set the tool to sample Current and Below so it pulls from the layer beneath.
-
Sample an Area Without a Wrinkle
Hold Alt/Option and click on nearby skin that doesn’t have a wrinkle, to use as the sample source.
-
Paint Over the Wrinkle
Paint directly over the wrinkle, including the highlight above it and the shadow below it, using a brush sized somewhat larger than the wrinkle itself for a more natural result.
Why the Healing Brush Blends Texture and Color Separately
Unlike the Clone Stamp tool, which copies pixels exactly as they are, the Healing Brush pulls texture from the sampled area and color from the area being painted over, then blends the two together. That blending is what allows it to patch in realistic-looking skin rather than leaving an obvious, flat-looking copy.
Sizing the Brush and Fixing an Unsatisfying Heal
A slightly oversized brush and the option to redo a heal at any time make the Healing Brush technique forgiving to work with.
-
Size the Brush Larger Than the Wrinkle
Increase the brush size beyond just the width of the wrinkle line itself, since a larger brush tends to produce a more natural-looking result.
-
Resample and Repaint if the Result Looks Off
Hold Alt/Option to sample the same or a different nearby area again, then paint back over any heal that didn’t blend well the first time.
Preparing a Layer for the Clone Stamp Technique
Rather than eliminating wrinkles entirely, lightening just their dark shadow areas keeps the skin looking like it belongs to the actual person being photographed.
-
Duplicate the Background Layer
Press Cmd/Ctrl+J to duplicate the background layer, since this technique needs to work on a layer that already has pixels on it.
-
Select the Clone Stamp Tool
Press S for the Clone Stamp tool, with sampling set to either Current and Below or Current, since the layer already contains pixels.
Setting the Clone Stamp’s Mode to Lighten
Switching the Clone Stamp tool’s blend mode from its default Normal setting to Lighten changes it from an exact copy tool into one that only brightens existing dark areas.
-
Change the Mode to Lighten in the Options Bar
Change the Clone Stamp tool’s mode from Normal to Lighten in the options bar.
-
Sample Nearby Skin and Paint Over the Wrinkle
Hold Alt/Option to sample skin right next to the wrinkle, then paint directly over the wrinkle to lighten just its dark shadow areas.
Why the Layer Needs Existing Pixels for Lighten Mode to Work
On a brand new, empty layer, the Clone Stamp tool in Lighten mode behaves like a completely normal Clone Stamp, since there’s nothing already on the layer for it to compare against and lighten. Working on a duplicated background layer, which already has pixels everywhere, is what lets Lighten mode actually target and brighten only the darker parts of a wrinkle.
Choosing Which Technique Actually Fits the Situation
The right choice between the two techniques comes down to how natural or how completely retouched the final image needs to look.
-
Use the Clone Stamp Lighten Method for a Natural Look
Reach for the Lighten mode Clone Stamp technique by default, since it keeps skin looking like it belongs to an older subject rather than looking artificially smoothed.
-
Use the Healing Brush Method When Full Removal Is Requested
Switch to the Healing Brush technique specifically when a client or project calls for wrinkles to be completely removed rather than just reduced.
Why Reducing Wrinkles Often Looks More Natural Than Removing Them
An older subject with skin that’s completely free of wrinkles tends to look obviously retouched rather than genuinely younger, since the rest of the image still reads as an older person. Lightening just the dark shadow areas of each wrinkle keeps enough real texture in place that the skin still looks like it belongs to the person in the photo.
Why This Approach Works
The Healing Brush tool’s ability to blend sampled texture with existing color is what makes it capable of removing a wrinkle entirely without leaving an obvious patch behind. Switching the Clone Stamp tool to Lighten mode targets only the dark shadow parts of a wrinkle instead of replacing the skin outright, which is why it tends to produce a more believable result. Choosing between the two ultimately comes down to matching the technique to how natural or how fully retouched the final image is meant to look.
Final Thoughts
Both wrinkle-removal techniques here take only a few minutes to apply, but the choice between them has a real effect on how believable the final portrait looks. Defaulting to the more subtle, Lighten-mode reduction rather than full removal is a good habit to carry into any retouching work involving an older subject’s skin.
Quick Reference: Keys, Menus and Settings
- Full removalHealing Brush or Spot Healing Brush, Mode Normal, Sample: Current and Below, on a new layer
- Sample and healAlt/Option-click clean skin, paint over the wrinkle with a brush a little wider than it
- Natural reductionCmd/Ctrl + J to duplicate the background first
- Lighten the wrinklesS, Mode: Lighten; Alt/Option-click next to the wrinkle and paint
No AI, no generative credits.
Removing Wrinkles: Common Questions
What is the most natural way to remove wrinkles in Photoshop?
Reduce them instead of erasing them. The Clone Stamp tool in Lighten mode only brightens the dark part of each wrinkle, so the skin still looks like the person’s own.
How do I remove wrinkles completely?
Use the Healing Brush or Spot Healing Brush in Normal mode on a new layer, sampling Current and Below. Alt/Option-click clean skin next to the wrinkle and paint over it.
How big should the healing brush be?
A little larger than the wrinkle. Cover the highlight above the line and the shadow below it, not just the line. A larger brush tends to look more natural.
What is the difference between the Healing Brush and the Clone Stamp?
The Clone Stamp copies pixels exactly. The Healing Brush takes texture from where you sample and color from where you paint, then blends them, which suits skin better.
What if a heal doesn’t look right?
Alt/Option-click to sample again, from the same spot or a different one nearby, and paint over it again.
Where is Lighten mode for the Clone Stamp?
Press S for the Clone Stamp and change Mode in the options bar from Normal to Lighten. Then Alt/Option-click skin right next to a wrinkle and paint over it.
Why does the Clone Stamp in Lighten mode act like a normal clone?
You are on an empty layer. Lighten needs pixels to compare against, so duplicate the background with Cmd/Ctrl + J and work on the copy.
Does the Lighten method work on anything else?
Yes. It works on age spots too, and you can paint over eyebrow hair and it still looks natural.
Which wrinkle technique should I use?
Use Lighten mode by default for an older subject. Switch to the Healing Brush when a client asks for the wrinkles to be removed completely.
From the Magazine View all
Stories, interviews and guides for photographers, new every week.
 EditingLightCraft vs Lightroom: I Edited the Same RAW Files in BothThe free clone on the same RAW files: what matches, what breaks and who should switch.
 InspirationRare Historical Photos: 13 of the Rarest Pictures Ever TakenFrom the earliest surviving picture of a person to the last passenger pigeon: who took each one and why it survives.
 EditingArtCraft: Photoshop Cloned by AI in Two Weeks. Is It Legal?ArtCraft cloned Photoshop and Lightroom with AI and gave them away. Any good? Legal? Safe?
Master Photoshop, Lightroom and Photography
Join PHLEARN PRO for $12.99 a month, or $99.99 a year (save 36%). Cancel anytime, with a 100% money-back guarantee.





