
Intro to Retouching in Photoshop
-

-
Add to
favorites
-
DifficultyEasy
-
Length8.75 hours
-
Software
Description
Learn how to remove minor skin blemishes, smooth out skin tones, fix distracting backgrounds, clean up and shape hair, dodge and burn, and nail the perfect exposure in any portrait – all while enhancing the subject’s natural features and beauty.
THIS COURSE INCLUDES
- 21 Sample Images
- 1 Photoshop Brush
- 1 Photoshop Action
Share
Table of Contents
-
01 - Lightroom18:26m
-
02 - Adobe Camera RAW9:41m
-
03 - Cloning & Healing15:23m
-
04 - Dodging & Burning9:50m
-
05 - Hue & Saturation14:25m
-
06 - Exposure Blending8:36m
-
01 - Remove Blemishes16:05m
-
02 - Enhance Eyes43:51m
-
03 - Flyaway Hairs & Skin Texture Actions36:07m
-
04 - Smooth Skin11:29m
-
05 - Cleanup & Add Volume to Hair29:09m
-
06 - Wrinkles9:20m
-
07 - Remove Glare in Glasses26:13m
-
08 - Dark Under Eyes21:54m
-
09 - Color Correction13:35m
-
10 - Skin Coloring29:52m
-
11 - Correct Exposure18:06m
-
12 - Highlight & Shadow13:02m
-
13 - Background Retouching (Part 1)29:49m
-
14 - Background Retouching (Part 2)36:05m
Course Downloads
Keep it Natural.


RETOUCH BACKGROUNDS
ORIGINAL
What is Retouching?
Retouching is a subtle and delicate process. Help people look their very best in any photo by enhancing their natural beauty and by removing distractions. We show you everything you need to know to make your subjects look great and with realistic results.
Tools & Techniques
We walk you through every tool and technique you’ll need to master the art of retouching in Photoshop. Smooth skin with the Brush Tool, remove distractions with the Spot Healing Brush Tool, fix exposure with the Adobe Camera RAW filter, and blend it all together with Layer Masks, Clipping Masks, and Adjustment Layers.
Clean Up Backgrounds
A messy background can be one of the most distracting elements in a photo. We show you how to remove distracting objects and smooth out colors so that the viewer’s eyes stay locked on the subject.
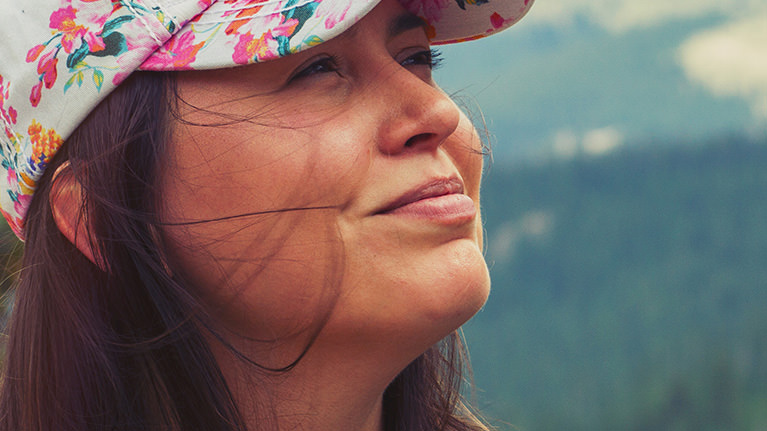
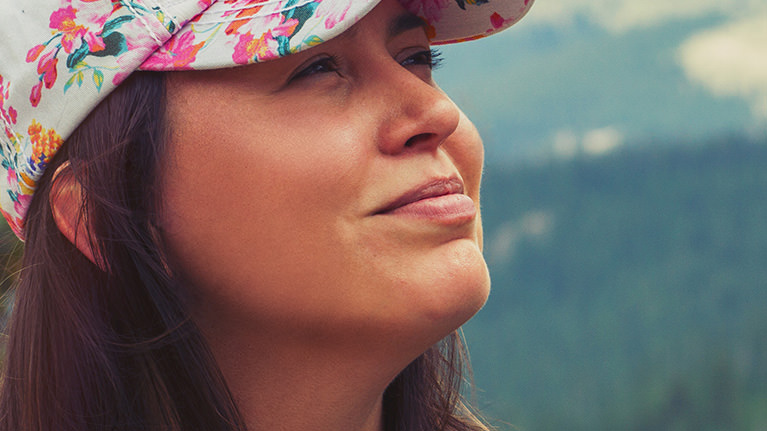
REMOVE SHADOWS & UNDER EYE CIRCLES
ORIGINAL
Retouching People
People are by far the most challenging thing to work with in Photoshop. From skin texture to hair, there are countless features that are delicate and need to be treated carefully to avoid an unnatural, ‘Photoshopped’ look. We show you proper methods to smooth skin, enhance features, and highlight a subject’s natural beauty.
Smooth Skin Tones
We all deal with skin blemishes on a daily basis. Whether it’s a surprise pimple, skin redness, or some unwieldy hairs, we’ll show you how to remove and reduce distractions so the best parts stand out.
Fix Exposure
Most techniques in retouching come down to light and shadow. Where do the highlights and shadows fall? Are there any areas that are too bright, too dark, or missing detail? We show you how to smooth out light transitions so that a subject’s face, hair, and features for a perfect exposure.
SHAPE HAIR
ORIGINAL
Professional Results
Retouching is in high demand. From billboards to magazine covers, client headshots to creative portraits, the skills you learn in this tutorial can help you achieve your image-making goals. Learn a professional workflow that will help you to work faster and smarter, so you can create the photos you, your clients, and subjects will love.
Dodging & Burning
If you have a portrait that’s feeling a little flat, dodging and burning can help! Add shape, structure, and definition to any photo by enhancing the highlights and shadows in Photoshop.
Clean Up & Shape Hair
Whether you’re dealing with some stray flyaway hairs or a righteous bout of bedhead, we show you how to cleanup hair, add volume, and enhance textures. Learn how to give hair the perfect, shape, color, and definition in Photoshop.
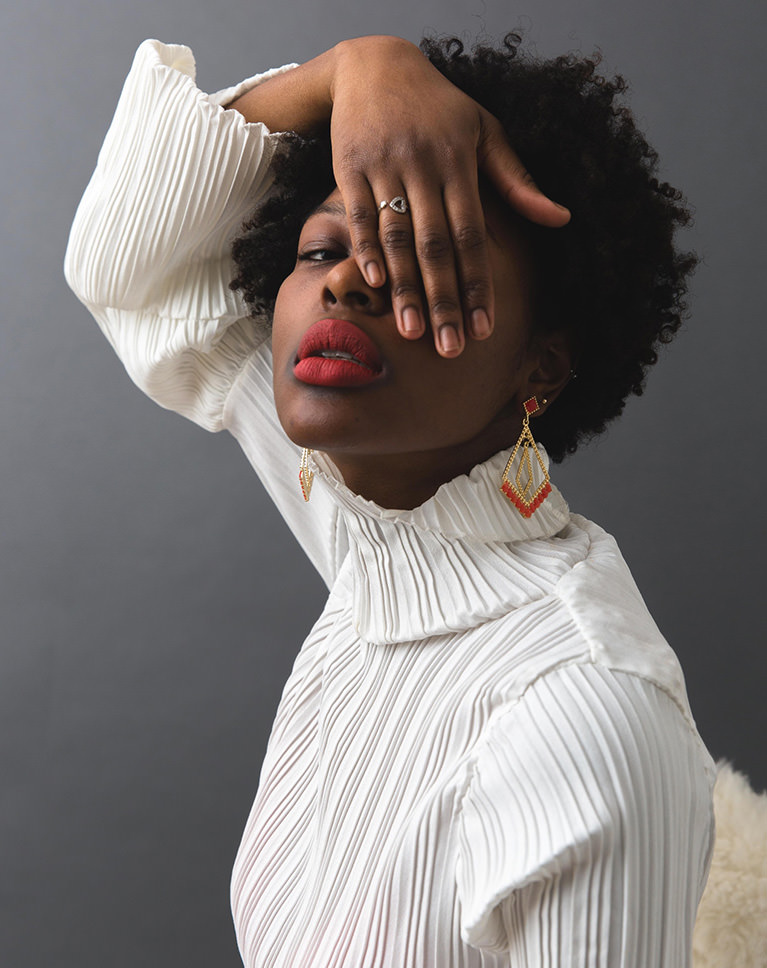
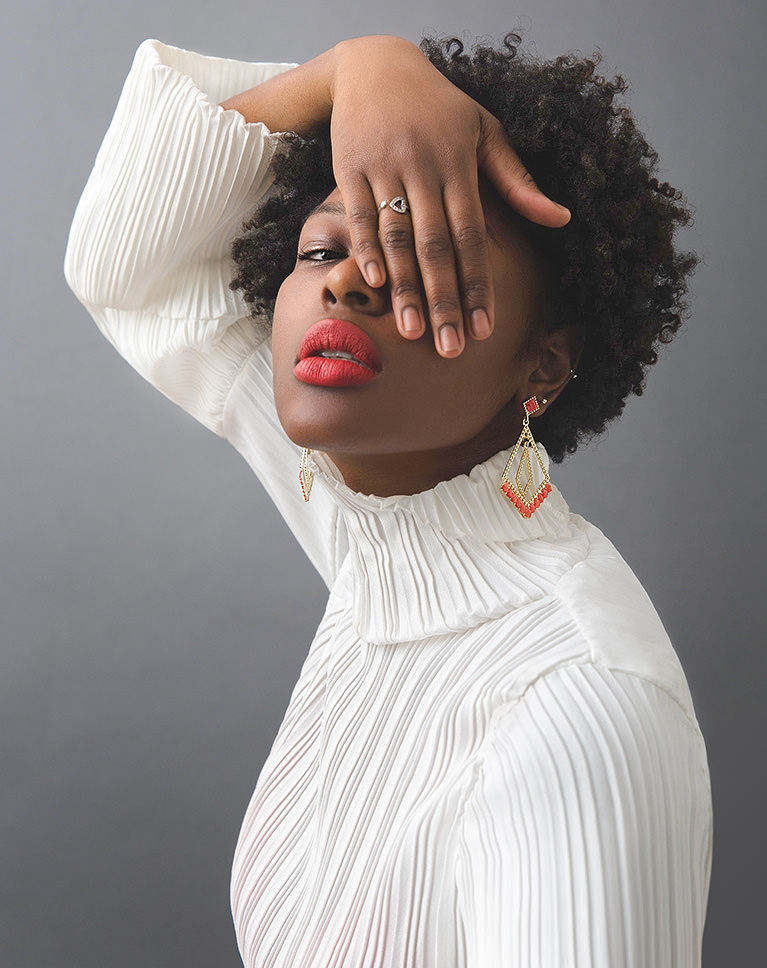
Picture Perfect Eyes, Hair & Skin
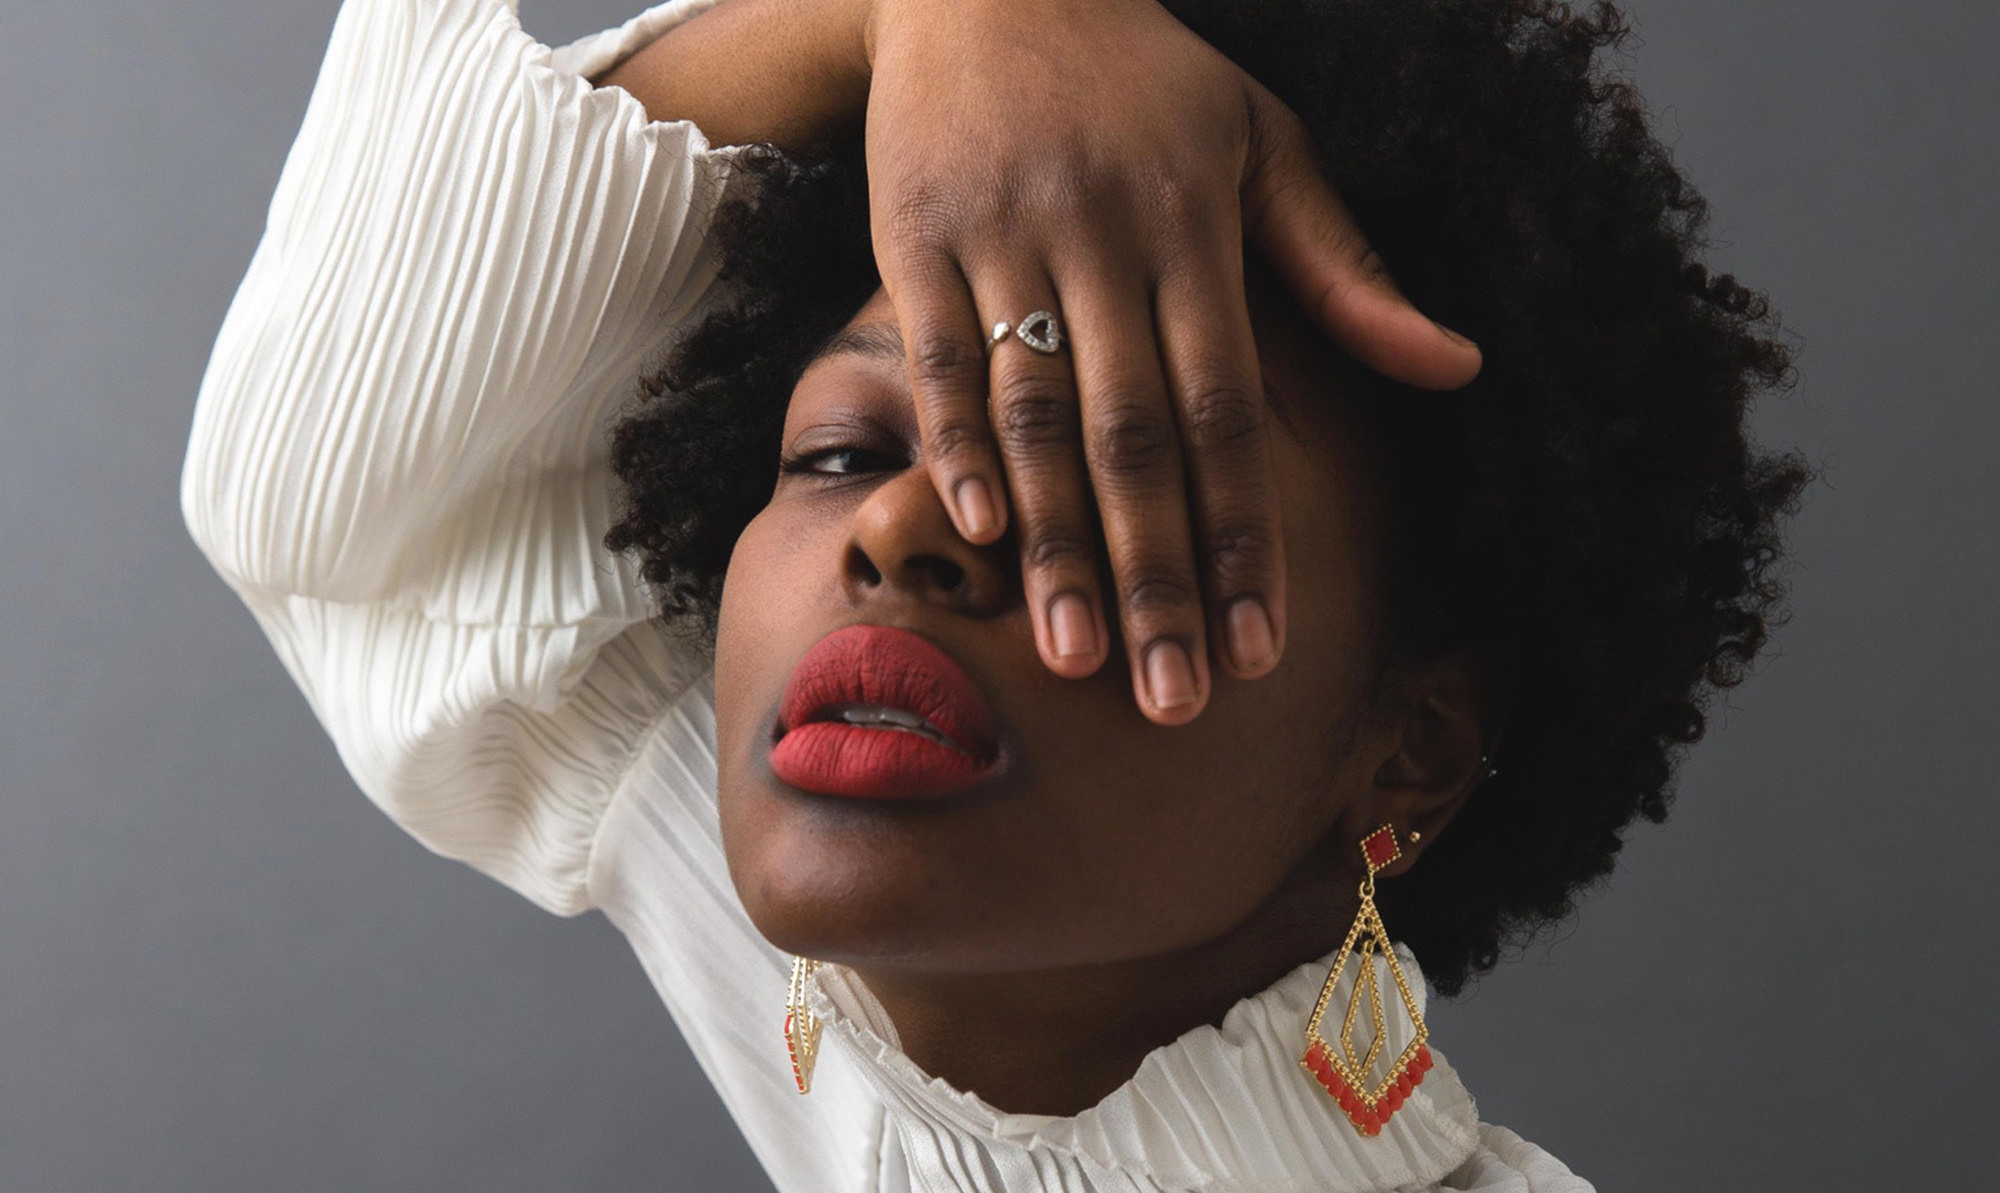
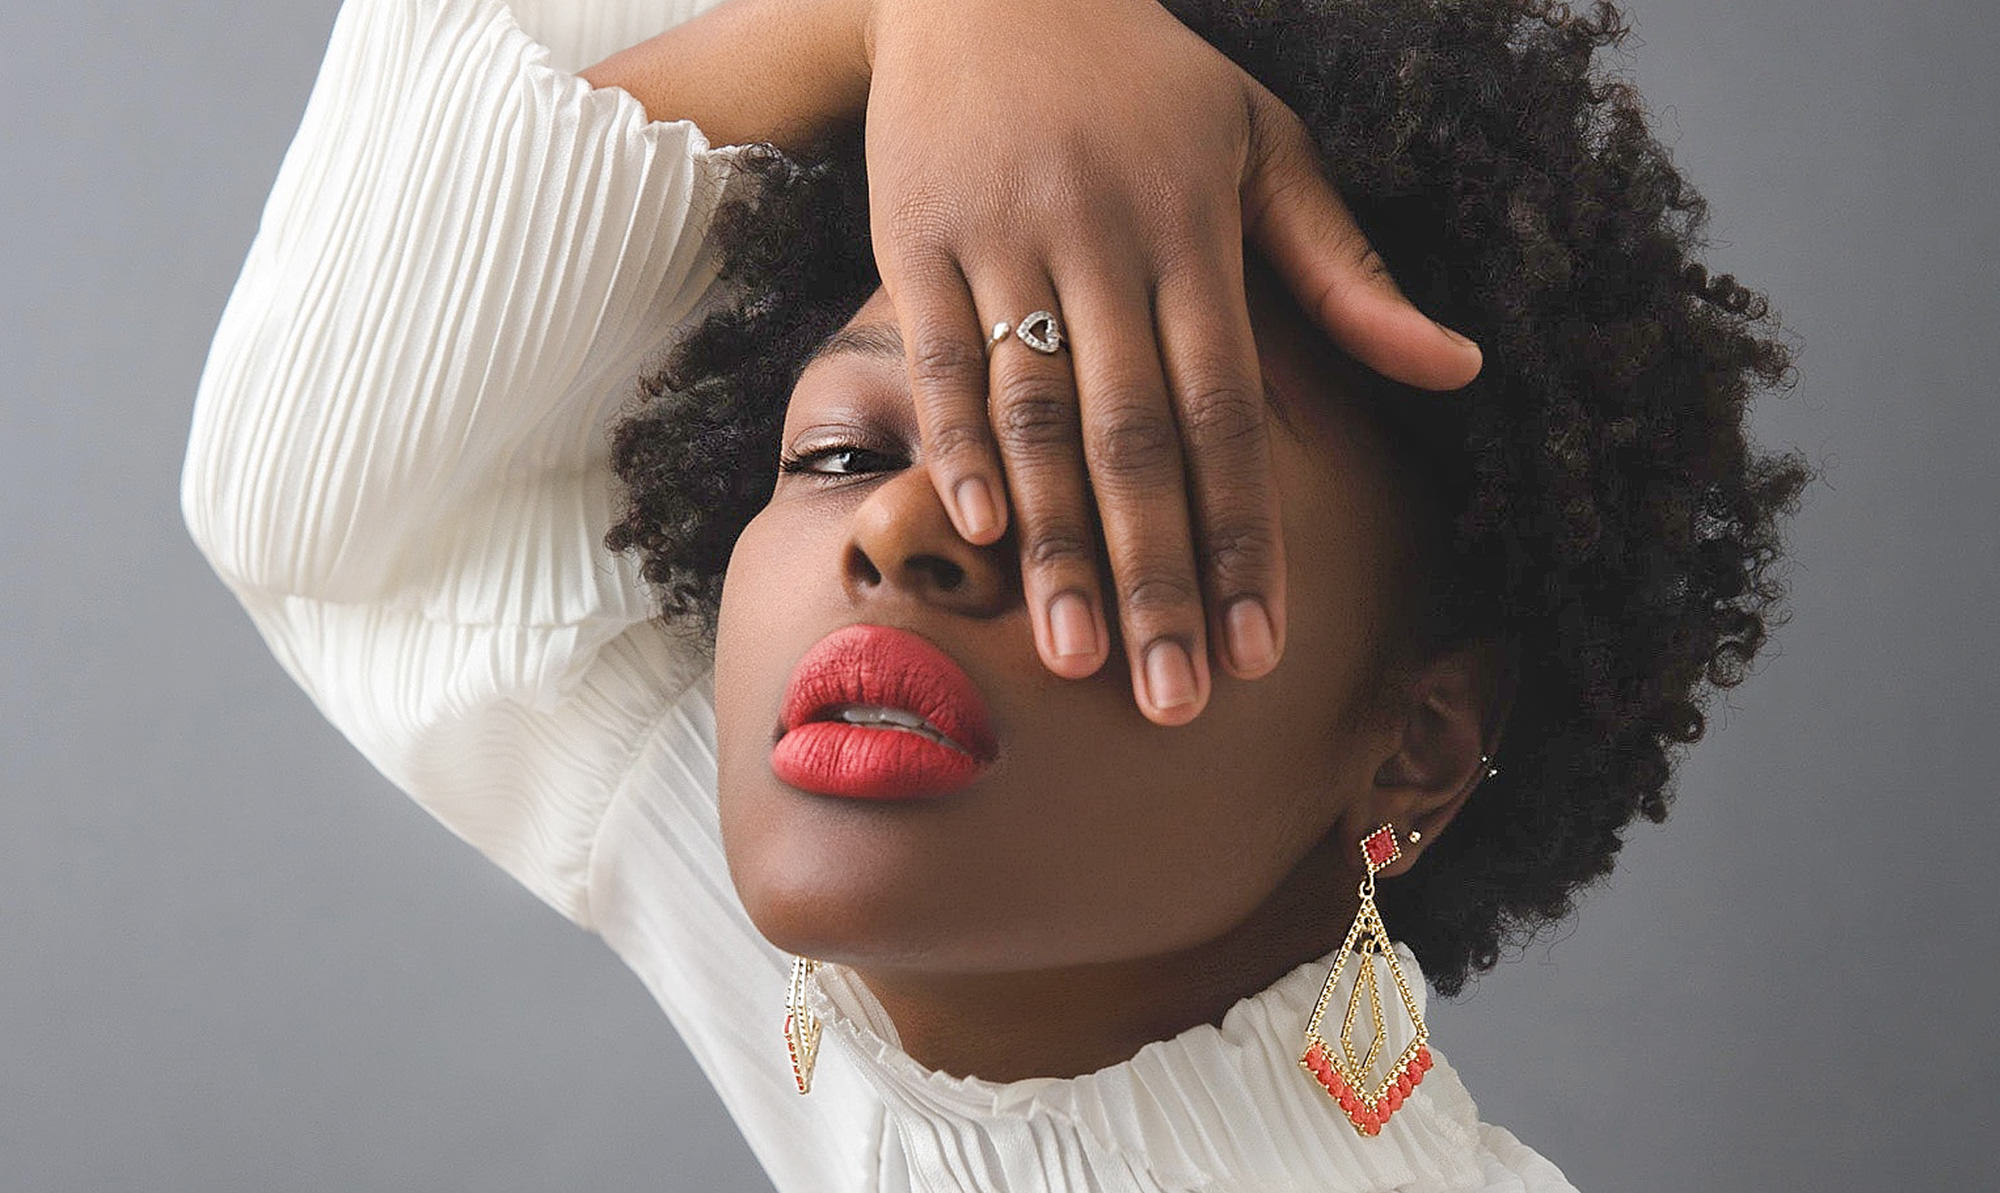
AFTER
BEFORE
Improve any Portrait
Fix exposure, remove distractions, and enhance details to help subjects look their best.
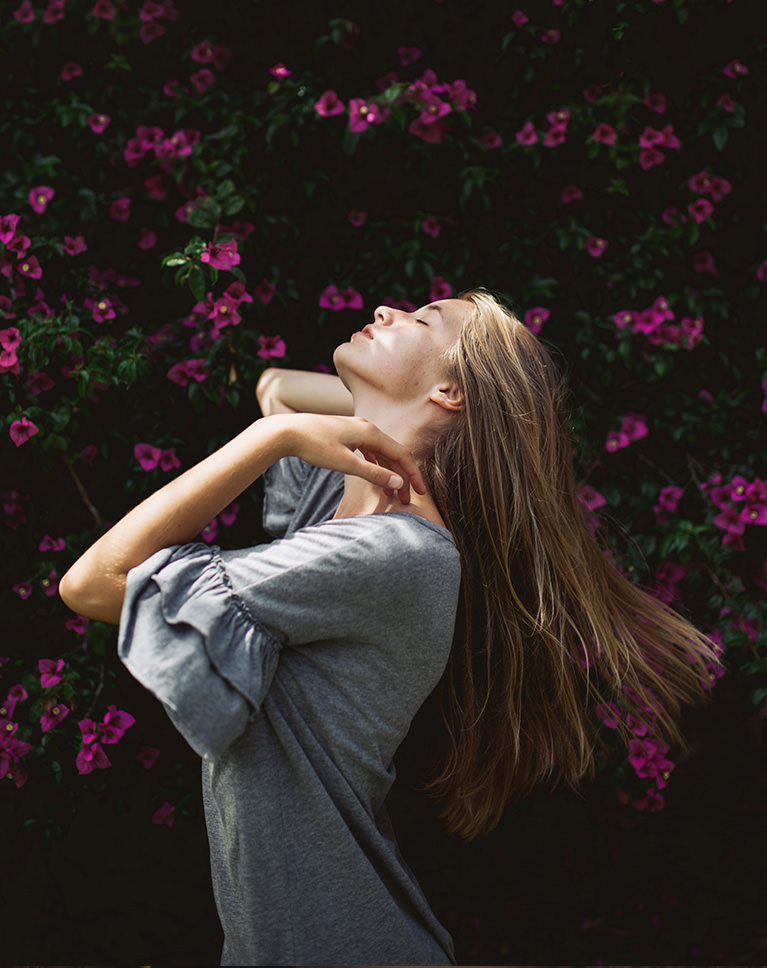
RETOUCH CLOTHING
ORIGINAL
Complete Portrait Retouch
We take you through an entire portrait retouch, from beginning to end. See how a professional retoucher plans their edit, works non-destructively, and solves a wide-variety of common problems that pop up during post-production.
Remove Blemishes
As retouchers, we should always aim for subtle changes that reduce distractions while respecting the unique features of the subject. Aaron shares his personal philosophy and professional experiences, discussing what temporary features to reduce or remove, and what permanent features to enhance and highlight.
Clothing & Wardrobe
Hair and skin maybe be the most difficult areas to retouch, but clothing is no walk in the park. Often full of loose strands, awkward folds, and unwanted wrinkles, wardrobe retouching is full of its own unique challenges. Learn how to smooth out clothing, remove distracting elements, and even recreate clothing and fabric from scratch.
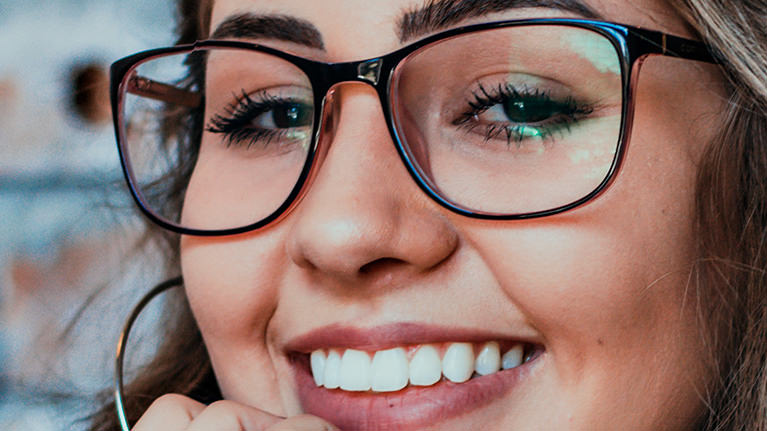

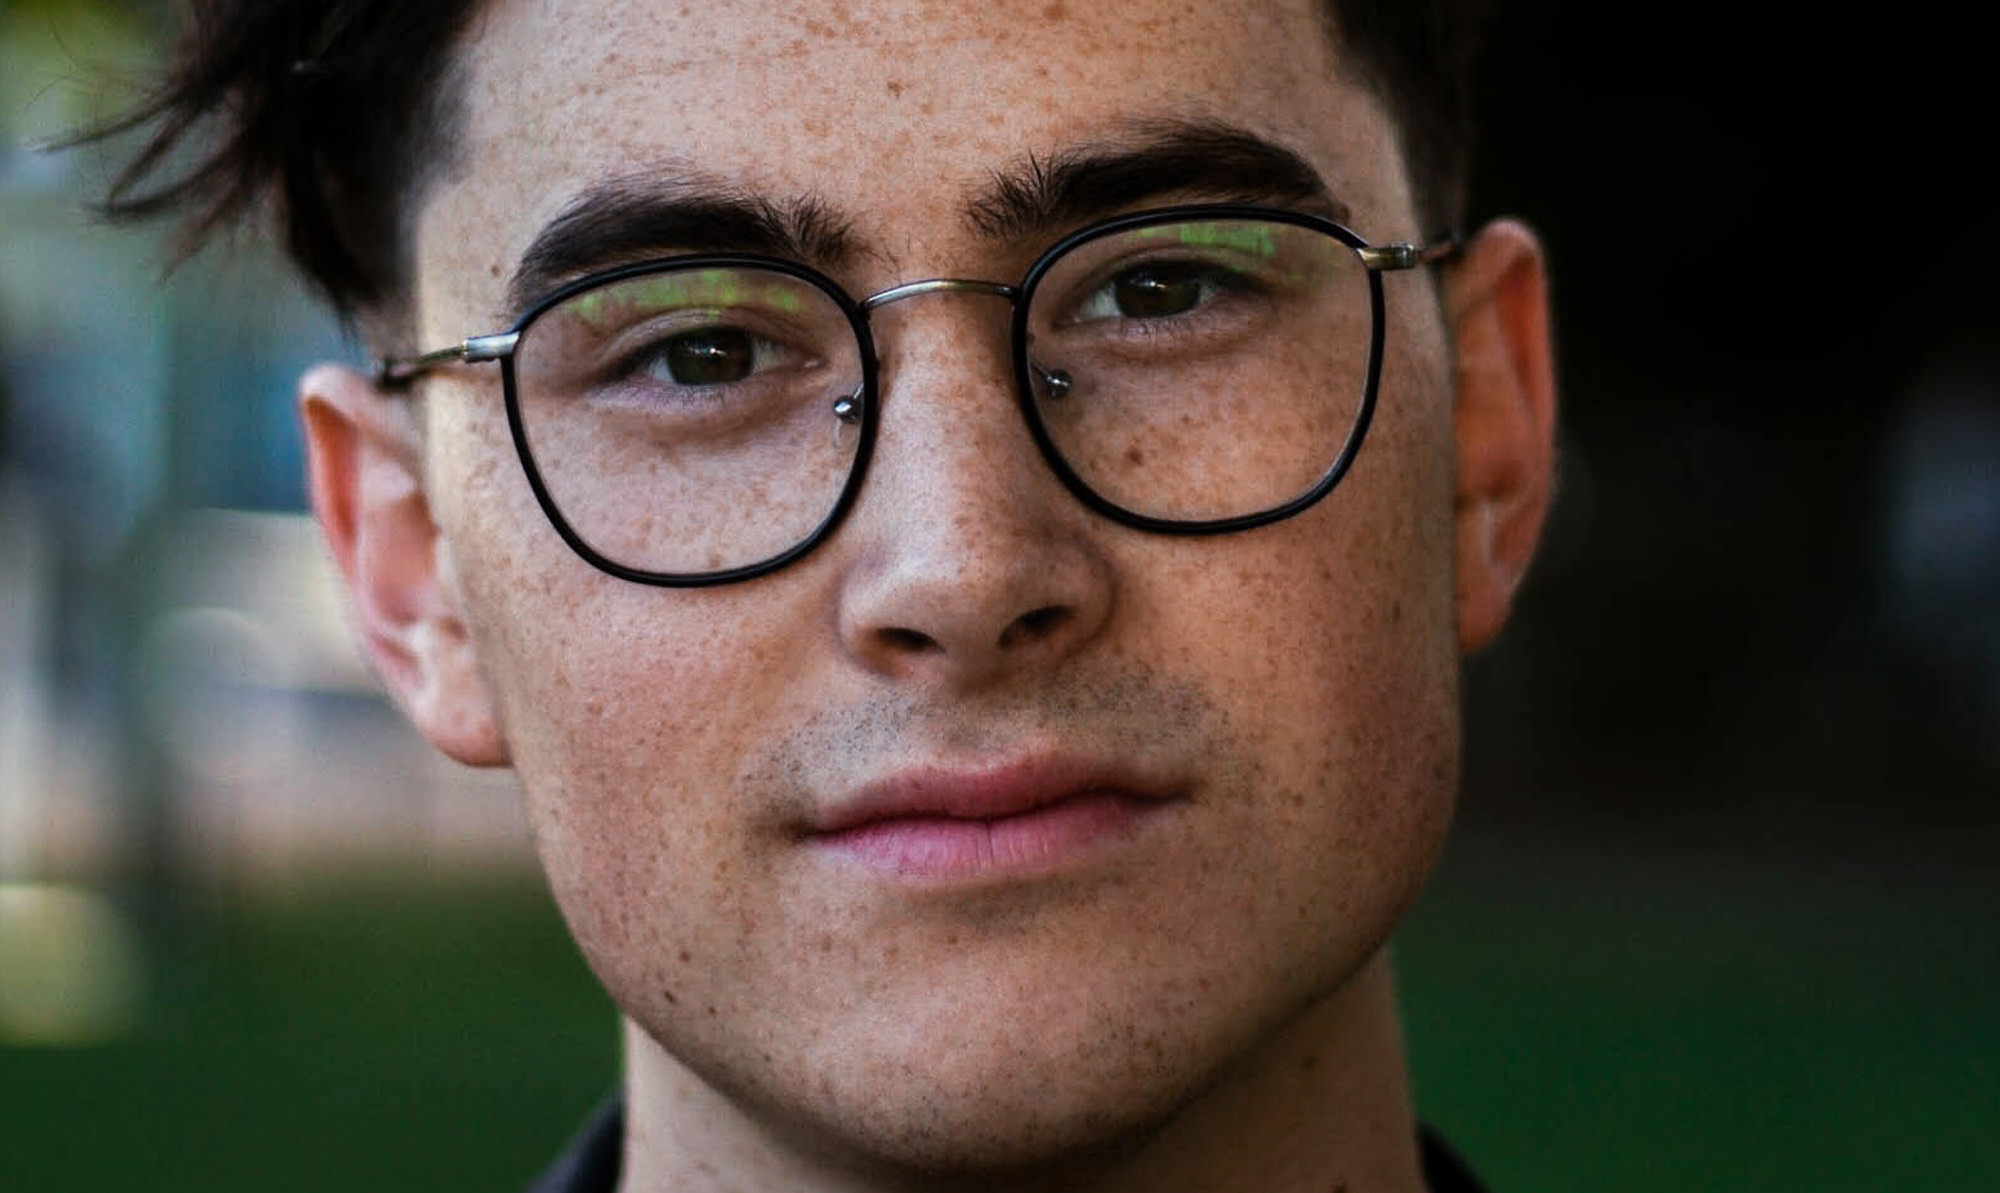
REMOVE GLARE FROM GLASSES
ORIGINAL
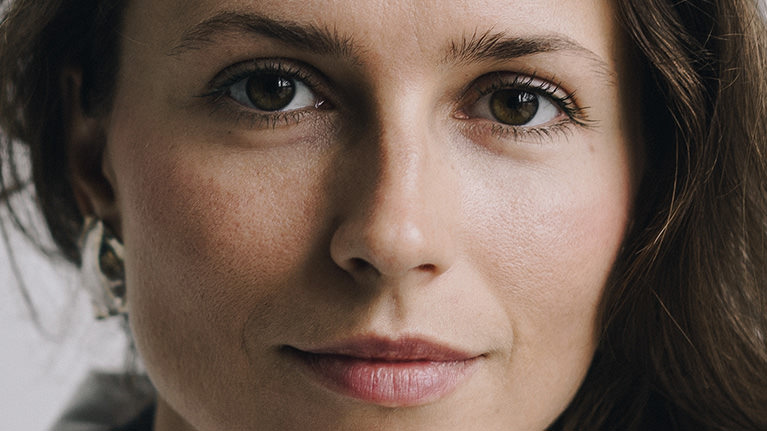
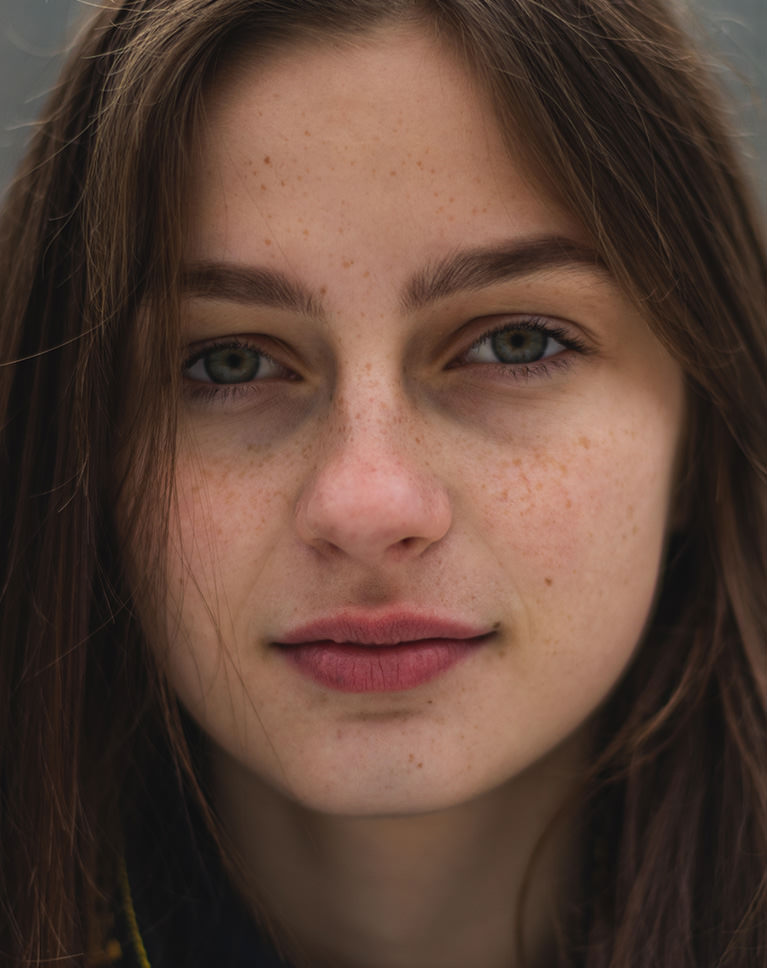
ENHANCE EYES
ORIGINAL
Fix Common Problems
We teach you how to overcome a variety of problems that can pop up during an edit. From removing an excessive amount of hair in a subject’s face to removing lights and glare from eye glasses, we’ll show you some powerful tricks to get you through.
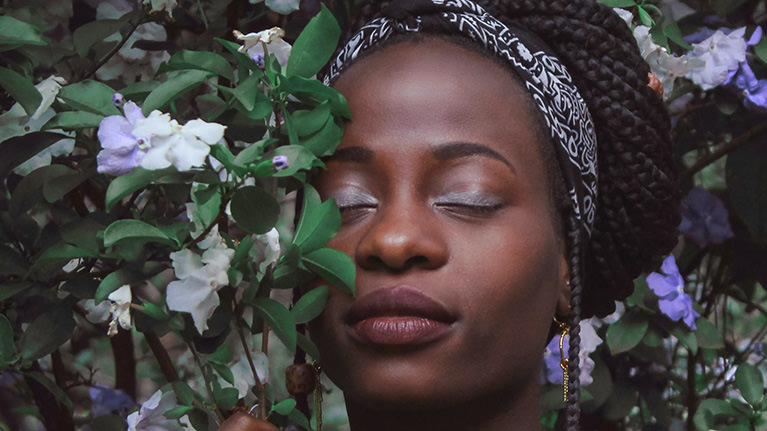
Natural Beauty
When it comes to retouching in Photoshop, less is more. Learn how to make subtle changes that won’t result in a person looking like they’re made of plastic. Remove distractions and enhance a subject’s natural beauty.
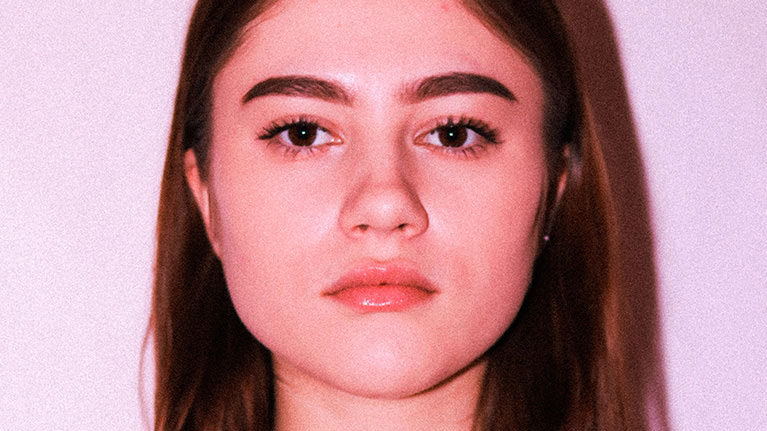
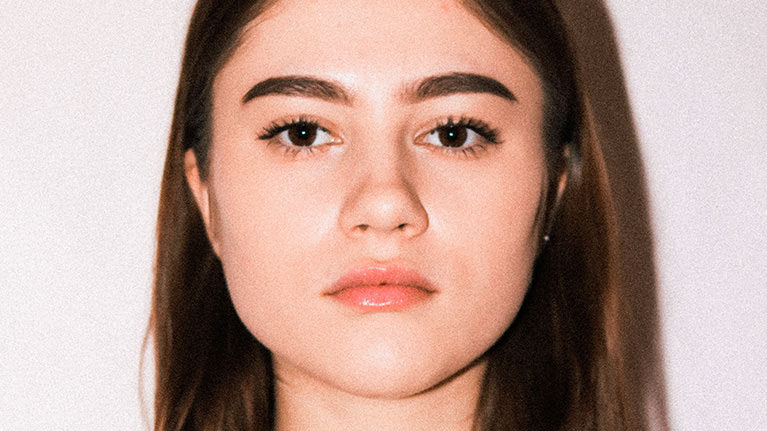
Enhance Eyes
Eyes are arguably the most important feature in any portrait–so much so that you can sometimes only retouch the eyes and still see a massive improvement in the photo. We show you how to analyze light as it hits the eye, enhance the highlights and shadows using professional makeup techniques, and add details and color to help eyes pop off the page (or screen).
AFTER
BEFORE
Smooth Skin Tones
Learn how to remove skin redness and minor blemishes with natural-looking results!

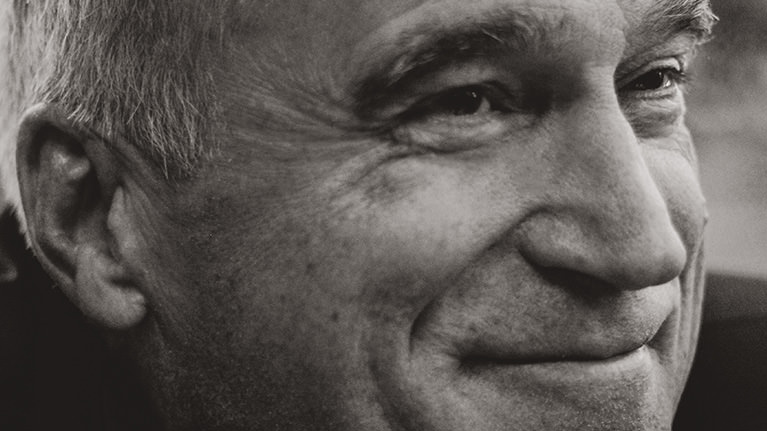
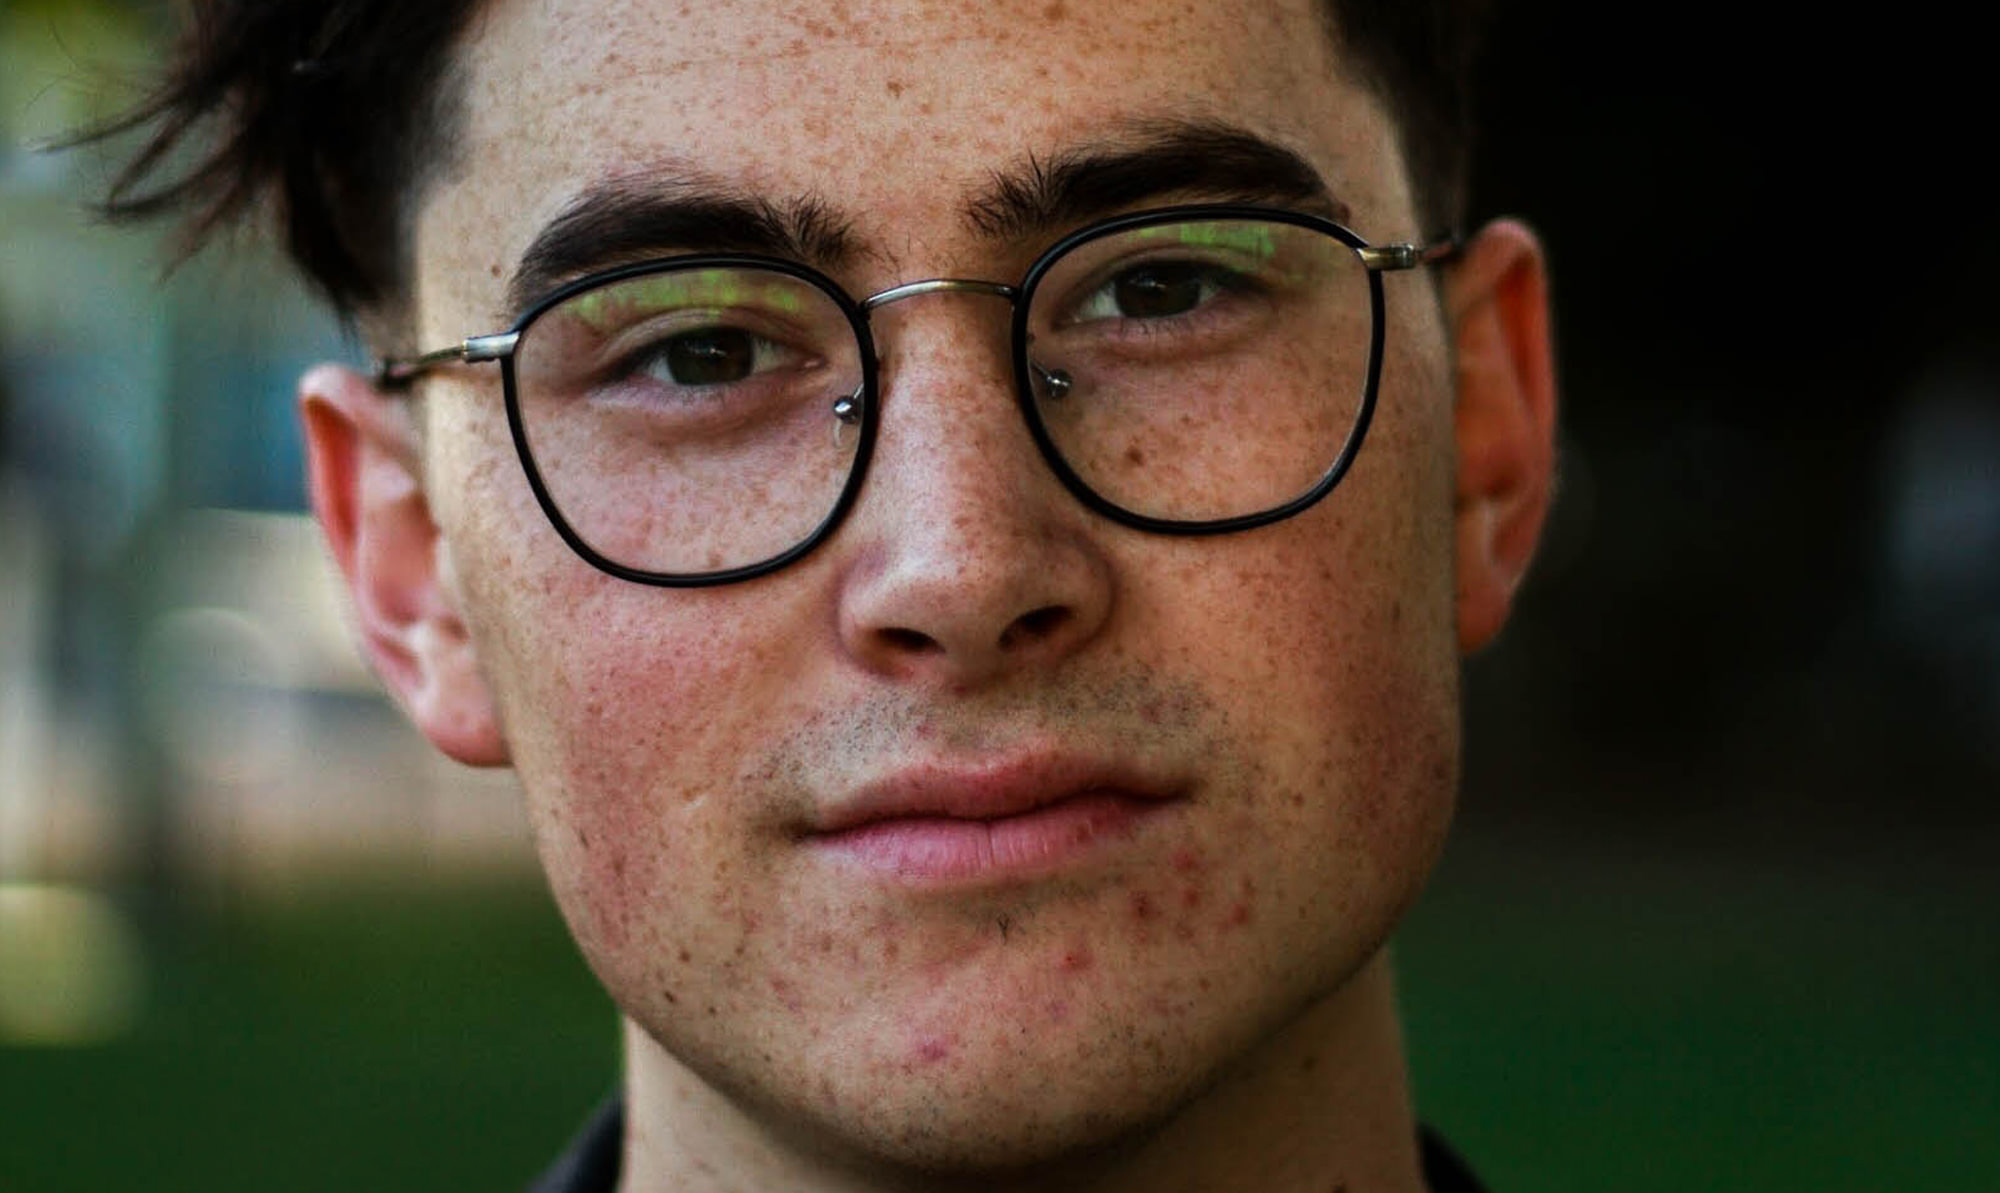
RETOUCH MATURE SKIN
ORIGINAL
REMOVE FLYAWAY HAIRS
ORIGINAL
Skills for any Skin Type
Whether the subject has a few extra wrinkles due to age and wisdom, or they have the minor pimples and skin redness that we all deal with, we show you techniques for skin types of all kinds. Learn what blemishes to remove, what features should stay, and how to precisely blend your edits for a natural look.
Skin Texture Action
Preserving natural skin texture can be one of the most challenging parts of retouching people. Fortunately, we make that process a whole lot easier with a custom Photoshop action that allows you to separate skin texture and place it over any edits you make.
Smooth Skin
We all deal with skin blemishes on a daily basis. Whether it’s a surprise pimple, skin redness, or some unwieldy hairs, we’ll show you how to remove and reduce distractions so the best parts stand out.
SKIN TONE COLOR CORRECTION
ORIGINAL

FIX EXPOSURE
ORIGINAL
Color Correction
Unnatural skin tones can ruin an otherwise great photo. Before any stylistic coloring, it’s important to get skin looking as natural as possible. Whether the camera’s white balance was off, or there was a color cast from lights in the environment, you’ll learn how to get skin tones back to normal in any situation.
Lightroom & Adobe Camera RAW
Photoshop might be our home base, but Lightroom and Adobe Camera RAW are powerful tools that can be very helpful throughout the retouching process. We break down some useful features in Lightroom that can help get your edits started on the right foot. Then we break down how to use Adobe Camera RAW to get the most out of your RAW files.
Exposure Blending
Sometimes it takes multiple images to nail the perfect exposure. We show you how to blend multiple images together and even create alternate exposures using the Adobe Camera RAW filter in Photoshop.

Aaron Nace
PHLEARN Founder – Class Instructor
Aaron Nace is a photographer, Photoshop artist and founder of PHLEARN. He is the #1 Photoshop instructor in the world with millions of YouTube subscribers.


Reviews
New & Popular Tutorials


Training Site in
the World
Tutorials!
Ratings
and Counting
Subscribers
Great retouching work overall. The skin texture looks natural while still being refined, which is not easy to achieve. With AI generated Human Modelsbeing used in digital production, high-quality retouching like this plays a key role in keeping visuals believable and brand-ready.
I’ve been using Photoshop for decades for comping and manipulating stock images – now I’m trying to sharpen my skills so I can do professional level retouching. Aaron’s clear and concise teaching style, along with real world examples, is perfect for getting me where I want to be.
Mi è piaciuto molto 🙂
Watching this right now and already learning a lot. Thank you! One thing I struggle with as a beginner at retouching is how to decide what needs to be done to an image, sort of like, how to develop that ‘eye’. I wonder if there’s a chance something like this can be addressed in an upcoming tutorial 🙂
Super duper!
Loving the tutorials but FYI: you forgot to include the Skin Texture Duplication Action in the sample files.
Thank you so much for share this content. Could you tell me please which action do you use photoshop retouching. Thank you
I had a little trouble with the clipping mask portion, and painting with the brush tool, felt like it didn’t look that natural.
his is a most important blog and it’s very helpful for us . Thanks for sharing . Photo Editing Service
Thanks, Aeron for the wonderful tutorials. I’m becoming a better retoucher after every lesson.
Thanks for Chapter 4. Great to see the techniques of Chapters 1 – 3 put to use in a real application. Helped explain the order in which the various techniques should be used. Great tutorial, start to finish.
Great tutorial. Have picked up a lot of good information and techniques. One thing that might make the tutorial even better is a recommended order in which each of the techniques shown in the separate lessons should be applied to a photo. Seems like you would not necessarily apply the techniques in the order presented (i.e. Exposure and Highlights near the end?). The order in which the techniques are presented could confuse us linear-thinking, left-brained types. This minor thing in no way detracts from the value of each of the lessons. Thanks!
Super cool! 😉
Want to say – “Thank you so much for such an incredible course!” because here in Russia i need to spend more time and money to find something similar to this. It’s awesome that i ‘m able to learn in English! It has been a year that we are together!
I have nothing else to say Mr Aaron . ” YOU’RE KILLING IT”. You’re such a great teacher! I hope other photoshop enthusiast come up to learn from PHLEARN.
Very good, my only hiccup was in the first chapter with opening an object as a smart object from light room, from what i read you cant do that in cc2020 but such a small complaint, this course gave me decisive comfort in photo retouching and I walk away with a deeper appreciation for photography and a deeper understanding on what to look for in a cohesive, polished photo as well as how to achieve those goals. Color separation here we go!
Excellent tutorials sir from last year I am watching you on Youtube and now in Phlearn Pro it’s too much amazing and very easy to understand
I just finished chapter 2 and I’m completely amazed! Can’t wait to learn more 😀
I have been using Photoshop for one year and have dedicated a lot of time to learning about the software. This class just brought me to the next level. I wish I would have started with this course a year ago. Aaron breaks down the steps for retouching in 3 sections and he goes over the steps and techniques he shows you multiple times. Even though it is repetitive, it does not feel that way. It is brilliantly laid out in bite sized pieces and clearly explained without feeling boring. Thank you so much. I feel really confident in the skills I gained in the course. Warm regards, Stormy IG: @agirlnamedstormy
Explains everything to the detail!
Aaron could pretty much give a tutorial on how to open a door, and I’d watch it. He’s such a fantastic teacher!
Great comprehensive tutorial on many tools to get into retouching! It breaks down the tools in a clear way and helps me think about the steps to take when correcting images. Very helpful!
I love it! Please keep more portrait retouching tutorials coming. PHLEARN.com is SERIOUSLY the BEST!
Course is great, but can we have eng sub for all of videos ? Cuz I’m not nature Eng speaker ! Hope we get this soon
Loved this tutorial! Found out I was already doing some things the right way (yay me!) and learned soooooo much more! Keep the great tutorials coming!!
Great!!
Even after working through various tutorials, I really enjoyed this one…well done!!!!
FANTASTIC ! Aaron’s is incredibly knowledgeable and his style instructional, yet he remains inclusive and relaxed, putting seemingly complex tasks within easy reach. Thank you Aaron and team.
I love Phlearn, I’ve been using for over a year now and have no intention of unsubscribing. This tutorials update on using Camera Raw rather than curves is a great example of why. I think it would really help me if with each tutorial there was a written workflow. I know each image is different and all techniques will not apply to all photographs but it would be so handy to have an example workflow in front of me. For example I am currently practicing retouching eyes on my own images and I keep stopping and staring the video to see what to do next. If I had in front of me I would only need to reference the tutorial if I need help with the actual technique.
Geez… where have you been all these years? That trick you show for smoothing the skin is so much more… now I know how to adjust different skin tones the easy way (not the fastest, but the easiest). I also might use my tablet more often for retouching than my mouse in the future 😉
You make everything seem so easy but the best part is phlearning (lol) all these non-destructive ways to edit. it really creates a relaxed no pressure environment for editing. Thank you
Fantastic. You make everything so easy to understand. Also you include the actual photos you use so we can compare our results to yours. Please keep going!!!!!!
Excellent compilation of some well known and some not-so well know techniques. Presented in a clear and easily understood way. I really enjoyed the course and will probably have to revisit specific lessons again to fully appreciate the fidelity of the tools. Excellent work.
Another great and easy to understand tutorial. Thanks!
I thought I was already learning a ton via youtube tutorials but boy am I wrong! Aaron is so thorough and technical. I’m so excited to advance my editing knowledge! Thank you!
Perfect video! It’s cool for beginners and for refreshing the skills. Thanks Aaron and your team for the high quality work. 🙂
This group of tutorials is incredibly helpful and clear. They break down a few techniques that can be used very easily at a beginner or intermediate level.
Aaron, you are just so talented and generous with your know-how. Every time I re-run one of your tuts I learn a new thing. Thanks, Charles Day