
Download Assets
This tutorial includes 1 PDF guide. Downloads are free with a PHLEARN account.
- Download the sample files from every free tutorial on PHLEARN
- New free tutorials published every week
- One free account: sign up once, then download anything
Free PDF Guide · 3 Pages
This Tutorial as a Step-by-Step PDF
The guide walks through three stacked layers: a masked Color Balance layer on Midtones to strengthen the hair color, a Solid Color layer in Vivid Light limited to the highlights with an Alt/Option-split Blend If slider, and a Soft Light layer painted white and black at 10% Flow for shine. Use it on any hair color.
description
Vibrant hair color in Photoshop is built in layers, not painted on in one pass. Learn how to reinforce the tone that is already there with a masked Color Balance layer, introduce a fresh highlight color using a Vivid Light solid fill restricted by Blend If, and finish with a low-flow Soft Light dodge and burn that follows the hair’s own pattern of light and shadow for natural shine.
Enjoying This Free Tutorial?
We publish a new free tutorial every week, each one with sample images and PSDs you can download and follow along with. Sign up and they land straight in your inbox, along with early word on sales, events and subscriber-only offers.
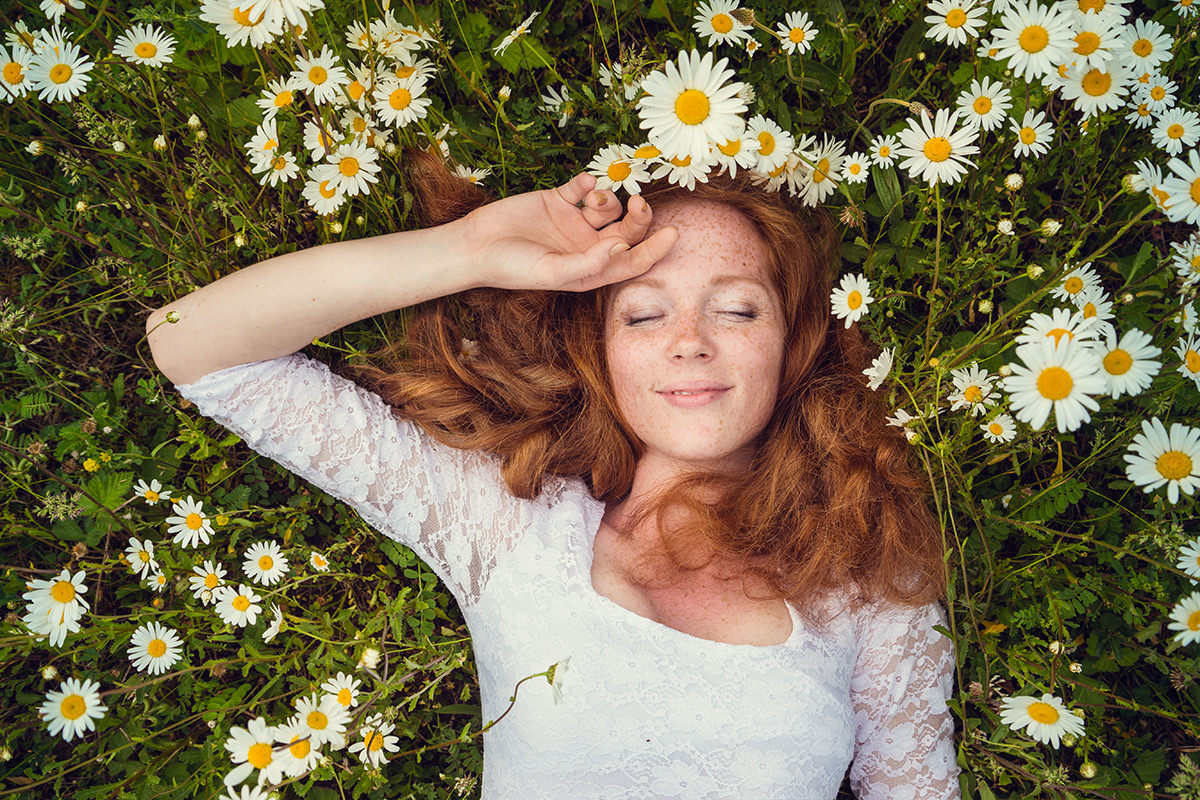

Making hair color pop without looking fake comes down to three layered techniques: enhancing the existing color with a masked Color Balance layer, pushing a new tone specifically into the highlights with Blend If, and finishing with a soft light dodge-and-burn pass for shine. This tutorial covers each of those steps in order, using a red-headed portrait as the example, though the same approach adapts to any hair color.
Enhancing the Existing Hair Color With Color Balance
Adjusting a Color Balance layer’s midtone sliders reinforces the color already present in the hair, such as pushing red on a redhead, without introducing an entirely new color.
-
Add a Color Balance Adjustment Layer
Add a Color Balance adjustment layer targeting Midtones first.
-
Push the Color Sliders to Enhance the Existing Hue
Drag the Red slider to the right, the Yellow slider to the left, and the Green slider slightly toward green to intensify the hair’s existing red tone.
Why Different Hair Colors Need Different Slider Adjustments
Pushing the sliders the same way for every hair color would overdo some colors while barely affecting others, since a redhead and a brunette start from very different base tones. Brown hair, for example, benefits from raising red and green more evenly rather than pushing red as far as it’s pushed for a natural redhead, which is why the sliders should be adjusted to match whatever color is already present.
Masking the Adjustment So It Only Affects the Hair
Inverting the Color Balance layer’s mask to black, then painting white at a low brush opacity, restricts the color enhancement to just the hair and eyebrows.
-
Invert the Layer Mask
Press Cmd/Ctrl+I on the Color Balance layer’s mask to invert it to black, hiding the effect everywhere.
-
Paint White at Reduced Opacity
Lower the brush opacity to around 30% and paint white over the hair and eyebrows to reveal the color enhancement gradually and naturally.
-
Compare and Fine-Tune the Sliders
Toggle the layer on and off, then return to the Color Balance sliders to push the color further if needed.
Creating a Solid Color Layer for the Highlights
A Solid Color adjustment layer, set to Vivid Light and reusing the same mask from the Color Balance layer, is where a distinct new tone gets introduced specifically into the hair’s highlights.
-
Add a Solid Color Adjustment Layer
Add a Solid Color adjustment layer and choose an initial placeholder color, such as green, to make the effect easy to see.
-
Copy the Existing Mask Over
Hold Alt/Option and drag the Color Balance layer’s mask onto the new Solid Color layer’s mask to copy it over.
-
Change the Blend Mode to Vivid Light
Change the layer’s blend mode from Normal to Vivid Light to introduce strong color into the hair.
Why Blend If Is Better Than a Layer Mask for This Step
A hand-painted layer mask would require carefully tracing every highlight area of the hair by hand, which is slow and hard to get perfectly consistent. Blend If instead automatically restricts visibility based on the underlying image’s actual brightness values, so it naturally follows every highlight in the hair without any manual painting.
Restricting the New Color to Highlights With Blend If
Blend If, with its sliders split by holding Alt/Option, limits the solid color layer’s visibility to just the brighter highlight areas of the hair rather than the shadows.
-
Open Blending Options
Double-click the Solid Color layer to open its Blending Options.
-
Split the Underlying Layer Slider
Hold Alt/Option and click one half of the underlying layer’s black slider to split it into two separate handles.
-
Drag the Split Slider to Hide Shadows
Drag the split slider handles to the right so the layer becomes invisible in the darker, shadow areas of the hair and visible only in the highlights.
Choosing the Final Highlight Color
Double-clicking the solid color swatch and adjusting hue, lightness, and saturation live updates the highlight color in real time until it looks natural rather than artificial.
-
Open the Color Swatch
Double-click the solid color fill layer’s color swatch to open the color picker.
-
Shift Hue Toward a Natural Highlight Tone
Drag the hue slider away from the placeholder color toward a natural tone, such as yellow or orange, watching the hair update live.
-
Adjust Lightness and Saturation
Fine-tune lightness and saturation until the highlight color looks like an enhancement rather than an obviously artificial tint.
-
Lower Opacity and Touch Up the Mask
Reduce the layer’s opacity if the effect looks too strong, and paint black on the mask over any area, like the face, where the color mistakenly shows up.
Why Low Flow Matters for Dodging and Burning
Painting at full brush flow would apply the entire darkening or lightening effect in one stroke, making it hard to build up a subtle, controlled result. A flow of around 10% applies just a small amount of the effect per pass, so painting repeatedly over the same spot gradually builds up exactly the amount of brightness or darkness needed.
Dodging and Burning the Hair for Shine
A Soft Light layer painted with low-flow black and white brings out the hair’s natural pattern of highlights and shadows, adding a final touch of shine and dimension.
-
Create a New Soft Light Layer
Add a new layer above everything else and change its blend mode from Normal to Soft Light.
-
Lower Brush Flow to 10%
Select the Brush tool with a soft edge and lower Flow to around 10% so the effect builds up gradually with repeated painting.
-
Paint White Over Existing Highlights
Paint white over areas that are already lighter in the hair to brighten them further, following the hair’s natural highlight pattern.
-
Paint Black Over Existing Shadows
Press X to switch to black and paint over areas that are already darker in the hair to deepen those shadows.
Why This Approach Works
Masking every adjustment to just the hair, using a low brush opacity to reveal it gradually, is what keeps the color enhancement looking like a natural extension of the existing hair color rather than an obvious paint job. Restricting the Solid Color layer to highlights alone with Blend If is what allows a genuinely new tone to be introduced without flattening or muddying the hair’s existing shadow detail. Finishing with a low-flow Soft Light dodge and burn, following the hair’s own existing pattern of light and dark, is what adds real dimension and shine on top of the color work already done.
Final Thoughts
Each of these three layers, color balance, highlight color, and dodge and burn, does a distinct job, and stacking them together is what turns flat, ordinary hair color into something that reads as vibrant and alive without looking artificially painted. The same three-layer approach works on any hair color, adjusting only which sliders and tones get pushed to match what’s already there.
Quick Reference: Keys, Menus and Settings
- Enhance the colorAdjustment layer > Color Balance, Midtones: Red right, Yellow left, Green up slightly
- Mask to the hairCmd/Ctrl + I inverts the mask; B, paint white at 30% opacity (3)
- Highlight colorAdjustment layer > Solid Color; Alt/Option-drag the mask onto it; blend mode Vivid Light
- Highlights onlyDouble-click the layer > Blend If; Alt/Option to split the slider, drag the left half right
- Pick the colorDouble-click the swatch; drag the hue to orange or yellow, then lower the layer opacity
- Dodge and burnNew layer set to Soft Light; soft B at 10% Flow (Shift + 1); X swaps white and black
No AI, no generative credits.

Free Downloads
Take the Guide With You
Get the PDF guide to the three hair color layers: a masked Color Balance, a Vivid Light color with Blend If and a Soft Light dodge and burn. Free with a PHLEARN account.
Making Hair Color Pop: Common Questions
Which adjustment layer makes hair color pop?
A Color Balance adjustment layer set to Midtones. For the redhead in the video, the Red slider goes right, the Yellow slider goes left and the Green slider comes up a little, so it strengthens the color the hair already has.
Does this work on brown or blonde hair?
Yes. Push the sliders toward whatever color is already there. On brown hair, don’t take the red as far; raising red and green more evenly gives a richer brown.
How do I keep the color off the skin?
Click the Color Balance layer mask and press Cmd/Ctrl + I to invert it to black. Then paint white over the hair and eyebrows with the Brush at about 30% opacity (press 3).
Do I have to paint a second mask for the highlight color?
No. Hold Alt/Option and drag the Color Balance mask onto the Solid Color layer to copy it.
Which blend mode adds the new highlight color?
Vivid Light. Set the Solid Color layer from Normal to Vivid Light and the color shows strongly in the hair.
How do I keep the new color out of the shadows?
Double-click the layer to open its Layer Style and find Blend If at the bottom. Hold Alt/Option to split the slider, then drag the left half to the right so the color shows only in the highlights.
Why start with a green color?
Green just makes it easy to see what the layer affects. Double-click the color swatch afterwards and drag the hue to an orange or yellow; the hair updates live as you adjust hue, lightness and saturation.
The new color looks fake. How do I tone it down?
Lower the layer’s opacity, try a lighter or less saturated color, and paint black on the mask anywhere it shows up on the face.
How do I make hair look shiny?
Make a new layer set to Soft Light. With a soft Brush at 10% Flow (Shift + 1), paint white over areas that are already light and black over areas that are already dark; press X to swap colors.
Is there a free download?
Yes, with a free PHLEARN account. You get 1 PDF guide with the Color Balance, Blend If highlight color and dodge and burn steps from the video.
Master Photoshop, Lightroom and Photography
Join PHLEARN PRO for $12.99 a month or $99.99 a year. Cancel anytime, with a 100% money-back guarantee.





