

Part two of this portrait picks up where the lighting left off and moves into Photoshop. Learn a light-touch approach to retouching that keeps skin texture intact, how to isolate and calm skin redness using the range sliders inside Hue/Saturation, a dodge-and-burn method built on Lightness plus Saturation and restricted with Blend If, and a cool-shadow color grade to finish.
We publish a new free tutorial every week, each one with sample images and PSDs you can download and follow along with. Sign up and they land straight in your inbox, along with early word on sales, events and subscriber-only offers.
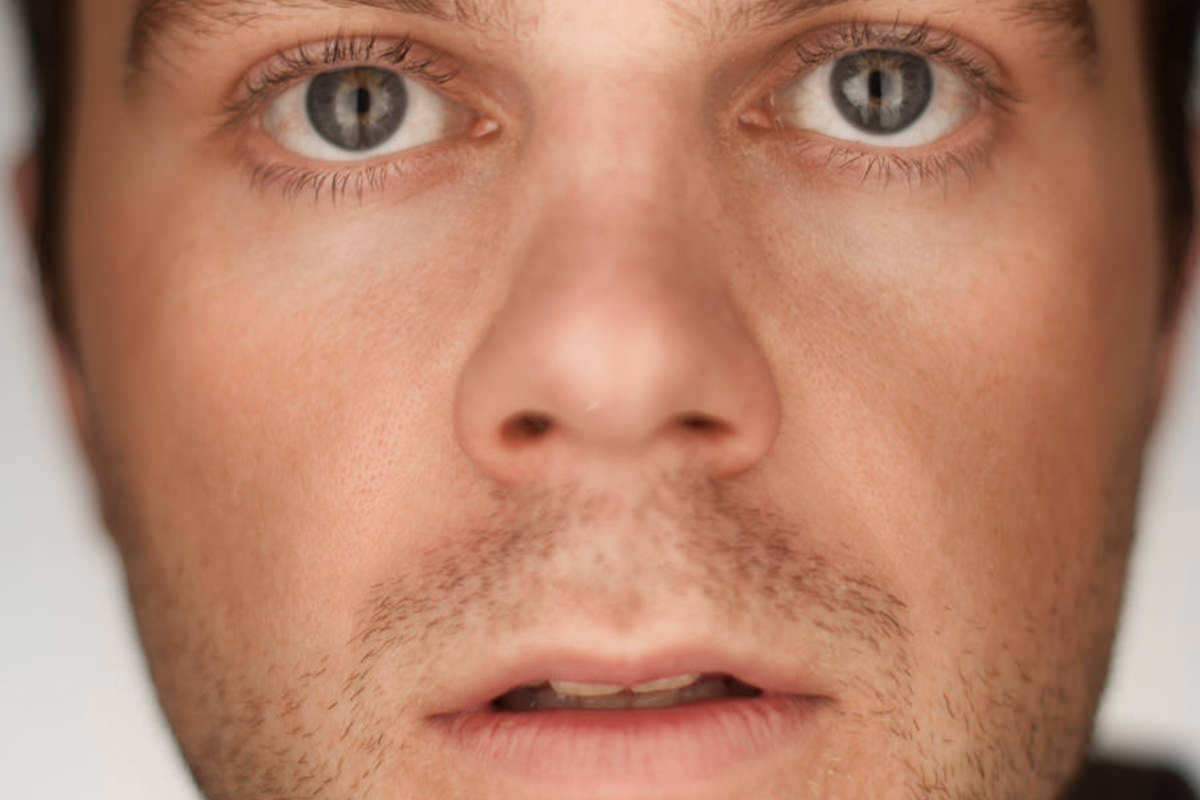
Martin Schoeller Inspired Portrait: Part 2 (Retouching)
With the lighting setup dialed in back in Martin Schoeller Inspired Portrait, Pt.1, this stage moves into post-production: light retouching, targeted redness correction, a Hue/Saturation-based dodging and burning technique, and a final color grade to finish the portrait’s mood.
Deciding How Much Retouching a Portrait Needs
Before opening the Healing Brush, it is worth thinking through how much retouching actually suits the subject and the tone of the image.
-
Retouch Only Temporary Blemishes
Focus retouching on things that will naturally go away on their own, like a temporary blemish, rather than permanent features, since a photo taken a week later likely would not show that same blemish anyway.
Why This Portrait Calls for Lighter Retouching
Retouching this kind of portrait as heavily as is common in beauty photography can look contrived, since qualities like visible texture, facial hair, and a more rugged complexion are often part of what reads as a strong, characterful portrait. This is a stylistic choice rather than a hard rule, and it is entirely reasonable to push in either direction depending on the specific portrait and subject.
Removing Temporary Blemishes With the Healing Brush
The Healing Brush tool handles small, temporary skin issues without disturbing texture in the surrounding area.
-
Sample and Heal Individual Spots
Press J for the Healing Brush tool, hold Option (or Alt) to sample a clean area of skin, then paint over any temporary spots or blemishes you want removed.
Targeting and Reducing Redness With Hue/Saturation
Skin redness, especially common around the eyes, nose, and cheeks, can be isolated and corrected precisely using the range controls inside a Hue/Saturation adjustment.
-
Add a Hue/Saturation Adjustment Layer
Add a Hue/Saturation adjustment layer and switch to the Reds channel.
-
Sample the Redness and Exaggerate It
Use the eyedropper to click on a visibly red area of skin, then temporarily push the saturation and hue sliders to an extreme, exaggerated setting so you can clearly see every area the adjustment is affecting.
-
Narrow the Range Slider to Isolate Just the Redness
Drag the gray range slider at the bottom of the panel to narrow down exactly which colors are affected, watching the live preview until only the genuinely red areas, not yellows or other skin tones, are being changed.
-
Return Saturation and Hue to a Natural Level
Once the range is properly isolated, bring the saturation back down and shift the hue toward a more neutral skin tone rather than the exaggerated preview color.
-
Protect the Lips With a Layer Mask
Add a layer mask and paint black over the lips, since lips are naturally red and should not be desaturated along with the rest of the skin.
Why Exaggerating the Effect First Helps
Pushing an adjustment to an extreme, obviously wrong setting makes it far easier to see exactly which areas of the image it is affecting. Once the range is dialed in correctly using that exaggerated preview, bringing the actual values back to something natural and subtle becomes a much more precise, confident final step than trying to judge a subtle change in isolation from the start.
Reducing Overall Saturation Slightly
A small global desaturation can push the whole portrait toward a specific tonal mood.
-
Lower Overall Saturation Slightly
Add another Hue/Saturation adjustment and lower the overall saturation slightly. A small amount, such as -10, is usually enough to shift the mood without draining the image of color entirely.
Dodging and Burning Using Hue/Saturation and Blend If
Rather than a traditional dodge-and-burn layer, this technique uses Hue/Saturation’s Lightness slider combined with Blend If to build convincing shadow and highlight detail.
-
Lower Lightness and Raise Saturation Together for Burning
Add a Hue/Saturation layer, lower the Lightness slider to darken, and simultaneously raise Saturation. Lowering lightness alone tends to make skin look gray and flat, while adding saturation back in makes it look like genuinely darker skin instead.
-
Paint White on the Mask Where You Want to Burn
Invert the layer mask with Command + I, then paint white with a large, soft brush around the edges of the subject where you want the burning effect to show.
-
Restrict the Effect to Shadows With Blend If
Double-click the layer to open its Layer Style, then hold Option (or Alt) and drag the underlying-layer black slider under Blend If to split it, restricting the burn effect so it is only visible where the underlying image is already dark.
Why Blend If Beats Painting the Mask Alone
Painting a burn effect with just a brush and hoping it lines up with the image’s existing shadows requires very careful, time-consuming masking to look convincing. Splitting the Blend If slider automatically restricts the effect to dark areas regardless of how loosely you painted the mask, which is what keeps the burn looking like it is sticking naturally to existing shadow rather than sitting visibly on top of the image.
Dodging Highlights With the Same Technique in Reverse
The identical approach, applied in the opposite direction, brightens and draws attention to specific highlight areas.
-
Paint White for a Highlight Layer
Create a new layer and paint white with a brush over the areas you want to draw attention to, such as the center of the face.
-
Restrict the Effect to Highlights With Blend If
Open Blend If on that layer and split the underlying-layer white slider in the opposite direction, so the painted white is only visible where the underlying image is already light.
-
Add Extra Punch to Specific Highlights Like the Eyes
Paint additional white with a slightly harder brush directly over small highlight details, like the catchlight in the eyes, using the same Blend If restriction, then lower opacity if the effect becomes too strong.
Adding a Cool Tone to the Shadows
A final color-grading pass pushes the shadows toward a cooler tone, adding contrast against the warmer skin tones.
-
Push the Blue Channel Into the Shadows
Add a Curves layer, switch to the Blue channel, and add blue specifically into the shadow region of the curve, then adjust the RGB composite curve to bring down overall brightness slightly.
-
Balance With a Touch of Green if Needed
If the blue shift looks slightly off, add a small amount of green in the Green channel to balance the color, and mask the effect away from the subject’s face if it is affecting skin tone in the background as well.
Finishing With a Vignette
A final vignette, deliberately added back in Photoshop after being removed earlier in Lightroom, closes out the edit.
-
Add a Vignette in Photoshop
Add a Curves or Levels adjustment layer with an inverted radial mask to darken the corners of the frame into a soft vignette, adjusting opacity to taste.
Why This Approach Works
The dodging and burning technique at the center of this edit works because it solves a problem plain brightness or darkness adjustments create on their own: lowering lightness alone makes skin look flatly gray, but pairing it with a saturation boost keeps it reading as genuinely darker skin instead. Combining that with Blend If, rather than relying purely on hand-painted masks, means the effect automatically respects the image’s existing shadow and highlight structure no matter how loosely the mask is painted. Isolating skin redness the same deliberate way, exaggerating the effect first to see exactly what is affected and then dialing it back to something natural, reflects a broader principle worth applying to plenty of other Photoshop adjustments: make the problem visible first, then correct it precisely.
Final Thoughts
None of the individual techniques in this retouch are especially exotic. Hue/Saturation, Curves, and Blend If are all standard tools. But combining them this specifically, using Hue/Saturation’s Lightness and Saturation sliders together for dodging and burning restricted by Blend If, produces a result with far more nuance than a single global adjustment ever could. It is a technique worth keeping in your retouching toolkit well beyond just this one portrait.
New Free Tutorials View All »











Enjoying This Free Tutorial? Go Further with PRO.
Unlock Full Sample Files, PSDs, and Hundreds of Masterclasses!

Download full project assets, original PSDs, and RAW images for every lesson
Unlimited access to our complete library of PRO Photoshop & Lightroom courses
Instant 4K Ultra HD streaming on all devices, anytime, anywhere
Full access to our entire library of Photoshop Actions, Presets, and LUTs
Flexible monthly and annual membership plans
Cancel anytime with zero hassle or commitments