
Download the Sample Image
Download Assets
This tutorial includes sample images and a PDF guide. Downloads are free with a PHLEARN account.
- Free sample files with every tutorial on PHLEARN
- New tutorials published every week
- Unlimited downloads with your free PHLEARN account
description
2020 Edition
This lesson is from the original 30 Days of Photoshop. Photoshop has changed a great deal since — there is an updated version of this lesson in the 2025 Edition: How to Use Select Subject in Photoshop, Day 9.
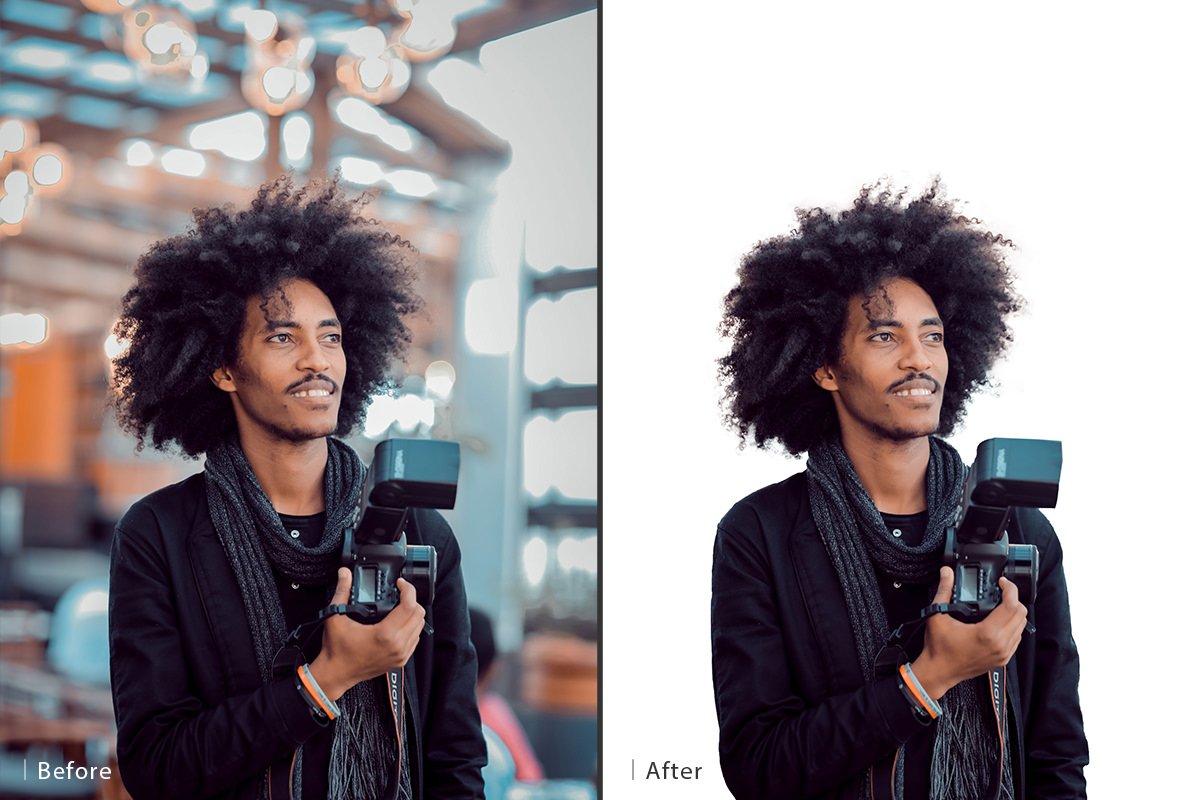
Working with hair in Photoshop can be a major challenge–especially when you need to cut it out from the background. Learn how to use smart tools like Select Subject and Select and Mask to make the process of cutting out hair easier than ever!
This is Day 27 of our 30 Days of Photoshop series. Follow along with all 30 episodes as we explore the magic of Photoshop together!
Continue Watching 30 Days of Photoshop
Enjoying This Free Tutorial?
We publish a new free tutorial every week, each one with sample images and PSDs you can download and follow along with. Sign up and they land straight in your inbox, along with early word on sales, events and subscriber-only offers.
Cut Out Hair with Select and Mask
Hair is the hardest thing to separate from a background. Automatic selection tools grab the outline of a person well enough, but fine strands and semi-transparent edges are usually lost. The technique in this lesson combines Select Subject, the Refine Edge Brush inside Select and Mask, and a simple Overlay-mode brush trick to get a clean hair cutout in a few minutes, even on a busy background.
For the body of a subject, the Pen Tool lesson from yesterday gives cleaner results. Use that for the hard edges and this method for the hair.
Start with Select Subject
-
Run Select Subject
Go to Select > Subject. Photoshop analyzes the image and draws a selection around the person. It will not be perfect on the hair, and it may miss small objects, but it is a strong starting point.
-
Clean Up with the Lasso
Press L for the Lasso Tool. Hold Shift and draw to add missed areas; hold Alt/Option to subtract. Hold Alt/Option while clicking to switch to straight polygonal segments. Rough is fine here; the hair is what matters.
-
Add a Layer Mask
Click the Add Layer Mask icon at the bottom of the Layers panel. The subject is cut out, but the hair edge looks chunky. That is what we fix next.
Refine the Hair in Select and Mask
-
Open Select and Mask
Click the layer mask thumbnail, then go to Select > Select and Mask. Set the View to Overlay so the masked-out area shows as red; it makes stray hair easy to see. Adjust the overlay opacity if needed.
-
Choose the Refine Edge Brush
On the left, select the Refine Edge Brush Tool (second from the top). Wherever you paint, Photoshop samples the texture and color under the brush and searches for more of it, adding fine hair to the selection and removing background between the strands.
-
Paint Along the Hair Edge
Click inside the hair near the edge and drag outward along the outline of the hair. Cover the whole edge in one or two continuous strokes. Stay on the boundary; painting deep inside the hairline can remove hair that doesn’t match the sample.
-
Output to the Layer Mask
Let Photoshop finish calculating, then set Output To to Layer Mask and click OK. Hold Alt/Option and click the mask thumbnail to view it in black and white. The strands should now be visible in the mask.
Fix the Mask with an Overlay-Mode Brush
If part of the mask is gray where it should be black, or background is still bleeding through, this trick cleans it without destroying the fine detail.
-
Set the Brush Mode to Overlay
With the mask selected, press B for the Brush Tool and change the Mode in the options bar from Normal to Overlay.
-
Paint Black to Darken, White to Brighten
Painting black in Overlay mode darkens the gray areas of the mask toward black while leaving the pure white (the hair) untouched. Painting white does the reverse, protecting the dark areas. Paint along the edge until the mask is crisp.
-
Switch the Brush Back to Normal
Set the brush Mode back to Normal as soon as you finish. A brush stuck in Overlay mode is a very common reason the Brush Tool “stops working” the next day.
Check the Result
-
Drop In a New Background
Add a Solid Color fill layer set to white and drag it below the subject. Press F for full-screen and inspect the hair. Fine strands should be intact, with no halo of the old background.
When You Need More
Hair varies enormously, from dark hair on a light background to blonde flyaways against a busy scene, and each situation has its own best technique. This method works most of the time; for the difficult cases, PHLEARN has a full PRO course on cutting out hair. Tomorrow we take a cut-out subject and match its light and color to a new background.
Related Tutorials
Master Photoshop, Lightroom and Photography
Join PHLEARN PRO for $12.99 a month or $99.99 a year. Cancel anytime, with a 100% money-back guarantee.





