download sample images
description
Layers are the backbone of Photoshop. Once you understand how they work, you’ll be well on your way to Photoshop mastery.
Learn how Layers are organized within the Layers Panel, how to edit without damaging your original photos, and how to show and hide parts of any Layer with Layer Masks.
This is Day 3 of our 30 Days of Photoshop series. Follow along with all 30 episodes as we explore the magic of Photoshop together!
watch next
30 days of photoshop

Sign up to receive email updates to keep you going, sample images to follow along, and a printable calendar to keep track of your progress!
Share
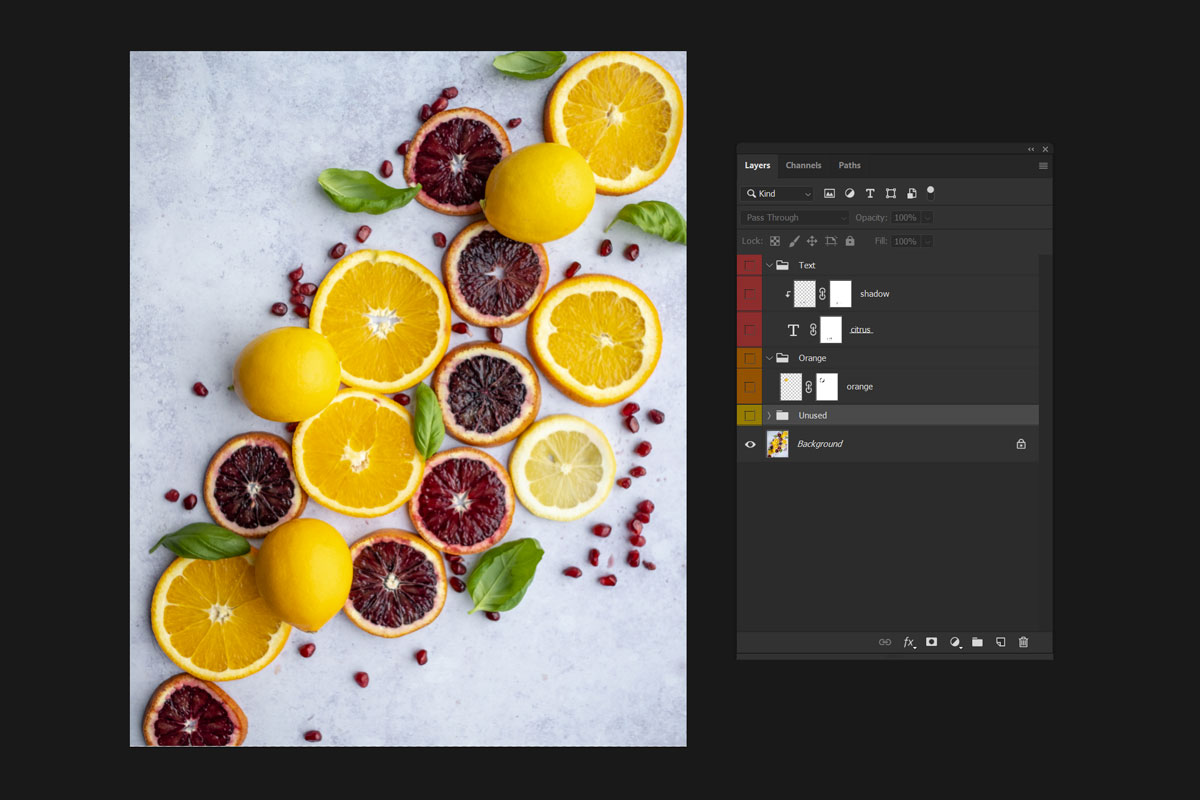
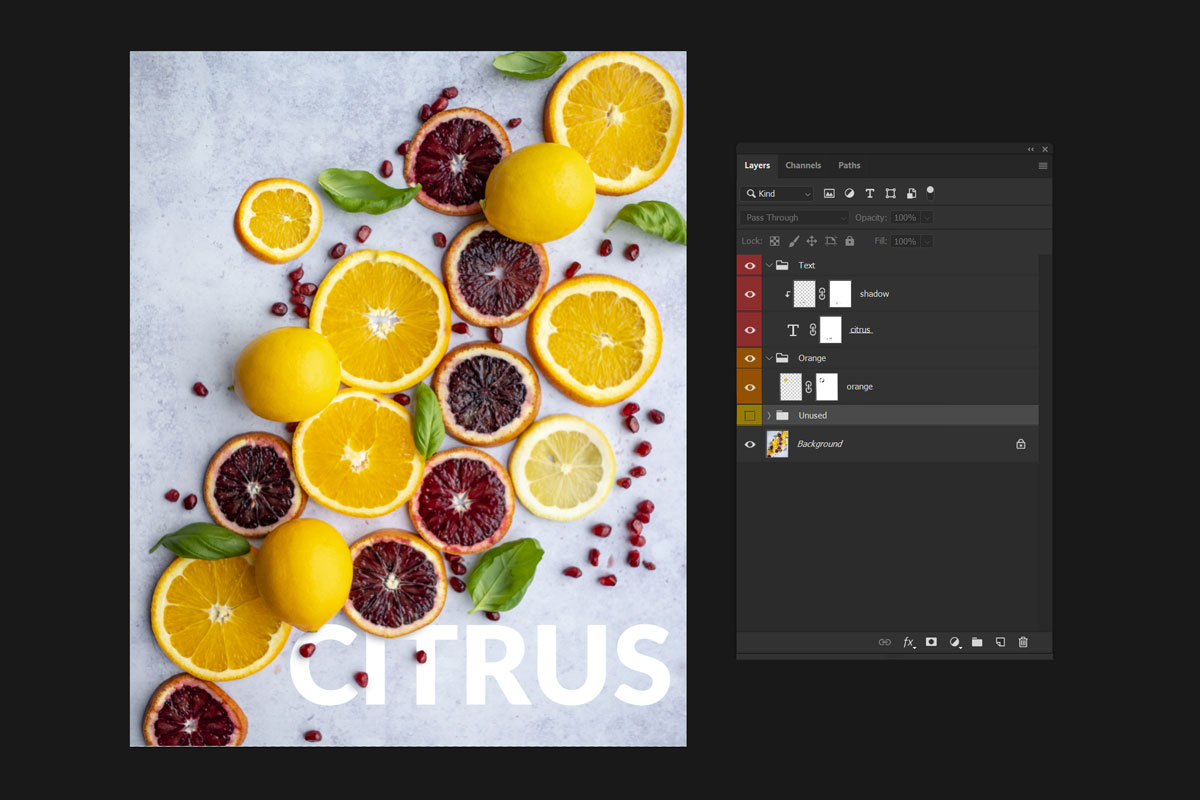
AFTER
BEFORE
The Backbone of Photoshop
The Layers Panel
Whenever you open an image or create a new Layer in Photoshop, they will appear within the Layers Panel. The Layers Panel displays a cross-section view of how all of your Layers are stacked on the canvas.
For example, if you open up an image and then, using the Rectangle Tool, create a large white rectangle on a new Layer, the Layers Panel would show your background image at the bottom and the new white rectangle just above it. If you were to click and drag the new rectangle Layer to the bottom of the panel, you’ll see it disappear from the canvas. That’s because the original image is now on top of it in the Layer stack. The rectangle still exists within the project, it’s just covered up.
This illustrates the fundamentals of how Layers are organized in Photoshop. Every Layer exists within a stack–Layers higher in the stack will appear on top of everything that’s below them and vice versa. In most cases, when you’re editing one image, you’ll be building up multiple Layers (sometimes hundreds!) on top of the original image, all working together to achieve the effect you want.
It’s also important to note that when you create a new Layer, you can edit it independently from every other Layer in a project. Again let’s say you create a white rectangle above the original photo. You can move, scale, transform, and add filters to the rectangle without affecting the image below.
Working Non-Destructively with Layers
The most important habit to develop as you learn Photoshop is working non-destructively. A non-destructive workflow makes it possible to disable or delete any edits you’ve made or even go back to the original image to start from scratch. This process will be your best friend as you create more complex projects or if you start working with clients who might request changes.
How do you do it? At it’s most basic, working non-destructively involves always working on a new Layer whenever you switch tools or switch the type of adjustment you’re making. Want to extend a background with the Brush Tool? Create a new Layer before you start painting. Need to remove some stray hairs? Create a new Layer and use the Spot Healing Brush Tool (make sure Sample All Layers is checked!) before you start removing strands.
Layers are powerful because they allow you to work on a single image by combining dozens of effects and changes. And each of those effects and changes can be adjusted, disabled, or removed independently of one another. This provides an amazing amount of control and flexibility, helping you stay organized while never feeling locked in to any particular edit or adjustment.