

Download Assets
This tutorial includes 6 sample images. Downloads are free with a PHLEARN account.
- Free sample files with every tutorial on PHLEARN
- New tutorials published every week
- Unlimited downloads with your free PHLEARN account
description
Learn how to add a background texture to a portrait in Photoshop without letting it take over the subject. Several photographed textures come into the document, get scaled to the canvas, and are grouped so one black mask hides them all at once; painting white back in reveals them across the background and a little into the hair, but never on the face. Soft Light blends them into the image, then Levels tunes each one’s tone and color separately.
Enjoying This Free Tutorial?
We publish a new free tutorial every week, each one with sample images and PSDs you can download and follow along with. Sign up and they land straight in your inbox, along with early word on sales, events and subscriber-only offers.
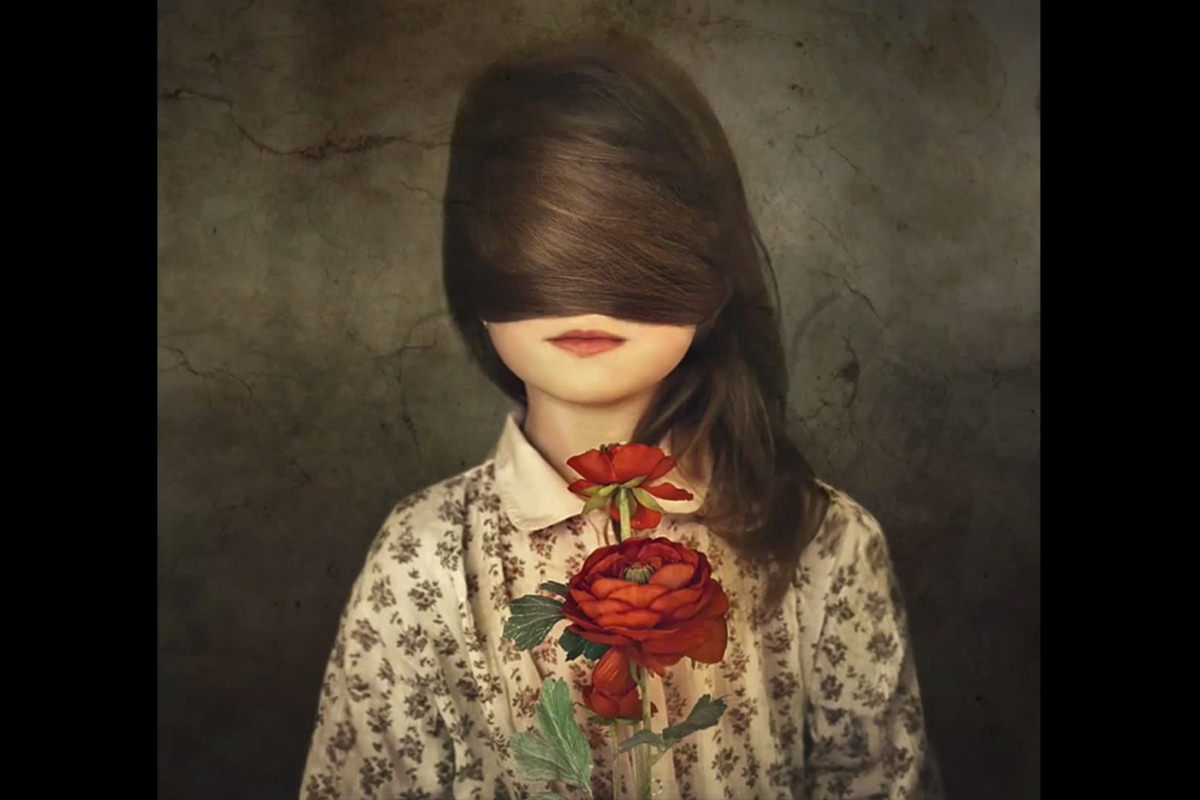
How to Add a Background Texture to a Portrait in Photoshop
A plain background behind a portrait can be transformed with photographed textures, layered in and blended so they add interest without overwhelming the subject. This tutorial brings several textures into a portrait, masks them out of the subject’s face, blends them with Soft Light, and adjusts each one’s tone and color individually.
Bringing Textures Into the Portrait Document
Several texture images get selected at once and moved directly into the portrait’s document to work with as a group.
-
Select Several Texture Images
Shift-click to select several texture images at once, such as six from a texture pack.
-
Move the Textures Into the Portrait Document
Drag the selected textures from their own document directly into the portrait document.
Scaling Down the Textures to Fit
Because textures don’t need to preserve exact proportions the way a person’s face would, they can be freely scaled to fit the canvas.
-
Open the Transform Tool
Press Cmd/Ctrl+T to bring up the Transform controls on a texture layer.
-
Link Width and Height Together
Click the chain link icon so width and height scale together, then drag a handle to resize the texture down to fit the canvas.
-
Repeat for Each Texture Layer
Scale each of the remaining texture layers down the same way so they all fit within the portrait’s canvas.
Grouping the Texture Layers Together
Grouping every texture layer keeps them organized and makes it possible to mask and adjust them all as a single unit later.
-
Select All the Texture Layers
Select every texture layer that was brought into the document.
-
Group the Layers Together
Press Cmd/Ctrl+G to group all the selected texture layers into a single group.
Deciding Where Textures Work Best
Textures read differently depending on the subject, so it’s worth deciding upfront whether they should cover the whole image or just the background.
-
Consider Full-Image Textures for Distant Subjects
Recognize that applying a texture across an entire image can give a nice artistic feel when the subject is small in the frame, such as someone far away in a field or in snow.
-
Avoid Full-Image Textures on Close Portraits
Decide against applying texture across an entire close-up portrait, since it tends to read as unwanted marks on a person’s face.
Why Portraits Need Texture Kept Off the Face
A texture that looks like an artistic overlay on a landscape or a distant figure reads very differently on a close-up face, where the same marks look like flaws in the skin rather than an intentional effect. Deciding in advance to keep texture off the face avoids having to redo the masking work later after noticing the problem.
Masking the Textures Off the Subject’s Face
A black layer mask on the texture group hides every texture completely, and painting white back in reveals them only where wanted.
-
Add a Black Layer Mask to the Group
Hold Option/Alt and click the Add Layer Mask button on the texture group to add a fully black mask, hiding every texture in the group.
-
Paint White Over the Background
Select a brush, set the foreground color to white, and paint over the background area to bring the textures back into view there.
-
Allow Some Overlap Onto the Subject
Paint white slightly past the edge of the subject into areas like hair, without concern about a small amount of overlap, while still avoiding the face itself. A soft brush at about 20% Flow lets just a hint of texture onto the hair.
Changing the Texture Layers’ Blend Mode
Switching every texture layer’s blend mode at once lets the textures interact with the underlying image instead of sitting on top as a flat, unconvincing overlay.
-
Select All the Layers Inside the Group
Open the group and Shift-click to select all the individual texture layers inside it.
-
Change the Blend Mode to Soft Light
Change the blend mode from Normal to Soft Light for all the selected layers at once.
-
Toggle Individual Layers On and Off
Turn each texture layer off and then back on individually to see the specific effect it contributes on its own.
Adjusting Each Texture’s Tone With Levels
A Levels adjustment applied directly to each texture layer fine-tunes how bright, dark, or subtle that individual texture appears once blended in.
-
Open Levels on a Texture Layer
Press Cmd/Ctrl+L on a texture layer to bring up its Levels adjustment.
-
Shift the Midpoint to Adjust Brightness
Drag the middle gray point slider left or right to make the texture’s effect lighter or darker without pushing it too far.
-
Adjust the White and Black Points as Needed
Move the white point darker or the black point lighter to reduce contrast, adjusting each texture individually until it blends in well.
-
Lower Opacity for a Subtler Effect
Reduce the layer’s opacity if the texture’s effect is too strong, keeping just a hint of it rather than an overwhelming amount.
Why Lowering Opacity Matters as Much as Levels Adjustments
Even after using Levels to tone down a texture’s brightness and contrast, the overall strength of the effect can still feel like too much once blended in. Lowering that layer’s opacity on top of the Levels adjustment is what turns an overwhelming texture into just a subtle hint of added interest.
Why Blend Mode Alone Doesn’t Replace a Layer Mask
Soft Light already keeps textures from fully hiding the subject beneath them, but even a subtle amount of texture crossing directly over a face still reads as an obvious flaw rather than an intentional artistic choice. Keeping the layer mask in place, rather than relying on blend mode alone, is what makes it possible to allow a touch of texture near the hair while still protecting the face completely.
Adjusting Individual Texture Color
Switching to an individual color channel inside the same Levels adjustment shifts a texture’s color to complement the rest of the image.
-
Open Levels and Switch to a Color Channel
Press Cmd/Ctrl+L on a texture layer and switch from the default channel to an individual color channel, such as Red.
-
Shift the Channel Slider to Adjust Color
Drag that channel’s slider left or right to add more of that color or its opposite, such as adding a touch of cyan to complement nearby greens in the image.
Why This Approach Works
Masking the texture group with a black mask and painting white back in is what makes it possible to keep every texture layer, mask, and adjustment fully editable rather than baking the effect in too early. Soft Light as a blend mode is what lets the textures react to the image’s own tones instead of sitting on top as a flat, obviously artificial layer. Adjusting each texture’s Levels and color individually, rather than treating them as a single flattened effect, is what makes several very different textures read as one cohesive, intentional look.
Final Thoughts
None of this requires expensive software or advanced retouching skill, just a handful of texture images, a layer mask, and some patience with Levels and opacity. Because the whole approach relies on masking and blend modes rather than anything baked into a specific texture, it works with any texture pack and any portrait, so it’s worth experimenting freely to see what feels right for a given image.
Quick Reference: Keys, Menus and Settings
- Bring in texturesShift-click, drag into the portrait, Cmd/Ctrl + T with the link icon on
- Group themCmd/Ctrl + G
- Hide them allAlt/Option-click the layer mask button, then paint white on the background
- BlendSelect the layers, Normal to Soft Light
- Tone each oneCmd/Ctrl + L, middle slider right to darken; lower Opacity
- ColorLevels > Red channel slider
- Over the hairSoft brush on the mask, Flow about 20%

Free Downloads
Follow Along With the Same Textures
Get the 6 texture images layered behind the portrait in the video, ready to mask, blend and tone behind your own photos. Free with a PHLEARN account.
Background Textures: Common Questions
Should textures go over the whole photo?
For a distant subject in a field or in snow, a texture over everything can look artistic. On a close portrait, keep it off the face, where it reads as spots and wrinkles.
How do I add several textures at once?
Shift-click to select the textures (six here), drag them into the portrait and press Cmd/Ctrl + T to scale them. Squishing them out of proportion is fine; they are textures, not faces.
Why group the textures?
Press Cmd/Ctrl + G so one mask covers all of them. Alt/Option-click the layer mask button for a black mask that hides everything, then paint white over the background.
How do I change the blend mode of every texture at once?
Open the group, Shift-click every texture layer and change Normal to Soft Light once. Toggle the layers to see what each one adds.
A texture brightens the photo too much. What do I do?
Press Cmd/Ctrl + L on that texture and drag the middle gray slider right to darken it or left to lighten it. Lower the opacity if it is still too strong.
Can I change a texture’s color?
Yes. In Levels, switch to the Red channel and drag its slider left or right. A touch of cyan here echoes the leaves in the photo.
Can the texture touch the subject at all?
A little. With Soft Light she isn’t covered up, so a soft brush at about 20% Flow on the mask lets a hint of texture onto her hair. Just keep it off her face.
Why not rely on Soft Light alone?
Even a soft texture over a face reads as blemishes, unless that is the look you want (Aaron jokes it would suit a zombie). The mask keeps the face clean.
Are the textures free?
Yes, with a free PHLEARN account. You get 6 sample images: the six textures layered behind the portrait in the video.
From the Magazine View all
Stories, interviews and guides for photographers, new every week.
 EditingHow to Color Grade Photos in Photoshop and LightroomCorrect the photo first, then put color in the shadows, midtones and highlights. Aaron Nace on the order, the tools and skin.
 BusinessHow to Compete With AI: Give Your Clients MoreEveryone has the same tools now, and your clients know it. The way to compete is to give them more.
 EditingLightCraft vs Lightroom: I Edited the Same RAW Files in BothThe free clone on the same RAW files: what matches, what breaks and who should switch.
Master Photoshop, Lightroom and Photography
Join PHLEARN PRO for $12.99 a month, or $99.99 a year (save 36%). Cancel anytime, with a 100% money-back guarantee.





