Download Sample Images
Click the link below to download the sample images and follow along with this tutorial.
DownloadTutorial Description
Whether you need to fix the exposure of a photo, brighten up a subject, or add some creative coloring, Curves Adjustment Layers can do it all. Follow along as Aaron demonstrates how you can use Curves Adjustment Layers in combination with Layer Masks and the Brush Tool to make precision adjustments to highlights, shadows, and color in any photo.
Curves are just one of many tools that can help you create extraordinary images. PHLEARN PRO gives you instant access to over 140 in-depth tutorials, teaching you everything there is to know about Photoshop, Lightroom, and photography.
You can learn to master every single adjustment layer, using them to color photos, create lighting effects, blend images together, and more! Or start with a strong foundation and learn the fundamentals of how Layers and Groups work in Photoshop.
Curves Adjustment Layers
Curves are a precision, do-it-all tool that can help fix a wide variety of photo issues and can also be used to create beautiful creative effects. While the Curves dialog can be a bit intimidating at first, we’re sure that after this tutorial, you’ll be using them on almost every one of your edits going forward.
Curves Adjustment Layers work in a very similar way to standard Layers. They sit in the Layer stack and their effects will display on top of every layer below. They also come with a Layer Mask, which you can use to adjust the visibility of the the Curves adjustments.
So now that we know that, what do Curves do and how do they work?
Highlights & Shadows
The basic function of Curves is the ability to make adjustments to the highlights, midtones, and shadows of an image. Opening the Curves dialog, you’ll see a histogram (a graph which displays where the light information is). The left side represents the shadow areas of the image and the right side represents the highlights. Lastly, you’ll notice a straight line that runs from the bottom left corner to the top right corner.
When you click anywhere on the line, a control point is created which can be moved up or down. Move the point up and the image gets brighter. Move it down and the image gets darker.
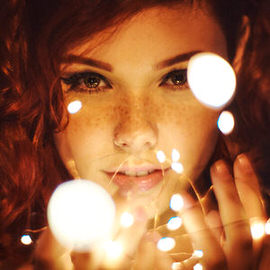
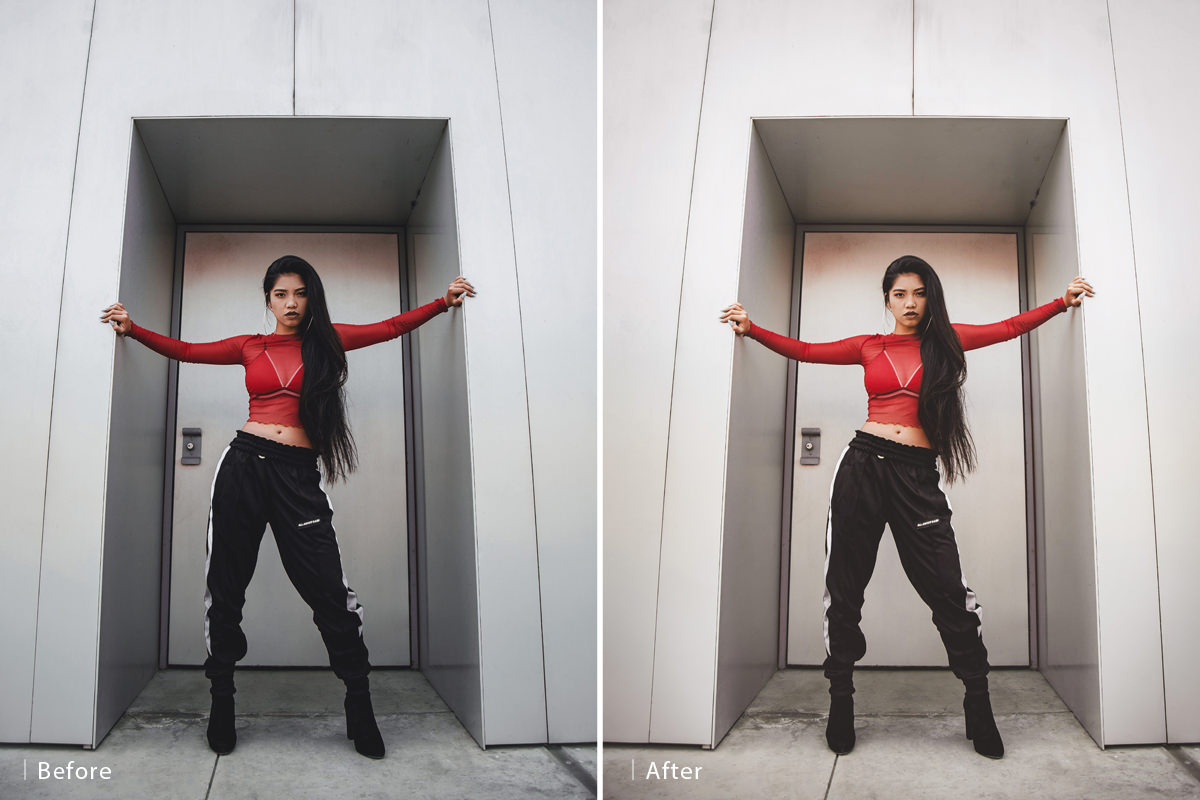
In our example, the goal is to make our subject a little brighter which will help make sure she draws the most attention in the photo. We can do that by creating a Curves Adjustment Layer and, within the Curves dialog, place a point in the center of the line and move it up slightly until we get an exposure that we like.
There’s a problem here though; the entire image is getting brighter. How do we make it so that the Curves Adjustment Layer only affects the subject? Easy! Layer Masks.
Any Adjustment Layer will come with a Layer Mask that’s visible and ready to go. Simply select the Layer Mask of the Curves Adjustment Layer and Invert it by hitting CTRL or CMD + I. This will turn it black, making the Curves Layer completely invisible. Now we can use the Brush Tool – with a soft Brush and a low Flow – to paint white on the Layer Mask in only the areas that we want to be brighter.
Color Adjustments
It doesn’t stop there! Curves can do some pretty heavy lifting with color as well. Within the Curves dialog above the histogram, there’s a dropdown box labeled ‘Channels’. By default it’s set to RGB. This will affect highlights and shadows, but will not affect color. If you click on the arrow, you’ll see options for Red, Green, and Blue.
By making adjustments to the Curves within an individual color channel, you can increase or decrease the presence of colors in an image. For example, if you choose the red channel and then create a point in the center and move it up, you will see the image become more red. If you lower the point within the red channel, the image will look more cyan.
The other channels work the same way. If create a point and move it up, you will introduce more of the same color as the channel into the image. If you move it down, you will introduce that channel’s complementary color in the image.
With all of this in mind, you can brighten up a subject’s face and warm up skin tones, all with Curves Adjustment Layers and without affecting unwanted areas of a photo. That’s the amazing power of Curves!