
Download Assets
This tutorial includes 2 sample images, 2 sample PSDs and 1 PDF guide. Downloads are free with a PHLEARN account.
- Download the sample images and PSDs from every free tutorial on PHLEARN
- New free tutorials published every week
- One free account — sign up once, then download anything
Free PDF Guide · 4 Pages
This Tutorial as a Step-by-Step PDF
Every step from the video in order: Window > Channels, finding the channel with the most contrast, duplicating it, Levels on the copy, Cmd/Ctrl-click to load the selection, Fill with white, dragging the clouds into the other document, the unlinked mask, and the duplicated-channel color effect with its screenshot workaround. Keep it next to your keyboard.
description
Color channels are three greyscale images stacked together, and reading them gives you selections nothing else can make. Master cutting out objects with soft edges, like clouds or hair, by leveraging image contrast within channels. Plus, discover a unique method to create artistic color effects that are impossible with standard adjustments.
Enjoying This Free Tutorial?
We publish a new free tutorial every week, each one with sample images and PSDs you can download and follow along with. Sign up and they land straight in your inbox, along with early word on sales, events and subscriber-only offers.
Image Source
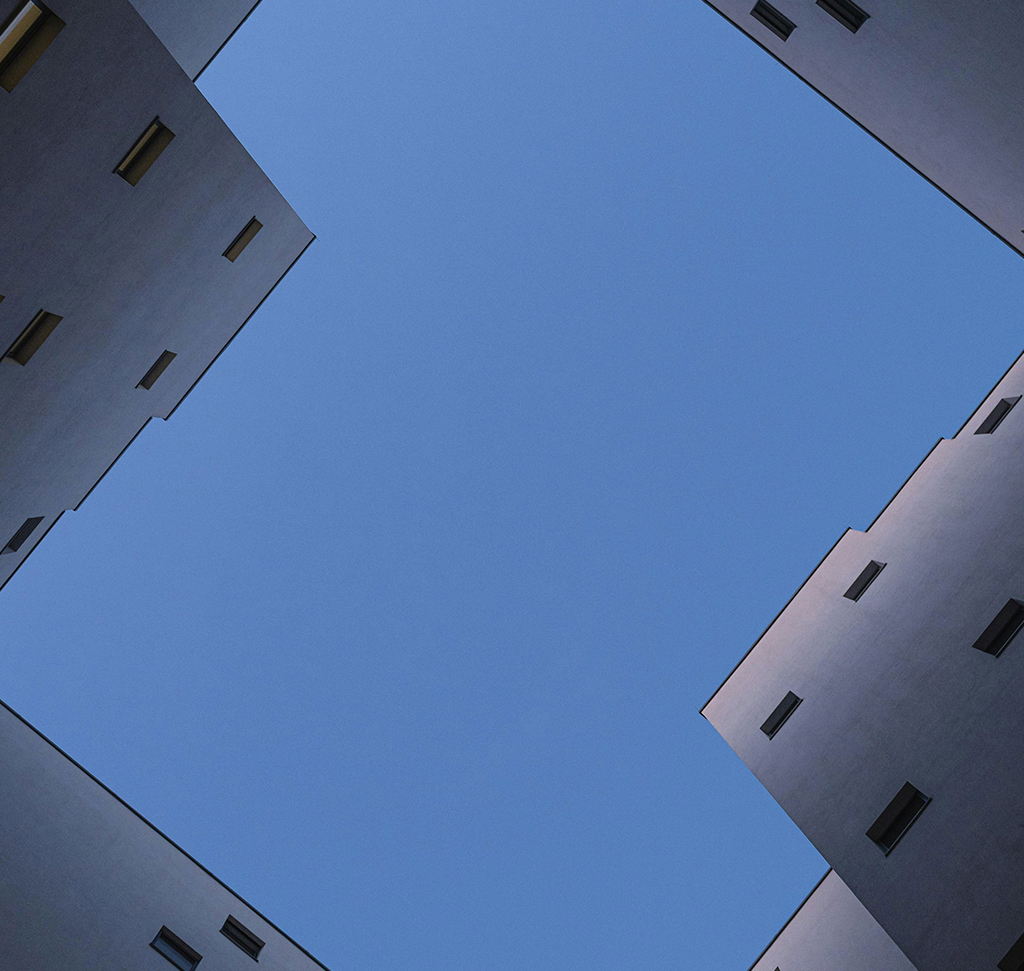
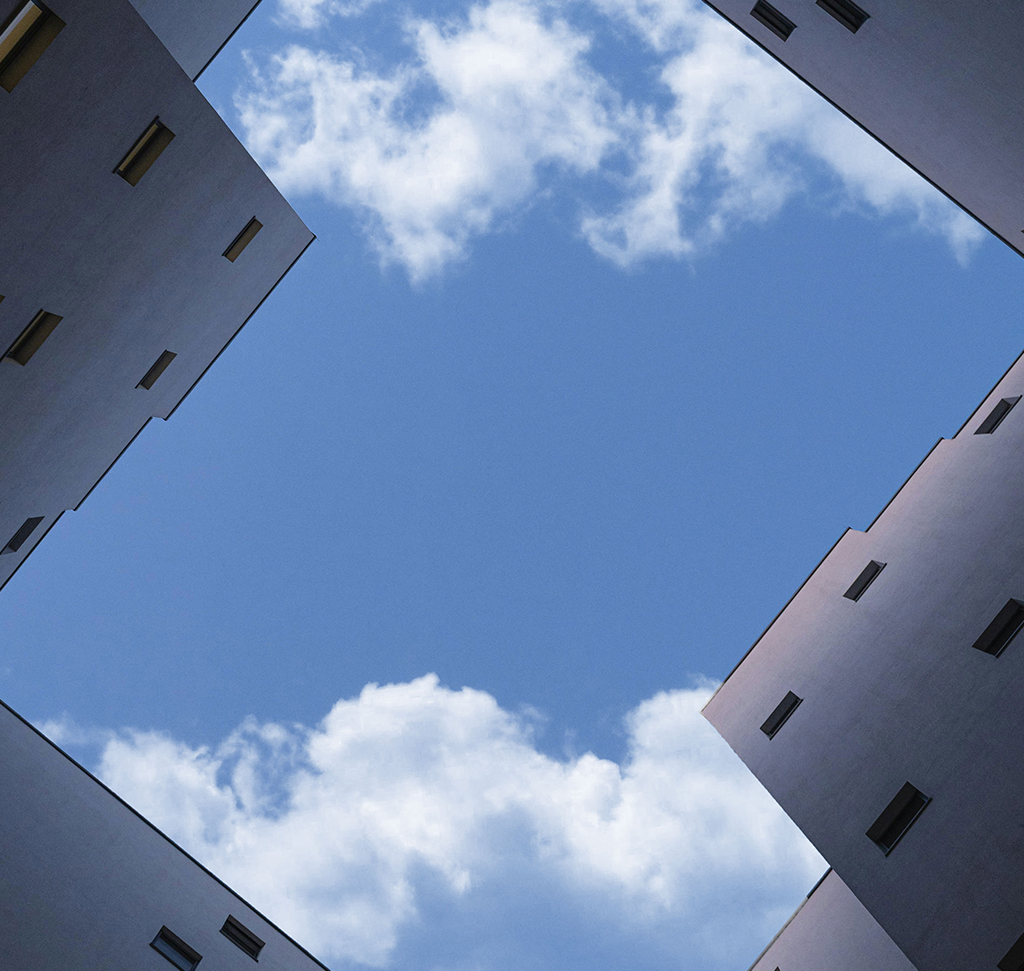
Understanding Color Channels in Photoshop
Every RGB image in Photoshop is three grayscale images stacked together — one for red, one for green, one for blue. The Channels panel lets you look at them individually, and in each one, brightness represents how much of that color is present.
That has one enormously practical use: making selections of things no selection tool can handle — clouds, hair, fur, smoke, anything with soft or intricate edges. It also enables color effects that cannot be produced any other way.
Reading the Channels
Open Window ? Channels. You will see RGB (all three combined) plus Red, Green and Blue individually. Click each one.
On a photograph of white clouds against blue sky:
The red channel shows the sky very dark — there is little red in blue sky — while the clouds stay bright. The green channel shows the sky mid-dark. The blue channel shows the sky very bright, because that is where the blue lives.
What you are looking for is contrast. Whichever channel shows the greatest separation between your subject and its background is the one to use. Here that is red — bright clouds, dark sky.
Turn a Channel Into a Selection
-
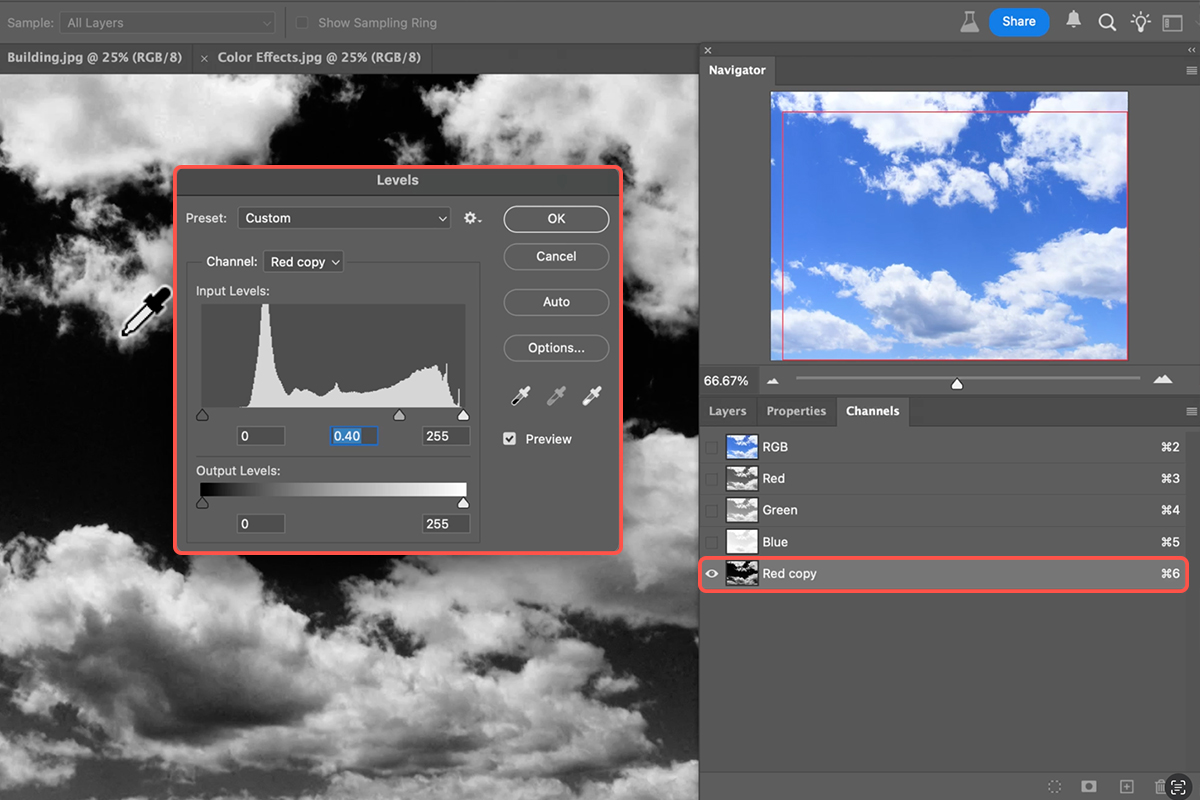
Duplicate the channel
Drag it onto the + icon at the bottom of the panel. Never work on the original channels — editing those alters the actual image. You want a copy, which is just a stored selection.
-
Push the contrast with Levels
Press Ctrl+L or Cmd+L and drag the sliders until the subject is close to white and the background close to black. You are not making a photograph look good — you are making a mask, and extreme contrast is the goal.
-
Load it as a selection
Hold Ctrl or Cmd and click the channel thumbnail, or click the dashed-circle icon at the bottom of the panel.
The rule to remember: white areas become selected, black areas do not, and grays become partially selected. That partial selection is exactly why this works on soft edges — a wisp of cloud that is 40 percent bright is selected 40 percent, which no lasso can express.
Fill the Selection
Return to the Layers panel with the selection active, create a new empty layer, and go to Edit ? Fill and choose White. Deselect with Ctrl/Cmd+D.
You now have the clouds on a transparent background with every soft edge intact — no fringing, no jagged boundary, no lost detail.
Use It in Another Image
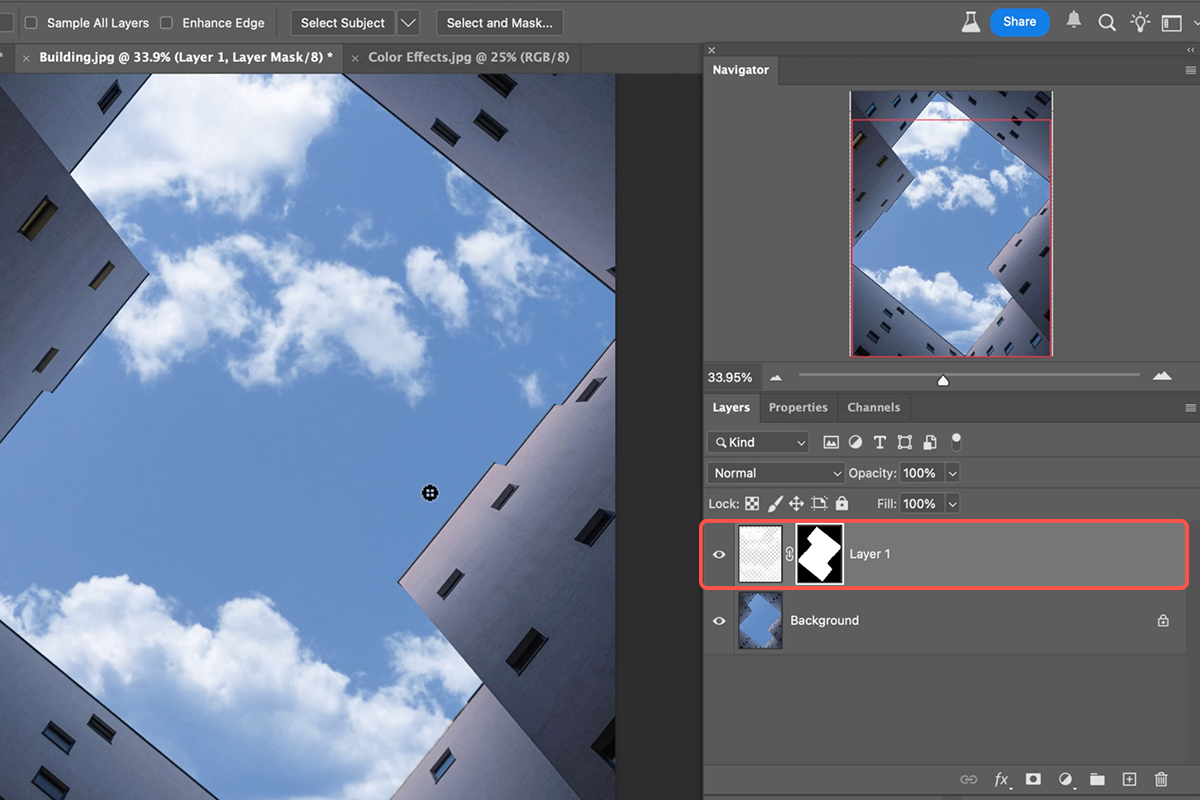
Drag the cut-out layer onto a different document. Press Ctrl/Cmd+T and scale it into position using the W and H fields.
To confine it to a particular area — the sky behind a building, say — select the background layer, use the Quick Selection Tool to select that region, then click the layer mask icon with the cloud layer active.
Unlink the Mask to Reposition
Click the chain icon between the layer and mask thumbnails to unlink them. Now the clouds can be moved, scaled and rotated freely while the mask stays fixed to the area it belongs to — letting you find the best arrangement without rebuilding the mask.
When to Reach for Channels
Whenever you need contrast between subject and background, and the edge is too soft or intricate for a conventional tool.
Light hair on a dark background. Dark hair on a light background. Fur, smoke, water spray, fine branches against sky.
And it is not only about brightness — color works too. Blonde hair against a red backdrop has almost no contrast in a normal view, but in the blue channel the red background goes very dark while the hair stays light, because red contains no blue. That is the real skill here: not memorizing which channel to use, but checking all three and picking whichever separates your subject best.
Channels for Color Effects
A more creative, more niche use — but it produces results nothing else in Photoshop can.
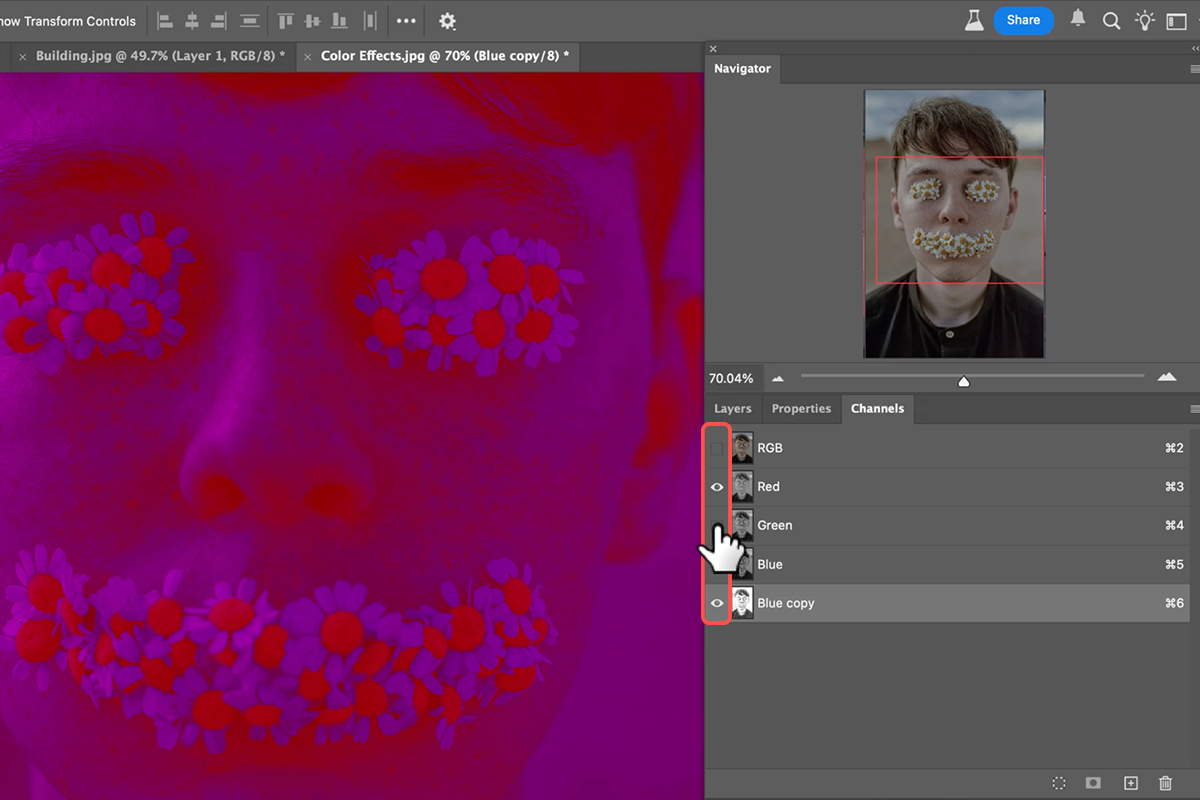
Duplicate a channel, then run Levels on the copy while the other channels remain visible. Because the duplicate is now contributing color information that no longer matches the original, you get intense, unusual color shifts with real control over where they land.
Duplicate the blue channel and push its levels and strange reds appear in the shadows. Duplicate green and pull the other way for something else entirely. Toggle individual channels on and off to compound the effect.
Always on duplicates. Because the originals are untouched, hiding your copies returns you to the unaltered image at any point.
Saving a Channel Effect Is Awkward
Worth knowing before you invest time in one: Photoshop will not export what you are seeing.
Export a channel effect and you get the original image back, because Photoshop has no way to record “show blue and the blue copy, hide everything else” as an output state. It assumes you want all channels exported.
The workaround is inelegant but effective. Press F for full screen and Tab to hide the panels, zoom in as far as resolution allows, and take several screenshots covering the image in sections. Then use File ? Automate ? Photomerge, set to Auto, and select those screenshots. Photoshop stitches them back into one high-resolution file you can export normally.
This applies only to channel color effects. A cut-out made with channels is an ordinary layer with an ordinary mask and saves like anything else.
Summary
Channels show how much red, green and blue exists at every point, rendered as brightness. Check all three, take the one with the most separation, duplicate it, crush the contrast with Levels, and load it as a selection — white selected, black not, gray partially.
It remains the best method in Photoshop for soft and intricate edges, and it has been for decades. The AI tools have not replaced it, because none of them handle partial transparency as well as a channel-derived mask does.
Quick Reference: Keys, Menus and Settings
- Open the panelWindow > Channels; click Red, Green or Blue to see each one
- Pick a channelThe one with the most contrast between the object and its background (Red for white clouds on blue sky)
- Never edit the originalDrag the channel onto the plus icon to make a copy
- Push the contrastCmd/Ctrl + L on the copy, drag the midpoint
- Load it as a selectionCmd/Ctrl-click the channel thumbnail (or the dotted-circle icon); light areas are selected
- Cut out the cloudsBack to Layers, new layer, Edit > Fill > White, Cmd/Ctrl + D
- Move themDrag the layer onto the other document’s tab; Cmd/Ctrl + T to scale; mask with a quick selection of the sky; unlink the mask to reposition
- Color effectDuplicate a channel, Levels on the copy, turn channels on and off; to save it, screenshots at 100% then File > Automate > Photomerge
No AI, no generative credits.
Free Downloads
Follow Along on the Same Photos
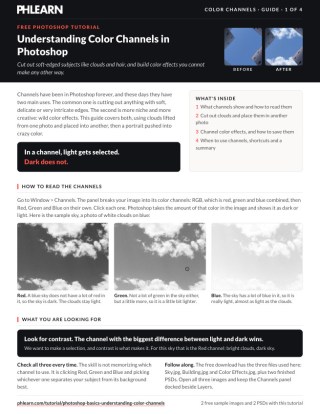
Get the cloud and building images, the flower photo for the color effects, both PSDs and the PDF guide. Free with a PHLEARN account.
Color Channels: Common Questions
What are color channels?
The red, green and blue layers that make up the image, shown as grayscale in the Channels panel. Where a color is strong the channel is light; where it’s weak the channel is dark. A blue sky is bright in Blue and dark in Red.
Why use them to make a selection?
Soft edges. Clouds, hair and fur keep every bit of their detail because the selection comes from the pixels themselves, not a brush or an AI guess.
Which channel do I pick?
The one with the most contrast between the thing you want and its background. For white clouds on blue sky that’s Red. Blond hair on a red background would be Blue.
Why duplicate the channel first?
Editing the original changes the photo’s colors. Work on a copy, push its contrast with Levels, and the image stays intact.
How do I turn the channel into a selection?
Cmd/Ctrl-click its thumbnail. Light areas are selected, dark areas aren’t. Then go back to Layers, make a new layer and fill the selection with white for a clean cut-out.
How do I get the clouds into another photo?
Drag the layer onto the other document’s tab, scale it, and mask it with a quick selection of that photo’s sky. Unlink the mask from the layer to slide the clouds around inside it.
What’s the color effect trick?
Duplicate a channel, run Levels on the copy and switch channels on and off. The shifts between channels make colors Photoshop can’t produce any other way. It’s for art, not accurate portraits.
Why doesn’t the color effect export?
Export always writes the normal RGB image. The workaround in the video: full screen, zoom in, take screenshots of the sections, then File > Automate > Photomerge to stitch them and export that. The cloud composite saves normally.
Are the sample files free?
Yes, with a free PHLEARN account. You get both sample images, both PSDs and the PDF guide.
Master Photoshop, Lightroom and Photography
Join PHLEARN PRO for $12.99 a month or $99.99 a year. Cancel anytime, with a 100% money-back guarantee.





