
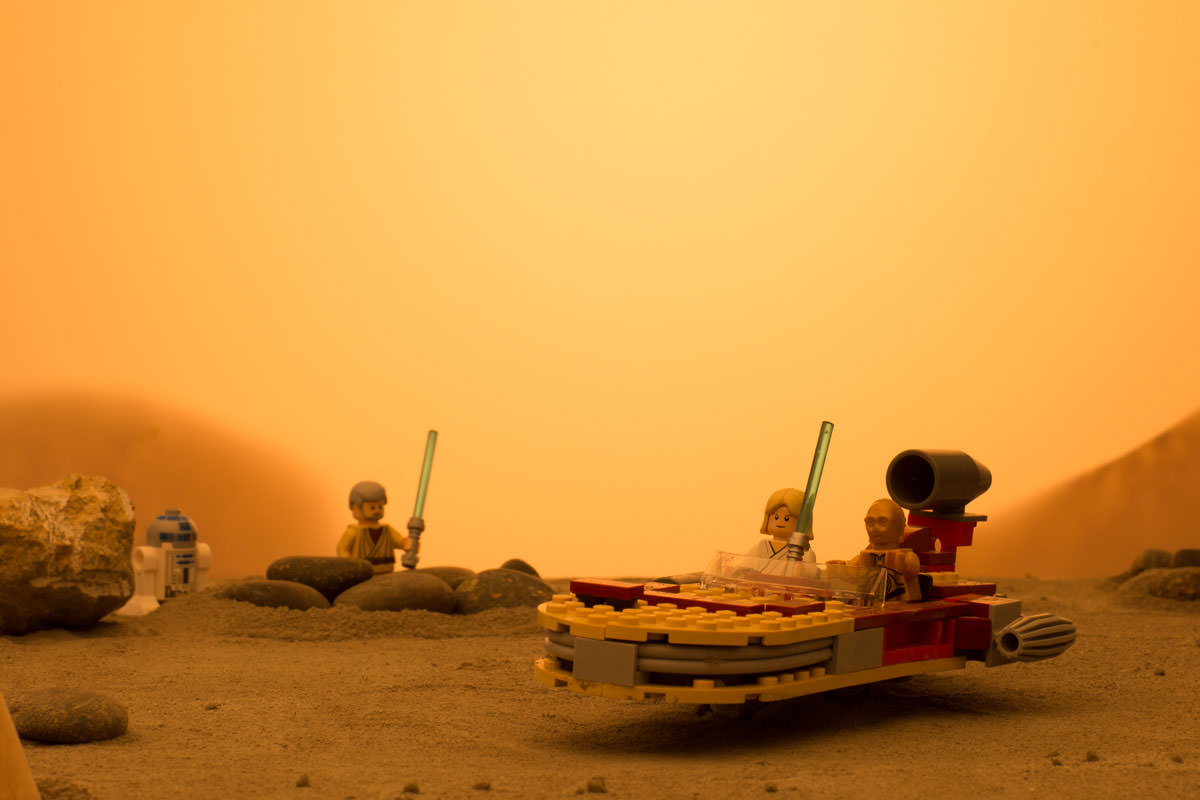

SHOT WITH AN APERTURE OF f/11
SHOT WITH AN APERTURE OF f/1.2
Download Sample Images
Click the link below to download the sample images and follow along with this tutorial.
DownloadTutorial Description
Photography is both an art and a science. When you can combine your instincts and creativity with a solid technical understanding of the craft, you will find yourself taking great images more often. And while creativity is a difficult thing to teach, anyone can learn the fundamentals of how a camera works. As you master these fundamentals, you should find yourself more well-equipped to discover how exactly you want to express your ideas.
LEGO are very similar. So what better way to teach the principles of the photography than by using LEGO to recreate our favorite scenes from Star Wars?
Allow me to answer that. There is not a better way.
We begin our adventure with an explanation of aperture.
Everything You Need to Know About Aperture
Exposure
Before we talk about aperture, we need to understand a little bit about exposure. Exposure is simply the amount of light that hits your camera’s film or sensor to record an image. You can control the amount of light in a couple of different ways and adjusting your aperture is one such method.
Light enters through the front of your camera through an opening in the lens. This opening is usually controlled by a mechanism called an iris. Think of the iris in your eyes. Your iris (and pupils) expand at night to help capture as much light as possible to help you see better in the dark. If you’re outside in the sunlight where there is an abundance of light, your iris will contract to reduce the amount of light entering your eye.
Similar to the iris of your eye, a lens can change the size of the opening to let different amount of light through into the camera. A larger opening allows more light and a smaller opening reduces the amount of light hitting your sensor. When you change your aperture, you’re simply changing the size of this opening.
Fraction Action
If you look at a lens, you’ll notice that different apertures are each represented by a number, usually written like f/2.0 or f/4.0. By replacing the “f” with the number 1, you’ll notice that these numbers are actually fractions.
f/2.0 is actually 1/2 (or 0.5)
and
f/4.0 is 1/8 (0.25)
Looking at it this way, we can see clearly that 0.5 is greater than 0.25 – so f/2.0 represents a larger opening in the lens when compared to f/4.0.
Understanding that these are fractions is key to making sense of one of the more confusing aspects of aperture – that a SMALLER aperture number, like f/2.0, represents a LARGER opening in the lens, therefore more light will enter the camera.
The Aperture Affect
Aperture is the primary way photographers can get a shallow depth of field, or more simply put, getting a background that is soft and blurry. Shooting with smaller aperture numbers like f/1.2 and f/1.4 will produce images that have much more out of focus in front of and behind your subject. Imagine you’re taking a portrait and you’re focused on the eye of your subject. At f/1.2 their eye would be in focus but their ear, since it’s slightly behind their eye, would be out of focus.
Shooting at larger aperture numbers has the opposite effect – more of your image will be in focus and your background/foreground will be less blurry. If you took the same portrait shot at f/11, your subject’s eyes and ears would both be sharp and in focus.
So remember, smaller apertures numbers will create a shallow depth of field, meaning less will be in focus behind and in front of your subject. Larger aperture numbers will keep more in focus and make your foreground and background less blurry.
Fast & Slow
Photographers will often refer to the “speed” of a lens or shooting with a “fast” lens. This means that the lens has a large maximum aperture – or an aperture that opens up very wide to let a lot of light in (like f/1.2 or f1.4). So what makes it fast? Well, the speed actually refers to the aperture’s relationship to the camera’s shutter speed. We’re going to get into shutter speed in another tutorial but to quickly summarize, it’s the length of time that the shutter stays open to capture light coming in through the aperture. Let’s use eyes as an example again. If you keep your eyes closed, open them for exactly one second, and then close them again, that’s the same thing as a shutter speed of 1 second (you’re let 1 seconds worth of light into your camera). The longer your shutter speed is open, the more light enters your camera. The shorter (or faster) the shutter speed, like 1/800, the less light enters your camera.
Shooting with a more open aperture, like f.1/2 which allows a lot of light into your camera, means you don’t have to let as much light in with your shutter. Now you can use a faster shutter speed (over 1/100th of a second) which will allow you capture motion without very little blur. Slower shutter speeds (less than 1/60) will generally result in motion blur if something in your scene is moving.
So a fast lens, like one that can open to f/1.2, is a lens that lets a lot of light into the camera, allowing you to shoot at faster shutter speeds.


