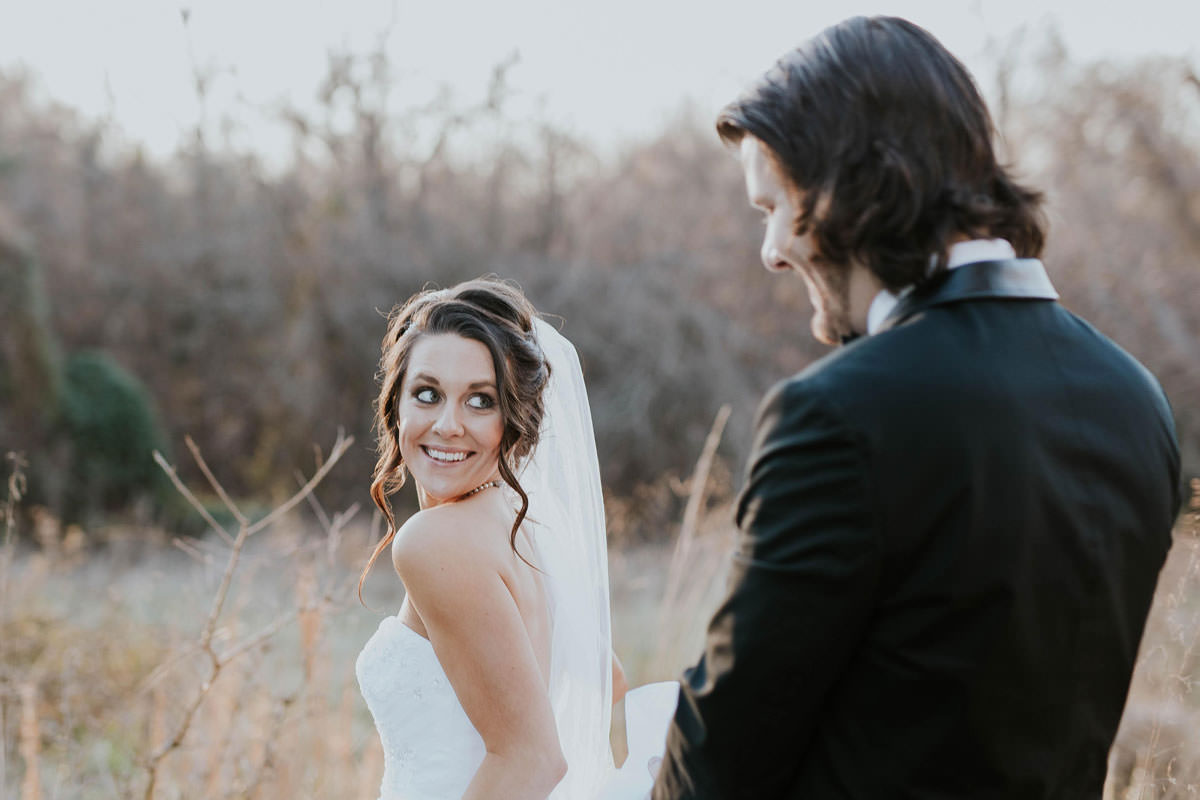


ORIGINAL
SHALLOW DEPTH OF FIELD EFFECT
Download Sample Images
Click the link below to download the sample images and follow along with this tutorial.
DownloadPhotoshop Background Blur Tutorial Description
Having a soft, out-of-focus background is an extremely effective way of drawing the viewer’s eye to your subject and it’s also a highly sought after look that should be a part of every photographer’s skillset. As always, the best way to do this is in-camera. So when you’re going for this look, try using a lens with a wide maximum aperture – like a 50mm f/ 1.2 or f/ 1.4 which are both fantastic for shooting portraits with a shallow depth of field.
Sometimes though, you may not have the right lens or you’re not able to shoot that wide open because of lighting conditions. This is where Photoshop can save the day and perfectly blur the background of any image.
Creating a Realistic Depth of Field Effect in Photoshop
This technique involves making an accurate selection of the subject(s) in the photo, duplicating them, removing them from the original background, blurring the background, and then placing them back into the image. It does take a bit of time but the effect is realistic and can easily make an image into one that your client will love!
Step-by-Step Background Blur Tutorial
Download the Sample Images
DownloadOpen the Samples Images in Photoshop
First, place the how_to_create_a_dreamy_blurred_background_in_photoshop.jpg into Photoshop by going to File and Open… or by dragging and dropping the files into the workspace.
Sample Edit: Applying Gaussian Blur
Duplicate the Background layer by hitting CMD or CTRL + J on the keyboard or by clicking and dragging the Background layer to the New Layer symbol at that bottom of the Layers Panel to duplicate the layer.
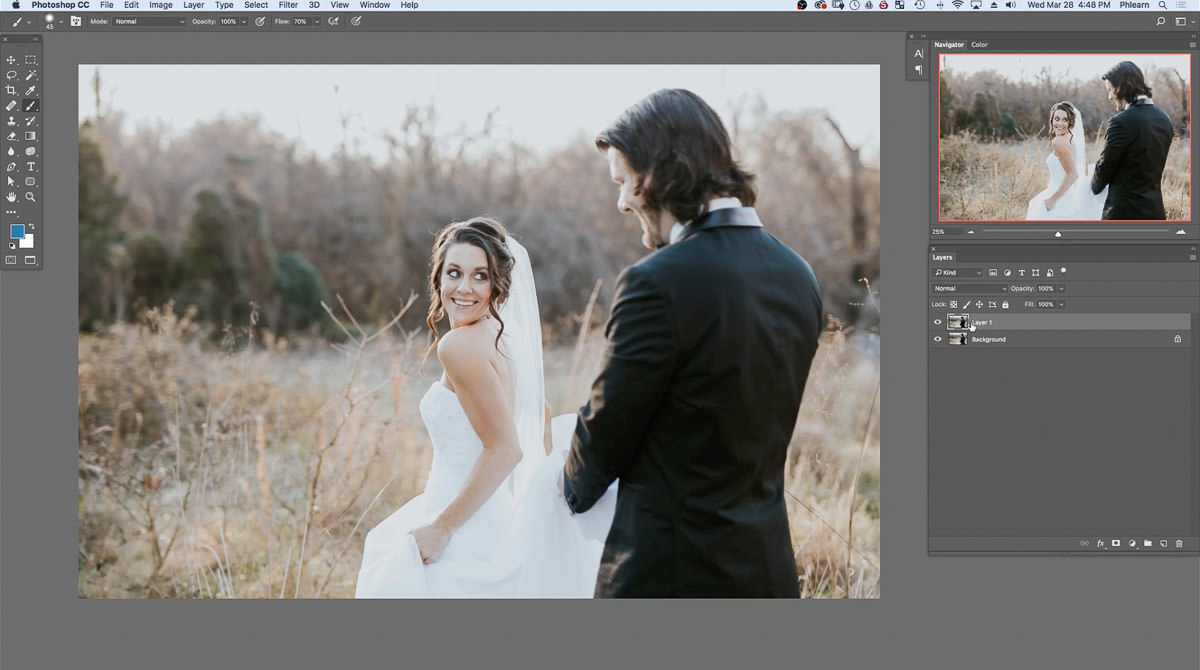
The New Layer symbol is identified by a square with the folded corner, which is located right next to the trash bin.
The duplicate layer should appear as Layer 1 in the Layers Panel.
At the top of the workspace locate Filter and go down to Blur.
Within Blur, select Gaussian Blur….
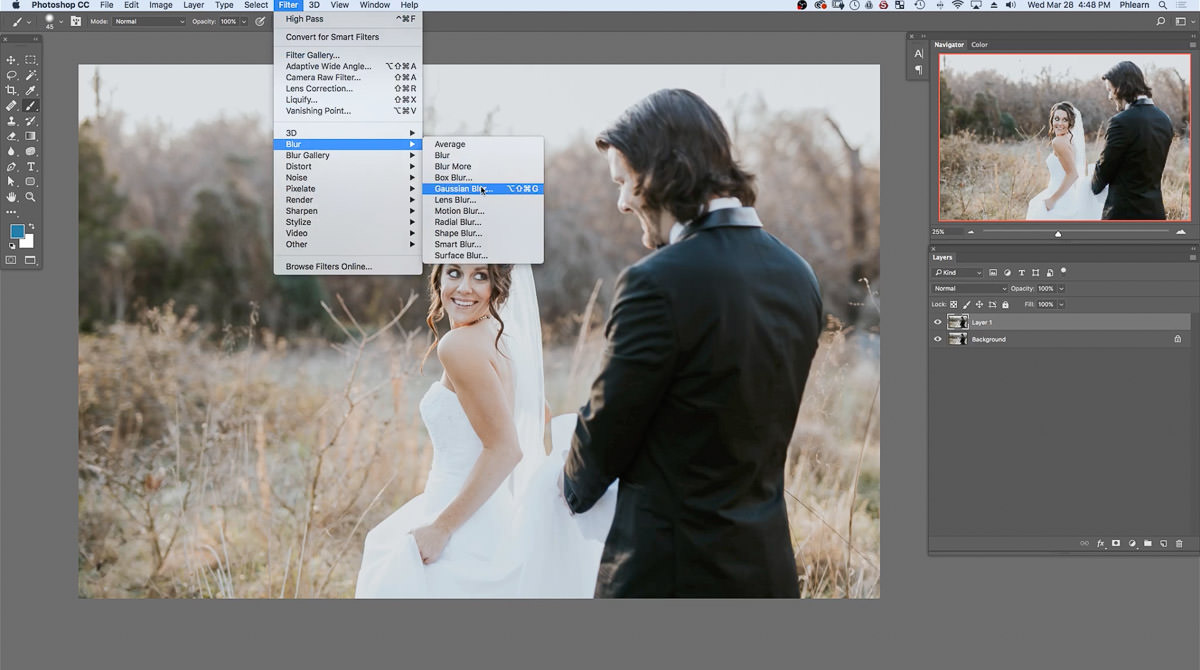
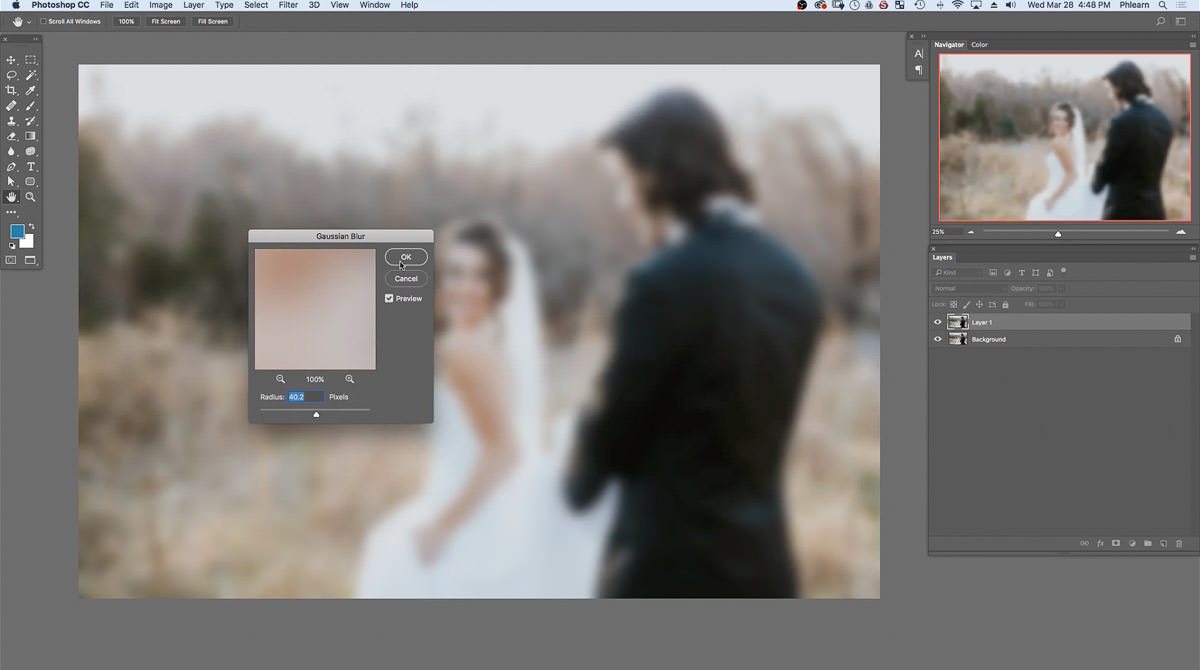
Once selected, the Gaussian Blur window will appear.
Notice how a zoomed in preview of the image with the Gaussian Blur effect is presented. This preview allows the current settings within the window to be previewed before applying to the actual image.
Located the Radius and Pixels slider beneath the preview of the image.
By moving the Pixels slider to the left or right the Gaussian Blur effect increases and decreases.
Position the Radius to 40.2 and hit OK.
Sample Edit: Extended Blur
Notice how the Gaussian Blur not only affected the background but the subjects as well.
Locate the top of the Layers Panel where the Opacity is located.
While Layer 1 is selected, lower and increase the Opacity.
As the Opacity is adjusted, notice how the Gaussian Blur extends past the main subjects.
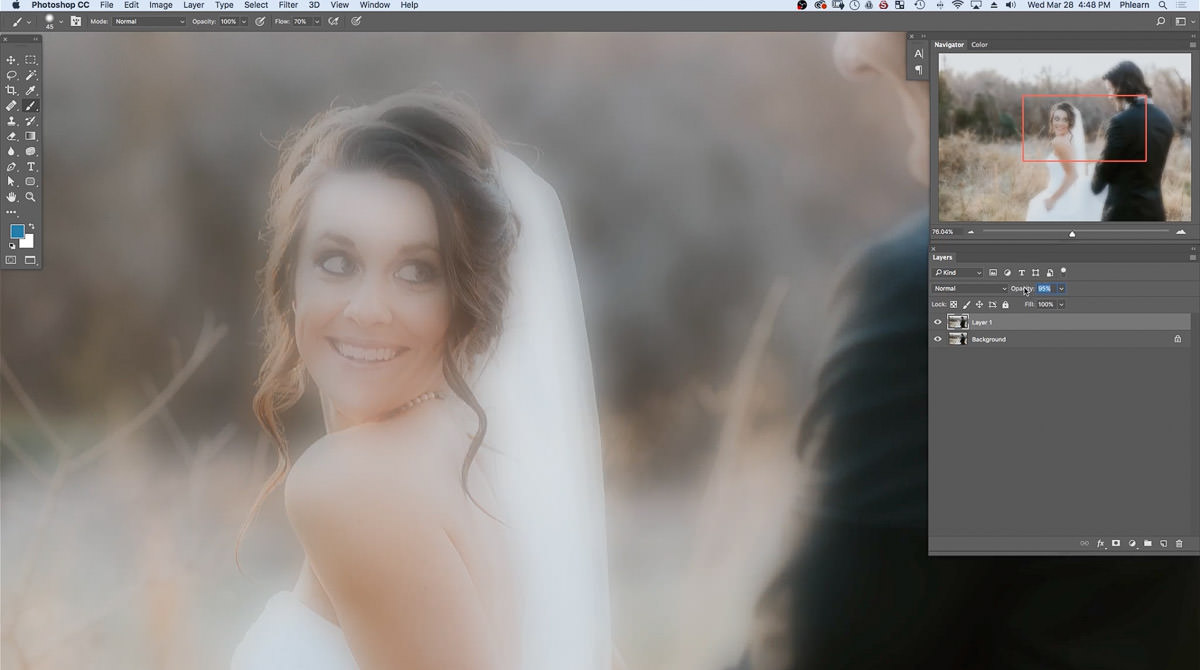
Since the blur around the main subjects extends past the individuals, applying a blur a different way is more advised.
Sample Edit: Applying A Blur with A Layer Mask
For examples, create a layer mask for Layer 1.
To create a new layer mask, locate the bottom of the Layers Panel.
Select the symbol with the rectangle with a circle in the middle. This symbol represents the Layer Mask.
If black is set as the foreground color, hit CMD + Delete or CTRL + Backspace on the keyboard to fill the layer mask for Layer 1 black.
If black is not already selected as the foreground color, locate the bottom of Tool Panel. Notice how there are two colored boxes. The color on top represents the foreground color and the color behind it represents the background color.
Locate the smaller two colored boxes beneath the foreground and background colors.
This is the Default Foreground and Background Colors button.
Simply click on the symbol or hit D on the keyboard.
Notice how the foreground and background colors are white and black.
Hit X on the keyboard to change the foreground to black.
Now, hit CMD + Delete or CTRL + Backspace on the keyboard.
The layer mask for Layer 1 will now be filled in with black.
Now, hit X on the keyboard to switch the foreground color to white.
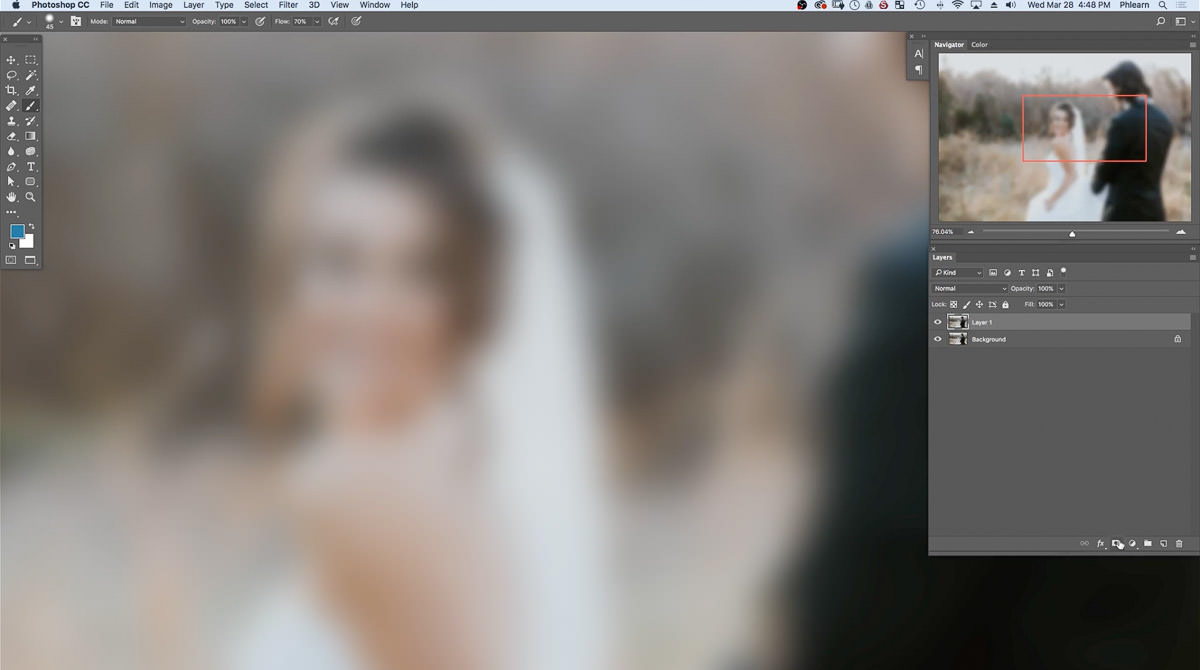
Since the layer mask is filled with black, this indicates that the effect added to Layer 1 will not be applied to the entire image because it is currently hidden.
To reveal the blur added to Layer 1, simply paint with white around the bride.
Notice a halo outline will appear around the main subject as the Blur is applied.

This effect happens because the subjects are included in the blur.
To view the difference between the original image and the image that was blurred, hold Shift and click on the Layers 1 layer mask to view the difference.
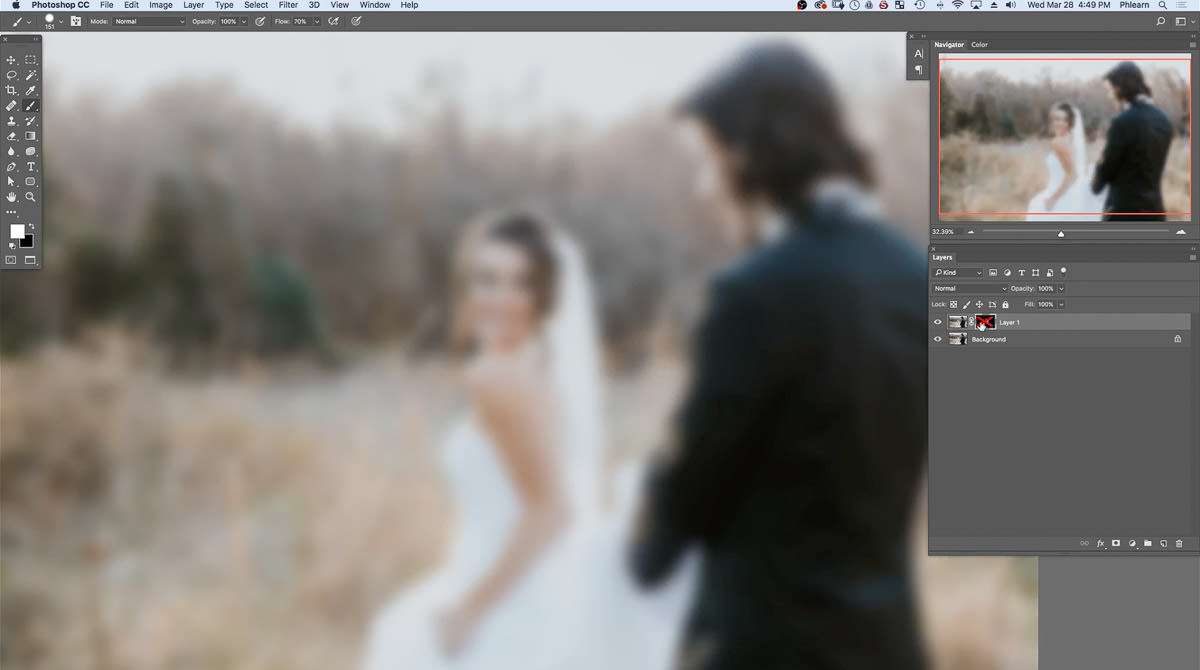
When applying this, a red X will appear on the layer mask.
To remove the red X, hold Shift and click on Layer 1 layer mask.
Another way to view the difference is by selecting and deselecting Layer 1.
This aspect is the most important for this image.
Now, delete Layer 1.
Outlining With The Pen Tool
The Pen Tool is an essential way to customize how the blur effect affects the image.
For more information about how to use the Pen Tool, go to Phlearn.com and type in Pen Tool into the search bar.
Hit P on the keyboard to select the Pen Tool or by locating the Tool Bar on the left side of the workspace. Within the Tool Bar, the Pen Tool can be recognized by a pen tip symbol, which is located right next to the Type or T symbol.
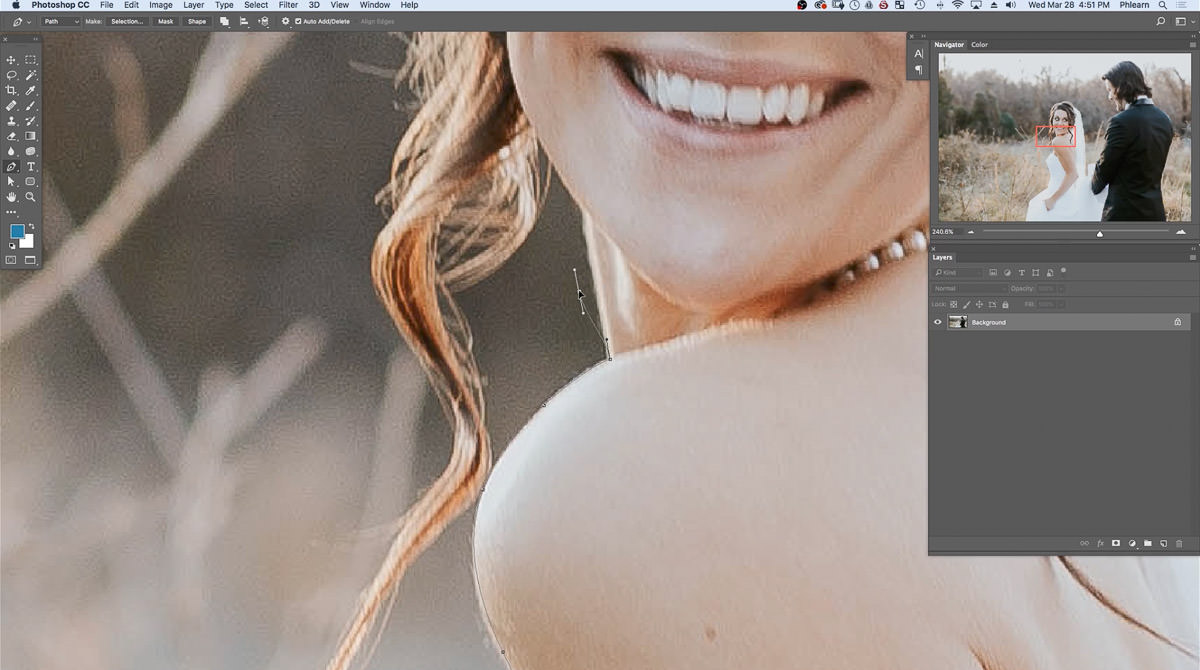
Start outlining the bottom left of the bride’s dress by clicking and dragging the Pen Tool.
When outlining the subjects, position the Pen Tool line slightly on the inside of the subject.
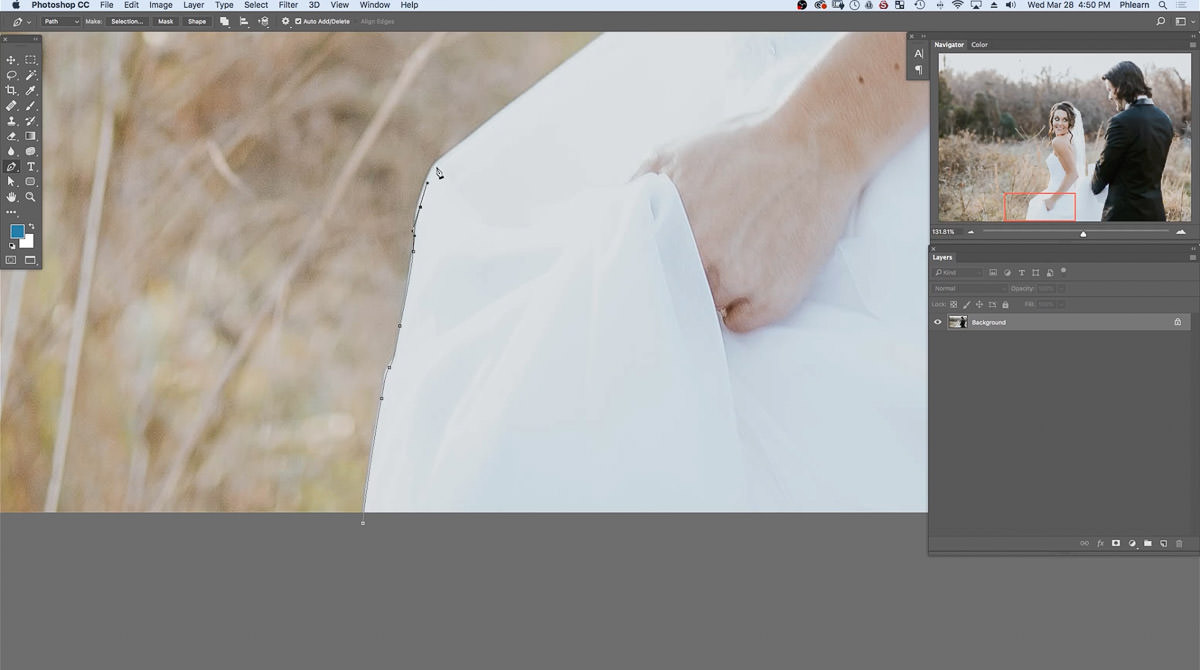
By doing this, this will help with not including the background with the subject when cutting the subject out and putting the subjects back into the image.
This action may take some time.
While outlining smaller areas, make as many points as needed to include every section.
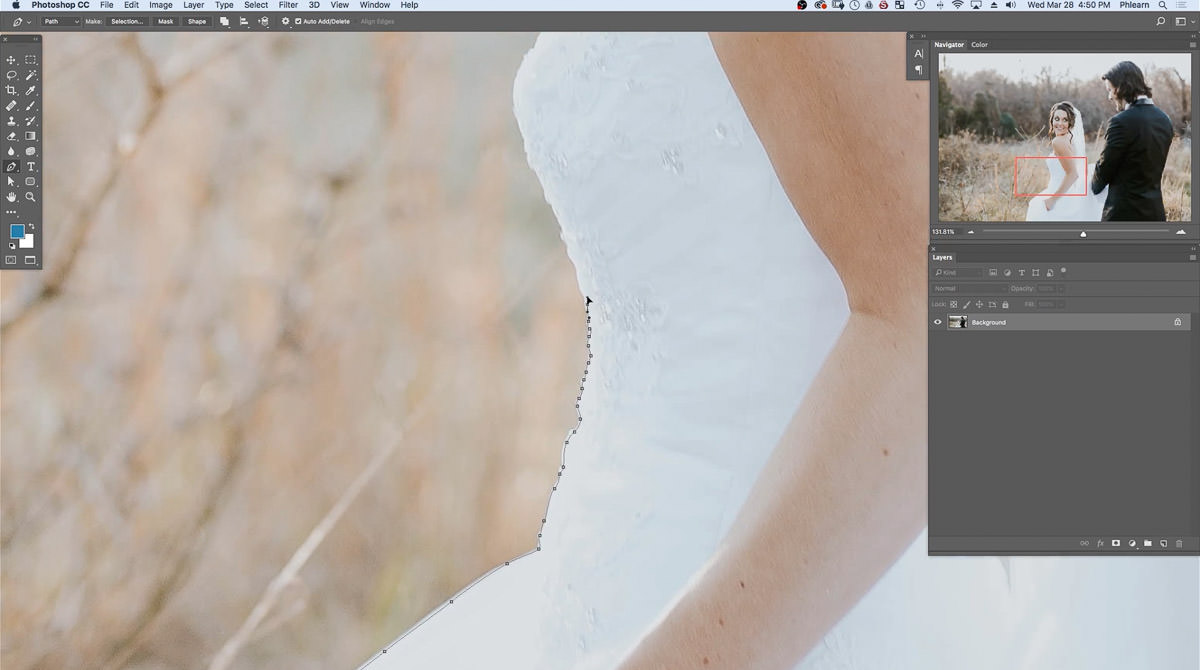
When reaching sections with a larger curve, apply lines that are farther apart.

To change the direction of a Pen Tool line, hold ALT or OPTN on the keyboard and a small arrow will appear next to the Pen Tool.
While holding ALT or OPTN, click and drag the solid black point in the desired direction.
To move a point, hit CMD or CTRL on the keyboard and click and drag the black point to the desired area.
These points can be moved at any time.
Creating A Selection With The Pen Tool
After creating a pen path around both the bride and the groom, duplicate the Background layer by dragging and dropping the layer to the New Layer logo at the bottom of the Layers Panel.
The New Layer symbol is identifiable by a square with the folded corner, which is located right next to the trash bin.

A new layer called Background copy will appear.
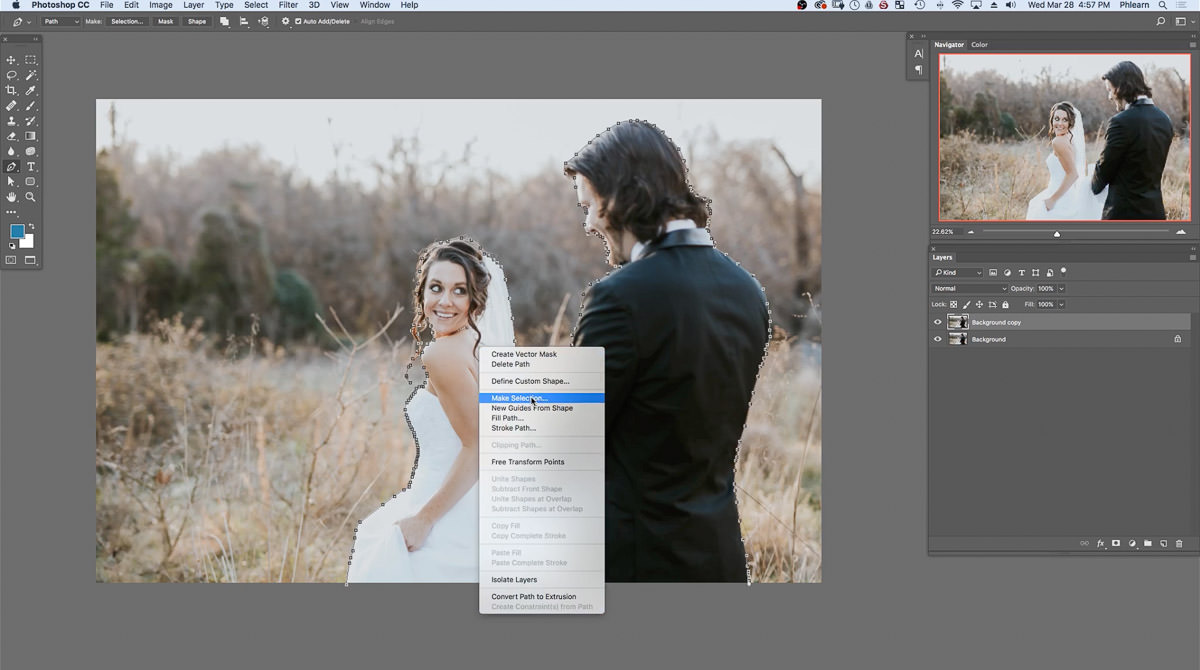
With the Pen Tool still selected, position the mouse within the outlined subjects and right click.
Select Make Selection….
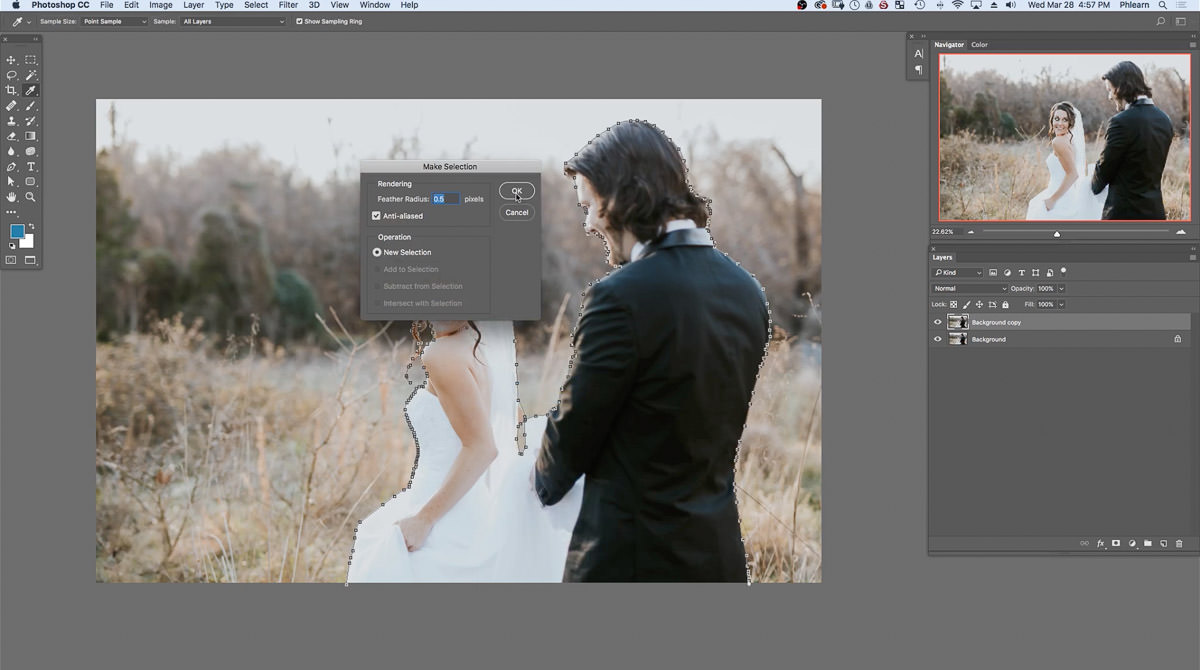
The Make Selection window will appear.
Underneath Rending set the Feather Radius to 0.5 pixels.
The Anti-aliased and New Selection should both be selected.
Once all the options are selected, click OK.
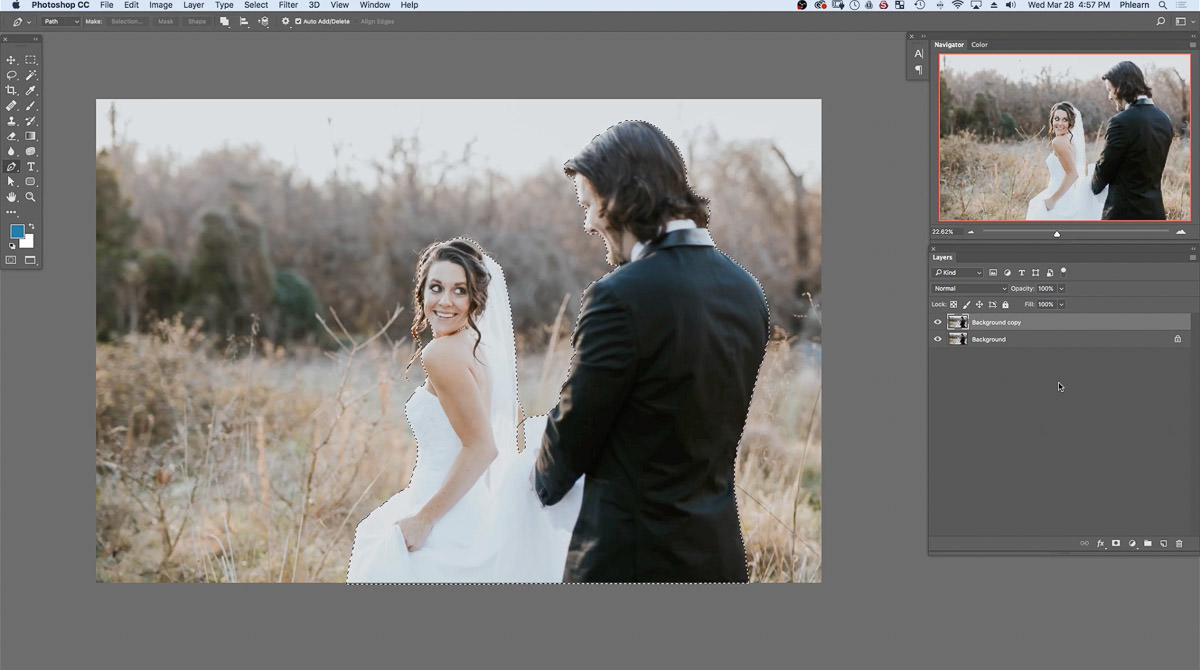
Now, notice a moving dotted outline has replaced the Pen Tool outline.
Applying the Selection To A Layer Mask
While the Background copy layer is selected, add a new Layer Mask.
Now the selection that was just made with the Pen Tool is now in the Background copy layer mask.
The white section of the layer mask indicates what is visible in the Background layer and the black in the layer mask represents what is hidden.
A Layer Mask allows changes to be made to the selected layer without completely deleting the information.
For an example, select the Move Tool by hitting V on the keyboard or by locating the very first item in the Tool Bar, which has four arrows pointing in different directions. This symbol represents the Move Tool.
Click and drag the subjects left or right.
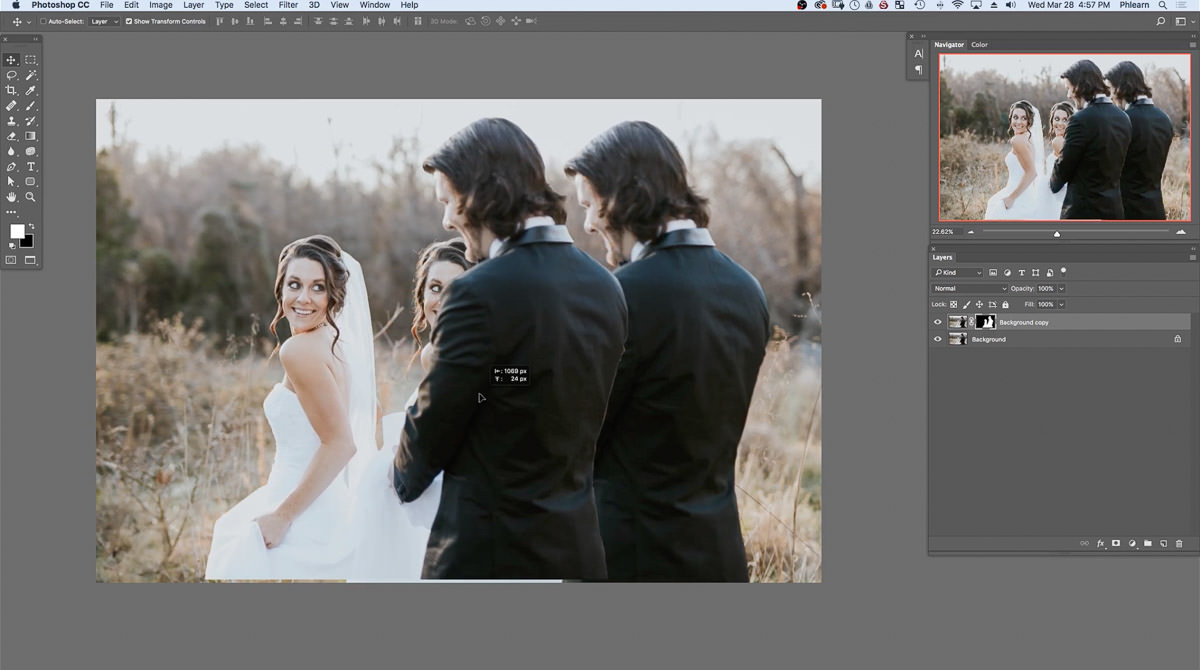
Notice how there is a copy of the subjects.
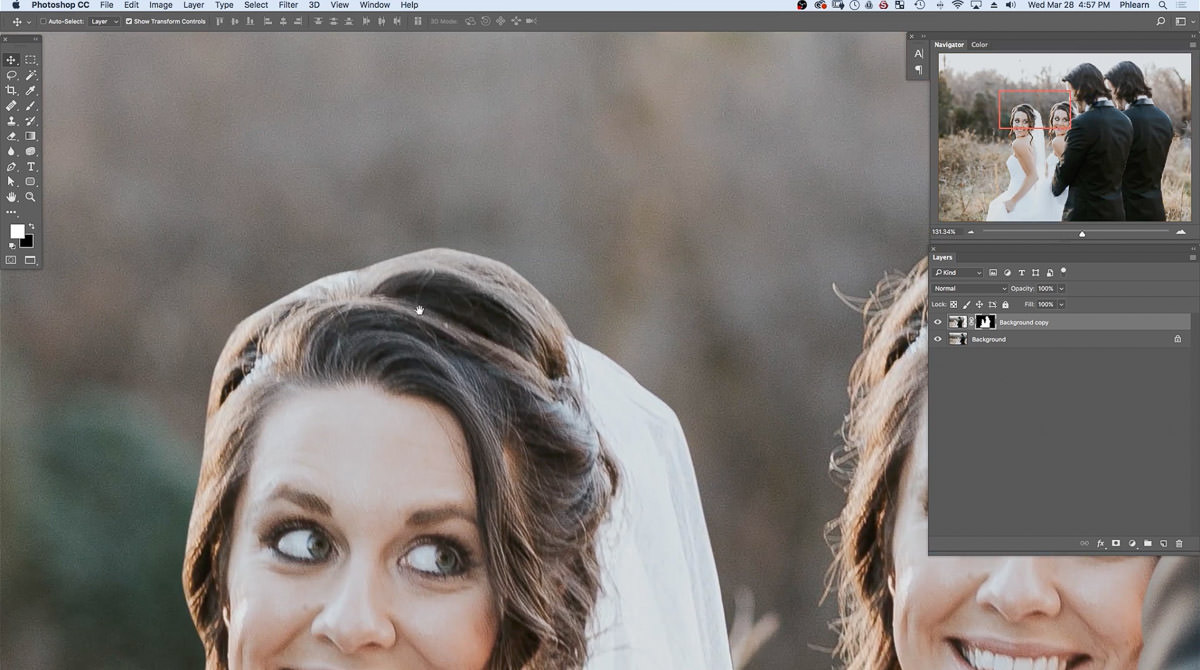
To zoom closer to the image to view the outline, hit Z on the keyboard to select the Zoom Tool.
Simply click to zoom in and ALT or OPTN and click to zoom out.
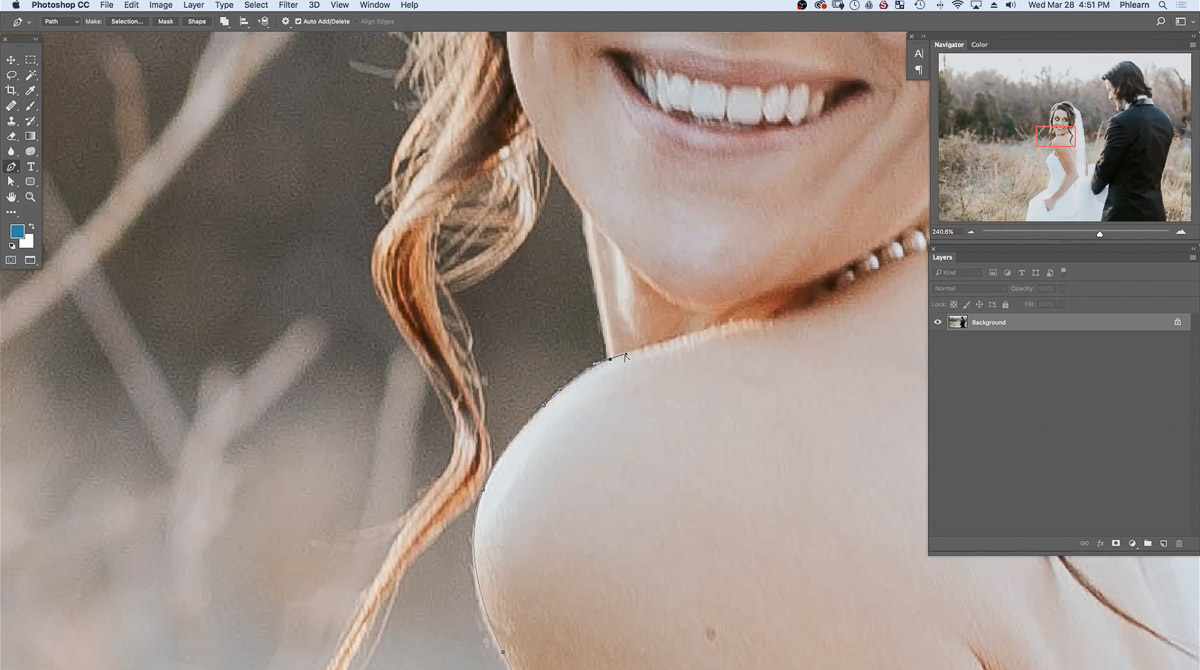
By zooming in, notice that there may be some spots, specifically around the subject’s hair, that may have been missed while outlining with the Pen Tool.
Move the subjects back to the original spot by hitting CMD or CTRL + Z or by going to the top of the workspace and hit Edit and then Undo.
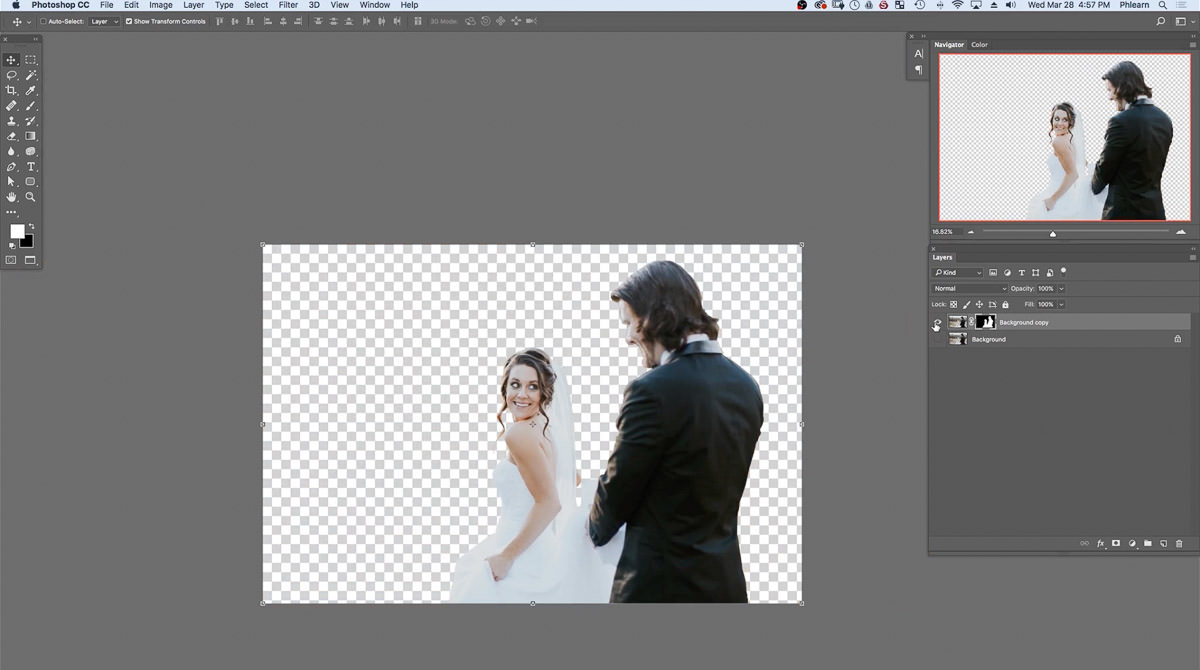
By deselecting the Background layer in the Layers Panel, notice how the Background copy layer is just the bride and groom.
Rename Layers
Rename the Background copy layer by double-clicking on the layer name.
Renaming the Background copy layer to Subjects.
Rename the Background layer to Original.
Click and drag the Original layer to the New Layer symbol at that bottom of the Layers Panel to duplicate the layer.
Rename the Original copy layer to Blur.
The new Blur layer will serve as the blur effect layer.

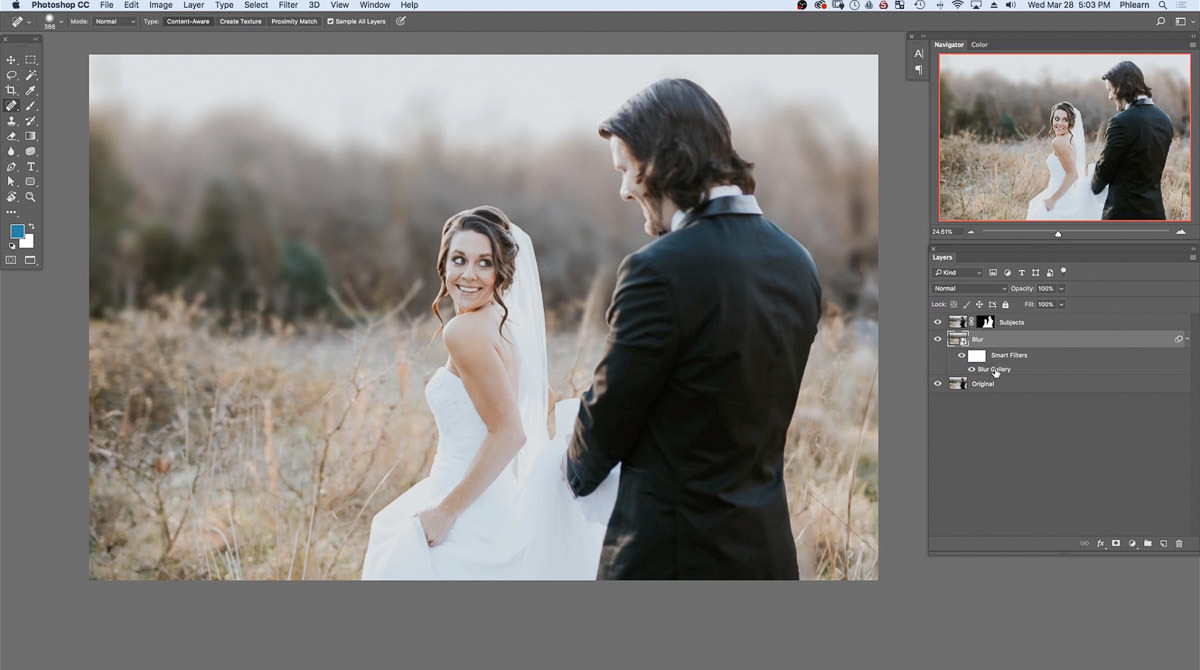
Now, the Subjects layer should be on the top, the Blur layer in the middle, and the Original layer at the bottom of the Layers Panel.
The order of the layers is very important.
Spot Healing Brush Tool
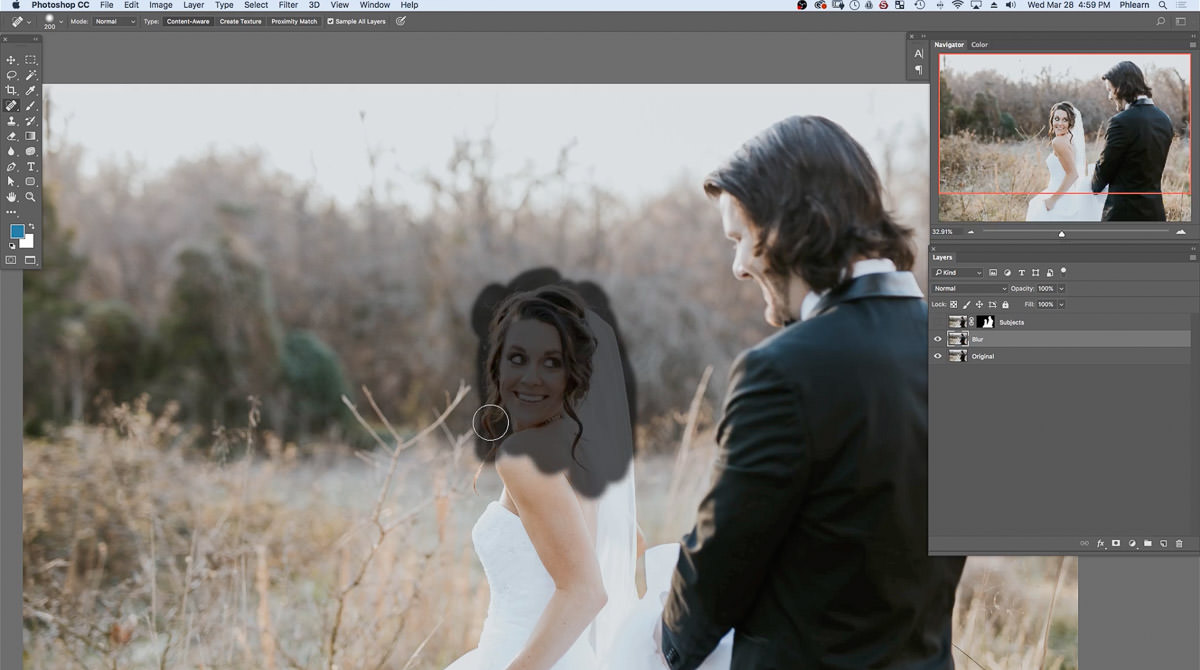
Before when the Blur effect was added to the original image, a halo outline appeared around the subjects. The Spot Healing Brush Tool is an effective way to fix this issue.
First, the subjects need to be removed from the Blur layer.
Deselect the visibility for the Subjects layer by clicking on the eye next to the layer.
Select the Blur layer in the Layers Panel.
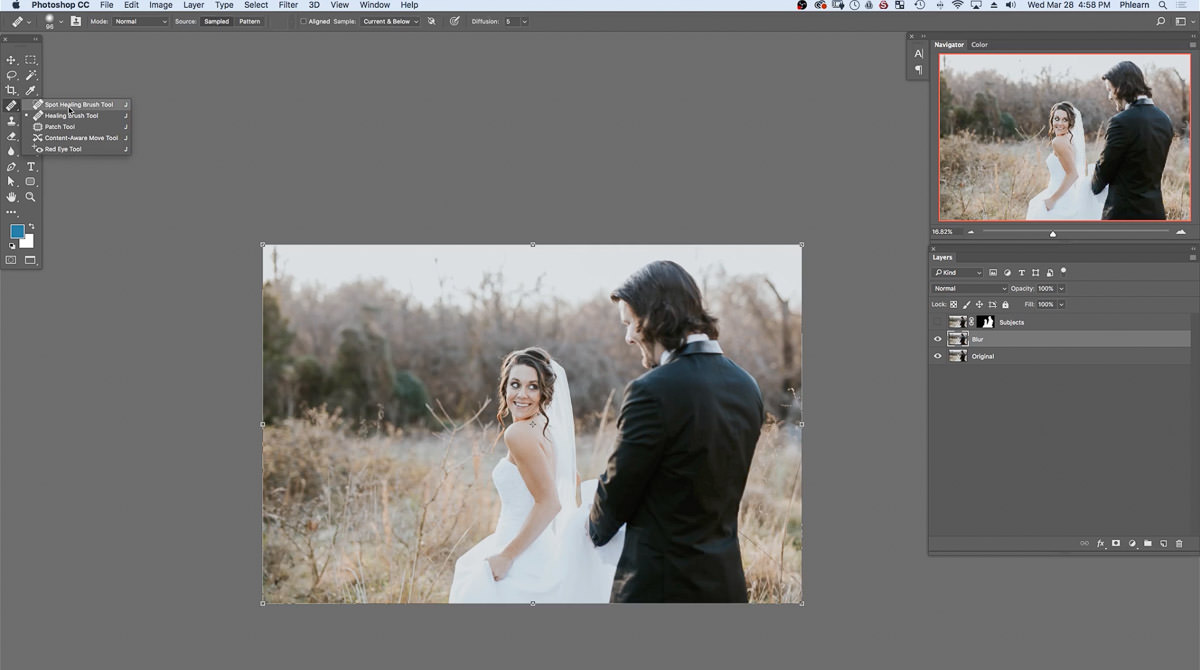
Locate the Spot Healing Tool, which is located in the Tool Bar on the left side of the workspace. The Spot Healing Tool is the fourth tool down in the Tool Bar and is identifiable by a band-aid shaped symbol.
Click and hold the mouse on the Spot Healing Tool.
Once the side tab appears, select the Spot Healing Brush Tool.
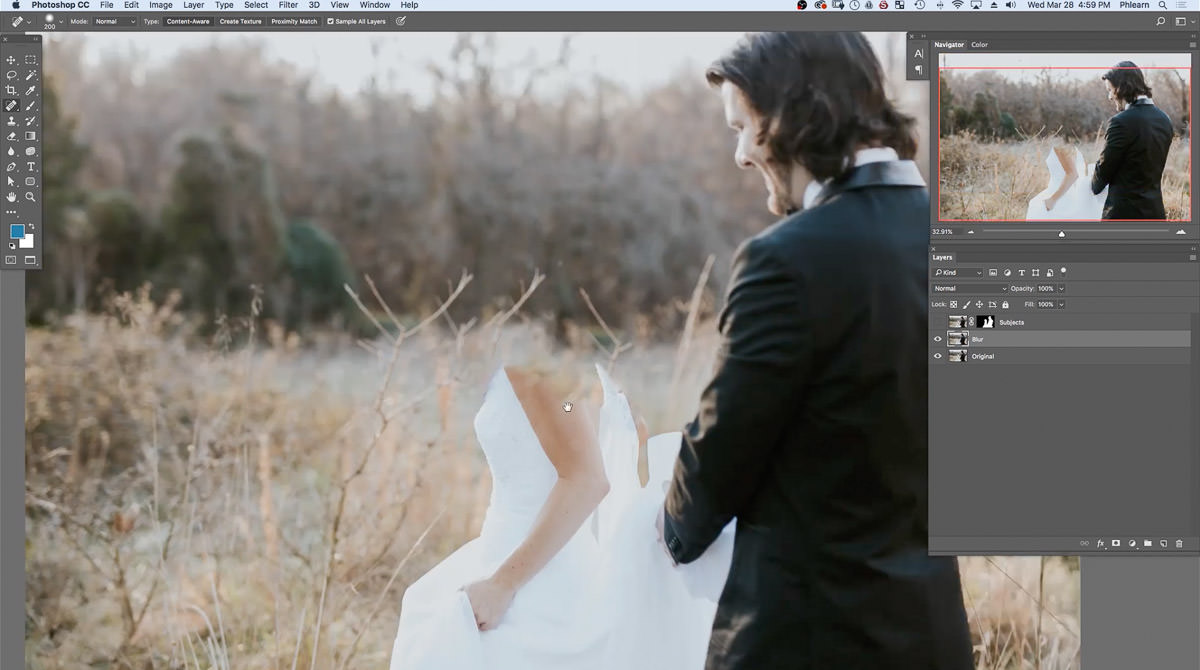
While using the Spot Healing Brush Tool, paint the subjects by clicking and dragging the mouse.
When painting, paint slightly past the subject so Photoshop can pull the information from the background and place that information on top of the subject.
Paint the subjects in multiple strokes.
If the size of the brush needs to be made bigger or smaller, hit the [ or ] on the keyboard to resize the brush to the desired size.
Notice how the background is replacing the subjects.
To undo an action, hit CMD or CTRL + Z on the keyboard or by going to the top of the workspace and hit Edit and then Undo.
Remember, the main image will be blurred so the painting does not need to be perfect.
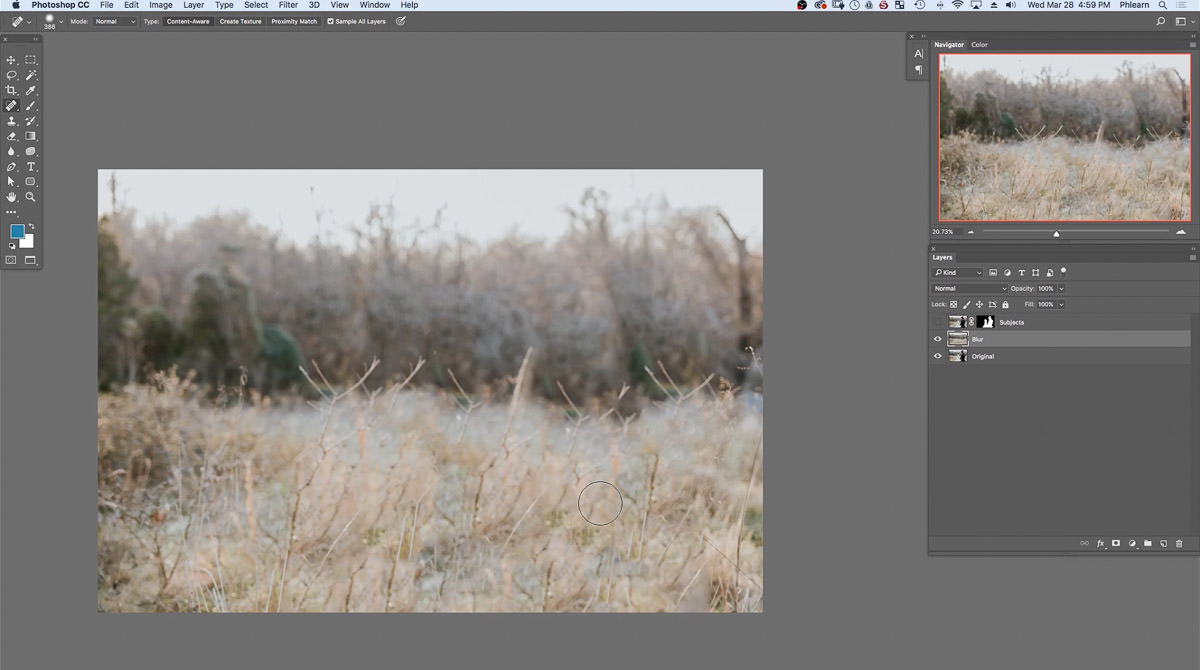
Once the subjects have been painted with the Spot Healing Tool, the background should only be visible.
Now, the Subjects layer will just contain the subjects, the Blur layer will just have the background, and the Original layer will contain the original content.
Covert Blur Layer To Smart Object
Next, the background layer needs to be converted into a Smart Object. By doing this, the applied blur can be changed at any time.
Make the Subjects layer visible in the Layers Panel.
Select the Blur layer and right click.
When right clicking, a side tab will appear and select Convert to Smart Object.
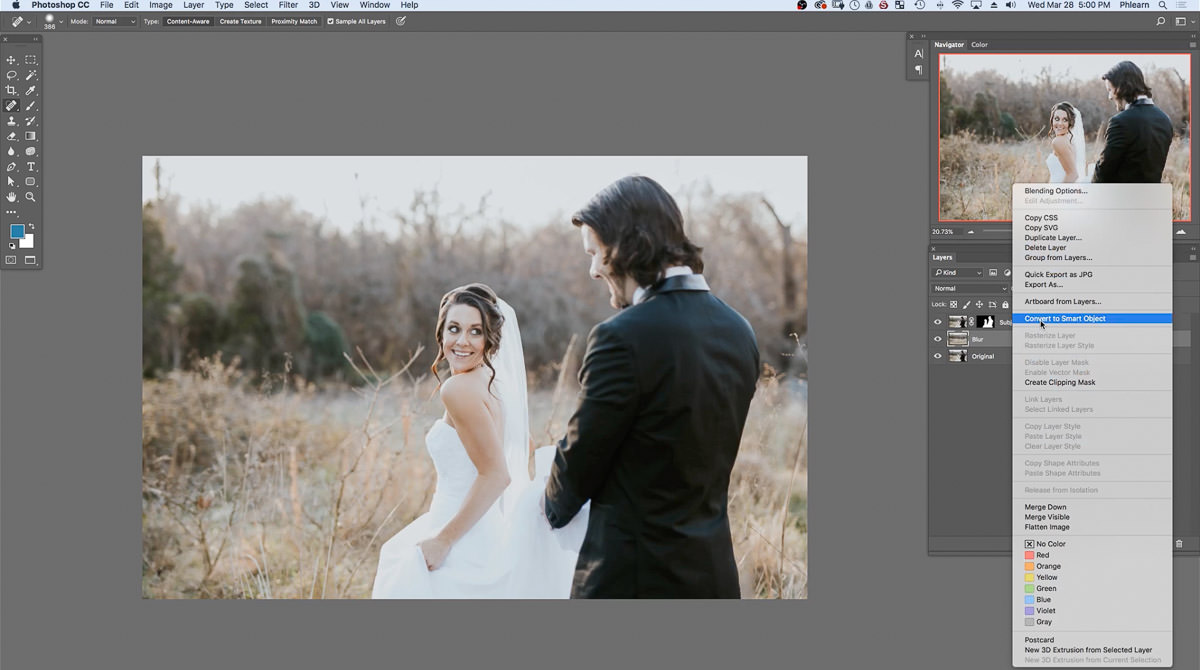
The Blur layer is now a Smart Object, which is identified by the small paper logo in the Blur layer thumbnail.
Apply A Tilt-Shift Blur
Now, a blur needs to be applied to the Blur layer.
To apply an advanced blur, locate the top of the workspace and select Filter.
Within the Filter tab, select Blur Gallery, and then Tilt-Shift…
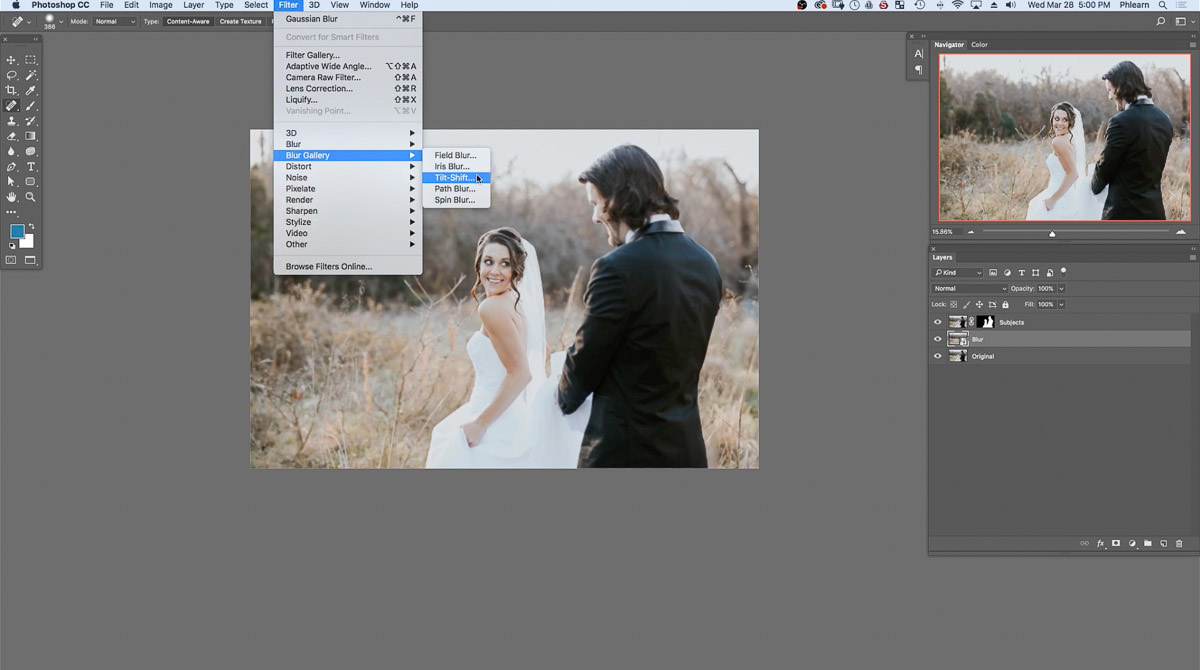
The Tilt-Shift Blur will allow the image to be blurred more as the perspective goes further back.
Notice how the Tilt-Shift workspace includes Blur Tools, Effects, Motion Effects and Noise, on the right side of the workspace.
Also, notice overtop the image is a centralized circle, solid line, and a dotted line.
This workspace allows the Blur to be customized.
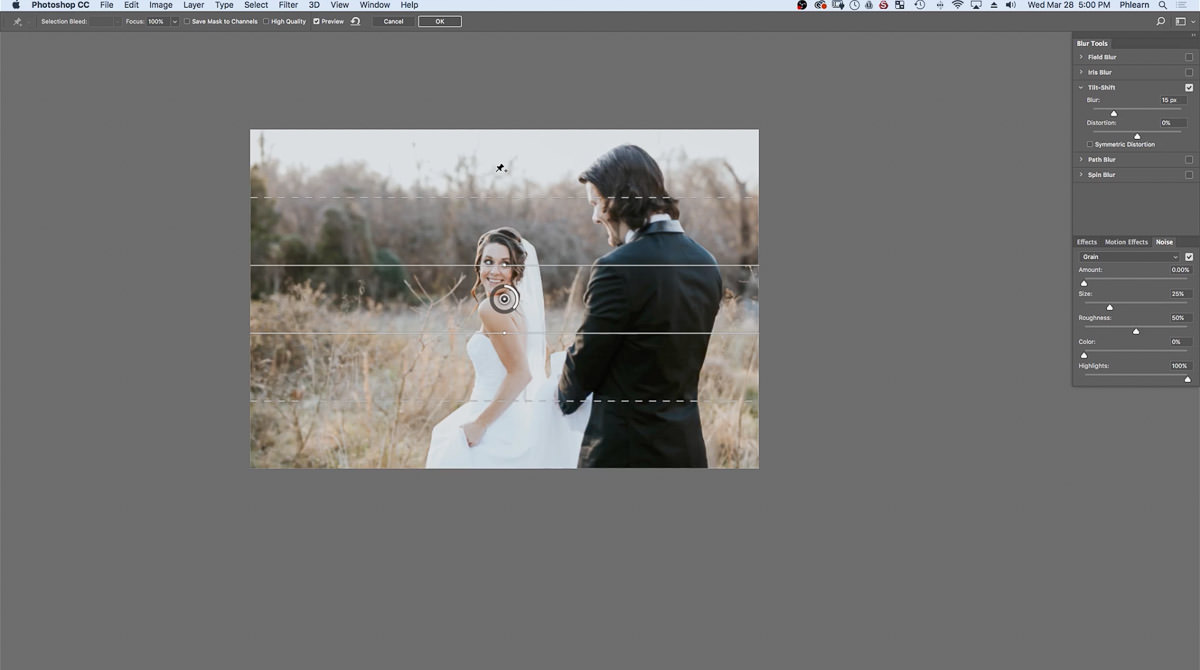
Click and drag the center point of the Tilt-Shift circle to the bottom of the photo.
Position the inner circle in the middle of the bottom line of the image.
Click and drag the solid midpoint line so the lines line up with the top of the bride’s dress.
Now, click and drag the top dotted line to the very top line of the image.

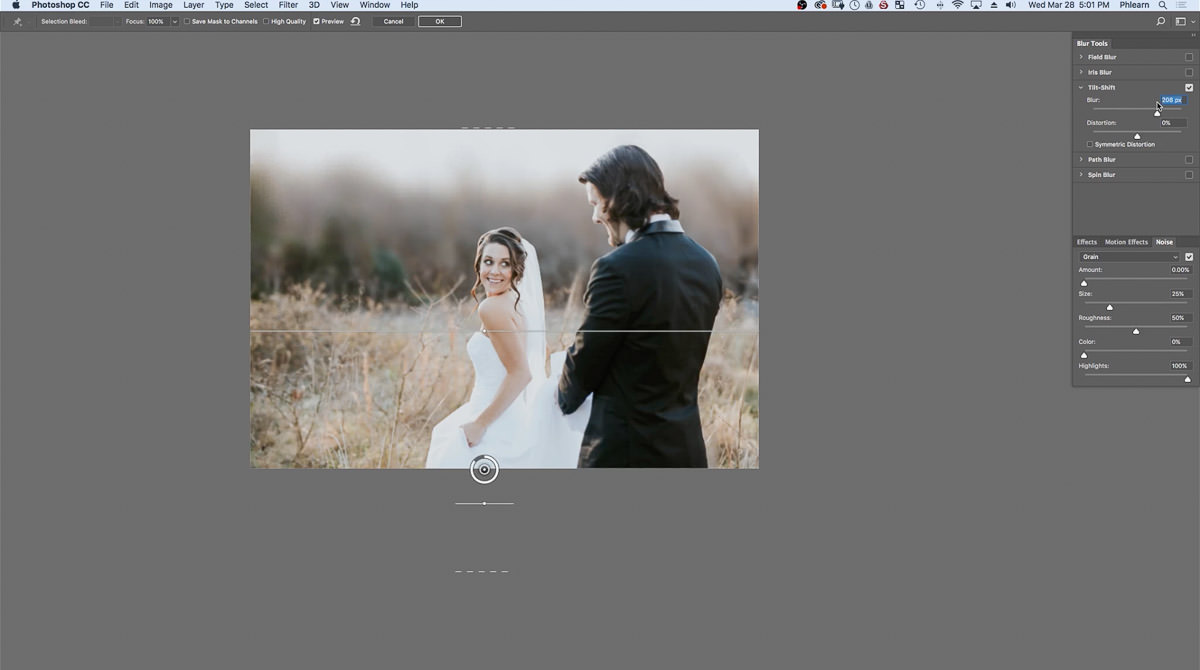
Within the Blur Tools bar, locate the Tilt-Shift section.
Adjust the Blur slider in the Tilt-Shift tab left and right.
As the slider is moved to the right the blur intensifies and as the slider moves to the left there is less of a blur.
For this image, set the Blur to 208 px.
Adding A Gradual Blur
As an example, try clicking and dragging the solid midline down and notice how the blur changes as the midline is moved.
The area between the circle and the solid line, which is the safe zone, serves as the unaffected blur area and the solid line to the dotted line acts as the area where a gradual blur is applied.
Move the top dotted line down towards the solid line.

By doing this, the blur becomes more of a solid blur than a gradual blur.
Set the Blur to 106 px.
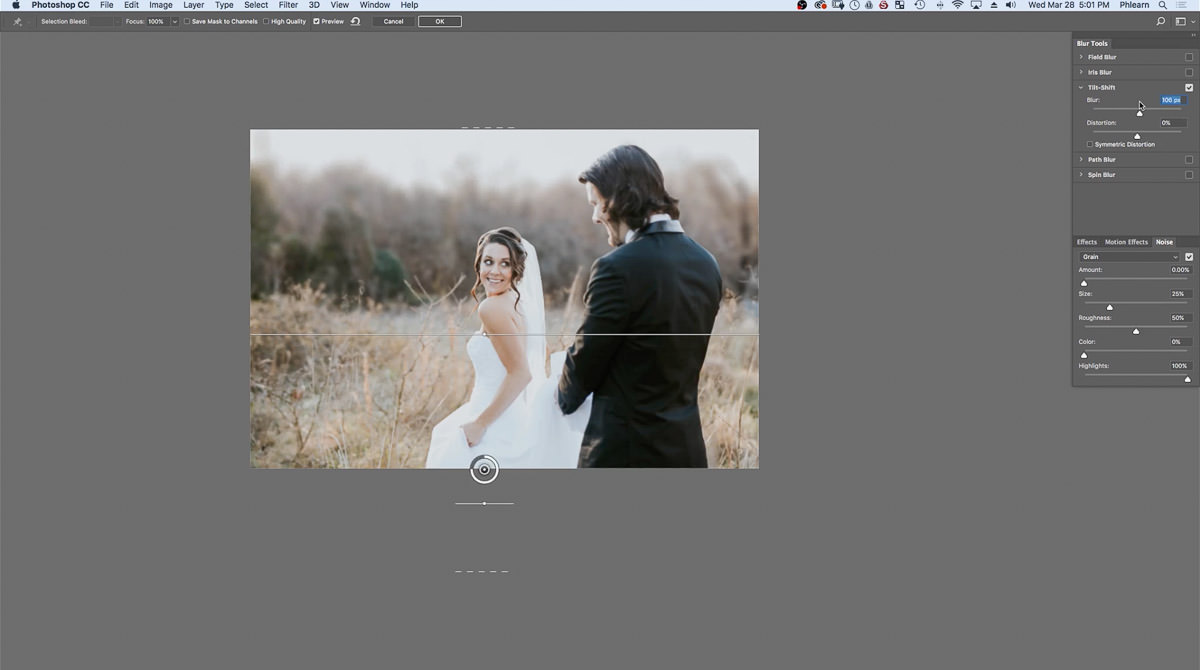
Now, position the solid line above the bride’s elbow and the dotted line at the top of the image.
The blur will now appear more realistic.
Applying Grain
Now that the Blur is applied, applying grain will make the image look more realistic.
When adding a blur to an image, it’s recommended to at least use 30% grain for a more natural look.
Locate the Noise tab on the right side of the blur workspace.
Set the Noise setting to Grain and select the checkbox next to the Grain selection.
Zoom in by hitting Z on the keyboard to notice how Photoshop has applied the grain to the image.
For this image, set the Amount to 20.90%, Size 5%, Roughness 50%, Color 0% and Highlights 100%.

Once the options are set, hit OK at the top of the workspace.
Now notice how the Smart Filters and Blur Gallery have been added to the Blur layer in the Layers Panel.
Select and deselect the eye next to the Blur layer to notice the differences in the layer.
Changes can be made to the Blur layer at any time by double-clicking on the Blur Gallery filter, which is underneath the Blur Layer. This is why a Smart Object is recommended.
Change the Blending Mode to Lighten
The next step is to recover the lost hair detail around the subject’s heads.
Duplicate the Original layer by dragging and dropping the layer to the New Layer icon at the bottom of the Layers Panel.
Rename the new layer, Original copy, to Hair Detail.
Move the Hair Detail layer to the top of the Layers Panel.
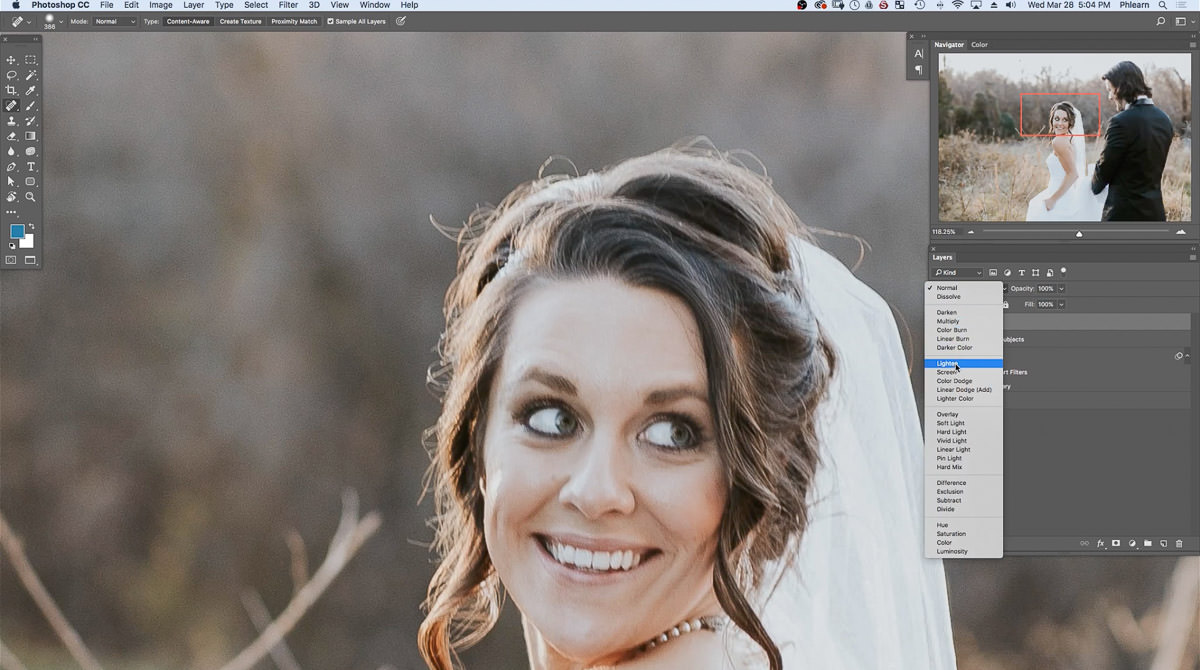
The small hairs on the bride will now be visible but notice how the small hairs above the bride’s head are lighter than the background.
The Lighten Blend Mode is a helpful Blending Mode, which will make anything that is dark, not visible and keep the light areas visible.
Locate the Layers Panel on the right side of the workspace.
In the Layers Panel, the Blending Mode for the Hair Detail layer is currently set to Normal.
Change the Blending Mode from Normal to Lighten.
Recovering the Subject’s Hair
Add a Layer Mask to the Hair Detail layer.
The layer mask will automatically be filled with white.
If black is set as the foreground color, hit CMD + Delete or CTRL + Backspace on the keyboard to fill the layer mask for Layer 1 black.
Hit D on the keyboard to select the Default Foreground and Background Colors.
Notice how the foreground color is white and the background color is black.
Hit X on the keyboard to change the foreground to black.
Now, hit CMD + Delete or CTRL + Backspace on the keyboard.
Notice how the Hair Detail Layer mask is completely black.
This indicates that the layer does not affect the entire image.
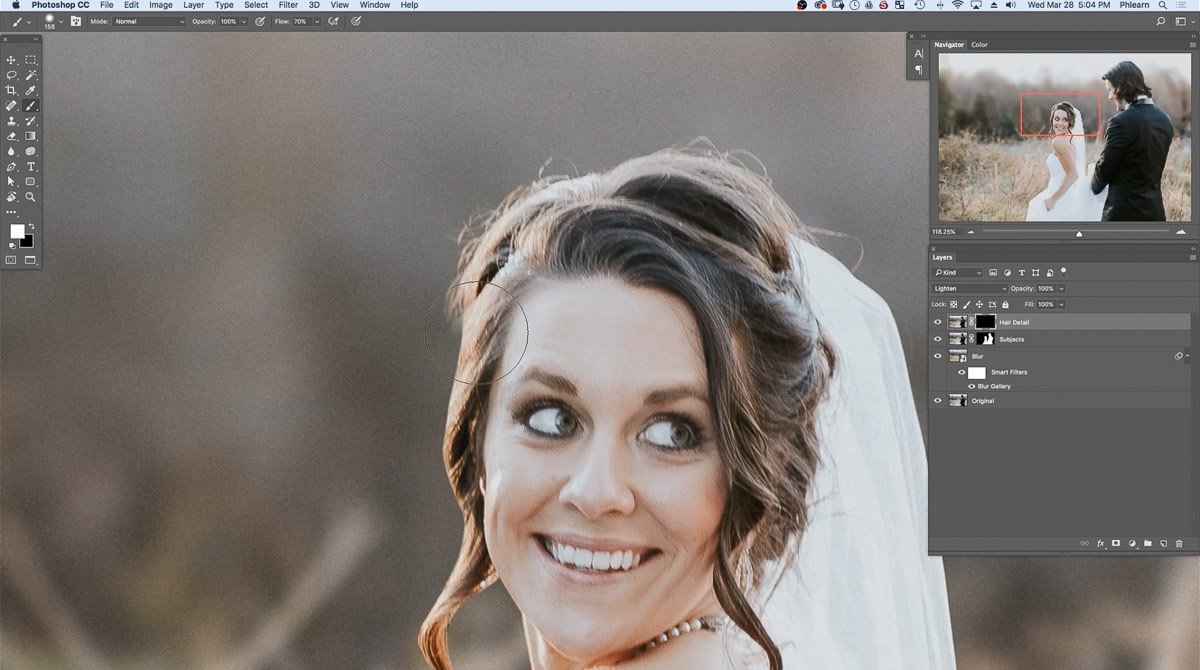
Hit B on the keyboard to select the Brush Tool.
At the top of the workspace, check that the Brush Mode is set to Normal, Opacity 100% and Flow 70%.
Since the layer mask is filled in with black, use white to paint.
Switch to white as the foreground color by hitting X on the keyboard.
When painting with white, notice how the effects of the layer are now visible in the image.
Now, while using the Brush Tool, click and drag the mouse around the top of the bride’s head where the small hairs appeared earlier.
To make the Brush bigger or smaller use the [ or ] on the keyboard.
As the white paint is applied around the bride and groom, the small hairs are revealed.
This allows a more realistic effect while still having a blurred background.
Smoothing Edges With The Blur Tool
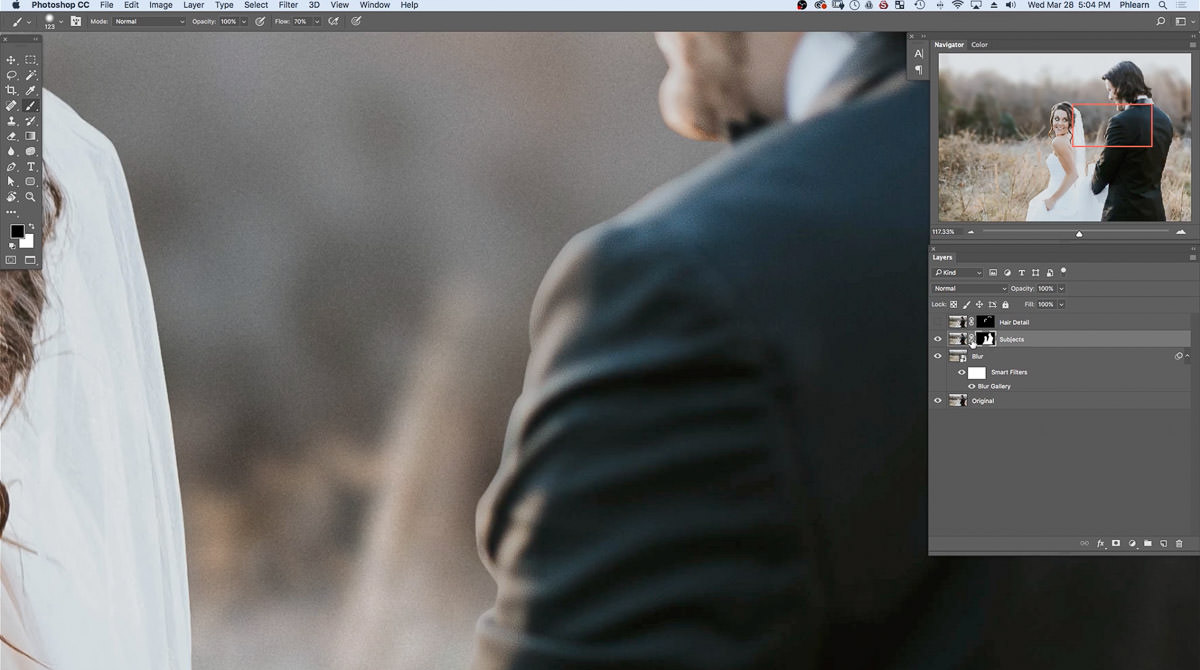
The last step is to smooth down the edges around the bride and groom.
Now, set the foreground color to black by hitting X on the keyboard.
Deselect the Hair Detail layer.
Hold Shift and repeatedly click on Subjects layer mask to notice the harsh line around the groom’s left shoulder.

While selecting and unselecting the before and after of the Subjects layer mask, a red X will appear on the layer mask.
Check if there are any other noticeable harsh edges from outlining.
To fix the harsh edges, unlink the image and layer mask for the Subjects layer by clicking on the link symbol, which is located in between the image and layer mask.
This allows for the layer mask to only be edited.
Locate the Blur Tool in the Tool Bar on the left side of the workspace.
The Blur Tool symbol is identifiable by a raindrop shape, which is located above the Pen Tool.
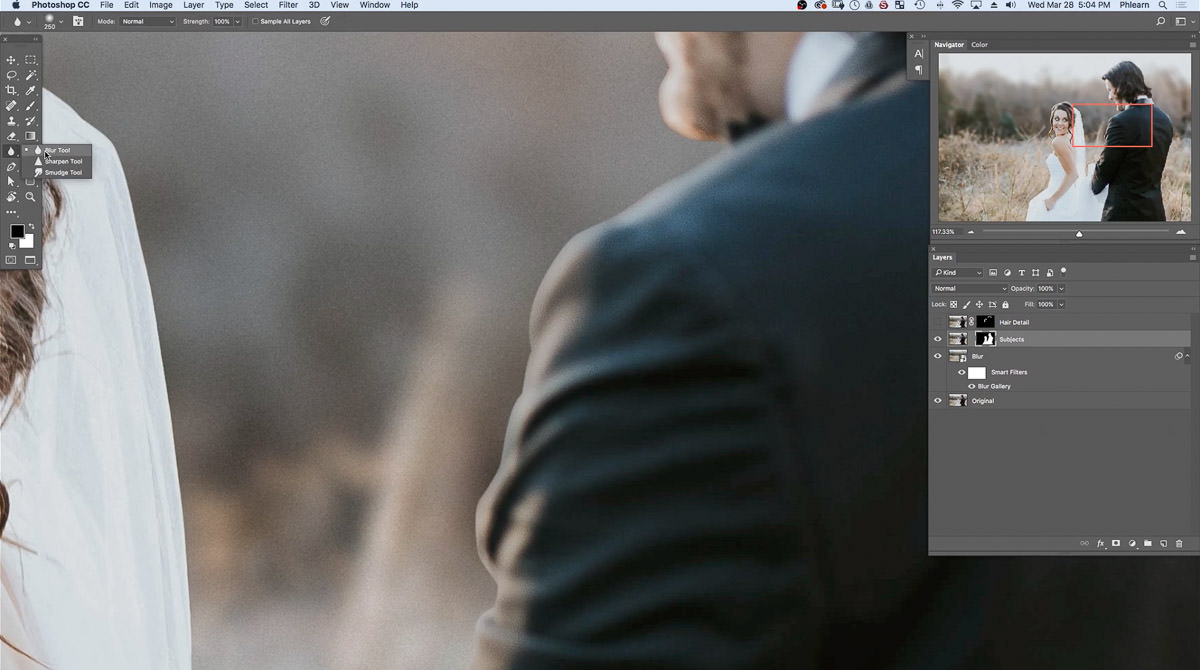
At the top of the workspace, notice how the Blur Tool can be customized.
Set the Mode to Normal, Strength to 100%, and uncheck the Sample All Layers option.
While the Subjects layer mask is selected, click and drag the brush to blur around the groom’s shoulder.
To view layer mask, hold ALT or OPTN and click on the Subjects layer mask.
The layer mask will now be presented on the entire image.

As the Blur Tool is applied, notice how the layer mask is only being affected.
While the layer mask is present, brush around the sharp or hard edges.
To view both the Subjects layer mask and layer again, hold ALT or OPTN and click on the Subjects layer mask.
As the Blur effect is added to the edges, notice the more realistic of a result.
Since the individuals in the image are slightly out of focus, using the Blur Tool is useful but if the subject were slightly out of focus with a defined edge, the results would not look as realistic.
After the edges of both the bride and groom have been blurred, select the Hair Detail layer so all of the layers are visible.