
BEFORE
AFTER
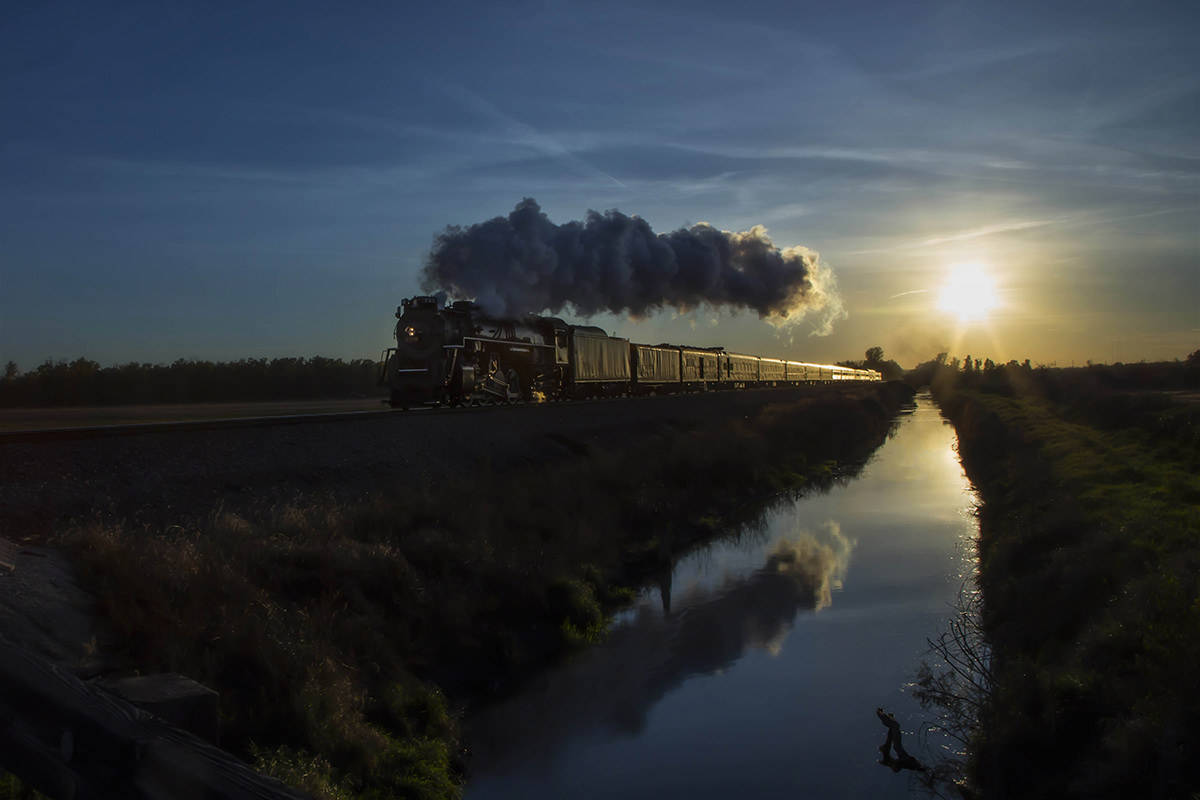
I Choo-Choo-Choose You
Today we’re using this incredible image from Chris to show how to use Photoshop to bring back detail into the Shadows of an image and then doing some Coloring and stylizing. Photoshop is incredibly powerful, this image was a contest submission which means the file quality had been reduced significantly, yet we were still able to find a ton of information to enhance the image.
Finding Shadow Detail
Using the Shadow/Highlights Tool from the Image Adjustments menu we were able to brighten the Shadow areas of the image, and just as importantly bring back Color in these areas. Shadows become very desaturated, and when brightening them it is crucial to bring back the Color along with the Brightness Level.
Toning Highlights & Shadows
Using a combination of a couple Curves Adjustment Layers and an Apply Image mask we added Color separately to the Highlights and Shadows to accentuate the mood of the setting sun.
Finishing Touches
To wrap up the editing we used a couple gradients and Vignettes to direct the focus of the viewer to the subject of the image. We also accentuated the head lamp of the locomotive to really make the image come to life.