
The winners have been announced! View the Winners
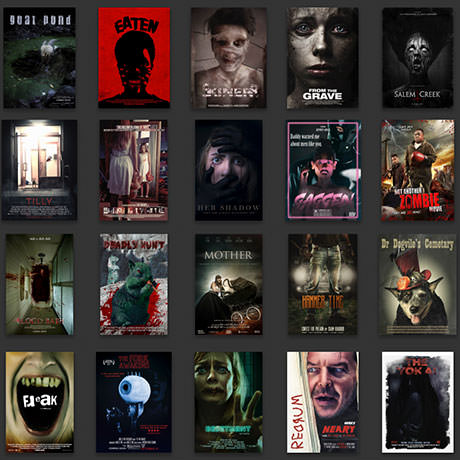
This tutorial is a part of the Horror Movie Poster Collection
Welcome Back
Welcome back for another week of terror and a brand new creative challenge! Last week, we wrapped Aaron up like a warm deli sandwich and the end result was just about as horrifying as we could have imagined. For this week’s image we try to transform something that everyone loves into something to fear. But what could it be?
iPhones?
Corgis?
Coffee?
No. Please. Anything but the coffee.
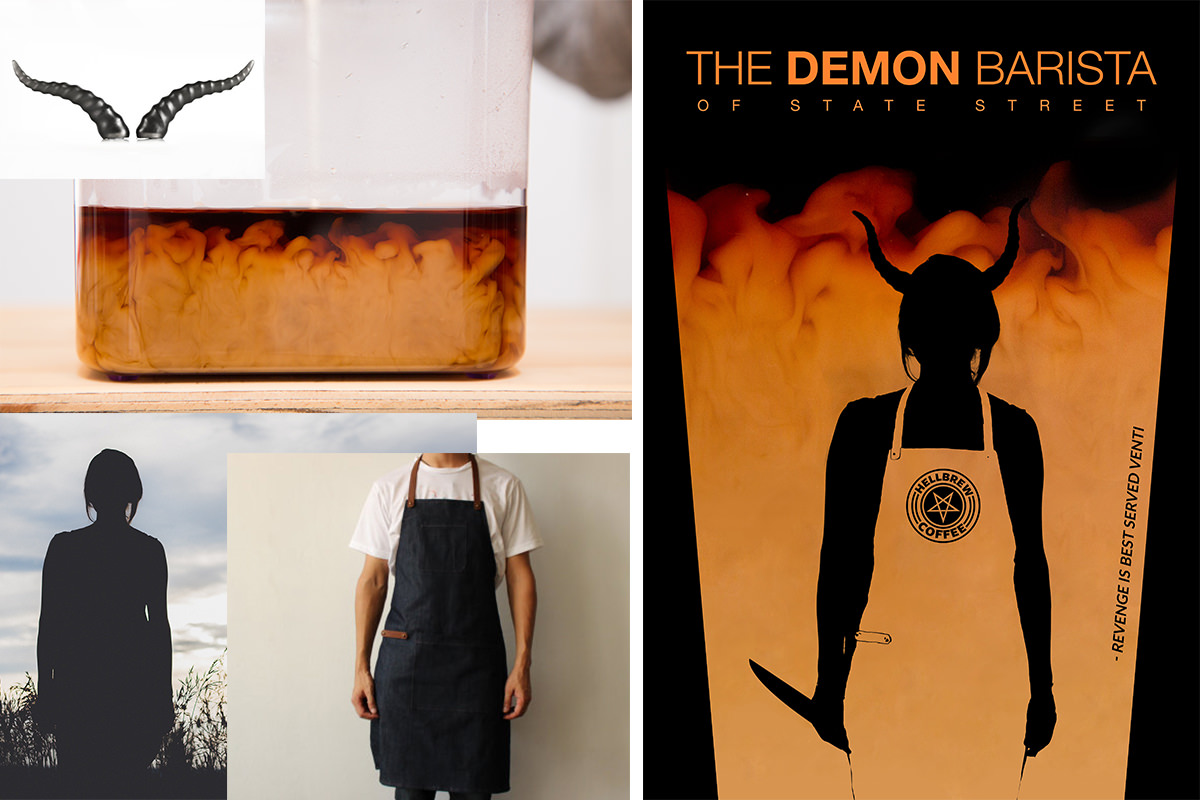
The Coffee Cream is People
For our theme, we decided on a coffee shop spoof of Stephen Sondheim’s Sweeney Todd: The Demon Barber of Fleet Street. And this time, instead of focusing on photography and realism, we wanted to take a more graphic-based approach. The plan was to use stock images to pull the majority of the poster together but we did want to include at least one original photo taken in our studio.
Aaron came up with the idea of photographing coffee as creamer is poured into it. The goal being to capture the initial separation of the two liquids. This image would function as our background, providing some texture and an eerie transition from light to dark.
The photoshoot was simple. We filled a large, clear container with coffee and set up a white v-flat as the backdrop. We needed a bit more light so we placed a strobe directly behind the camera and aimed it at the ceiling. The light would bounce off of the ceiling and back down on top of our coffee mixture, helping to enhance the detail and separation.
The image was taken on a Canon 5D Mark III using a 24-105mm lens. We shot at 1/200 second, f/ 6.3, and at an ISO of 400. As an additional light source, we used a Paul C Buff Einstein.
After another successful photoshoot, we pounded the gallon of coffee that we had just made and promptly lost our minds.
It was time to bring The Demon Barista of State Street to life in Photoshop.
Photoshop
Our plan in Photoshop was to emphasize the transition from light to dark in our coffee photo and utilize stock images to create a silhouette of our demonic protagonist.
Open up the coffee image and use the Crop Tool C to adjust the image so that it is in portrait orientation. Then create a Solid Color Adjustment Layer and fill it with black. Move this layer bottom of your layer stack. This will serve as the background. For our image, we chose to have the cream colored area of the coffee near the bottom of our frame, transitioning to black near the top.
Once you have your coffee image positioned where you like, select the Layer Mask of your coffee layer. Use the Marquee Tool to select the larger areas of the coffee image that you don’t want to be visible and fill those selections with black. The Brush Tool is a great option for working in areas that require more detailed masking. Use a large soft brush and paint around the areas where the cream transitions into the background.

Quick Tip:This mask doesn’t have to be perfect! Create a Levels Adjustment Layer and clip it to your coffee layer. In the Levels Adjustment window, drag your black point from the left to the right until the dark areas around the coffee cream change from dark gray to completely black. This will make the transition seamless!
Next, hit CTRL or CMD + T to scale and reshape your coffee layer so that it fills the area of the poster that you want. For any areas underneath the coffee cream that you need to fill, simply create a new layer, sample a color from the cream by holding ALT or OPTN and paint with your brush tool until the desired area is filled. To help blend the colors, choose a large soft brush and sample a variety of colors from the cream area and continue to paint until you feel that the transition looks more natural. Lastly, you’ll want to add some of the cream texture to the areas you’ve painted. Create a new layer and select the Healing Brush Tool J. Sample an area with the texture that you want to copy by holding ALT or OPTN and then paint where you want to apply that texture. Repeat this process, making sure to regularly sample new areas so that the textures you paint appear natural.
The background is ready! Next we need to bring in the barista.
Bring in the silhouette image and place it on top of the layer stack. We used the Rectangular Marquee Tool to delete the areas to the left and right of our subject, since we only need the silhouette to appear in the poster.
Use CTRL or CMD + T to Transform the subject until they fit into your image as desired. To cut the subject out of the remaining background, we chose to use the Select Color Range option. Simply sample the color of your subject and adjust the sliders until the woman is completely cut out. With that selection active, create a new layer and fill that layer with black. You can further refine the cut out of your subject by using the Marquee Tool and Lasso Tool to remove undesired areas.
Select the horns using the Magic Wand Tool, apply a bit of smoothing, and fill that selection with black. Bring them into your main image, moving and transforming them until you’re happy with the placement.
Use the Move Tool to drag the apron image on top of your layer stack. Lower the opacity of the apron layer to help position and transform it so that it fits on your subject. Use the Magic Wand Tool again to select the areas of the apron that you want. On a new layer, fill the selection with white (white will help you see what you’re doing as you adjust this layer.) Since we want the edges of all of these elements to appear a rough and jagged, use the lasso tool to help complete areas of your apron that might be missing. Draw with the lasso tool and fill those selections with white. If the selections are too rough, select the layer and go to the Select menu and down to Select and Mask. Apply smoothing to any layers that need to be cleaned up.
Load the apron as a layer mask on your subject and invert the layer mask by hitting CTRL or CMD + I. This will make the area of the apron invisible, revealing the coffee layer underneath.
To help tie the theme together we created a coffee shop-style logo in Adobe Illustrator before going into Photoshop. You can totally do this in Photoshop as well! The important point here is that once you have a theme, have fun with it and try to introduce as many elements as possible to help tell your story.
With all of our main pieces in place, we added our title, some additional text, and transformed our background so that it was in the shape of a coffee cup.
You don’t need expensive equipment or complex photoshoots to make something fun and original. So get weird, channel your weirdness into something creative, and submit your new weird, digital offspring to our Halloween DIY Horror Movie Poster Contest. Time is running out!
We’ll be back at it again next week!