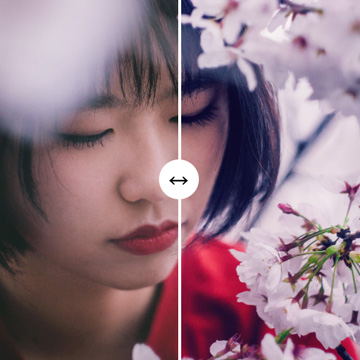


BEFORE
AFTER
LAB Mode VS RGB Mode
It can be hard to pump up the Colors in a photograph without making it look unnatural. In RGB mode, changing your Colors in Curves will also produce changes in Brightness and Exposure. To fix this, we can easily switch to LAB Mode by selecting it from the Image drop down menu.
LAB stands for Lightness, A Channel, B Channel. If you pull up a Curves Adjustment Layer in LAB, you’ll see that your red, green, and blue Channels have been replaced with Lightness, A, and B. Your A and B Channels ONLY affect the Colors in your image, so you’re free to push them as much as you desire without messing up your Exposure.
Once you’ve settled on colors you like, simply create a Stamp Visible Layer by pressting Shift + Alt/Option + Command + E. You can drag this layer back into your RGB mode image and the incredible Colors will stay the same. Try using this technique and post your re-colored images in the comment section below!