
Download Assets
This tutorial includes sample images. Downloads are free with a PHLEARN account.
- Download the sample images and PSDs from every free tutorial on PHLEARN
- New free tutorials published every week
- One free account — sign up once, then download anything
description
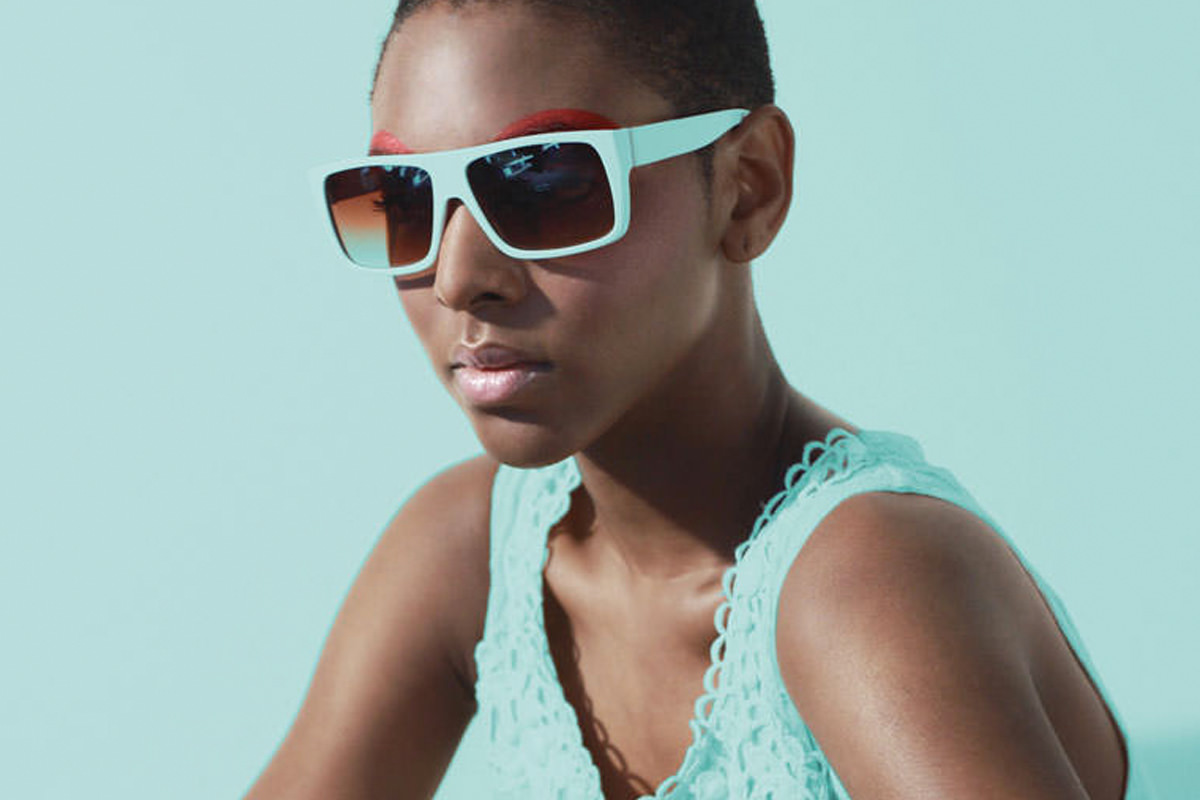
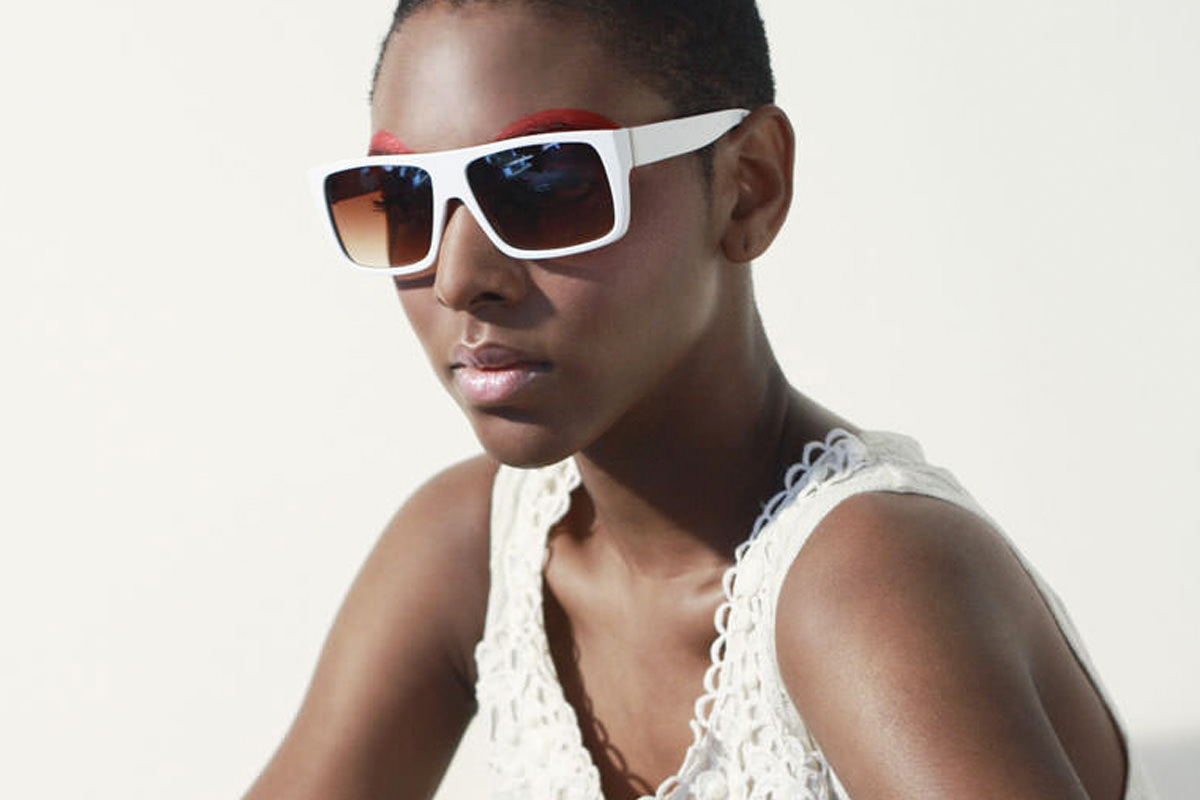
Shoot the wardrobe white and you can change white to any color you like afterwards, as many times as you like, without a reshoot. White holds every fold, shadow and texture, and it is the easiest thing in a photo to isolate cleanly. This tutorial builds the mask from an RGB channel, sharpens it with Levels and an Overlay brush, then tints the result with a single Hue/Saturation layer.
Enjoying This Free Tutorial?
We publish a new free tutorial every week, each one with sample images and PSDs you can download and follow along with. Sign up and they land straight in your inbox, along with early word on sales, events and subscriber-only offers.
How to Change White Clothing to Any Color in Photoshop
There is a practical trick buried in this technique that is worth knowing before the Photoshop part. If you are shooting and cannot decide what color the wardrobe should be, shoot white. White holds all its detail — folds, shadows, texture — and gives you the freedom to decide the color afterwards, on any number of variations, without reshooting.
The reason it works is that white is the easiest thing in a photograph to isolate cleanly, and once it is isolated, tinting it is a single adjustment. Most of the work here is building the selection. The color change at the end takes seconds.
Start in the Channels Panel, Not the Layers Panel
The instinct is to reach for a selection tool. Channels get you a better result faster, because the image already contains a near-perfect mask — you just have to find which channel is holding it.
-
Open the Channels panel and click through Red, Green and Blue
You are looking for one thing: the channel with the greatest separation between the white clothing and everything you want to leave alone — skin especially.
-
Pick the channel where skin goes darkest
On most images that is Blue, but check rather than assume. Skin tones carry a lot of red, so the blue channel usually renders them dark while white clothing stays bright.
-
Duplicate that channel
Drag it onto the new channel icon. Everything that follows happens on the copy, so the image itself is never touched.
What the Channel Is Actually Giving You
A channel is a grayscale map of how much of one color each pixel contains. That map is already most of a mask — bright where the white fabric is, dark where the skin is. You are not building a selection from nothing; you are sharpening one the file has been carrying all along.
Push the Contrast with Levels
-
Press Ctrl + L on PC (Cmd + L on Mac) for Levels
-
Drag the black point right to darken the darks
-
Drag the white point left to brighten the whites
The aim is not a good-looking image — it is the widest possible gap between the area you want and the area you do not. Push it further than looks comfortable.
Load the Channel as a Selection
-
Hold Ctrl (Cmd on Mac) and click the channel thumbnail
Light areas become selected, dark areas do not. That is the whole logic of the technique in one click.
-
Return to the Layers panel and add a Hue/Saturation adjustment layer
Layer > New Adjustment Layer > Hue/Saturation. Because a selection was active, it is converted into the layer mask automatically.
-
Hold Alt (Option on Mac) and click the layer mask to view it
You will see the channel you just built. White reveals the adjustment, black hides it — which is why the clothing needs to end up pure white and the skin pure black.
Perfect the Mask with an Overlay Brush
This is the part worth learning even if you never change a color again. It makes masking this kind of subject almost automatic.
-
Select the Brush Tool (Keyboard Shortcut “B”)
-
Change the brush blend mode from Normal to Overlay
-
Paint with black over the areas that should be hidden
Skin, hair, anything that is not the clothing. Anything already dark is driven to pure black; anything already light is left alone.
-
Paint with white over the areas that should be revealed
Same behavior in reverse — light areas go to pure white while dark areas are ignored.
-
Go over stubborn spots a second or third time
Each pass pushes further toward pure black or white. A forehead or a hand that resists on the first stroke usually gives way on the third.
Why Overlay Mode Makes This Almost Automatic
An Overlay brush respects what is already there. Painting black does not lay down black — it deepens what is already dark and leaves light pixels untouched. That means you can be genuinely careless. You can drag the brush straight across the boundary, over the white areas, and nothing happens to them. The precision that normally makes masking slow simply is not required.
When to Switch Back to Normal
Overlay only strengthens what already leans one way. Areas sitting in the middle, or large regions that need filling outright, will not move. Switch the brush back to Normal for those, and finish the mask conventionally.
Colorize, and the Job Is Done
With the mask right, the color change itself is trivial — which is the point. All the effort went into the selection.
-
Open the Hue/Saturation layer and tick Colorize
-
Lower Lightness and raise Saturation
-
Move the Hue slider to whatever color you want
Because the adjustment is masked, only the clothing changes. Drag the slider and watch the whole wardrobe cycle through every option you might have shot.
Light Colors Hold Up Better Than Dark Ones
You are starting from white, so pale and mid-tone colors read convincingly. Pushing toward a deep, saturated dark tends to look off, because the original fabric has none of the shadow density a genuinely dark garment would have. If you need dark, expect to do more work than this technique alone.
Where This Usually Goes Wrong
Choosing the channel by habit rather than by looking is the most common error — Blue is usually right, but not always, and starting from the wrong channel means fighting the mask for the rest of the process. Being too gentle with Levels is the next: a timid contrast push leaves gray areas that the Overlay brush cannot resolve in either direction. And forgetting to switch the brush back to Normal for the mid-tone regions leaves people convinced the technique has stopped working when it is simply doing exactly what it is designed to do.
More Free Photoshop Tutorials
More recent ways to take control of color and selection:
- The New Hue/Saturation Tool in Photoshop 2025
- How to Create and Use Layer Masks in Photoshop
- Photoshop Basics: How to Use Clipping Masks
What Makes the Result Believable
The color survives because the mask preserves everything underneath it. Folds, creases, shadow and highlight all remain — the adjustment tints them rather than replacing them, so the fabric still behaves like fabric. This is why white is such a useful thing to shoot: it carries the full range of tonal detail with no color of its own to fight. The same channel-and-mask thinking is what lets you replace any color in an image, work convincingly in Black & White in Photoshop, or isolate a subject from its background.
Shoot White, Decide Later
The real value here is not the recolor — it is what it frees you to do on the shoot. A white garment is a wardrobe of every color at once, decided afterwards, with the client in the room and no reshoot required. Build the mask once and you can generate as many variations as anyone wants to see, which is a considerably stronger position than committing to a color before the shutter ever fires.
Related Tutorials
New Free Tutorials View All »












Enjoying This Free Tutorial? Go Further with PRO.
Unlock Full Sample Files, PSDs, and Hundreds of Masterclasses!

Download full project assets, original PSDs, and RAW images for every lesson
Unlimited access to our complete library of PRO Photoshop & Lightroom courses
Instant 4K Ultra HD streaming on all devices, anytime, anywhere
Full access to our entire library of Photoshop Actions, Presets, and LUTs
Flexible monthly and annual membership plans
Cancel anytime with zero hassle or commitments