Download Sample Images
Click the link below to download the sample images and follow along with this tutorial.
DownloadTutorial Description
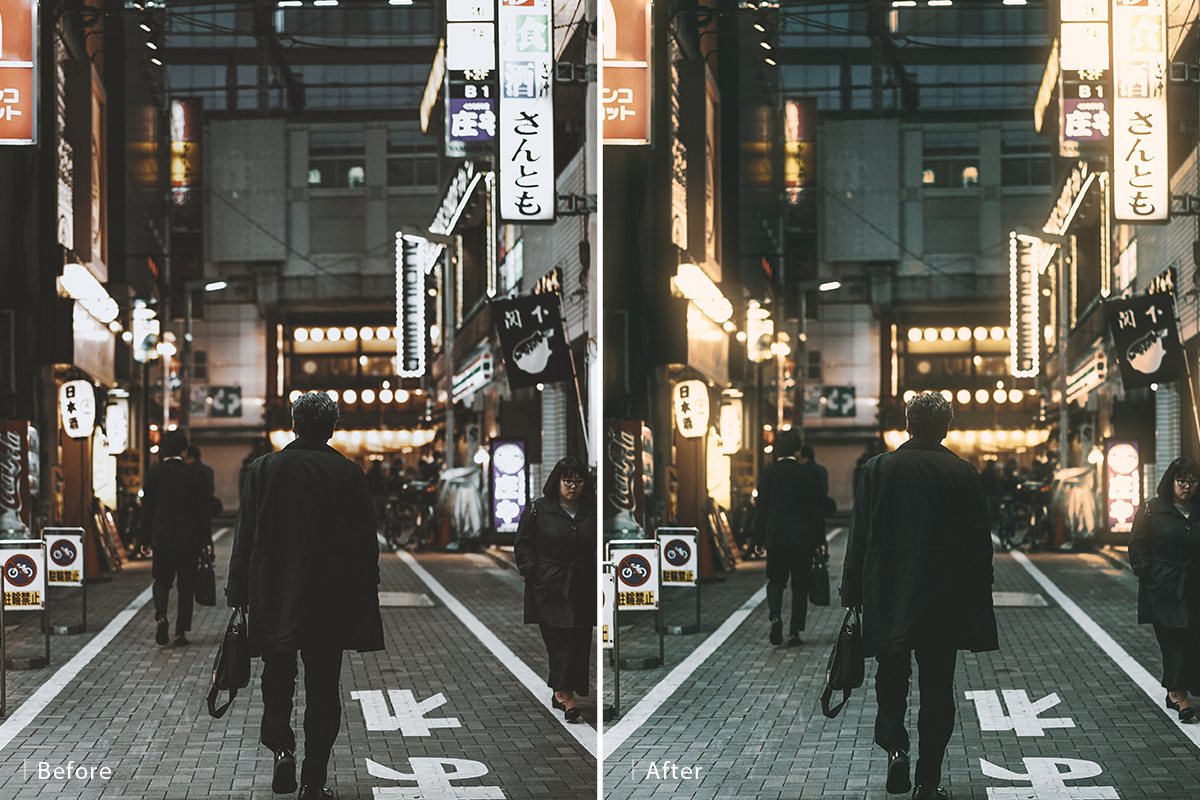
Learn how to quickly enhance the lighting in your photos with Photoshop! Make light sources brighter, adjust the colors, and add a realistic glow–all with the power of Channels, Adjustment Layers, Blending Modes, and more!
Selecting Light with Channels
Before we can make any adjustments to the lighting in an image, we need a way to accurately select the light sources. So how do we select only the bright parts of a photo? The difference between areas of light and dark is called contrast and Channels allow us to identify and select high contrast areas in Photoshop!
You can find the Channels menu within the Layers Panel. In it, you’ll see options for each available color channel–since we’re working in RGB, the options are red, green, and blue. Click through each and look for the channel that contains the most contrast between light and dark. If the darker areas of a photo are close to pitch black, and the lighter areas are close to pure white, you’ve found the right channel!
In our example, the blue channel contains the most contrast between light and dark. We can use that Channel to make a selection of the light areas in the photo. Simply hold CTRL or CMD and click on the channel you want to select. Now let’s move this selection into a Layer Mask.
Working with Layer Masks
With your new selection active, go back to the Layers Panel and add a Solid Color Fill Layer to the project. Our selection will automatically load into the Layer Mask of the new Fill Layer. We’re getting close, but you might notice that our Layer Mask is affecting way more than just the light sources in the photo. In our example, there are some white signs and reflections that Photoshop recognizes as ‘bright’, but that are not light sources that we want to enhance.
With the Layer Mask selected, you can create a Levels Adjustment and move the slider from the left to the right. This will preserve the brightest areas of the Layer Mask, while turning less bright areas to black. This will help a little bit, but we can refine the mask even further with the Brush Tool. Simply paint black on the Layer Mask over any areas that are not light sources you want to affect.
You should now have a Solid Color Fill Layer that only appears over the light sources in the photo. From here, we can change the color of the Fill Layer (we went with orange to warm the lights up a bit) and apply additional effects.
Blending Modes & Blurs
Blending Modes are quick and effective way to merge Layers together to create different effects. By changing the Blending Mode of the Solid Color Fill Layer to Screen or Overlay, you’ll notice the coloring effect is much more subtle and realistic.
You can take this even further by Duplicating the Solid Color Fill Layer and adding in additional colors or choosing different Blending Modes. By combining multiple adjustment Layers and multiple Blending Modes, you can get some truly unique effects.
And if you want to add a little bit of glow, just duplicate one of the Fill Layers, select the Layer Mask, and add a Gaussian Blur. Change the Blending Mode to Screen or Overlay and it will add a nice atmospheric effect to the lights in the image.