The 3 Steps of Applying Motion Blur in Photoshop
In order to apply motion blur to an image in Photoshop and make it look realistic there are 3 things you must keep in mind. In this episode we show you how to master the motion blur in Photoshop using these techniques and give some Insights on how to make Motion Blurs look real.
Step One: Cut Your Subject Out
The first step you will need to do when applying Motion Blur to an image is to cut out your subject. Most of the time you will want your subject to remain still while the rest of your image looks blurred.
The best way to cut out your subject is by using the Pen Tool. If you need help with the Pen Tool be sure to check out these episodes on the Pen Tool.
Step Two: Remove Your Subject From Background
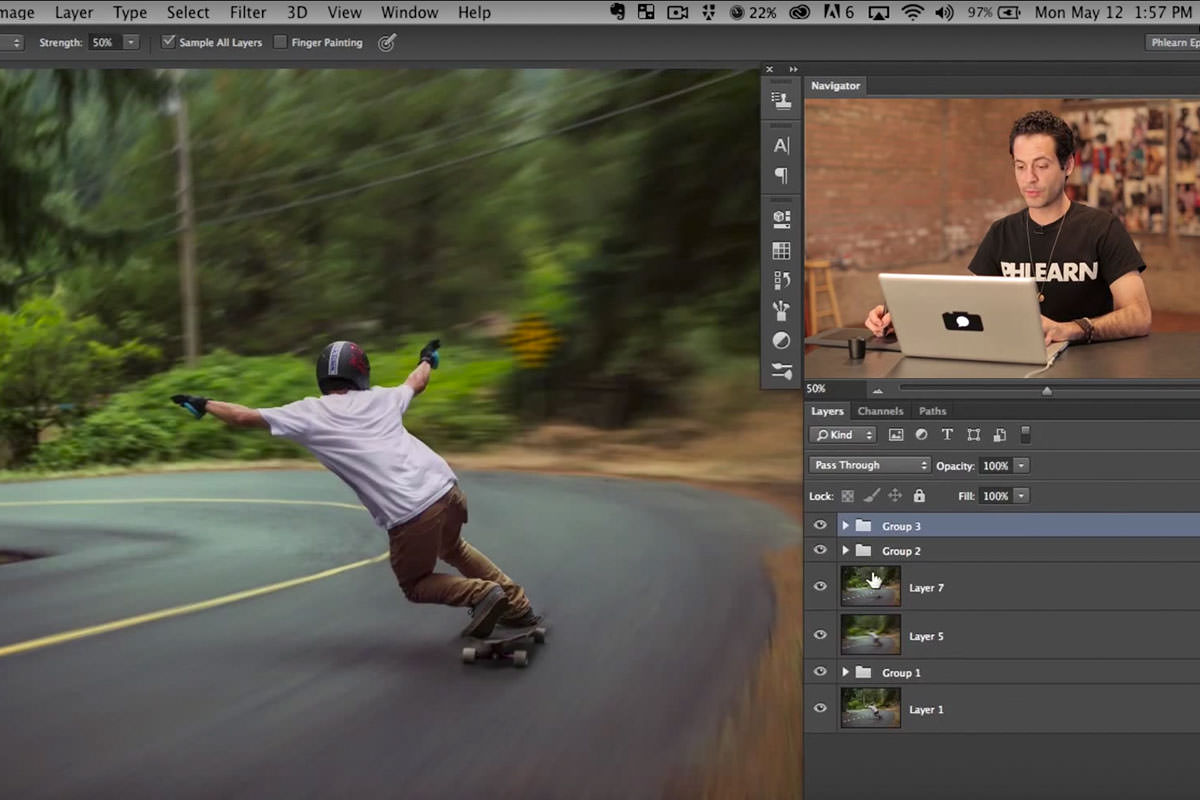
It is important to remove your subject from the Background before applying the blur because these Blur Filters effect the entire layer, including your subject. If you don’t remove your subject from the background first you will see a blurred “halo” around your subject in the final image.
In order for there to be a clean blur on the background and no haloing on your subject simply copy the Background over top your subject. In this episode we use the Clone Stamp tool to cover the subject with the Background. Now we have a cut out of our subject as well as a clean Background.
Apply the Appropriate Blur
The last step is to apply a Motion Blur that is appropriate for your image. In many cases a simple “Motion Blur” will do the job.
If the blur needed for your photo is a bit more complex you will need to be a little more creative. In this episode we show you how to make a complex blur that changes with the direction of the photo.