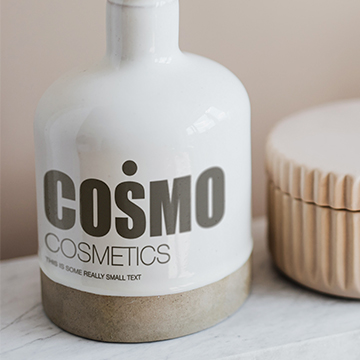
Download Sample Image & PSD
description
Today we show you how to use Photoshop to identify any font used in a photo, and then create your own text that blends in perfectly with the scene.
Learn how to use the Type options in Photoshop to match a font, create new text, and then use a variety of adjustments to make the new text match the lighting, color, and perspective of the photograph!
Share
IDENTIFY & RECREATE ANY FONT
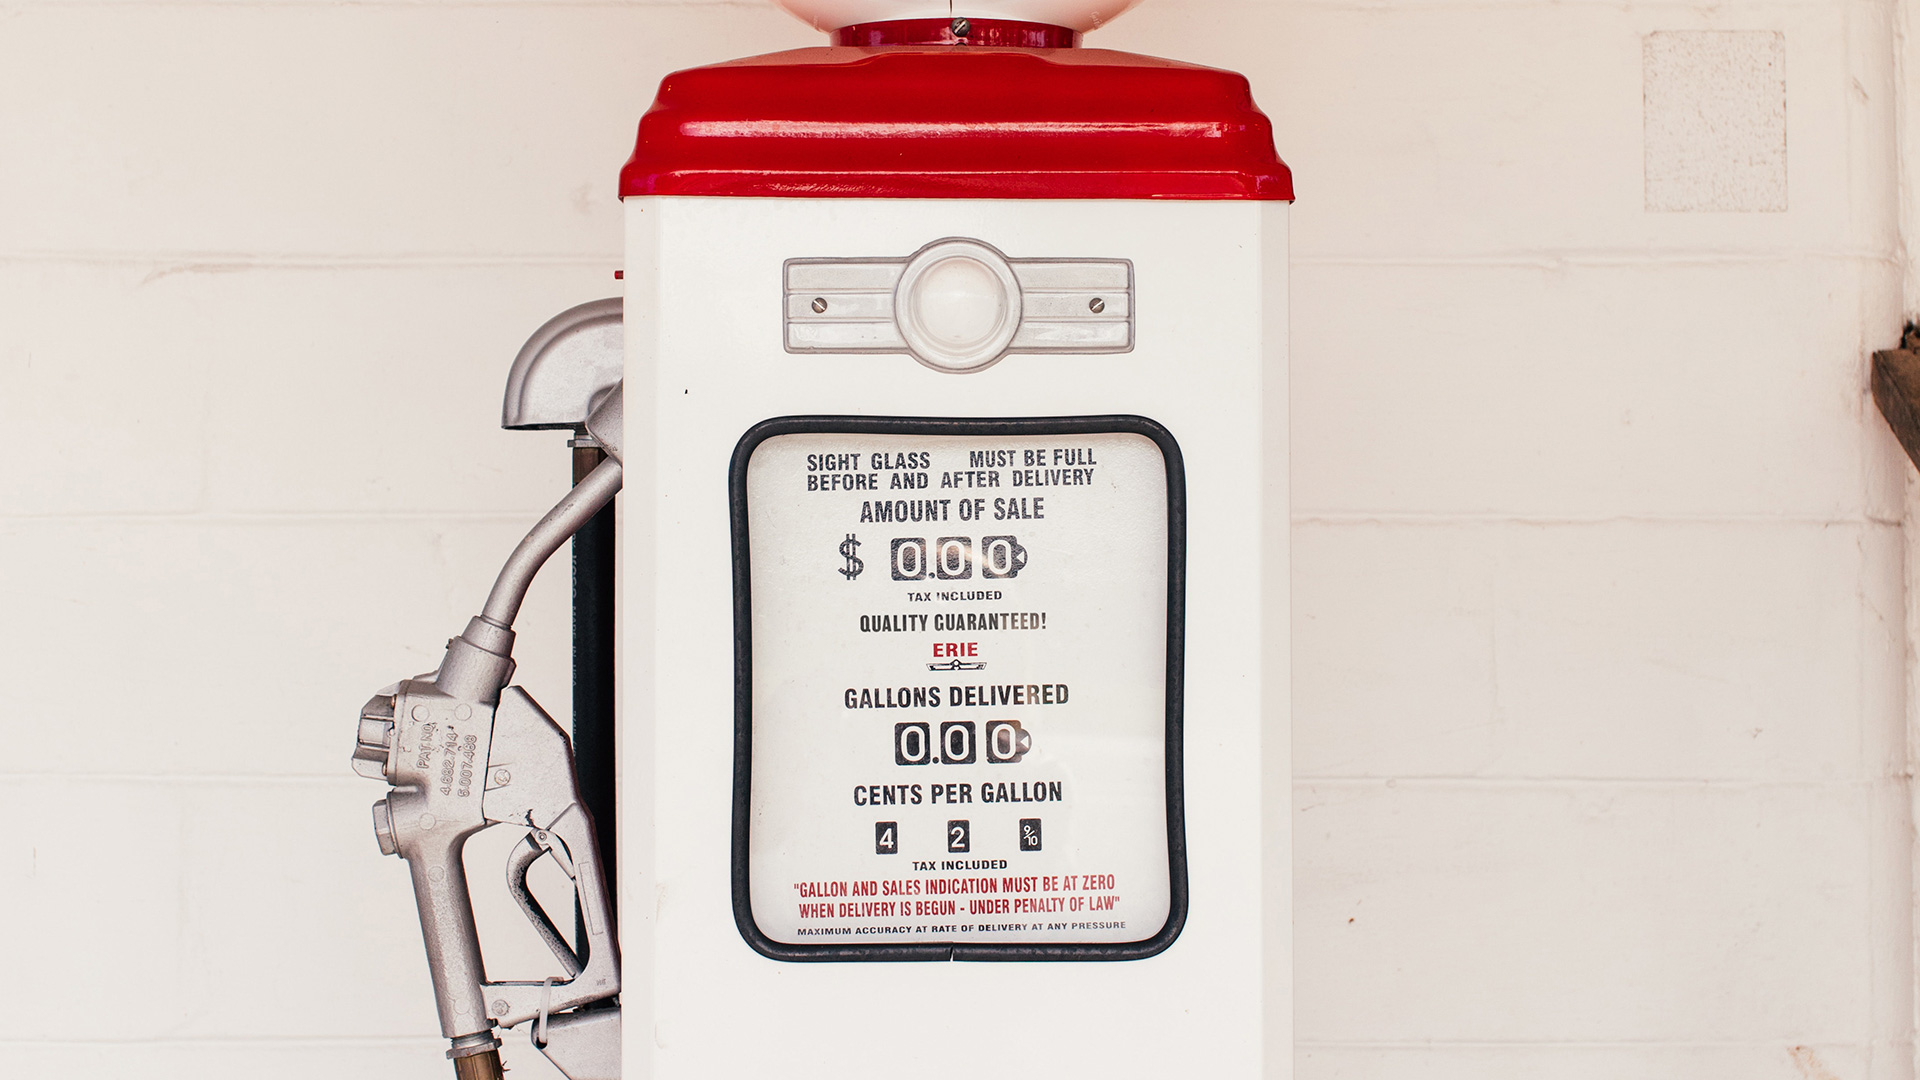
BEFORE
How to Match Fonts in Photoshop
This is a question that we get a lot: How do you correctly identify a font in a photograph? This wasn’t always easy, but Photoshop has some new, powerful tools tied to Adobe Fonts that make this process easier than ever.
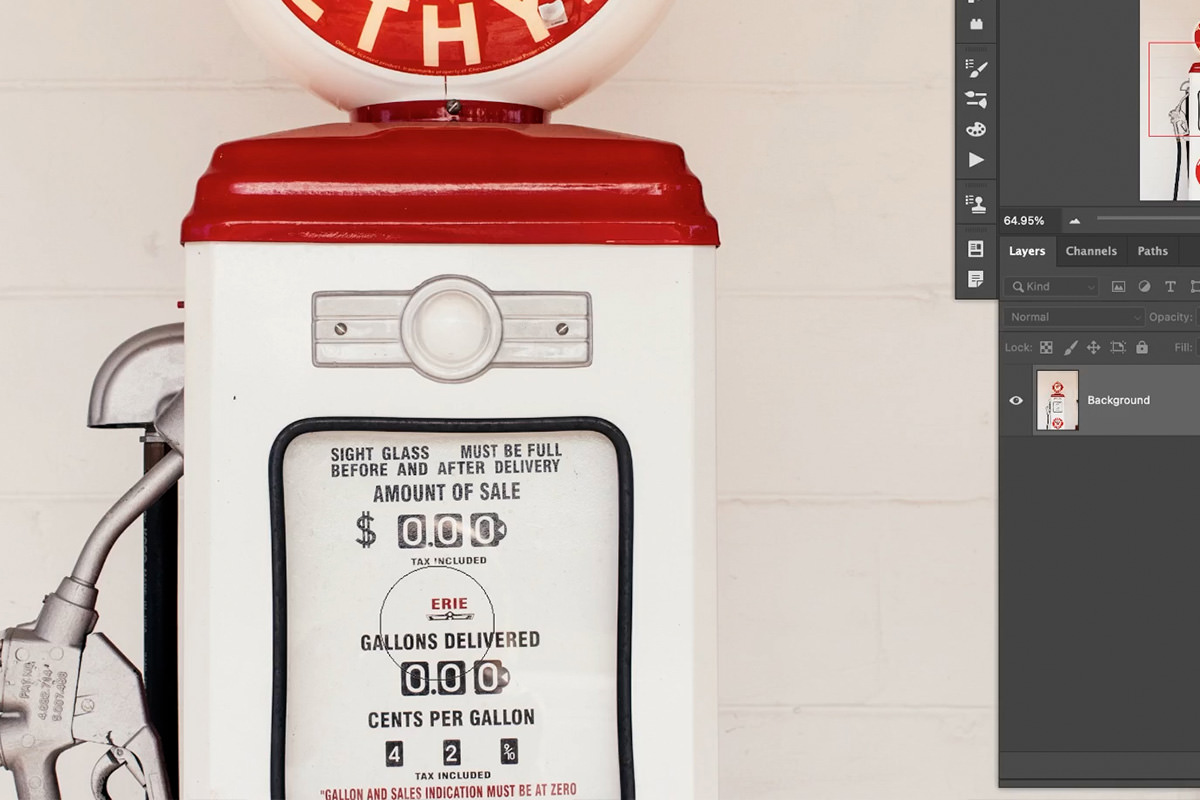
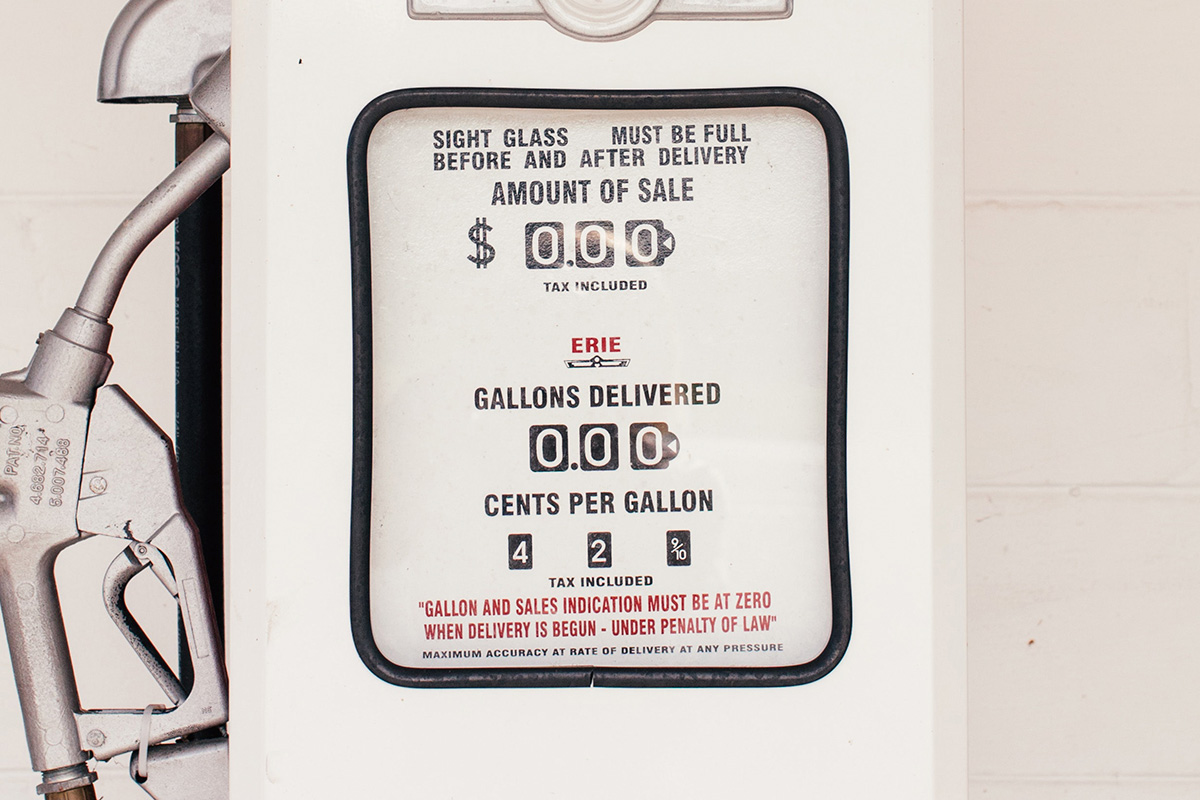
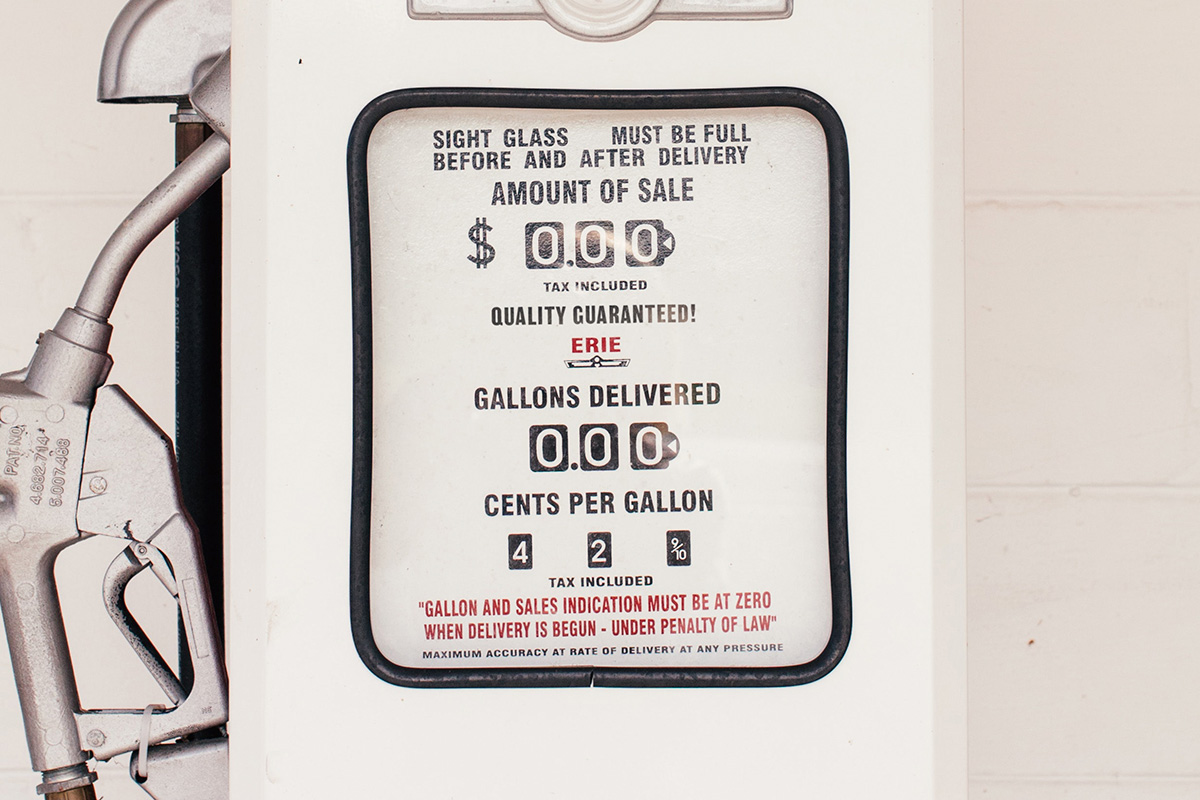
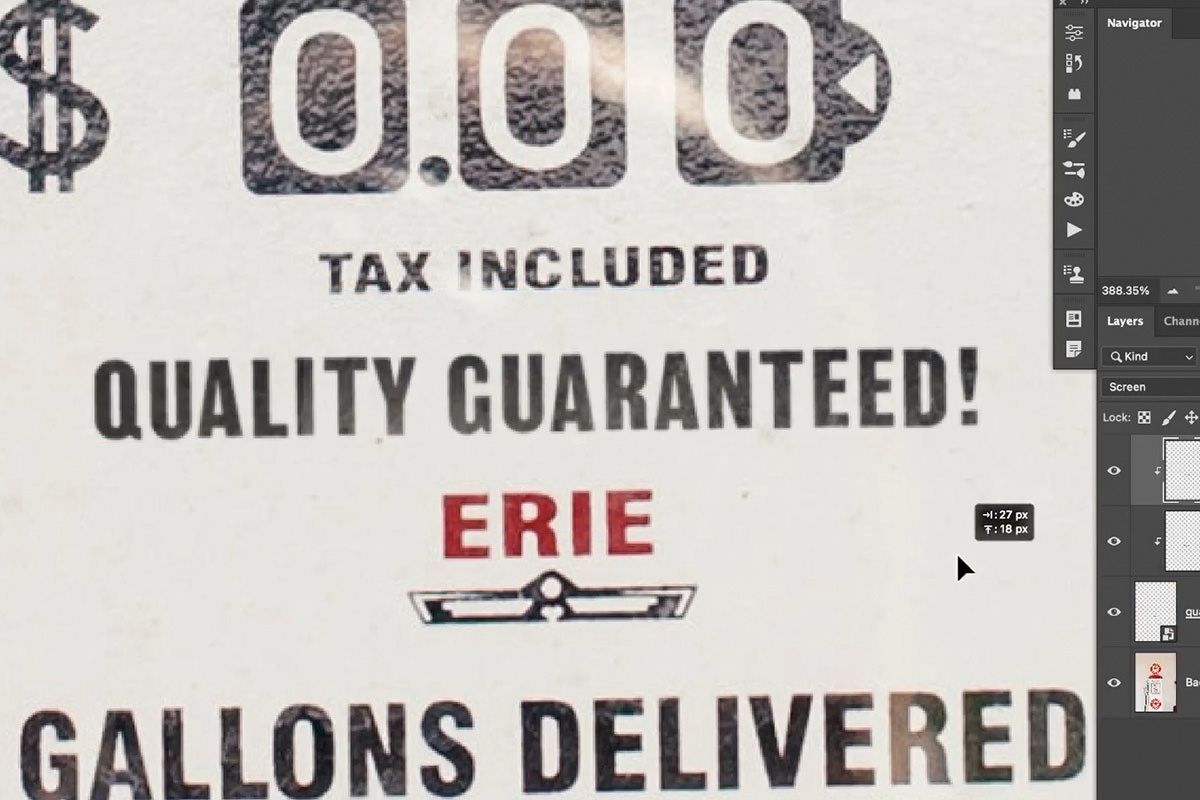
Take this image for example. Let’s say that we want to add some additional text to the fuel pump. First, we need to figure out what the existing font is.
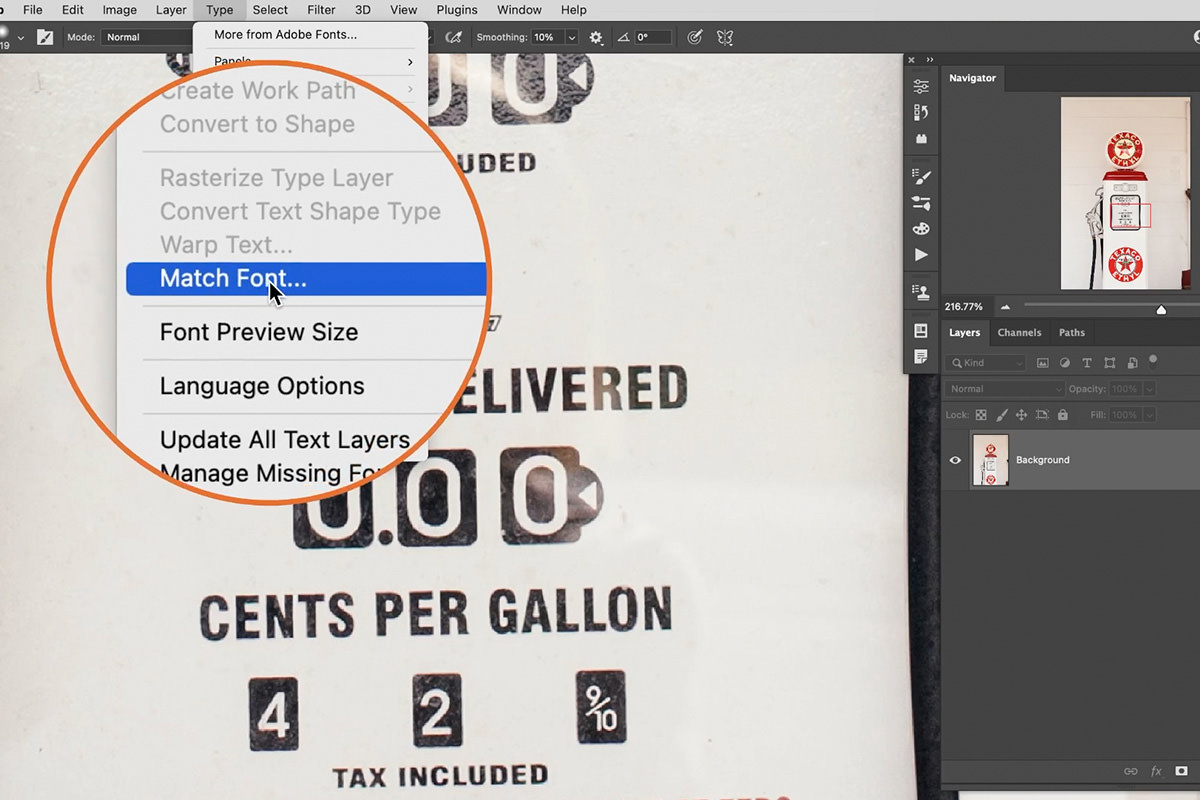
This is where the Match Font option in Photoshop can save us precious time. Open the Type menu, and select Match Font.
A dialog will open along with a bounding box that appears over the image. Adjust the bounding box so that it surrounds the font you want to identify.
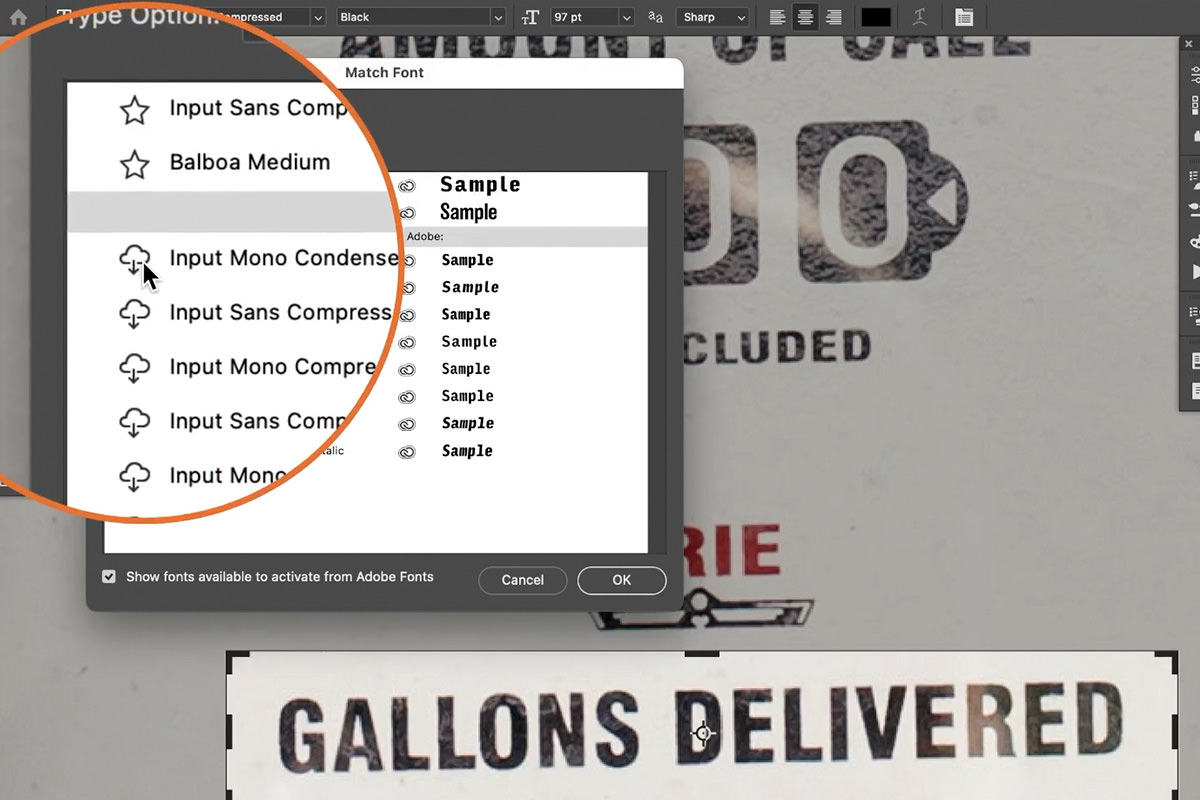
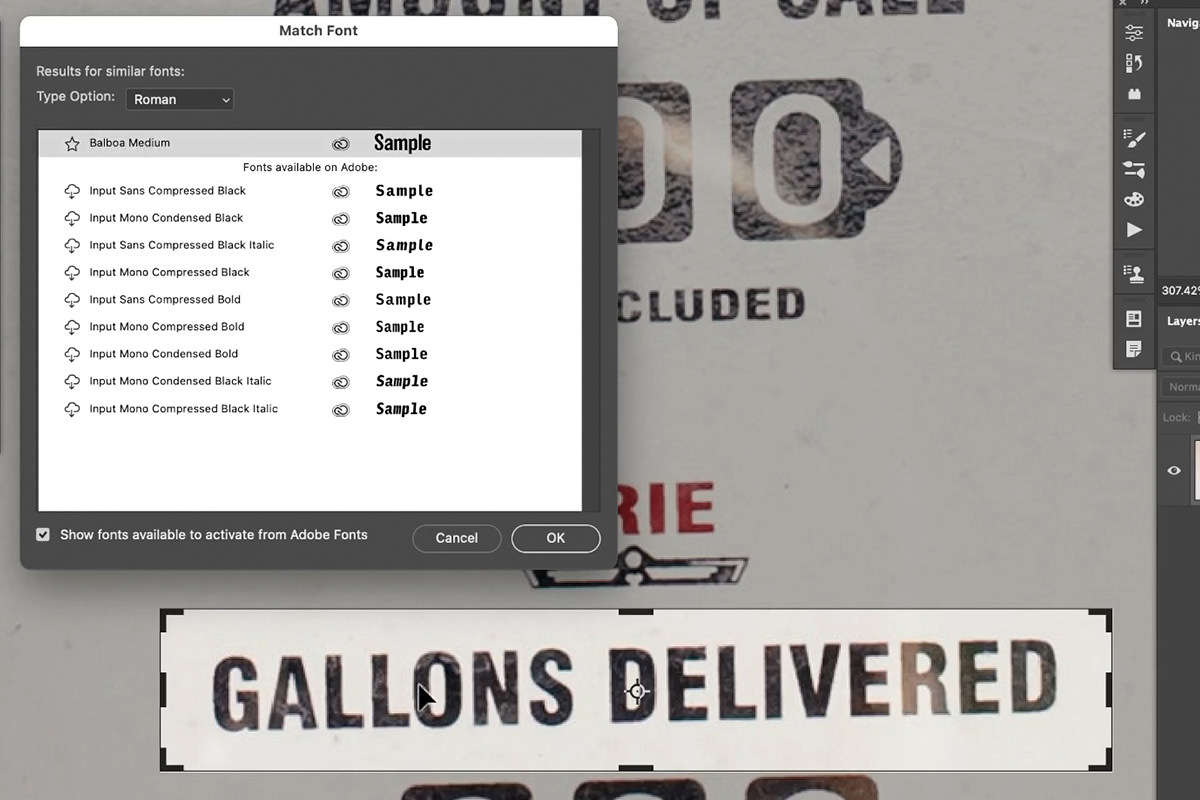
Photoshop will automatically serve up fonts that it thinks are a match. Best of all, it will even provide download options if the font is available through the Adobe Fonts library.
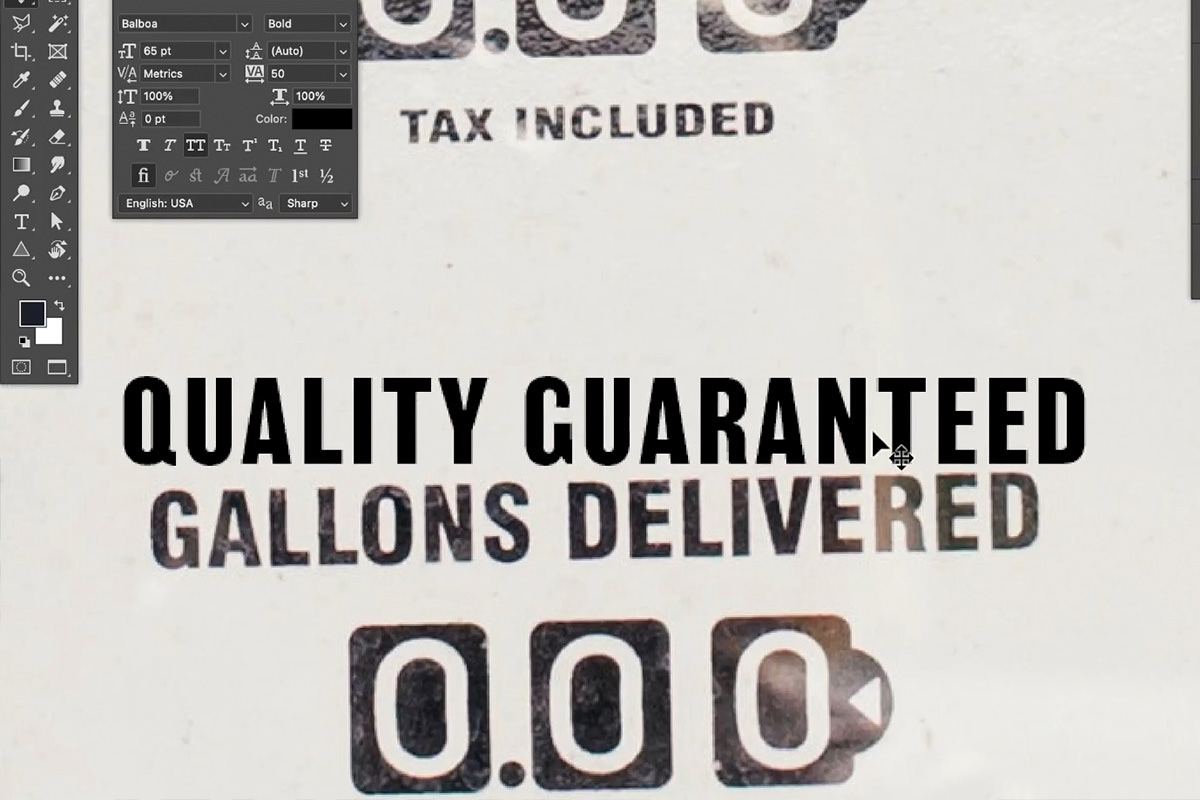
You may need to make some adjustments to find the correct font weight and the right settings for the kerning. Once that’s all dialed in, you should have an exact match of the font used in the photo!
Blending Text into a Photo
Alright, so we successfully found the font we need to match the image, but how do we integrate it into the scene so that it looks like part of the photograph? Let’s see what we can do using some borrowed textures from the image and some easy-to-use Photoshop adjustments.
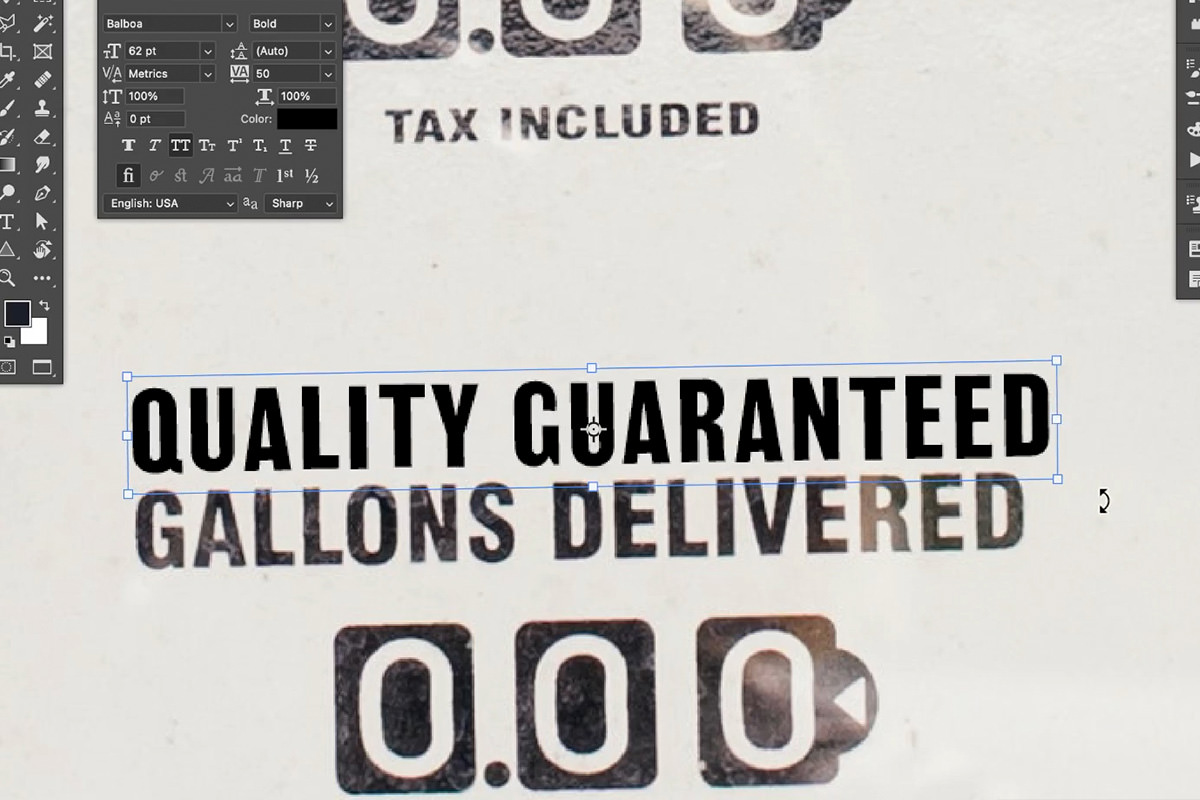
First, we need to make sure that the text is properly aligned and in the correct perspective to match the existing text in the image. Fortunately, the existing text was photographed straight-on, so there’s no tricky perspective work we have to do. Although, if you need it, we do have several free tutorials on how to match perspective in Photoshop.
For our example, all we need to do is use the Transform options (CTRL or CMD + T) to resize and rotate the type to get it into the right position.

Before we make other adjustments, we’ll need to convert the text layer into a Smart Object. You can do this by right-clicking on the text layer in the Layers Panel and selecting Convert to Smart Object, or Photoshop will give you the option as an alert when you try to make your first adjustment.
Once the text has been converted to a Smart Object, we can begin the process of blending it into the image by matching light, color, and texture.
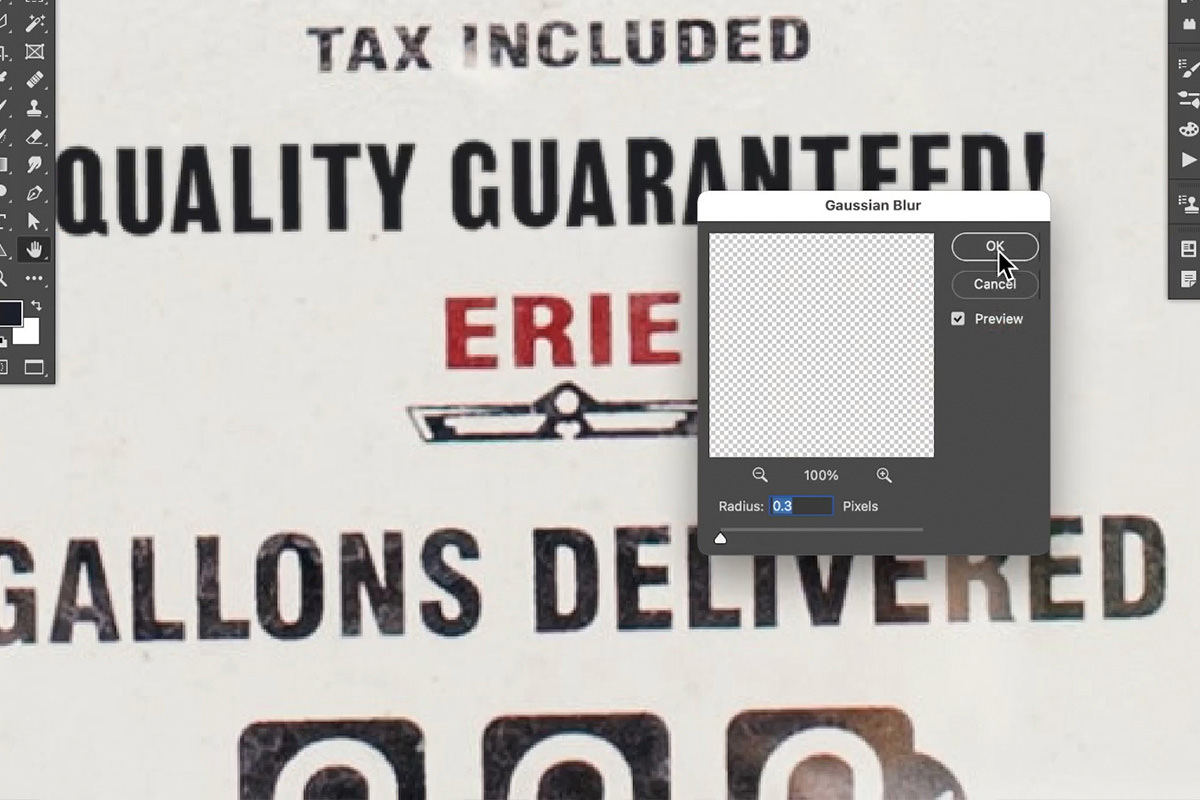
First, let’s make sure that it’s not too well-defined by adding a slight Gaussian Blur. This will eliminate sharp edges that will help make the text appear more photographed.
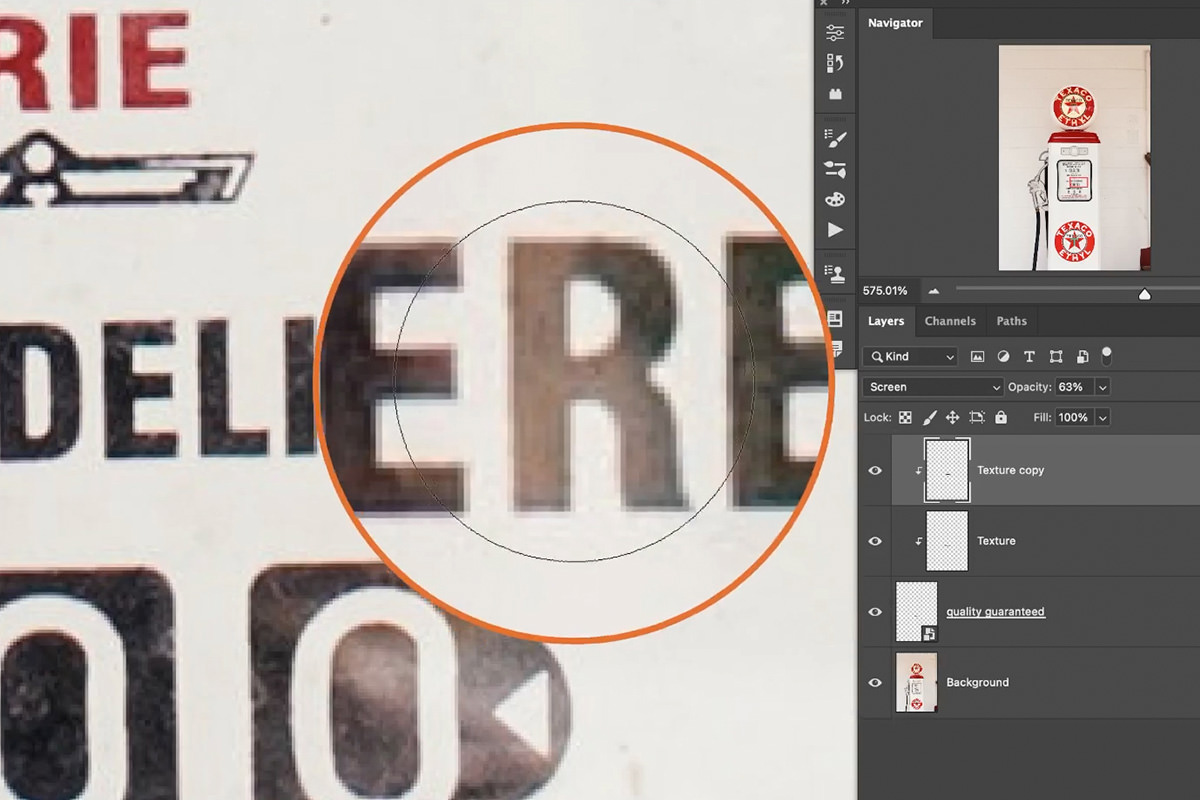
Matching Font Texture
Next, we need to add some texture that matches the material that the original text is printed on.
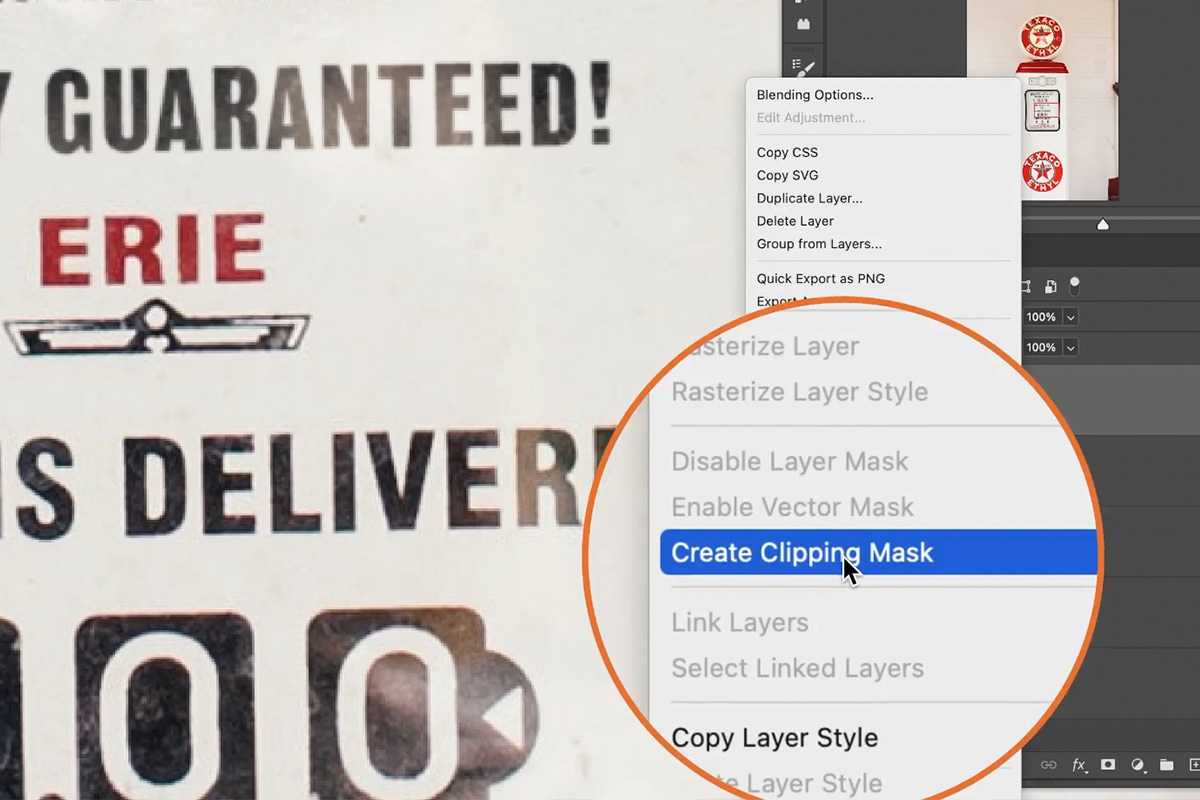
Select the background image layer, and then use the Rectangular Marquee Tool to grab a selection of the background texture that’s slightly larger than the new text we’ve added.
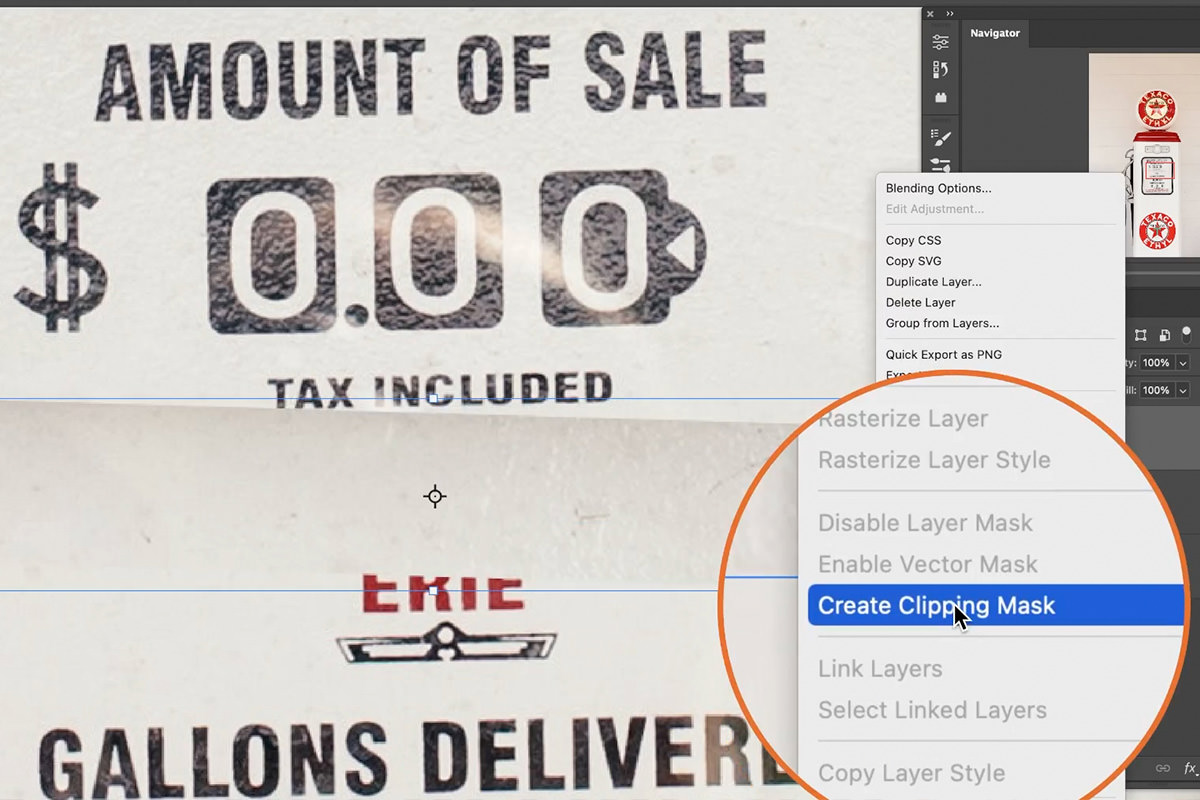
Copy and paste that selection to a new layer. Rotate and position that new layer so that it sits over top of the text we created. Right-click on the texture layer and select Create Clipping Mask. This will make it so that this texture only appears over top of the text.
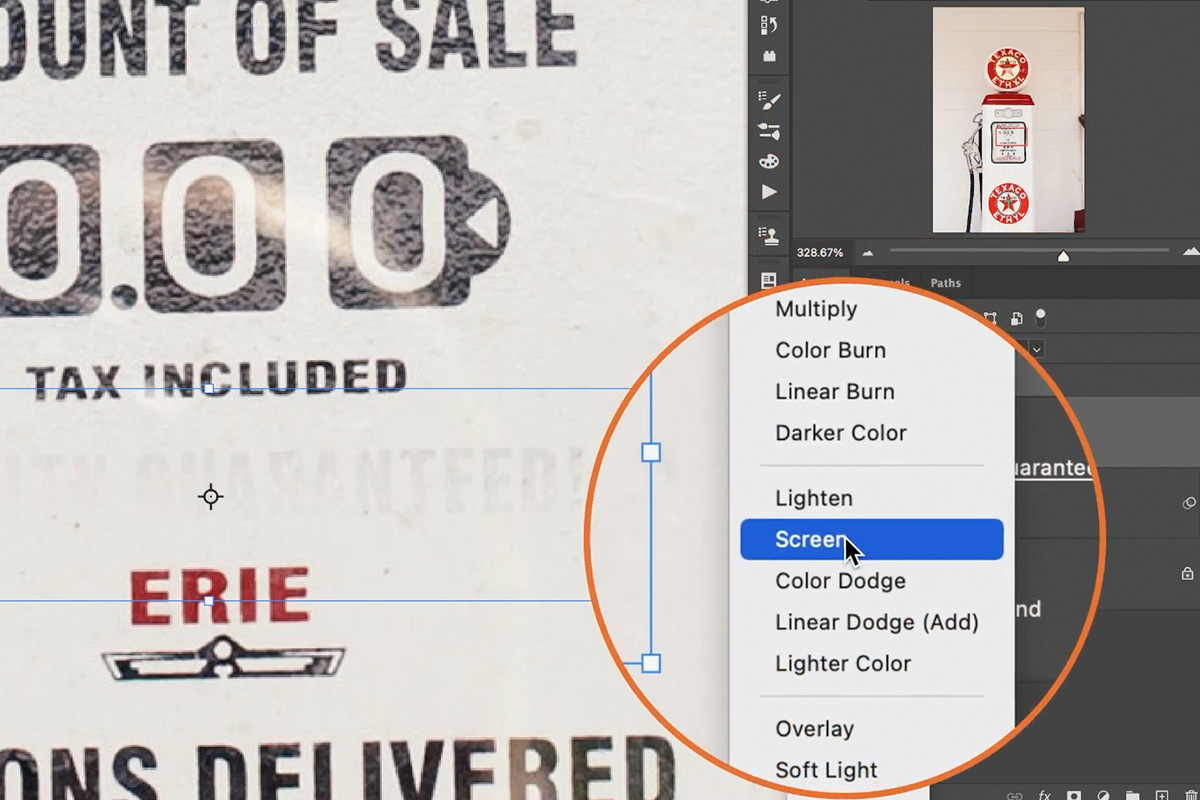
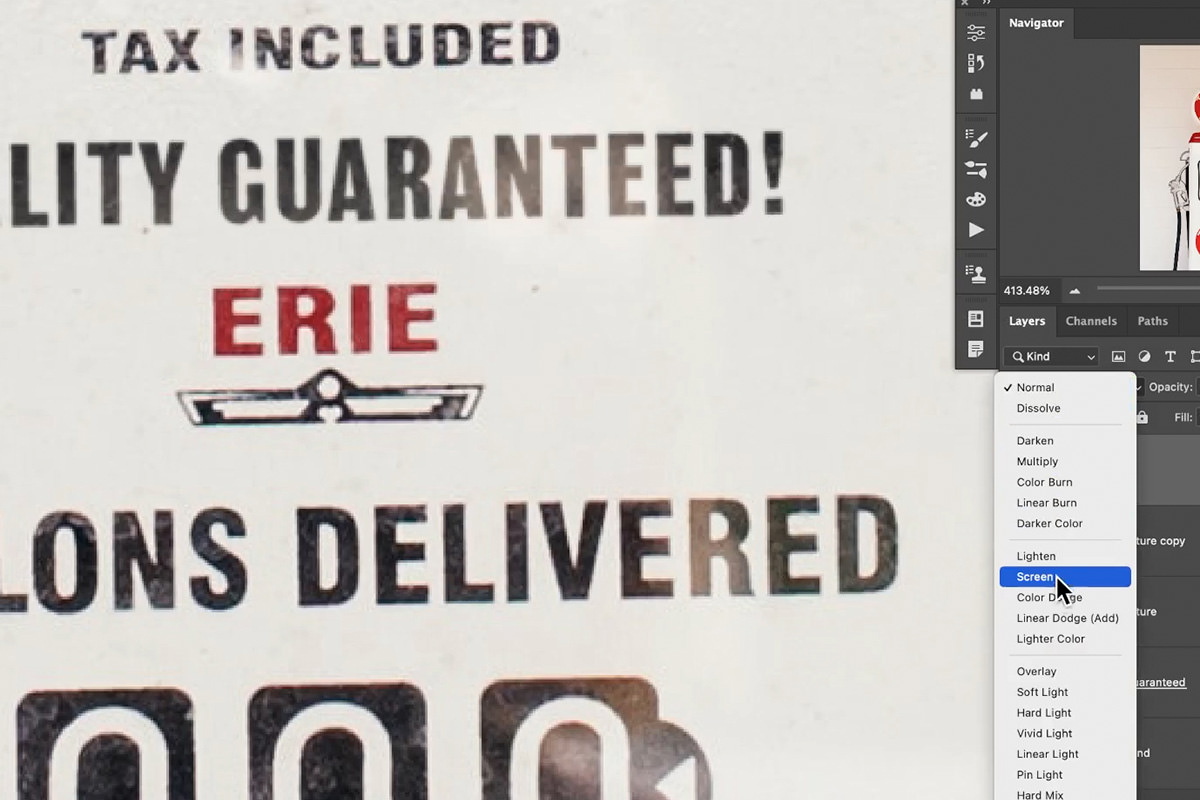
Next, set the Blending Mode of the texture layer to Screen. This will help blend the texture into the text, but we’ll need to do some additional adjustments so that the text is more visible.
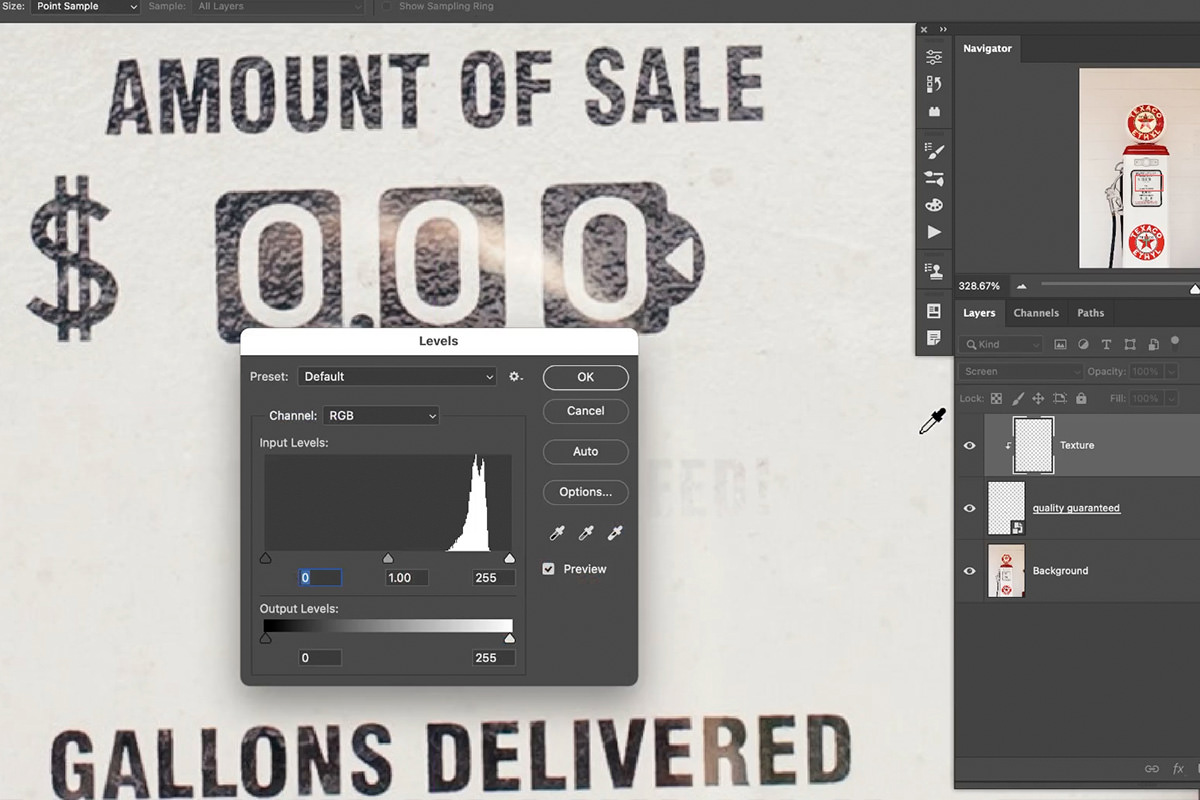
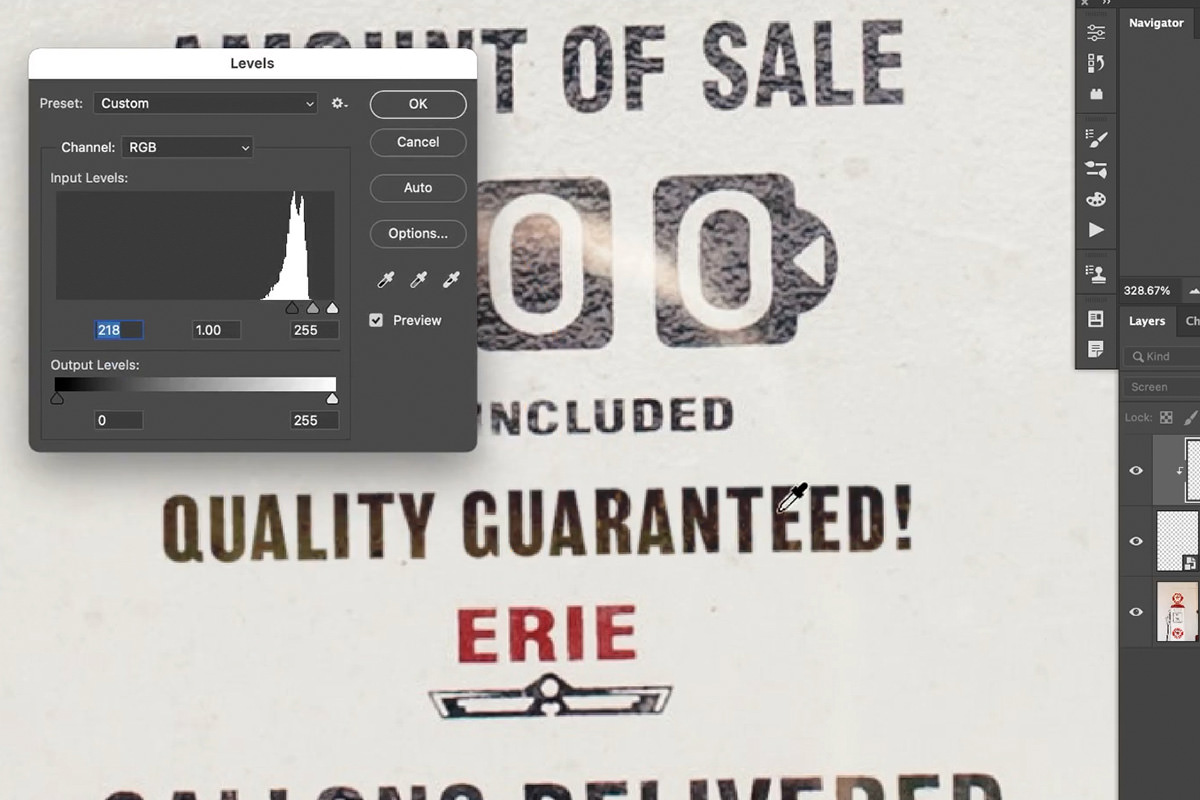
With the texture layer active, hit CTRL or CMD + L to open the Levels Adjustment dialog.
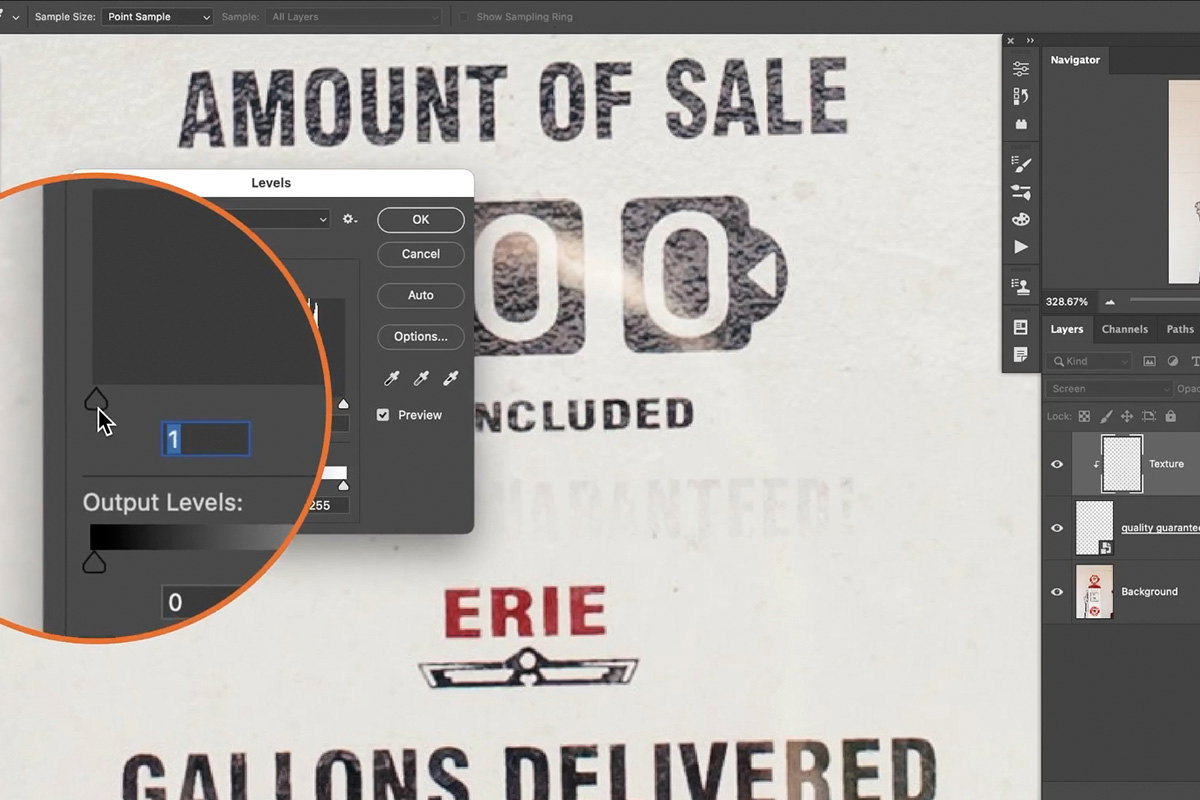
Locate the slider that controls the darks in the image.

Then, drag it to the right until the text is more visible and closely resembles the rest of the text in the image.
We’re getting close! There’s only a few small adjustments left to make.
Matching Font Color
It’s looking great, but we need to make some small adjustments to the color of the type we created.
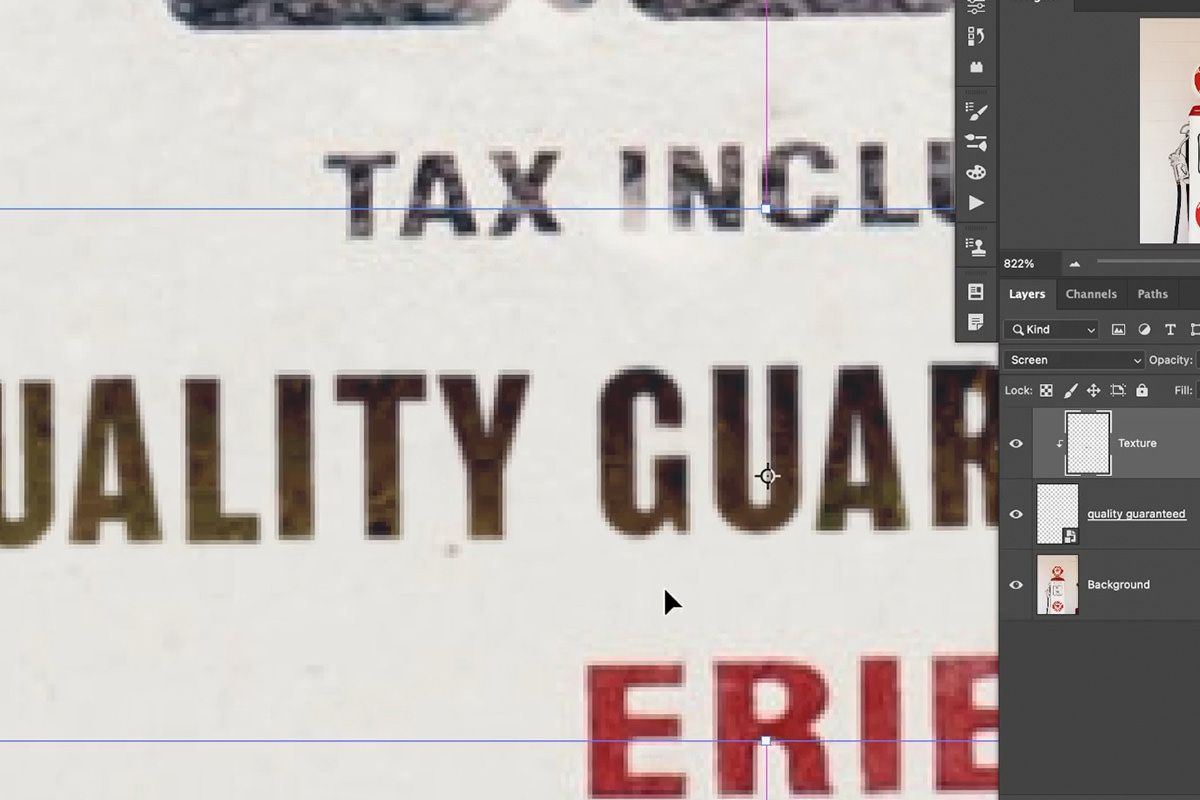
Zooming in, notice that the effect we created is a bit too yellow when compared to the existing text in the photographed.
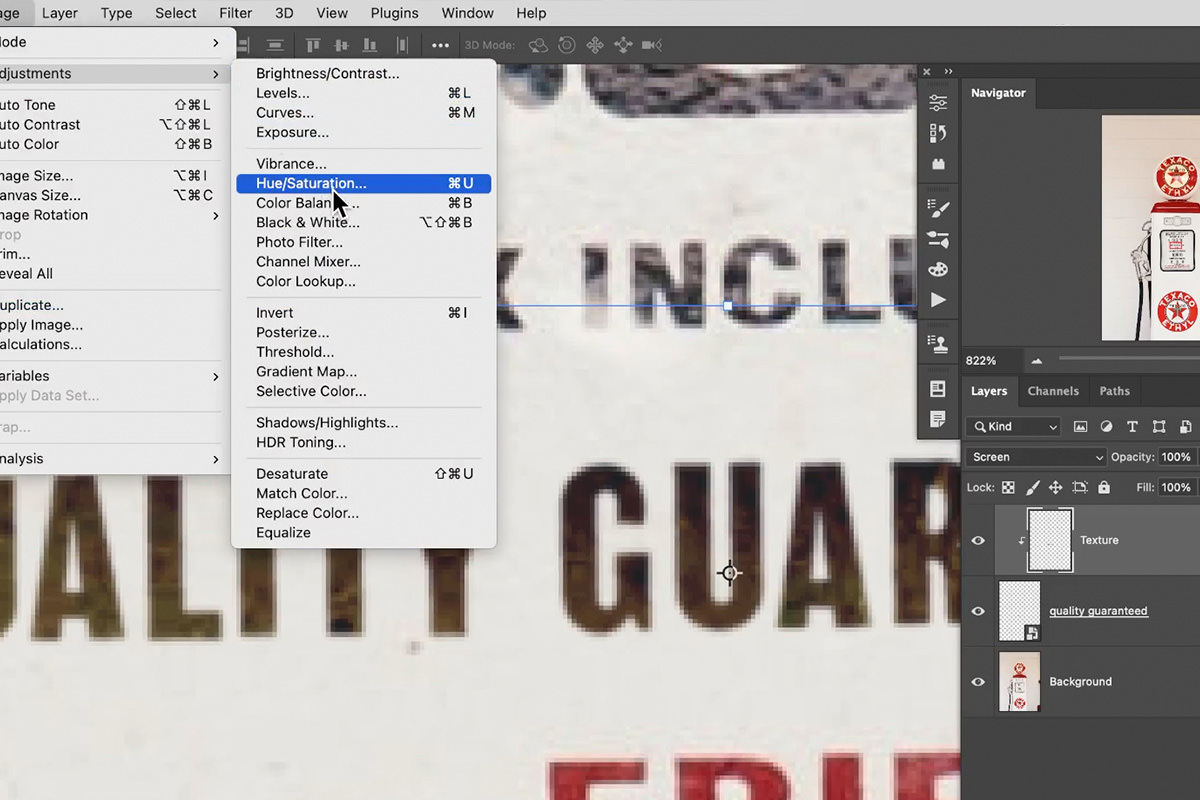
Open the Image menu at the top of the screen, hover over Adjustments, and select Hue/Saturation.
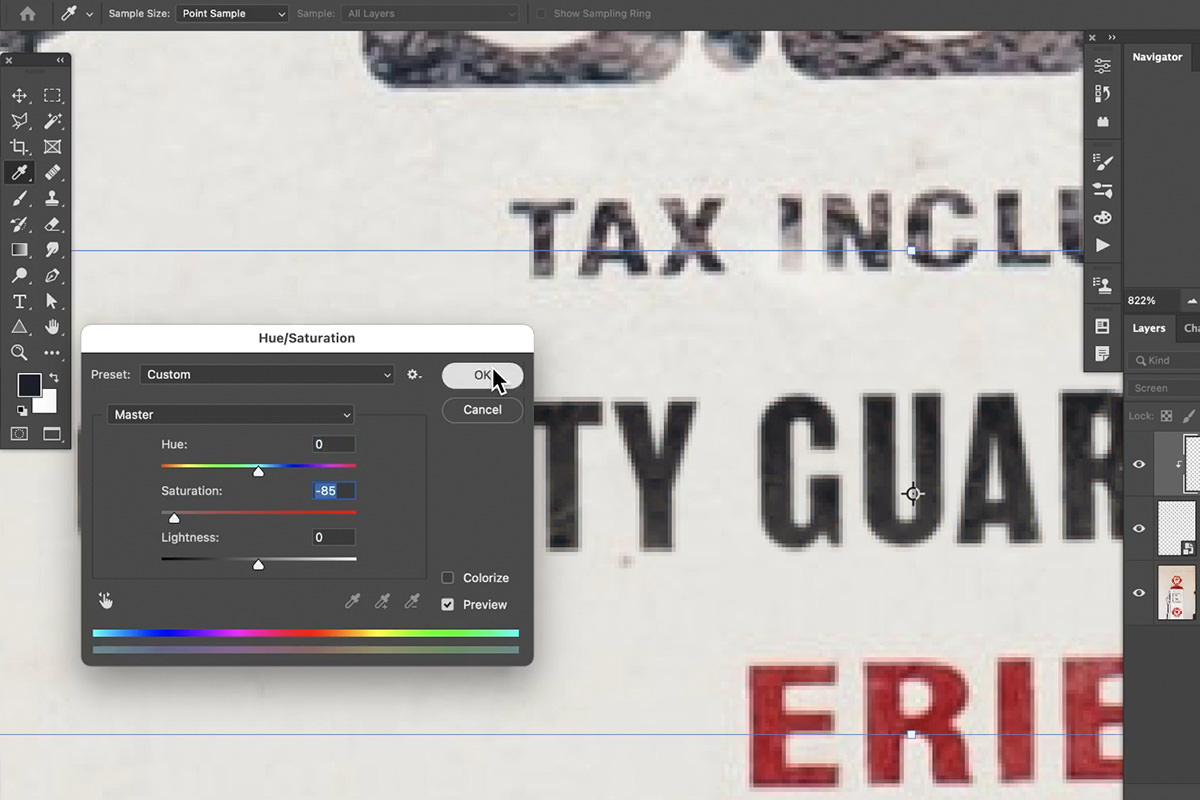
The Hue/Saturation dialog will open. Since we want to remove the yellow color, we can do this by simply moving the saturation slider to the left until the color is no longer visible.
Perfect! You could probably stop here and have a pretty convincing effect, but let’s try and take it one step further to create an ultra-photorealistic result.
Matching Lighting & Glare
In this particular image, the original text is behind a transparent surface that reflects a little bit of the environmental light.
If you zoom in to some of the existing text, you’ll see areas that are lighter due to the glare. Let’s try to recreate that effect in a similar pattern so that our text also looks like it’s behind the same transparent material.
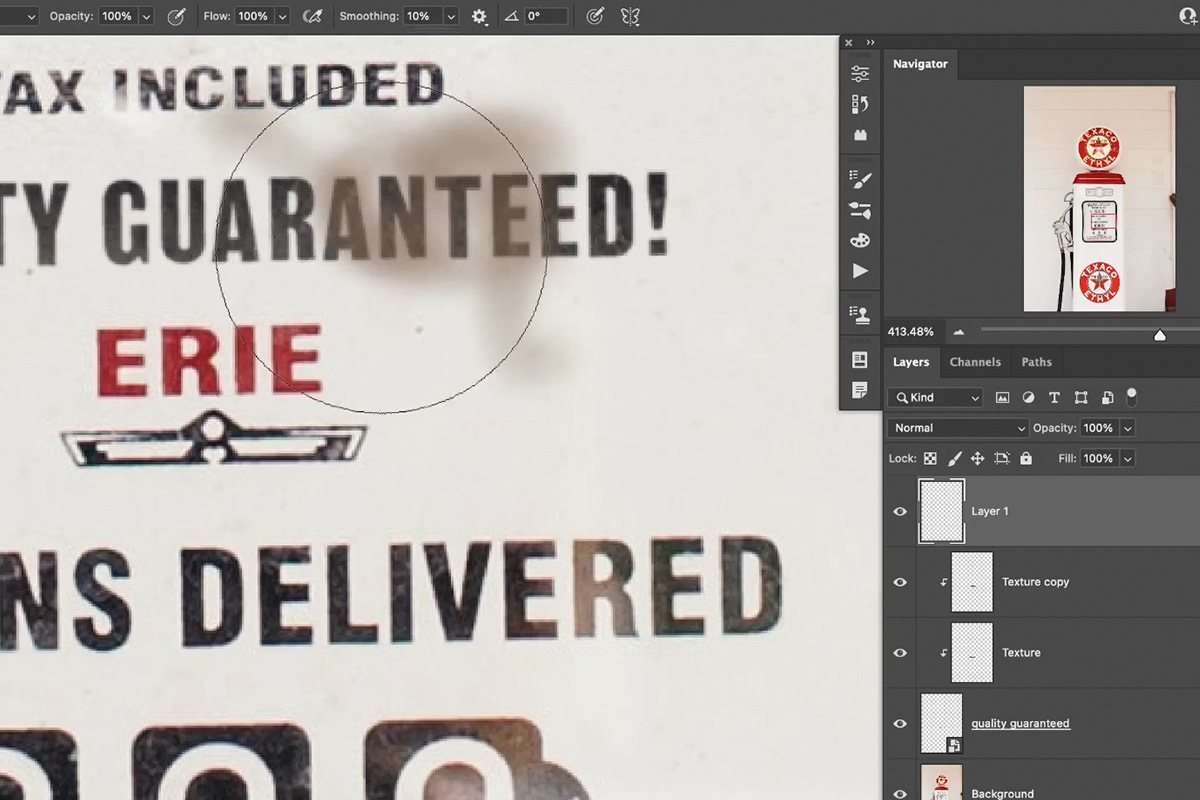
Create a new layer on top of the layer stack. Select the Brush Tool and Sample a color, by holding ALT or OPTN and clicking on it, from the glare in the original text.
Paint over top of text we created (and make sure you’re on the new, blank layer) in a rough pattern that matches the position of the existing glare in the photograph.
Then, set the Blending Mode of the paint layer to Screen.
Right-click on the paint layer and select Create Clipping Mask. Again, this just makes it so that the effect only appears over top of the text and won’t be visible in the lighter background areas.
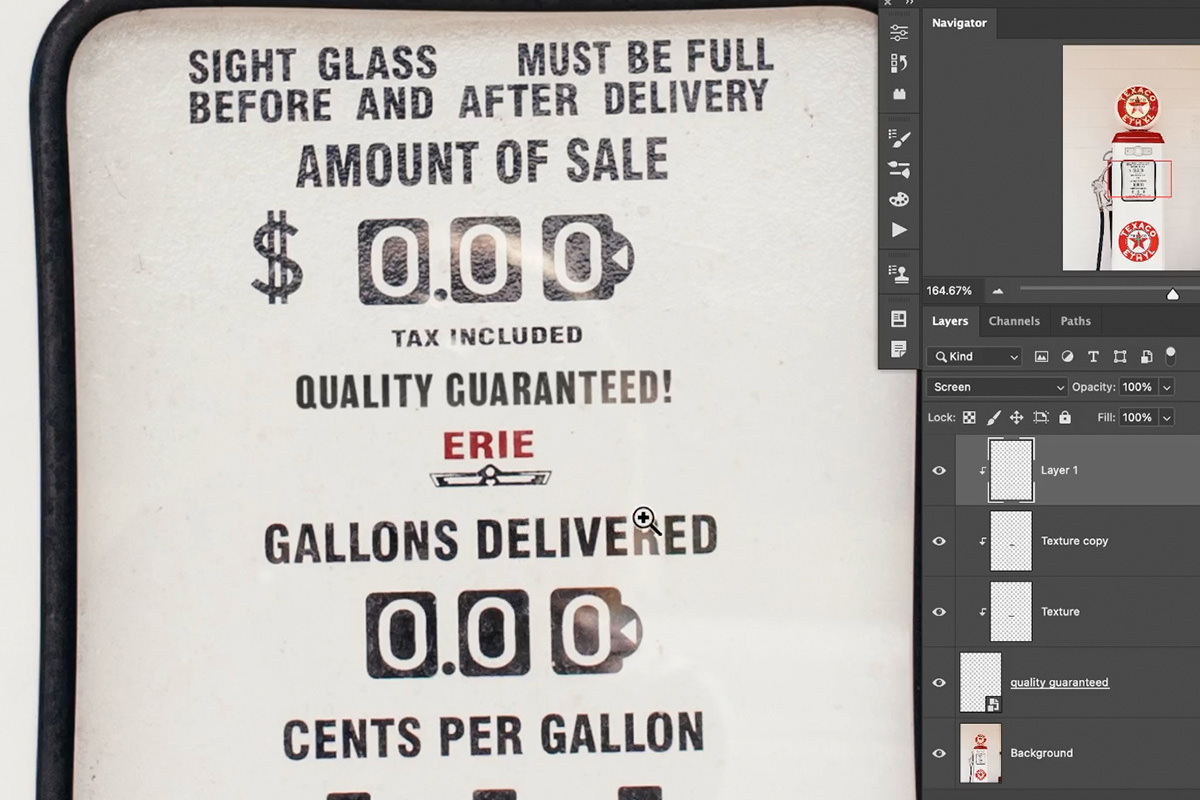
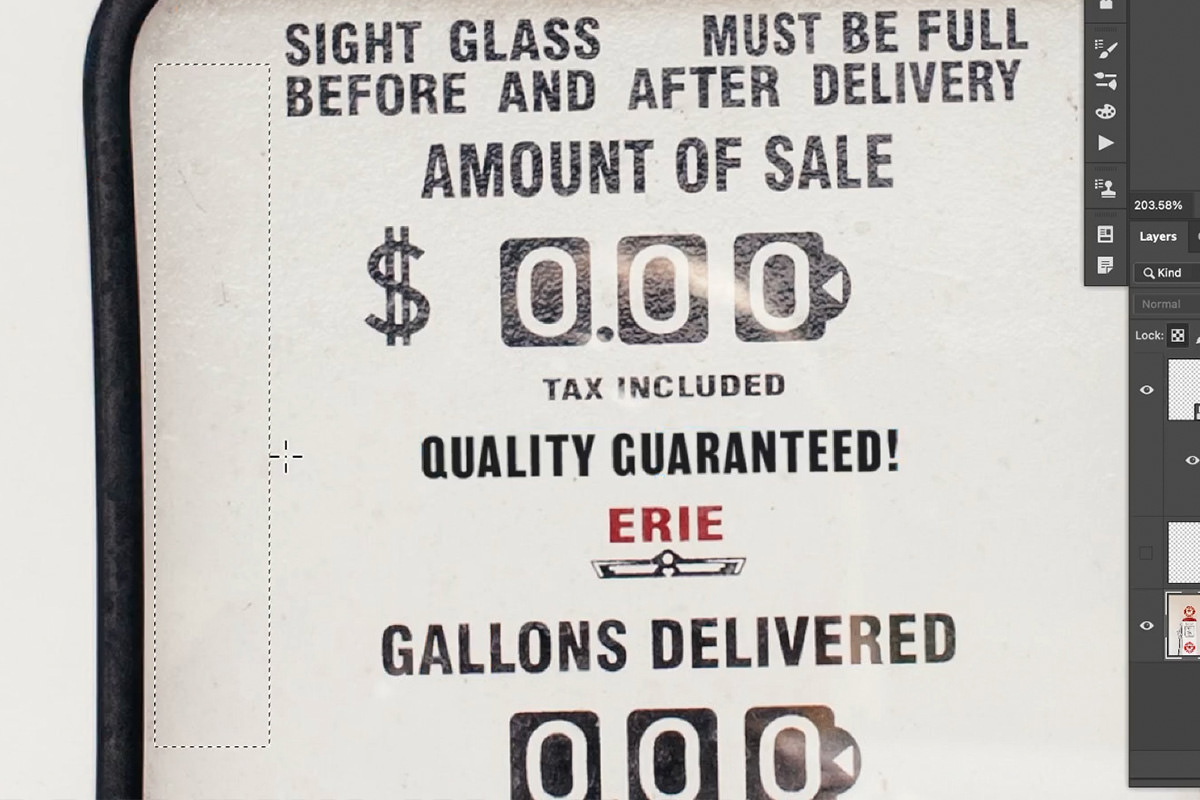
Zoom out and check your work! Not only should you have new text in the image that matches the original font, it will also match the positioning, color, texture, and lighting of the photographed text.