
Download Assets
This tutorial includes sample images. Downloads are free with a PHLEARN account.
- Download the sample images and PSDs from every free tutorial on PHLEARN
- New free tutorials published every week
- One free account — sign up once, then download anything
description
Photographer Natalia Seth, known on Instagram as Escaping Youth, walks through one of her own surreal self-portraits and shows exactly how she built the paint splashes radiating from around her eye. The whole shot cost about four dollars to make, since the paint was the only real expense. Covers preparing and cutting out the splash images, positioning and coloring each one, building the full effect, then adding shadow and a final color boost.
Enjoying This Free Tutorial?
We publish a new free tutorial every week, each one with sample images and PSDs you can download and follow along with. Sign up and they land straight in your inbox, along with early word on sales, events and subscriber-only offers.
Create a Paint Splash Effect in Photoshop with Natalia Seth
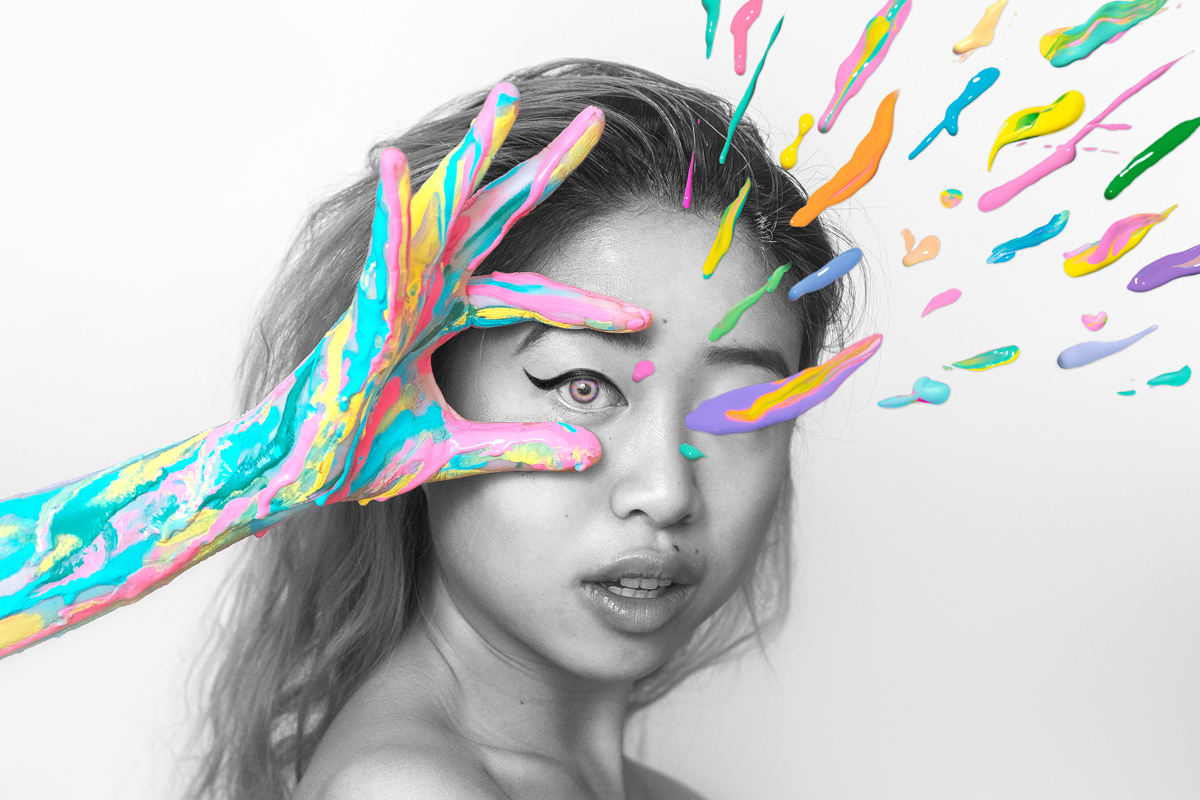
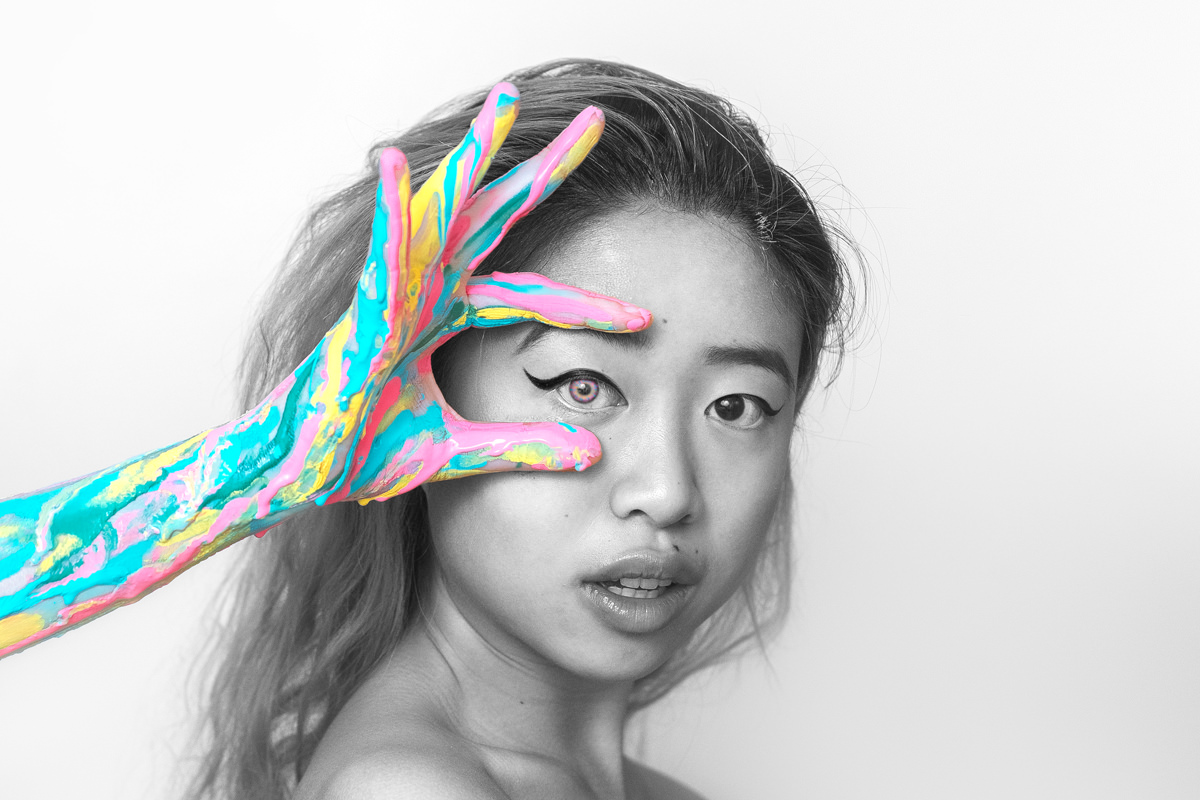
In this tutorial, photographer Natalia Seth, known on Instagram as Escaping Youth, walks through one of her own surreal self-portraits and shows exactly how she added the paint splashes radiating from around her eye and cleaned up the details afterward. The entire photo, including borrowed studio lights and a wall for a background, cost her roughly four dollars to shoot, since the only real expense was the paint used on her model’s hands.
About This Paint Splash Effect
Natalia’s surreal, self-portrait-heavy style is built almost entirely on a tight budget and a lot of creativity rather than expensive gear or locations. For this particular image she used just a plain wall for space, lighting borrowed from her school, and a few dollars of paint splattered onto paper and photographed separately in her dorm room. Those separate paint-splash photographs are the raw material this tutorial cuts out, recolors, and composites into the final surreal portrait.
Preparing Your Paint Splash Images
Start in Photoshop by going to File, then Open, and opening all of the separate paint splash photographs alongside the original base portrait. Once they’re all open, zoom each one out with Command/Ctrl and the minus key a few times so the full canvas of each paint splash photo is visible and easy to work with side by side with the base image.
Cutting Out the Paint Splashes
Drag the first paint splash photo onto the base portrait as its own layer, then use Command/Ctrl+T to transform it down to a more manageable size. To cut the splash out from its white background, select the Magic Wand tool, set its tolerance to around 17, click on the white background, then Shift-click to add any additional white areas the first click missed. Add a layer mask, then Command/Ctrl+I to invert it, which leaves the paint splash visible and masks out most of the surrounding white.
The magic wand pass usually leaves some distracting scraps of the original paper or background still visible around the edges. Clean those up with the Lasso tool by drawing a selection just inside the paint splash itself, then use Command/Ctrl+Shift+I to invert that selection so everything outside the splash is selected instead. With the layer mask targeted and white as the foreground color, hit Delete to clear away everything outside the splash, then Command/Ctrl+D to deselect. Any small bits the mask missed can be cleaned up afterward with a soft brush painted directly on the mask.
Smoothing the Rough Edges
Even after masking, the edge of a paint splash cut out this way can still show a slightly rough, papery white fringe. Double-click the layer mask to open its properties, then increase Shift Edge to push that rough white edge inward, and raise the Smooth slider to soften the remaining jagged edges. It isn’t necessary to manually clean every single edge pixel by pixel first, since this global smoothing pass handles most of it at once, with only a few remaining trouble spots needing a manual brush touch-up afterward.
Positioning Your First Paint Splash
With the first paint splash cut out and smoothed, duplicate that layer so the original stays as an untouched backup copy, then apply the layer mask to the duplicate to bake the cutout in permanently. Use the Lasso tool to select just one paint splash shape from the source image, one with enough width to cover an eye, mask it out the same way, and use Command/Ctrl+T to rotate and enlarge it until it sits directly over the eye you want to hide. Go to Edit, Transform, Warp to reshape the bottom edge of the splash so it doesn’t look overly bulky, pulling and adjusting the warp handles until the shape naturally covers the entire eye without looking blocky, then apply the layer mask again and bring the layer’s opacity back up to full.
Cleaning Up Stray Color
After placing a splash, check closely for any small bits of the original eye or skin tone still peeking out around the edges. Add a layer mask, increase the brush’s hardness so it doesn’t feather too softly, raise the flow, and paint directly over any stray color to erase it cleanly, adjusting brush size as needed to fit into tight corners.
Coloring Each Paint Splash
Plain paint-splash white and red tones don’t always match the mood of a surreal composite, so each splash gets its own color treatment. Add a Hue/Saturation adjustment layer, then Command/Ctrl+Option/Alt+G (or the clipping mask button) to clip it to just that one splash layer, and shift the Hue slider until it reaches a color that works, raising Saturation and darkening as needed. For the first splash, Natalia dialed in a purple, then masked out a leftover red patch in the middle of the splash since red and purple next to each other pulled focus, occasionally blending a bit of red and yellow together to land on an orange instead when that suited the composition better.
Building Out the Full Effect
From here, the process repeats: duplicate the backup paint-splash layer, lasso out a new splash shape, mask it, transform and rotate it into place, and give it its own Hue/Saturation clipping adjustment for color. Natalia builds the splashes outward from the covered eye like rays radiating from a sun, angling each new splash slightly differently so they read as a single burst rather than a random scatter, mixing in noticeably smaller and larger splashes for variation. Splashes are also allowed to extend past the edge of the frame so the effect reads as continuing beyond what’s visible, and colors are varied deliberately across the set, including aqua, pink, and green, so no two splashes look identical.
Adding Shadow and a Final Color Boost
Once every paint splash is placed, colored, and positioned, the composite still needs a shadow pass to feel physically grounded rather than pasted on top of the photo.
Grouping the Splashes and Adding a Drop Shadow
Select every paint splash layer and group them together into a single group, then double-click the group to open its layer styles and enable Drop Shadow. Set the shadow’s angle to match the actual light direction in the photo, around 134 degrees here since the light in the reference photo comes from that side of the face, then dial the opacity down to a subtle level, around 36 percent, so the shadow doesn’t look too harsh. Reduce the Size so the shadow doesn’t blur too far outward, and keep the Distance small, around 2, so each shadow sits close and tight against its own paint splash rather than floating away from it.
Brightening the Image with Curves
To finish, add a Curves adjustment layer above everything and drag the top-right point of the curve slightly to the left. That brightens the highlights across the whole image and gives the final composite a cleaner, more finished look before exporting.
More Free Photoshop Tutorials
- Select Subject and Refine Edges in Photoshop
- Three Ways to Use Blend If
- Curves vs Levels: Learn the Difference
Why This Technique Works on Any Budget
What makes this tutorial worth revisiting is how little it actually depends on expensive equipment or a big production. A wall, borrowed lights, a few dollars of paint splattered onto paper, and a solid grasp of masking, clipping adjustments, and layer styles are enough to build a genuinely surreal composite. Anyone who wants to see Natalia apply this same compositing mindset to a full surreal portrait from start to finish can go deeper with the full Surreal Portrait Compositing with Natalia Seth tutorial.
Final Thoughts
The paint splash effect in this tutorial comes together through a small handful of repeatable moves: cutting a shape out cleanly with the Magic Wand and a layer mask, smoothing its edges, transforming and warping it into place, recoloring it with a clipped Hue/Saturation layer, and finishing the whole group with a believable drop shadow. None of those individual steps are complicated on their own, and building several splashes with the same process is what turns a simple cutout into a convincing, radiating surreal effect.
Related Tutorials
New Free Tutorials View All »












Enjoying This Free Tutorial? Go Further with PRO.
Unlock Full Sample Files, PSDs, and Hundreds of Masterclasses!

Download full project assets, original PSDs, and RAW images for every lesson
Unlimited access to our complete library of PRO Photoshop & Lightroom courses
Instant 4K Ultra HD streaming on all devices, anytime, anywhere
Full access to our entire library of Photoshop Actions, Presets, and LUTs
Flexible monthly and annual membership plans
Cancel anytime with zero hassle or commitments