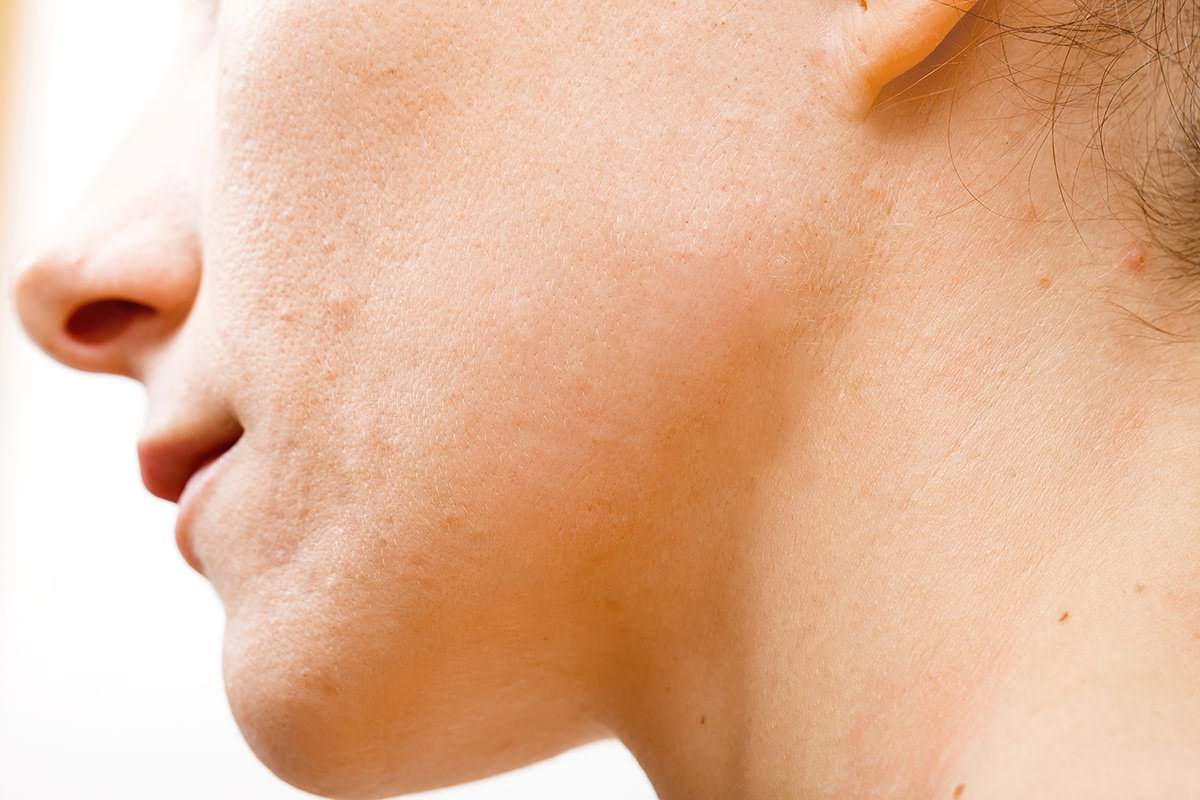


BEFORE
AFTER
Download Sample Images
Click the link below to download the sample images and follow along with this tutorial.
DownloadPick the Best Method for You
A portrait doesn’t need to be all clear skin and perfect hair. But whether you want to remove distractions from an everyday photo, or smooth skin until it’s flawless for a studio portrait, these 5 tools will make your life easier.
Target Acquired: Reducing Redness
One of the most noticeable things about our pimples and zits is the RED of inflammation as our body battles the excess oils in our pores to the death. Our goal is to reduce these reds, which will minimize the appearance of blemishes.
Target that red color range in a snap by going to Layer, New Adjustment Layer, and over to Hue/Saturation. In the dialog box, change the drop-down from Master to Reds and grab the eye dropper tool on the bottom left of the dialog. Simply hover over the red area that you want to reduce, and click to target it.
This is all well and good, but right now, we can’t really see if we have selected the reds that we want. If we select too little red, we won’t be reducing much of anything. If we select too much red, the reds naturally present in our skin will be reduced, making for a sickly-looking face.
Bump up your Hue as well as your Saturation to get a clear picture of what reds we are affecting. The grey slider at the bottom shows us what range of colors we have selected (shown in the top rainbow bar) and what colors they will change into (shown in the bottom rainbow bar). The grey slider has two handles for adjusting the feathering of the effect. Once we are sure we have got the right range of reds, pop all those values back to zero.
Now that the reds are selected, we can get to reducin’. Increase the Lightness until the red areas look just about as light as the rest of the skin. Darker areas tend to be less saturated than lighter areas, so bump up the Saturation to bring some color back. We are almost there, simply move the Hue slider to the right a bit to shift the red into its complementary color: cyan. The cyan will cancel out any excess redness.
Don’t forget to paint black on the layer mask of the Hue/Saturation Layer over the mouth and nose. Otherwise, it will take the red out of the lips and nostrils (which don’t look as fun without it).
And bam! Redness, gone.
Spot the Blemish!
Stop here if reducing the redness was enough to do the job for you. If you’re working on a close up with a lot of detail, or want to get rid of blemish texture entirely, the next few tools have got you covered.
The first is the Spot Healing Brush tool. Simply click on a blemish and the tool will choose a texture from another part of the face and replace it. Often it will do well, but in the event that it does not, click over the spot again and it will try another texture.
Head Over Heal!
The next is the Healing Brush tool. This tool works similarly to the Spot Healing Brush, except you decide what part of the face it takes texture from. Hold ALT or OPTION to sample a bit of skin that you like, and then paint over the blemish you want to remove. It will blend the texture from where you sample with the color of where you paint.
Stamp On It!
The Clone Stamp tool is next. This tool takes an exact copy of where you sample and puts it on top of where you paint, without any blending. Hold ALT or OPTION to sample and then paint over the desired spot. Beware, as this tool will NOT try to blend anything. This does however make it great for removing blemishes that are close to edges.
Big Brother Patch!
Use this tool in the Normal Mode (Content Aware does not work as well). Create a new layer and go to Image, Apply Image, as the Patch tool in Normal Mode only works when there are pixels on the layer you’re working on. But once that is done, simple draw a circle around the blemish you want removed, drag around until you see a clean spot, and pop! The blemish disappears. The only complication to this tool is the destructive nature of Normal Mode. Make sure to do this on a new Applied Image layer!
If you want to take a texture that is too defined for the area you need it for, use the Fade function and make that texture less apparent in a snap.
Those are 5 easy ways to remove blemishes! These are not limited to faces at all, backgrounds and objects definitely benefit from some clean up via these tools. So good luck editing, PHLEARNERS, and at the end of the day, remember:
“Here today, gone tomorrow!”
– Aaron Nace, 2017