

Download Assets
This tutorial includes 1 sample image and 1 PDF guide. Downloads are free with a PHLEARN account.
- Download the sample images and PSDs from every free tutorial on PHLEARN
- New free tutorials published every week
- One free account — sign up once, then download anything
Free PDF Guide · 4 Pages
This Tutorial as a Step-by-Step PDF
Walks through the whole retouch in order: Spot Healing Brush for hooks, the Healing Brush for the hinge, a skewed copy of the frosted window masked with a 3 px Polygonal Lasso, a painted wall over the heater, the table rebuilt back to front with Add Noise, and a Blend If Curves layer. Keep it next to your keyboard.
description
A room carries as many distractions as a face. The trick is matching the tool to the size of the problem: Spot Healing for hooks, the Healing Brush for a hinge on a straight line, hand-painted brush work for a whole wall, with a little added noise on the painted table, and duplicated elements from elsewhere in the same photo — another window, another chair — skewed into perspective for anything larger. Overlapping areas get rebuilt back to front.
Enjoying This Free Tutorial?
We publish a new free tutorial every week, each one with sample images and PSDs you can download and follow along with. Sign up and they land straight in your inbox, along with early word on sales, events and subscriber-only offers.

How to Retouch Environments in Photoshop
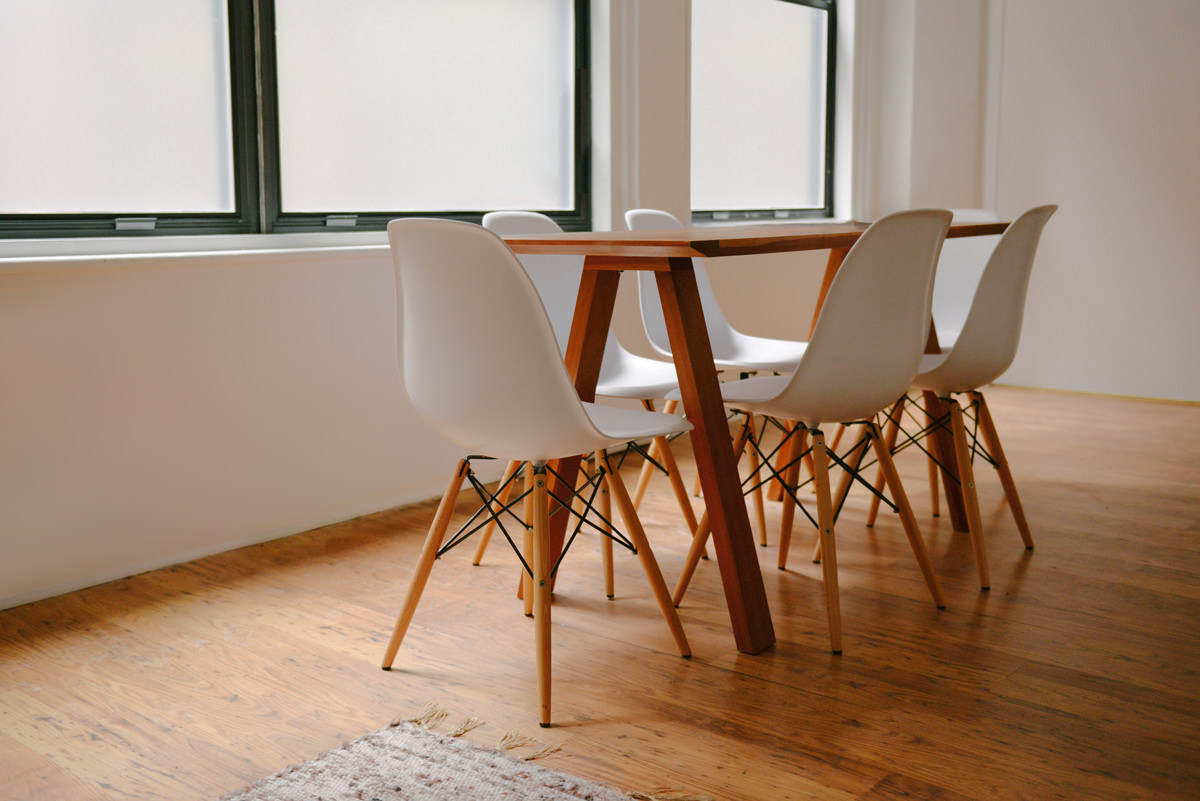
Retouching isn’t just for people — an environment can carry just as many small distractions as a portrait, from stray hooks on a wall to clutter on a table. This walkthrough covers a full environmental retouch using several different tools, each suited to a different kind of distraction: the Brush tool, the Healing Brush and Spot Healing Brush, the Clone Stamp tool, and selection tools like the Pen tool and Polygonal Lasso.
Marking Your Distractions Before You Start
Before touching anything, it helps to map out every distraction at once. Create a new layer, grab the Brush tool, and circle every element you plan to remove in a bright, obvious color — small hooks and a hinge on the wall, a window that needs to be frosted to match its neighbor, clutter on a table, and a large heating element with its cord. Working from this visual map keeps you from losing track of what still needs attention as you move through the image, and you can simply toggle the layer off once you’re ready to start editing.
Removing Small Objects with the Spot Healing Brush
For small objects sitting on an otherwise consistent surface — hooks on a wall, for example — the Spot Healing Brush handles the job almost automatically. Create a new layer, select the tool, and paint directly over the object; Photoshop identifies a clean nearby area and fills the object in without any further input.
Using the Regular Healing Brush for More Control
When the Spot Healing Brush doesn’t pick the ideal source area on its own, the regular Healing Brush tool offers more control. Hold Alt or Option to sample a specific clean area, and Photoshop shows a live preview as you move your cursor so you can line up details like a straight line or edge before painting. This is especially useful for something like a hinge sitting along a straight seam, where lining the sampled area up precisely keeps the line looking continuous once the object is gone.
Replacing a Window with a Duplicate from the Photo
When a room has two similar windows and one needs to match the other — in this case, turning a clear window frosted to match its neighbor — the fastest approach is often to duplicate an existing element from elsewhere in the photo rather than build a fix from nothing. Use the Marquee tool to select the frosted window with a bit of extra room around it, then select that area on the background layer and press Ctrl or Cmd+J to duplicate it onto its own layer. Lower that new layer’s opacity temporarily so you can see through it while lining up a matching reference point, like a shared corner, between the two windows.
Skewing the Duplicated Layer to Match Perspective
Once the corners are roughly aligned, the duplicated window rarely matches the target window’s perspective exactly. Hold Ctrl or Cmd and drag a corner handle (or use Ctrl/Cmd+T, right-click, and choose Skew) to adjust the shape until its edges line up with the perspective of the window you’re replacing. It’s fine to only worry about the edges that are actually visible in the final image — if a window frame isn’t visible on one side, there’s no need to match that edge perfectly.
Masking the New Window into Place
With the duplicated window shaped correctly, bring its opacity back to 100% and add a black layer mask by holding Alt or Option while clicking the mask icon, which hides the layer completely until you paint it back in. Use the Polygonal Lasso tool with a small amount of feathering — try starting around 3 to 4 pixels — to trace the exact shape of the window opening. A quick way to judge whether the feathering matches the photo’s natural softness is to press Q to preview the selection as a Quick Mask and compare its edge softness to the surrounding image. Once the selection matches the window opening, go to Edit, then Fill, and fill the layer mask with white in that area, which reveals the duplicated frosted window exactly where the old window used to be. A small pass with the Clone Stamp tool afterward can clean up any remaining edge details.
Painting a New Wall Surface with the Brush Tool
For a large, solid object like a bulky heater mounted against a wall, the Healing Brush tends to blur rather than cleanly replace the area, since it works by blending pixels together rather than generating a fresh surface. A thin cord on its own is easy to remove with the Healing Brush: sample next to it and paint it away. Across the heater, though, the result turns into a blurry mess. For something this size, painting the wall back in by hand with the Brush tool works far better. Create a new layer, select a large, soft-edged brush (roughly 1000 pixels with zero hardness), hold Alt or Option to sample the existing wall color, and paint generously over the area — including a bit past where the object actually was, since that overlap creates a smoother color transition once it’s masked. Don’t worry about painting precisely at this stage; a layer mask handles keeping the new paint confined to the right area next.
Masking Out Chairs and Hardware with the Pen and Lasso Tools
Once the new wall color is painted in broadly, anything that sits in front of that wall — chairs, hardware, small screws — needs to be masked back out so the new paint doesn’t cover objects that should stay visible.
Choosing the Pen Tool for Curves and the Lasso for Straight Lines
For a smoothly curved edge, like the back of a chair, the Pen tool produces a far cleaner result than trying to trace the same curve freehand with a brush. Press P, click and drag to build a smooth path along the curve, then right-click and choose Make Selection with a small feather amount (around 1 pixel) before filling that selection with black on the layer mask. For straight-edged details — hardware, screws, the edges of furniture — the Polygonal Lasso tool is faster and just as precise, since it creates clean straight-line selections point by point. Whichever tool fits the shape, the goal is the same: exclude anything that should remain visible in front of the new wall paint by filling those areas with black on the mask.
To finish the bottom of the wall, borrow a clean piece from next door. On a new layer, press S for the Clone Stamp tool, sample the clean strip along the bottom of the wall and paint a piece of it, then drag that piece over to where the heater was with the Move tool. The copy comes out a little dark, so go to Image, down to Adjustments and Curves, and brighten it a little. Add a layer mask and blend the edges in with a soft brush, keeping it off the chair; a brush is simply faster than a lasso here.
Rebuilding the Table Area Layer by Layer
When several overlapping elements all need to be rebuilt in the same area — a window behind a chair, behind a table, for instance — the key is working from back to front. Start with the furthest-back element, in this case another window duplicated with the Clone Stamp tool and warped into position, add a black layer mask, and paint back in only the parts that should be visible. Move forward one layer at a time: next a chair, duplicated from an existing chair in the photo using the Clone Stamp tool and resized to fit, again masked carefully with the Pen tool for smooth edges and the Lasso tool for straight ones. Save the object closest to the camera, like the table surface itself, for last.
Adding Grain for a Photorealistic Finish
Painting a surface like a wood table by hand with the Brush tool, sampling colors directly from the original table and using smaller strokes to suggest wood grain, can end up looking too smooth and flat compared to the rest of the photo. Go to Filter, down to Noise, and add a small amount of noise to the painted area — this single step goes a long way toward making a hand-painted surface blend in convincingly with the natural grain and texture of a real photograph.
Brightening Shadows with a Blend If Curves Adjustment
As a final touch, add a Curves adjustment layer and brighten it a little — the goal is for the highlights to stay untouched while only the shadows lift. Double-click the layer to open its blending options, hold Alt or Option, and drag the right-hand Blend If slider toward the left. This makes the brightening effect disappear from the highlights, leaving it visible only in the darker parts of the image, which lifts shadow detail without washing out anything that was already properly exposed.
Why This Approach Works
Environmental retouching relies on matching the right tool to the size and complexity of each distraction rather than reaching for one tool for everything. Small, isolated objects on a consistent surface are perfect for the automatic Spot Healing Brush, while large solid objects need the more deliberate control of hand-painting with the Brush tool, since a healing tool’s blending behavior breaks down at scale. Reusing existing elements from the same photo — another window, another chair — rather than inventing a replacement from scratch keeps lighting, texture, and perspective consistent throughout the image. And working from the back of a scene toward the front, masking each new layer carefully with the Pen tool for curves and the Lasso tool for straight edges, keeps a complex, multi-object area organized instead of turning into an unmanageable pile of overlapping fixes.
Final Thoughts
Retouching an environment takes patience, but the process breaks down into manageable steps once you separate distractions by size and complexity: small objects for the healing tools, large surfaces for hand-painted brush work (with a little added noise on the painted table), and complex overlapping areas for a careful, back-to-front rebuild using selections and masks. A final shadow brightening pass with a Blend If curves adjustment pulls the whole image together, leaving a clean, distraction-free space that still looks completely natural.
Quick Reference: Keys, Menus and Settings
- Hooks and hingeSpot Healing Brush on the hooks; Healing Brush, Alt/Option-click to line up the straight line
- Copy the windowMarquee, Cmd/Ctrl + J; Cmd/Ctrl + T, right-click > Skew
- Mask the windowAlt/Option-click the mask icon; Polygonal Lasso, Feather 3 px, check with Q; Edit > Fill with White
- Paint out the heaterB, about 1000 px, Hardness 0; sample the wall and overpaint
- Mask around objectsP for curves, Make Selection, Feather 1 px; Polygonal Lasso for straight parts; fill Black
- Painted tableFilter > Noise > Add Noise, just a little
- Brighten the shadowsCurves layer, double-click, Alt/Option-drag the right Blend If slider left
No AI, no generative credits.

Free Downloads
Follow Along on the Same Photo
Get the interior photo with the hooks, window, heater and table clutter to clean up, plus the 4-page PDF guide. Free with a PHLEARN account.
Retouching Environments: Common Questions
Where do I start when a room has lots of distractions?
Map them first. On a new layer, take the Brush tool and circle every distraction in a bright color, then hide the layer and keep it as a reference so you never lose track.
When should I use the Healing Brush instead of the Spot Healing Brush?
The Spot Healing Brush picks a clean area for you, which is perfect for hooks on a wall. Use the Healing Brush when you want to choose the source, like lining up the straight line above a hinge so it simply continues.
Why does healing a big object turn into a blurry mess?
The Healing Brush works by blending things together. It is fine on a cord, but across a big heater it smears. Paint a new surface with a large, soft Brush instead and mask it to the wall.
How do I replace something with a copy from the same photo?
Select the matching element with the Marquee tool, press Cmd/Ctrl + J to copy it to a new layer, lower the opacity, line up one corner, then skew it into perspective with Cmd/Ctrl + T or by Cmd/Ctrl-dragging a corner.
How much feather should my selection have?
Match the softness of the edge in your photo. Make a test selection and press Q to see it as a Quick Mask. The video settles on 3 px for the out-of-focus window and 1 px for the chair and its hardware.
Should I use the Pen tool or the Polygonal Lasso?
Use the Pen tool for smooth curves like the back of a chair: right-click the path, choose Make Selection and fill it with black on the mask. Use the Polygonal Lasso for mostly straight lines like legs, hardware and screws.
How do I rebuild an area with several overlapping objects?
Work from back to front, one layer each. In the video that is the window, then the wall beside it, then a chair borrowed from next door, and the table, closest to the camera, last.
Why does my painted surface look fake?
Painted areas have no grain. Go to Filter > Noise > Add Noise and add just a little. It makes the hand-painted table look far more photorealistic.
How do I brighten only the shadows?
Add a Curves adjustment layer and brighten it a little. Double-click the layer, hold Alt/Option and drag the right Blend If slider toward the left. The layer disappears from the highlights and stays in the shadows.
Are the sample files free?
Yes, with a free PHLEARN account. You get 1 sample image and 1 PDF guide: the interior photo used in the video and a 4-page guide to the whole retouch.
Master Photoshop, Lightroom and Photography
Join PHLEARN PRO for $12.99 a month or $99.99 a year. Cancel anytime, with a 100% money-back guarantee.





