Download Sample Images
Click the link below to download the sample images and follow along with this tutorial.
DownloadTutorial Description
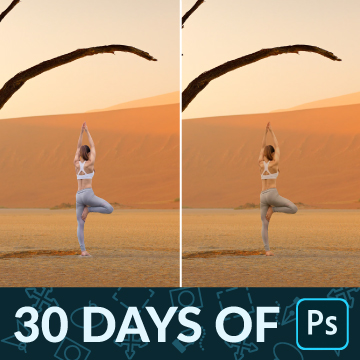
The Patch Tool is one of the best ways to remove large objects from a photo in Photoshop. Learn how to select distractions and replace them with textures that blend in seamlessly with the rest of an image.
Using the Patch Tool in combination with the Healing Brush, Spot Healing Brush, and Clone Stamp Tool, you’ll be able to quickly remove almost anything from an image. Help your portraits by removing background distractions and clean up any landscape for a picture-perfect look!
Learn more about removing objects and distractions in our PRO tutorial How to Remove Anything in Photoshop!
Less is More
The goal of removing objects from an image is to reduce distractions and to help your primary subject stand out. With a wide variety of tools and techniques, Photoshop makes this process easier than ever before!
The Patch Tool is one of the most efficient tools at removing objects, allowing you to make a selection (using any selection tool) and replace the contents of that selection with any texture from elsewhere in the image.
Why use the Patch Tool?
With so many options of object removal tools, when and why should you think about trying the Patch Tool? Tools like the Healing Brush and Spot Healing Brush are powerful, but they tend to work best on smaller areas and smaller distractions. The Patch Tool excels at removing large objects from images and, best of all, it can be used with any selection tool for even more flexibility.
Working Non-Destructively
As with any edits we make in Photoshop, it’s important to work in a way that won’t permanently change our original image. We have a couple of workflow options with the Patch Tool to preserve the original information in our background layer.
The first method is to create a new layer above your background layer and, with the Patch Tool selected, select the Content-Aware option in the tool options. This allows you to hide distractions using a blank layer while sampling the information from all of the layers below. This method is a bit easier than the alternative, but we find that not using the Content-Aware option yields better results recreating textures.
To use the Patch Tool in Normal Mode, we’ll need to work directly on a layer where all of the photo information is present. So how do we do this without affecting our original background layer? Easy! Simply create a new layer then go to the Image menu and select Apply Image. This will place a snapshot of all visible layers into the new blank layer. You can then use the Patch Tool to remove any and all distractions on the new snapshot layer. If you ever need to go back, all of your edits and your original image still exist underneath!
Source & Destination
The Patch Tool has two main options for filling in areas. The Source option allows you to select an area you want to remove, then click and drag around your image to find a texture to replace it. The Destination option allows you to select an object, then click and drag to clone and reposition it in the photo.
Using these Patch Tool options, along with powerful tools like the Spot Healing Brush and Clone Stamp, you’re on you way to being able to remove anything from any photo!