

Download Assets
This tutorial includes 2 sample images and 1 PDF guide. Downloads are free with a PHLEARN account.
- Download the sample images and PSDs from every free tutorial on PHLEARN
- New free tutorials published every week
- One free account — sign up once, then download anything
Free PDF Guide · 2 Pages
This Tutorial as a Step-by-Step PDF
The guide walks through picking the Red, Green or Blue channel with the most contrast, Ctrl/Command-clicking its thumbnail to select the highlights, a Solid Color fill layer in a light color, a second unmasked fill layer below it for the shadows, and the second example on the Green channel. Keep it next to your keyboard.
description
Duotone coloring — two distinct colors mapped separately onto a photo’s highlights and shadows — is one of the fastest stylized effects in Photoshop, and it stays completely non-destructive. Learn how to pick the color channel with the strongest contrast, load it as a selection, and use two Solid Color fill layers to own the highlights and the shadows separately, so either color can be swapped at any time without rebuilding the effect.
Enjoying This Free Tutorial?
We publish a new free tutorial every week, each one with sample images and PSDs you can download and follow along with. Sign up and they land straight in your inbox, along with early word on sales, events and subscriber-only offers.
Image Source
Photos by Camila Cordeiro and Shot by Cerqueira via Unsplash
How to Apply Duotone Coloring in Photoshop
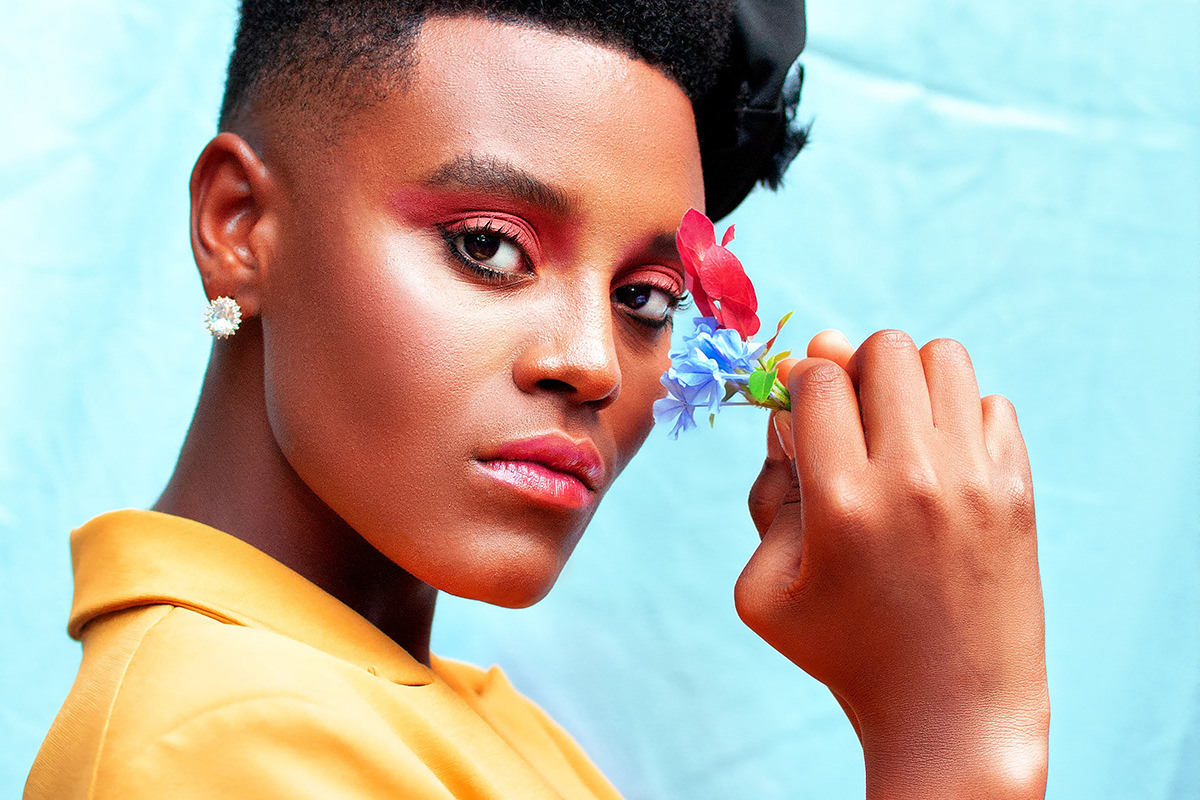
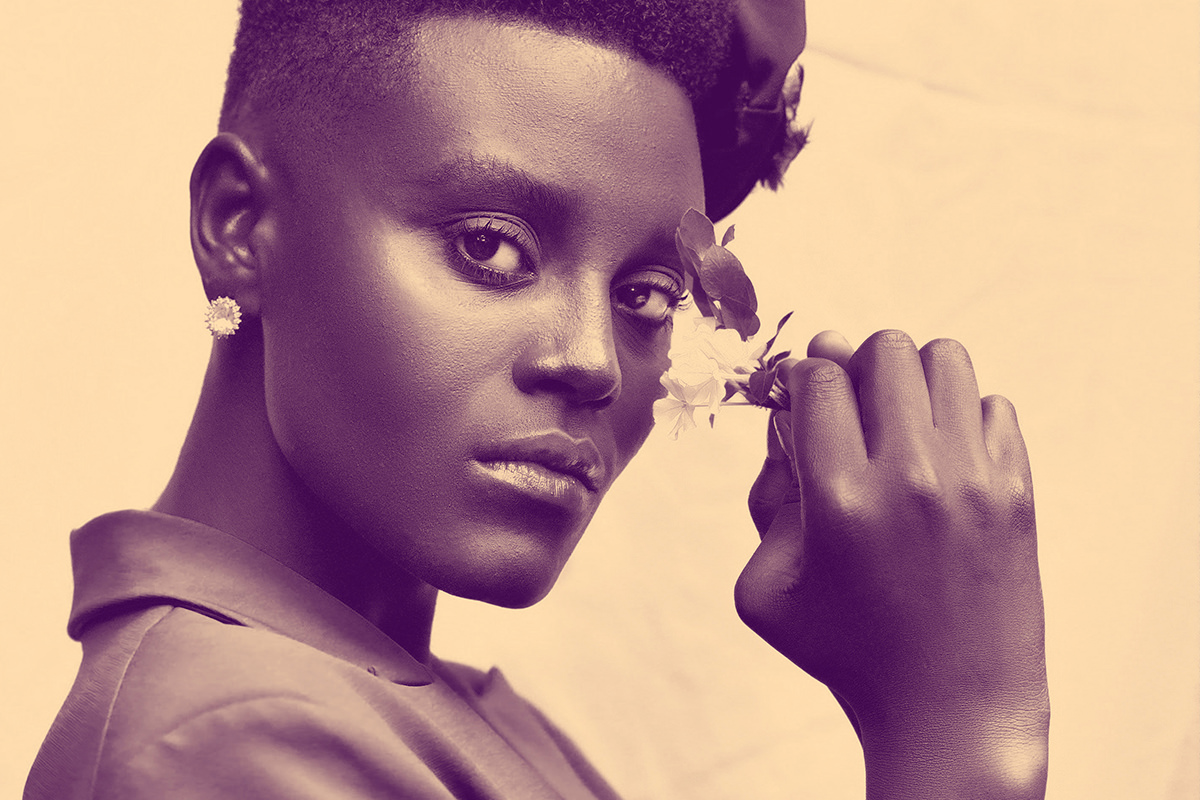
Duotone coloring — two distinct colors mapped separately onto a photo’s highlights and shadows — is one of the fastest stylized effects to build in Photoshop, and it’s entirely non-destructive from start to finish. The whole technique comes down to two solid color fill layers and one channel-based selection, and it works on almost any photo you throw at it.
Getting Started: Choosing the Right Channel
Every duotone starts by finding which of the image’s three color channels gives the strongest highlight-to-shadow separation to build the effect on.
-
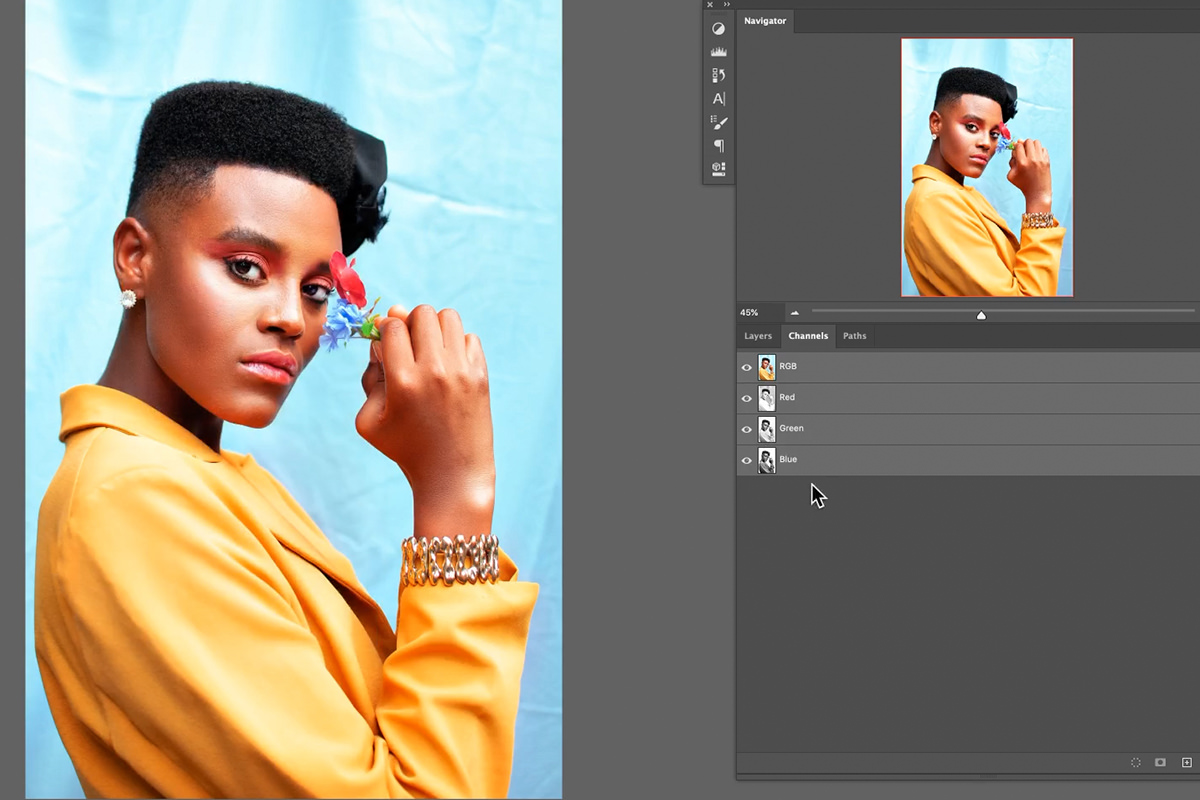
Open the Channels Panel
Go to Window > Channels if it isn’t already visible, then click through the Red, Green, and Blue channels one at a time.
-
Pick the Channel with the Best Contrast
Choose whichever channel looks closest to a finished, high-contrast black-and-white version of the photo. This is a subjective call — whatever that channel looks like is a strong preview of how the final duotone will read, so the channel with the most pleasing contrast between light and dark areas is usually the right one.

Turning the Channel into a Highlight Selection
Once the right channel is chosen, converting it into a usable selection takes one click.
-
Load the Channel as a Selection
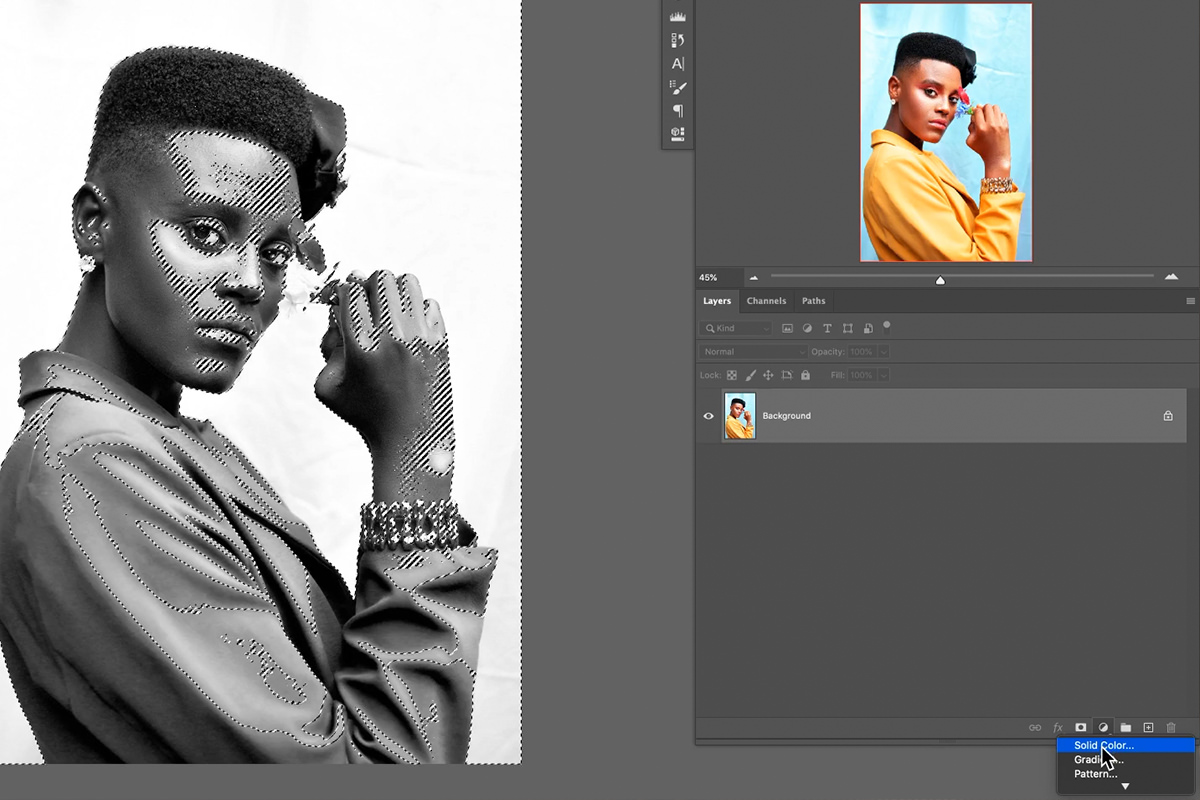
Hold Ctrl/Cmd and click the channel’s thumbnail — or click the small dotted circle icon at the bottom of the Channels panel — to load its lightest areas as an active selection.
Coloring the Highlights with a Solid Color Fill Layer
With the highlight selection active, applying color to just that tonal range is a single adjustment layer away.
-
Add a Solid Color Fill Layer
With the selection still active, click the adjustment layer icon in the Layers panel and choose Solid Color. The active selection loads automatically into that layer’s mask, so the color only shows up in the highlights.
-
Choose a Light Color for the Highlights
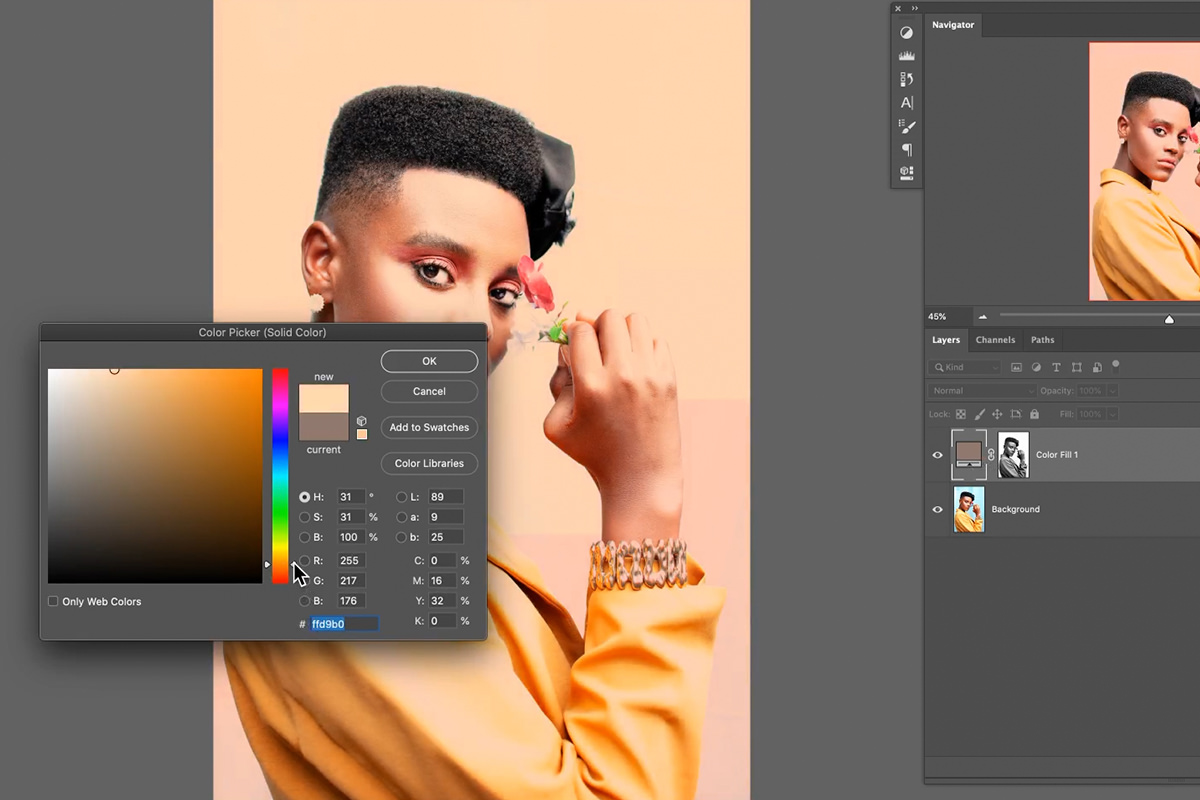
Pick a light color for this layer — a soft yellow, for instance. Since this layer only affects the highlights, a lighter color keeps the brightest parts of the image reading as bright rather than muddying them down.
Coloring the Shadows with a Second Fill Layer
The second half of the duotone needs no mask at all, since it simply sits underneath the first layer and shows through wherever the highlight layer’s mask hides it.
-
Add a Second Solid Color Fill Layer
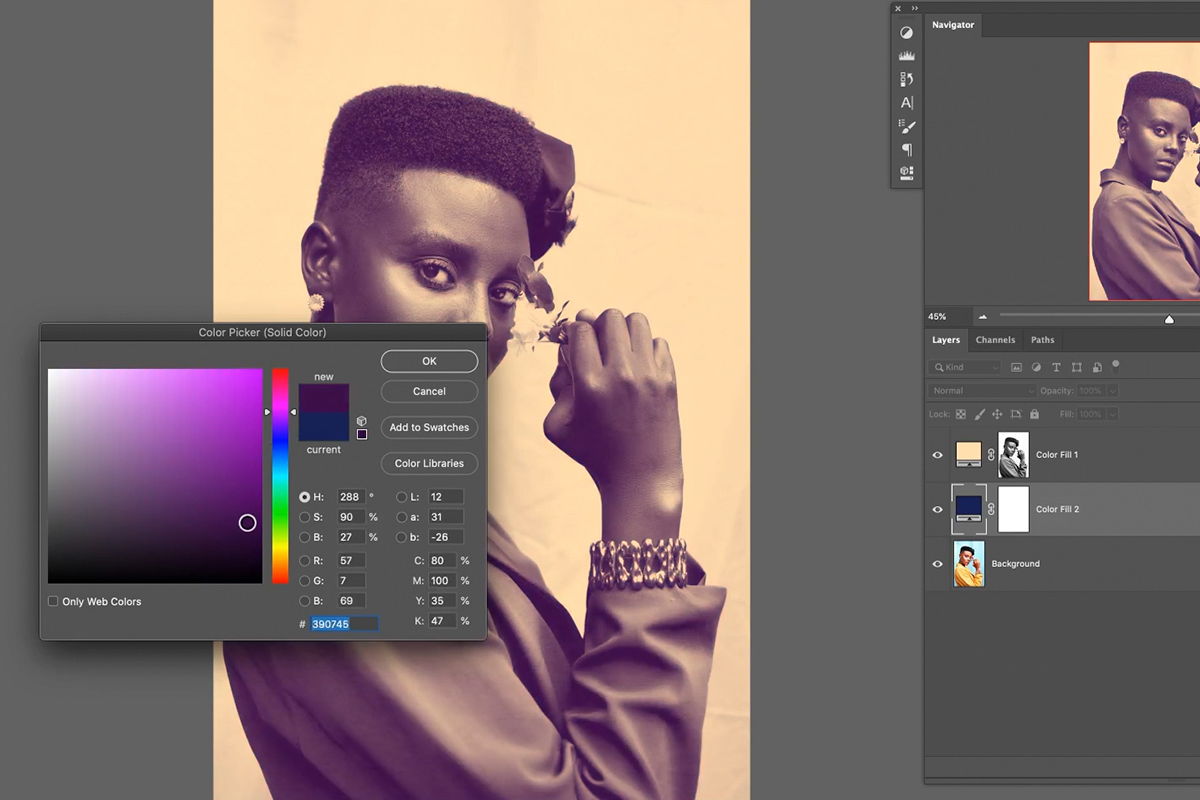
Select the background layer, then add another Solid Color adjustment layer beneath the highlight color layer. This one doesn’t need a mask — it fills the entire layer and only becomes visible in the areas the highlight layer’s mask isn’t covering.
-
Choose a Darker, Contrasting Color for the Shadows
Give this layer a different, darker color. Together, the two solid color layers complete the duotone effect — one color owns the highlights, the other owns everything else.

Changing Colors at Any Time
Because both colors live on their own adjustment layers, nothing about this effect is locked in once it’s built.
-
Double-Click a Color Layer to Change It
Double-click either solid color layer’s thumbnail to reopen the color picker and choose a new color. The mask, the selection, and the rest of the effect all stay exactly as they were — only the color changes.
Why This Effect Stays Fully Editable
Because the highlight selection is baked into a layer mask rather than applied directly to the pixels, and both colors live on their own adjustment layers, the entire duotone can be restyled in seconds. Turning either layer off and on, or swapping its color, never requires rebuilding the channel selection from scratch.
Applying the Same Technique to a Second Image
The whole process repeats identically on a completely different photo, which is what makes this technique so fast to reuse.
-
Repeat the Channel Selection on a New Image
Check the Red, Green, and Blue channels again on the new photo — a different image will often favor a different channel than the last one did.
-
Build the Two Color Layers Again
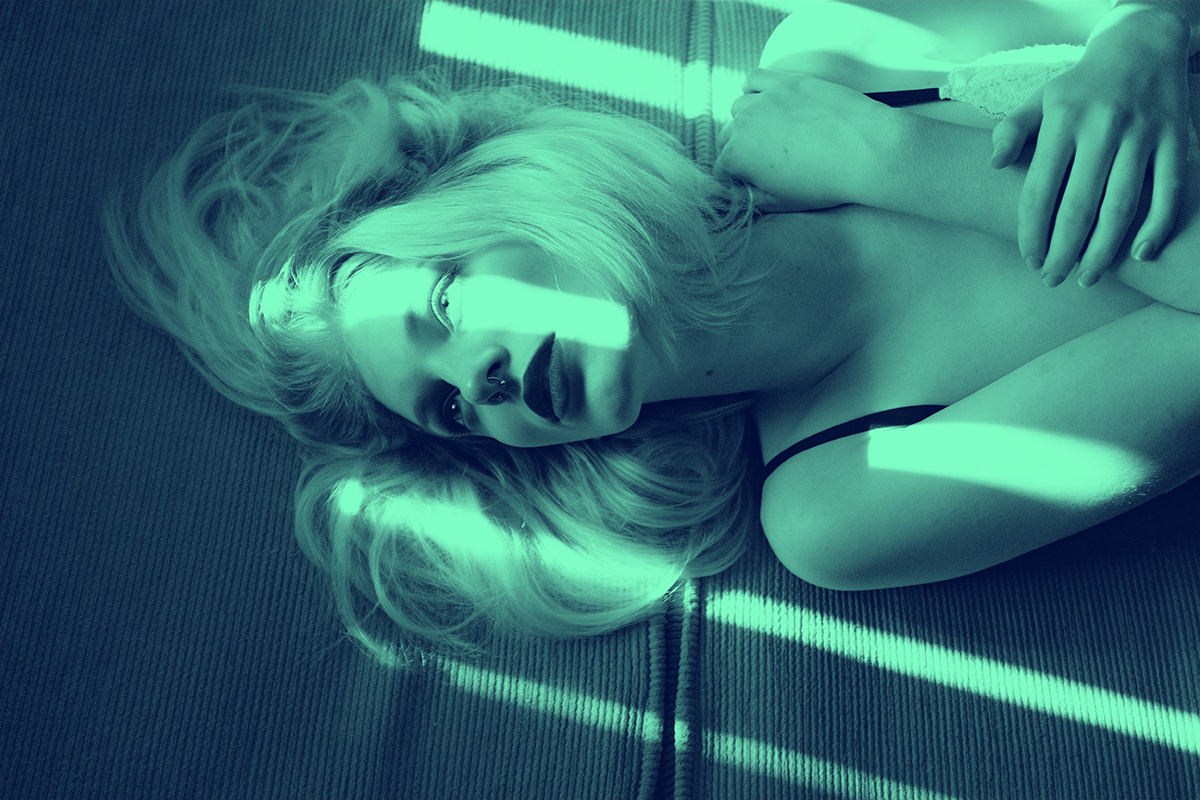
Load the chosen channel as a selection, create a solid color highlight layer with the selection as its mask, then add an unmasked solid color layer underneath for the shadows — a bright color on top and a deep, contrasting color underneath, for example.
Why the Best Channel Changes from Photo to Photo
A channel’s contrast depends entirely on the colors actually present in that specific photo — a photo with strong blues will often show its best contrast in the blue channel, while a photo dominated by greens might read best through the green channel. There’s no universal “correct” channel; checking all three every time is what keeps the technique working consistently across completely different images.
Comparing the Before and After
Toggling the two color adjustment layers off shows the original, uncolored photo underneath, which is a useful check before committing to a final look — the contrast between the flat original and the finished duotone makes it obvious how much of the image’s mood comes from color alone.
Why This Approach Works
Duotone coloring built this way works because it separates two decisions that are usually tangled together: which tones get affected, and what color they become. The channel selection handles the first question once, and after that, either color can be changed instantly without touching the selection at all. That’s a meaningfully more flexible setup than applying color directly to pixels, and it’s the same underlying logic behind more advanced channel-based work covered in this deeper look at color channels — understanding what each channel actually represents is what makes a technique like this one predictable rather than trial-and-error.
Final Thoughts
What makes this technique worth keeping in a regular workflow is how little it costs to try: one channel selection, two adjustment layers, and the entire effect can be previewed, adjusted, or completely undone in seconds. Because both colors stay fully editable after the fact, it’s easy to cycle through several color combinations on the same photo before settling on a final look, which makes duotone coloring one of the fastest ways to give an image a distinct, stylized identity without any destructive editing at all.
Quick Reference: Keys, Menus and Settings
- Full screen viewF
- Find the best channelWindow > Channels, click Red, Green and Blue in turn
- Select the highlightsCmd/Ctrl-click the channel thumbnail, or the dotted-circle icon
- Highlight colorLayers panel > adjustment layer icon > Solid Color, a light color
- Shadow colorClick the Background layer, add another Solid Color layer, no mask
- Change a colorDouble-click the fill layer’s color thumbnail
- CompareClick the eye icons on the fill layers
No AI, no generative credits.

Free Downloads
Follow Along on the Same Photos
Get both sample photos from the video, ready to turn into duotones, and the 2-page PDF guide with every step. Free with a PHLEARN account.
Duotone Coloring: Common Questions
What is a duotone?
Two colors mapped onto one photo: one for the highlights and one for the shadows. Here you select the highlights from a channel and color them separately from everything else.
Which color channel should I use?
Click Red, Green and Blue in the Channels panel and keep the one with the most contrast, the one that already looks most like the finished image. It is a subjective call: Aaron picks Blue for the portrait and Green for the second photo.
Where is the Channels panel?
It sits next to the Layers panel. If you don’t see it, go to Window > Channels.
How do I turn a channel into a selection?
Hold Cmd/Ctrl and click the channel’s thumbnail, or click the small dotted-circle icon at the bottom of the Channels panel. The marching ants surround the highlights.
Which layer gets the light color?
The first Solid Color fill layer, the one made while the selection is active. The selection loads into its mask, so it covers the highlights and should be a light color, like the soft yellow Aaron picks.
Does the shadow color layer need a mask?
No. Click the Background layer first so the second Solid Color layer is created under the highlight layer, and give it a different, darker color. It shows wherever the highlight mask lets it through.
Can I change the colors after the duotone is built?
Yes. Double-click a fill layer’s color thumbnail to reopen the Color Picker and scroll through options. The mask and selection stay as they are.
How do I compare the duotone with the original?
Click the eye icons to turn the two fill layers off and on. The photo stays untouched on the Background layer, so the effect is completely non-destructive.
Are the sample files free?
Yes, with a free PHLEARN account. You get 2 sample images and 1 PDF guide: both photos from the video and a 2-page guide to every step.
Master Photoshop, Lightroom and Photography
Join PHLEARN PRO for $12.99 a month or $99.99 a year. Cancel anytime, with a 100% money-back guarantee.





