
Advanced Compositing with Stock Images in Photoshop
-

-
Add to
favorites
-
DifficultyAdvanced
-
Length5 hours
-
Software
Description
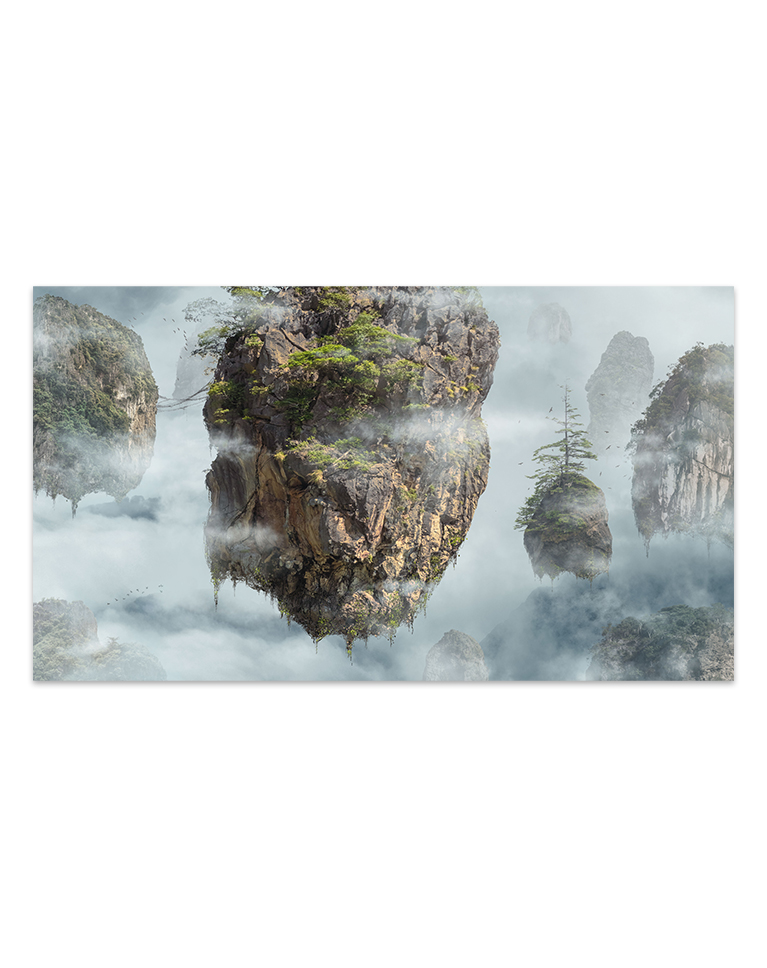
You don’t need expensive gear or complicated photoshoots to create beautiful works of art in Photoshop! Follow along as we show you how to use advanced compositing techniques to combine 19 free stock images into an out-of-this-world fantasy scene.
Learn how to cut out objects from their background, match light and color between images taken in different environments, create realistic depth and atmosphere, and more!
THIS COURSE INCLUDES
- 19 Sample Images
- 1 Sample PSD
- 4 Photoshop Brushes
Share
Table of Contents
-
01 - Building the Background28:57m
-
02 - Cutting Out the Mountains26:06m
-
03 - Using the Rock Brush19:49m
-
04 - Cutting out Tree Detail13:17m
-
05 - Painting Vines23:45m
-
06 - Additional Texture36:00m
-
07 - Balancing Light Levels18:47m
-
08 - Adding Clouds35:37m
-
09 - Adding Birds17:36m
-
10 - Color Tone and Dodge and Burn43:48m
-
11 - Blur and Final Touches22:44m
Course Downloads


Create a Fantasy Landscape From Scratch

Create Your Own Fantasy Landscape
It’s one thing to create an epic fantasy scene in Photoshop. It’s another thing entirely to do it using only free stock photos. Learn how to seamlessly combine 19 different images together, while perfectly matching light, color, and perspective.
INTO ONE AMAZING FANTAST LANDSCAPE
TURN 10 STOCK IMAGES
Advanced Compositing with Stock Images
If you know PHLEARN, you know that we love creating conceptual composite images in Photoshop. But a lot of other courses, like The Beginners Guide to Levitation and How to Create an Epic Composite, involved multiple photoshoots using high-end photography gear. So what if we told you that you can make your own works of art using only free stock photos? Well, it’s possible! And we’re here to show you how.
Match Light & Color
The biggest challenge of using stock images for a composite is that, most of the time, the lighting and color in each photo will be different. If we want our final image to look like everything was photographed in the same scene, we need tools and techniques to help tie it all together. Learn how to use advanced Photoshop tools like Curves, Levels, Gradient Maps, and Check Layers to seamlessly match light and color between any number of images.
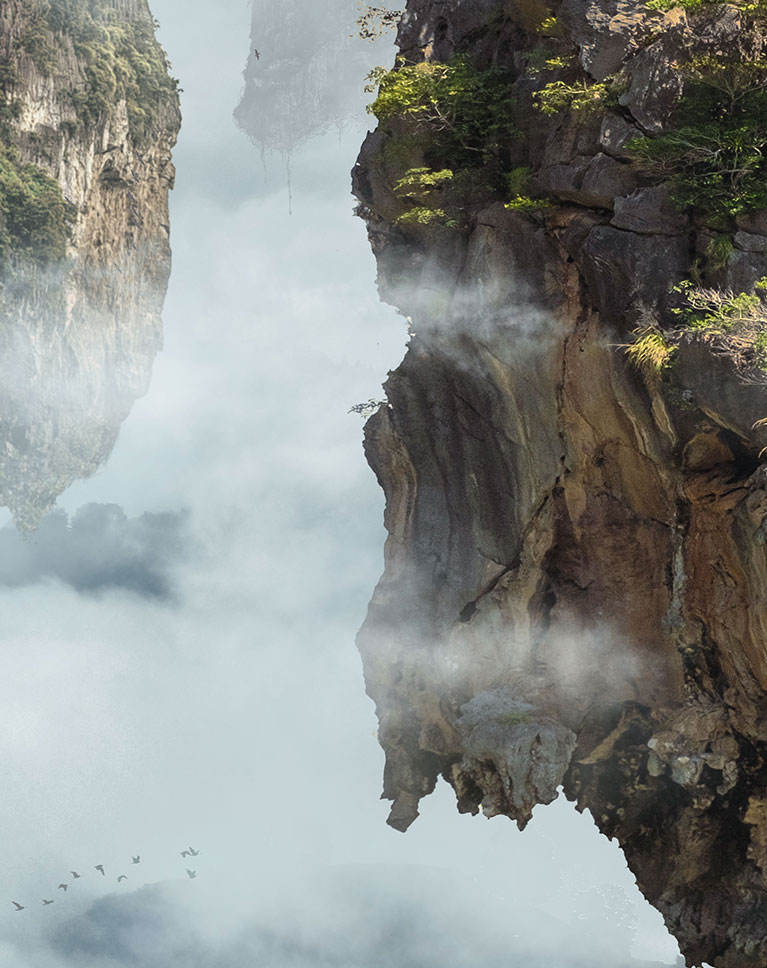
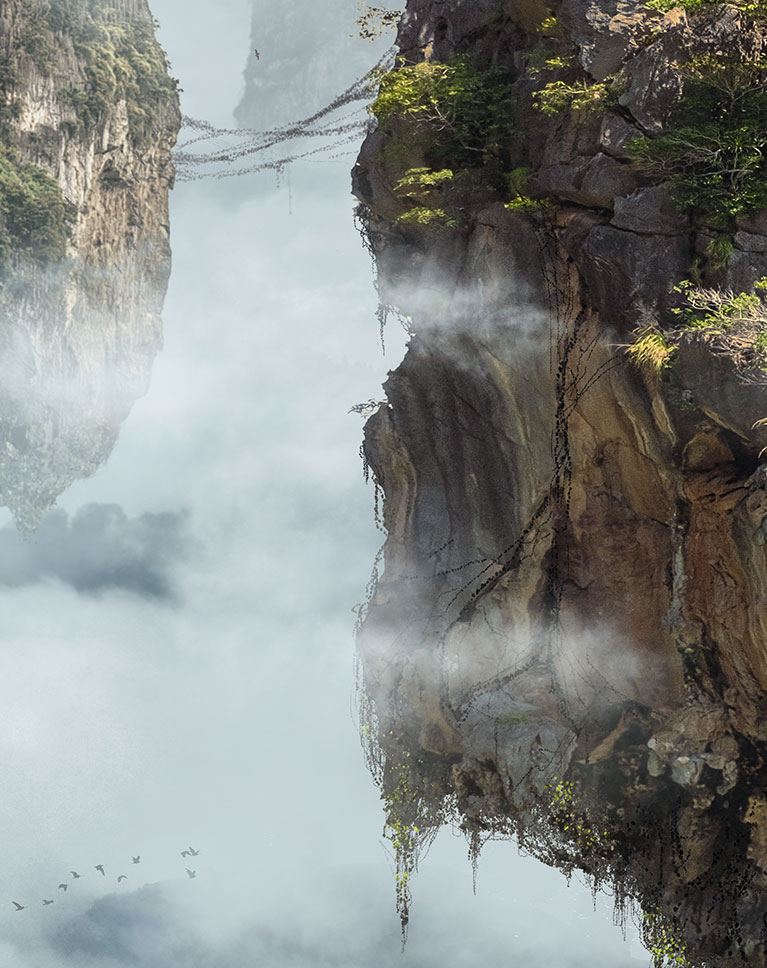
Foreground, Midground, Background
The best images build depth by having elements in the foreground, midground, and background. We show you how to create the illusion of depth using light, color, and atmospheric effects so that you can build your own photorealistic worlds.
ADD VINES & ROCKS
ORIGINAL
Rock & Vine Photoshop Brushes
When you’re going for a particular special effect, making your own custom Photoshop Brushes can save you time while delivering realistic results. For a floating island effect, we needed rocks and vines to clean up Layer Masks and to help tie different elements together. Learn how to create and use specialized custom Photoshop Brushes for amazing special effects!
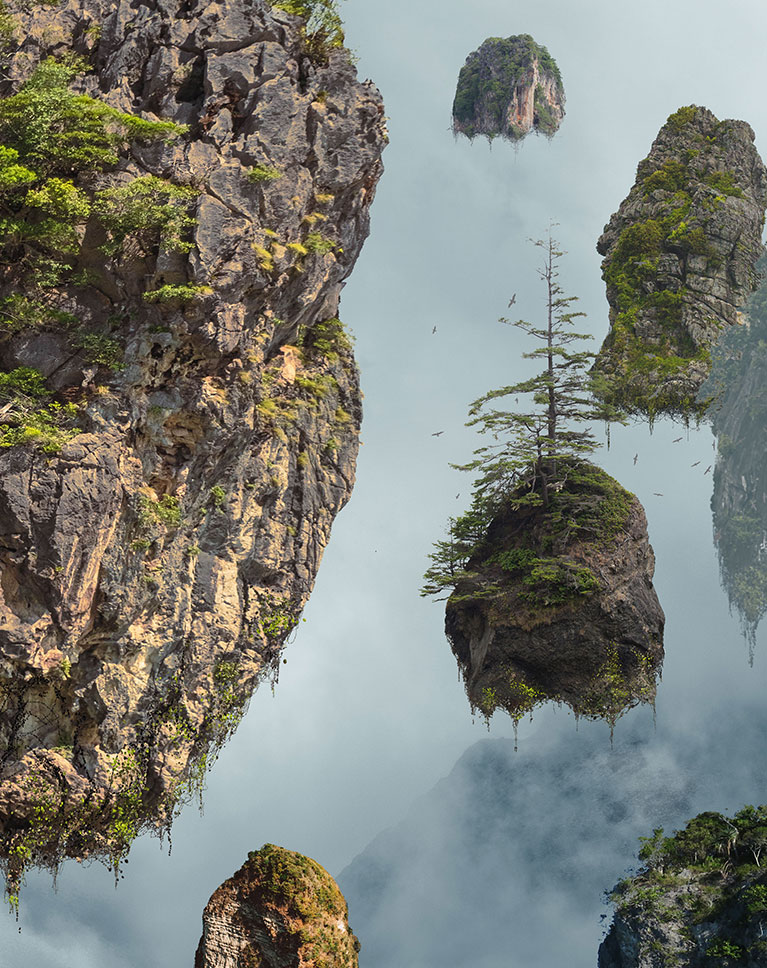
Amazing Sci-Fi Effects
Misty mountains. Floating islands. Strange, new worlds. Learn how to create realistic special effects that you can use to create your own science fiction and fantasy scenes. If you’re looking for more fun and challenging projects like this, try How to Create a Parallax Effect in Photoshop & After Effects.
Professional Photoshop Skills
While we’re working on creating a fun image in this course, these tools and techniques are the same ones that professional artists and creatives use on daily basis. Learn how to analyze and modify light, make precise cutouts and selections, seamlessly blend different photos together, and add beautiful coloring.
Out-of-this-World Photoshop Techniques
ADD CLOUDS, FOG & ATMOSPHERE
4 PHOTOSHOP BRUSHES INCLUDED
Clouds, Fog & Atmosphere
Create realistic clouds, fog, and atmosphere with the included PHLEARN-made Photoshop Brushes. Great tools for adding depth and dimension to any photograph–and they’re yours to keep and use forever.
Learn About Check Layers
Check Layers are tools that we’ve developed to help with the compositing process. More specifically, they’re special Adjustment Layers that we use to help match luminosity, saturation, and hue across multiple different images. We show you how to create and use Check Layers in Photoshop which will help you create seamless, ultra-realistic composite photos!
Color Grading
Once the compositing is complete, color grading is how we tie it all together. Learn how to add beautiful coloring effects that will help put the finishing touches on a composite image while adding richness and realism to the scene.

CREATE DEPTH WITH LIGHTING & ATMOSPHERE
ORIGINAL
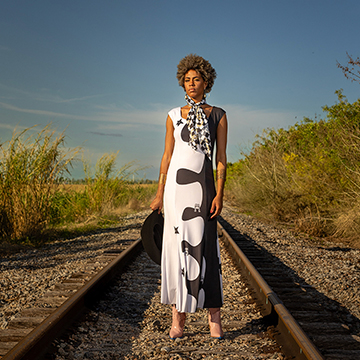
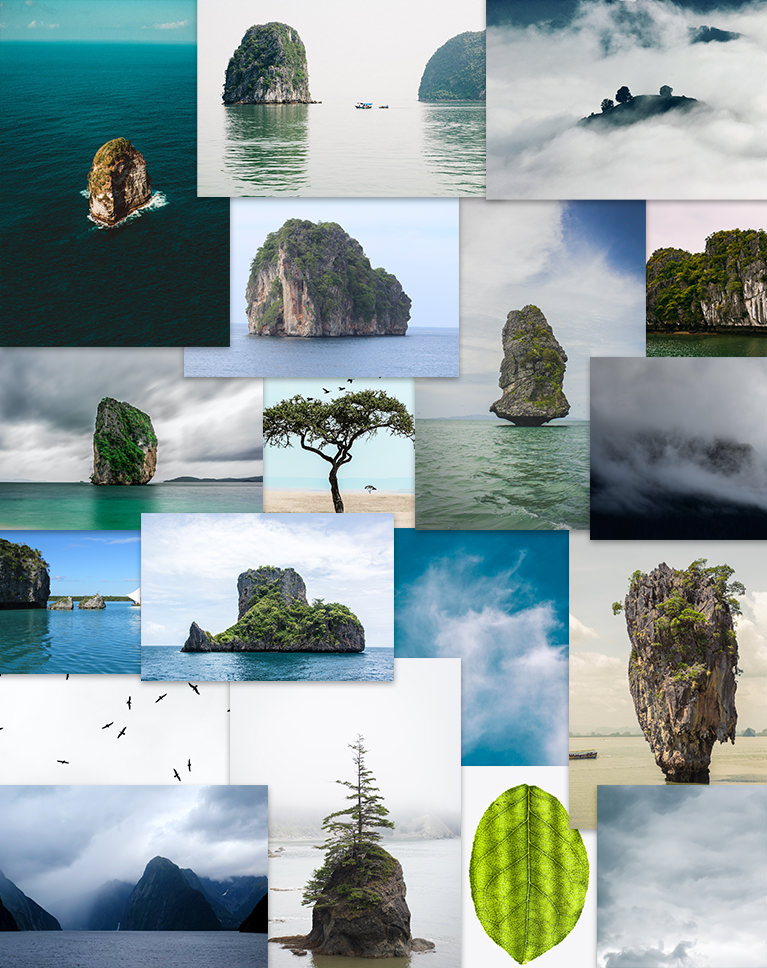
19 Stock Photos Included
All 19 stock photos used to create this scene are included with the course! That means that you’ll have everything you need to start learning and creating right away. You can even customize your work with other free stock images! We recommend using websites like Pexels and Unsplash to find free assets captured by brilliant artists and photographers.
Sample PSD
Not only do we show you how to create a beautiful scene in Photoshop, we also provide the complete PSD file so that you can see how a professional artist assembles and organizes their work. Take a look at how the entire image was created, with every Layer, adjustment, and effect available for you to see.
Master Photoshop Compositing
We love compositing in Photoshop! So much so that it’s become a pillar of our course catalog here on PHLEARN. If you’re new to the craft, we recommend trying some of the courses that break down the fundamentals. Try Photoshop Compositing: Essential Tools & Techniques, and Intro to Photoshop Compositing for Beginners to level up your compositing skills!

Aaron Nace
PHLEARN Founder – Class Instructor
Aaron Nace is a photographer, Photoshop artist and founder of PHLEARN. He is the #1 Photoshop instructor in the world with millions of YouTube subscribers.


Reviews
New & Popular Tutorials


Training Site in
the World
Tutorials!
Ratings
and Counting
Subscribers
Excellent class. Aaron certainly shows the techniques but also discusses the reasons for the decisions that he makes in the composition. Thank you.
This was a very educational tutorial! It was advance level but it was so easy to follow 🙂 and I had a lot of fun doing it! Im gonna move to the underwater composite now :3
This course is EXACTLY what I need to go to the next level in my digital art. Aaron explains each step and the why we do them- not only the how. VERY HELPFUL.
Yea You really did yout thing with these tutorials i needed this, really want to be one of the best to create anything and you helped so much with these
Pena que meu inglês não seja perfeito. Existem milhares de pessoas que poderiam ser beneficiadas com esse curso, caso houvesse tradução. Quem sabe a produção do Aaron não pense seriamente nisso e extenda essa possibilidade a milhares de estudantes do planeta.
I loved this Tutorial, it covers everything in such a detail. I have taken many classes but still I learned so many things. Sometime it’s such a simple step or adjustment but it makes a huge difference. Thanks for an amazing class.
Another amazing tutorial. It’s jam-packed with useful tips and insights. I definitely learned a lot going through all of the steps. The transformation from the sample images to the final product is nothing short of spectacular.
Superb tutorial as always Aaron. I have been compositing images for around a decade and am still amazed to find so many new ways to do things in Photoshop. I especially appreciate the methods for matching luminosity and colour in this tutorial. I look forward to trying them out in my own work. Thank you.
UNBELIEVABLY helpful and clear. The one complaint I have about some of the other free youtube tutorials is sometimes people don’t take enough time to tell you WHY things are happening and what those choices mean, they go too fast, or they gloss over certain important things that are actually really important, and this ends up making me feel confused and frustrated. This class is the opposite. It’s so easy and clear and he goes at a reasonable pace! I had never really worked in Photoshop before (as a video person, I would usually get in and get out of Photoshop as soon as possible because it was unfamiliar and scary) and after this one class I feel VERY comfortable in Photoshop now, and a lot of my knowledge from the video side (blend modes, opacity, working with layers) transferred right over! Highly recommend!
A very thorough tutorial, highly recommended. The only thing I don’t get is why Aaron left some of the vines totally black. To my eye they do not fit the photo that way. Otherwise learned so much and it looks very realistic! -J
Just stunning! Thank you! So many subtle learning points that its a must re-watch again and again. Simply the best tutorials on the net. I’m hooked. 🙂 key points on tools and grouping etc. would be great as a set of notes to accompany the tutorials.
I really enjoyed this tutorial. Thank you for all the information, techniques, and especially the free to watch! I appreciated your teaching style, humor and the relaxed atmosphere. Once again, many thanks!
So much amazing, practical and useful information, well presented and structured. Your tutorials are helping me develop my photoshop skills and to learn new ways of manipulating images. Thank you.
It´s an amazing course, full of tips and really cool PS features. Everytime I come to Phlearn I always get amazed by how much I realize this powerfull program can do.
Thank you for the opportunity to view this tutorial. I enjoyed it very much and learned a lot. Thanks alot.
Always love Aaron’s tutorials and this one is no exception. Much appreciated, thank you!
I am not a compositing artist, but I have seen some of the earlier Phlearn tutorials. This one by Aaron takes it up a notch – to a new level. Take your time to watch this tutorial, because there are some excellent tips and suggestions that he throws in along the way. Watch his process carefully. You will learn a lot from this. And, his style of delivering the tutorial is fantastic. Excellent
Awesome!!! I learned so much watching this demo. Knew about clipping mask but didn’t realize the range of options available. Color balance was very informative also. Thank you!!
While I primarily use PS to colorize B&W photos of WW II aircraft and crews and railroad images I found the whole process amazing. I’ve always wondered what one of your complete tutorials would look like so I appreciate the opportunity to review this one. Unfortunately the fact that I am a 78 year old retiree living on a fixed income and just doing this type of work as a hobbyist precludes me from investing in your program. Still, I am convinced that anyone who is serious about PS would benefit from your teaching. Thank you so much for making this tutorial available. the finished product is amazing!
What a great tutorial. So much information. The image was not zoomed enough for me on some of the painting and adding textures. I really could not “see” what you were doing. I think if you really zoom in when you were working on the teeny parts, I would have been able to enjoy it even more! Thank you so much for making this available!
I can’t begin to list all the tips ‘n tricks I picked up while engaged in this comprehensive tutorial. I appreciate Aaron’s engaging style but especially his ability to clearly demonstrate a technique. I have a PRO membership – this is exactly why!
This tutorial is awesome! It gives you the opportunity to learn and practice a ton of skills with Photoshop. Aaron is an excellent educator; he takes the time to explain the rational behind every step. Overall a great learning experience. Highly recommended!
Brilliant tutorial from Aaron. I have always wanted to do composites. I wish I could purchase just this tutorial w/o the yearly subscription which I cannot afford. Wonderful and clear instructions. I shall watch it as much as possible before it disappears!
Thank you for all your great tutorials! I always learn something new or another way of doing something that may create a better effect. Five stars for sure.
Thanks a lot for this fantastic tutorial. and apart of your Ps knowledge, for your didactic qualities. With so many object in the composite, I noticed how many times you searched the layer you wanted to work on, I got the idea of adding a temporary text layer above each object of the composite with a number corresponding to the name of the group of the object: maybe it could help.
Thanks for the tutorial. I really enjoyed it. Sometimes I thought you went into too much detail but I ended up learning more than I knew when I began. Good Job!!!!
The best thing about this course is the work flow. Starting with the background and then working to the foreground pics. Not worrying about colors at first, but instead focusing on lighting. These are techniques that can be used in any composite. So next composite you start on your own, you will actually have a good workflow model to follow. More than just advanced skills and techniques, it is project planning. Great course. Great structure.
LIke, like, like, like.
perfect tutorial !!!
Amazing tutorial, always so helpful with the different ways to solve problems! Thank you so much Aaron 🙂 You’re the best!
as always an excellent tutorial, learn small new tricks in every class…and reinforces techniques from previous classes !! it would be wonderful to know exactly how much time it takes for the retouch when you speed up the workflow…just to have an idea your work speed.
It gives so much to think about. Great course. Learned a lot!
I loved doing this tutorial. At the end it went a Little bit to fast for me. The color handeling I found difficult (colorblind 🙁 ) the saturized layer helped a bit But it was my first lesson after the 30 days course. so I think it was not the easyest. and I Learned a lot.
This tutorial is really excellent. As well as teaching Photoshop techniques, Aaron uses best practice in workflow and organisation which is really helpful. I followed along with this and built my own version that I am quite happy with and I learned so much in the process. Thank you Aaron. Keep up the great work.
Great tutorial !!!
I’ve just finished this tutorial, it was fun to watch and practice with you, I believe the best way to teach is by doing real examples this way the informations will stick better, I hope will you continue to do more compositing tutorials like this or to continue this like a series, I noticed there is another tutorial like this but I hope to make it a series about compositing and focus on other concepts in each new one. Thank you so much for all the info you provided to us🌹🌹
I love all those tutorials you’ve made. They help me much. Thanks a bunch.
Great tutorial, one of my favorites. If you work with compositing or are interested in giving it a try this is a must see.
Fantastic pro tutorial, it is really worth it every single minute. Great to see Aaron going back to the basis, it was how I got interested in his outstanding work and became a loyal Phlearn member – learning him creating real composites.
I enjoyed this Tutorial so much! Aaron you are such a patient and creative teacher!
amazing. we need more compositing tuturials like this.
It’s really amazing how you master all these techniques and tools in Photoshop – really showing master control. Even if I know and use several of the tools and techniques in this long and super complex video, I always learn something new or realized that I forgot about some techniques that I can or should use. Since it’s recorded I can skip some parts where you are nit picking on details that are important for a final product but I dont’ need to spend too much time watching it – not saying it’s not important and useful for others. I admire your patience and dedication to details.
I’d like to add so many swear words in my review, but I’ll stick with: “AARON, THIS WAS AMAZING!!!” Really, I had a blast following the tutorial! Added sooo many new tools to my toolbox… And I got a beautiful image that I’m super proud of to boot!
Great class as always 🙂
This is my favorite advanced compositing tutorial yet! Aaron shows clearly how to treat color, luminosity, saturation and position to simulate perspective. He lets us hear his thought processes which I find super helpful. He reviews the use of check layers which we use throughout the tutorial. I hope there will be more advanced tutorials using stock images with compositing.
Great tutorial!! I learned many tips from it.
Aaron is one of the best PS and LR trainers I’ve watched. He is clear and Thorough.
Excellent tutorial as always from Aaron. Some great techniques used in this. So inspirational!!!
Great tutorial, learned so much and encourages me to try some new things, Thanks Aaron
…fantastic tutorial, it helps me to implement my new ideas better.
I was able to pick up so many tips from this tutorial which I am sure will help to up my skills, Thanks Aaron
Tremendous tutorial! I expected to learn about matching colors, and selection but the tips on use of custom brushes for cutouts and creation of shrubbery as well as clouds was a surprise bonus that I expect will be very useful. Hadn’t really thought of using brushes with scatter, randomness on masks in particular.
Great tutorial !!!
What makes Aaron’s tutorials stand out is not just his Photoshop skills (which are obviously excellent) but the sheer perfectionism that he brings to every image that he produces. There are a number of very skilled Photoshop tutors around but none in my experience are as thorough and painstaking as Aaron Nace. This particular tutorial is an excellent example of his approach.
I loved this tutorial. Really amazing and detailed with clear explanations. Great job Aaron. I am a big fan of your tutorials. I learnt a lot from this one. Looking forward to using the skills to create a dreamscape of some kind! Raj Talluri
Brilliant! This is the kind of content I enjoy the most! Your techniques help to achieve the types of results needed to make these composite so believable. Also, the layer and group organizing keeps things in their place to find later. Please add more content like this one. Thank you Aaron.
One of the best tutorials! Thank you so much for including the .PSD file, it is great to follow along with a starting point and an accurate reference 🙂
Another great tutorial from Aaron Nace. Once again the effort put into giving us this material is simply staggering. This style of tutorial reminds me of watching Aaron some years back. I shall be polishing my compositing with this. I recommend that you should watch his other tutorials on compositing also. Great work!!