
Two things go wrong when a finished photo reaches the web: the colors shift and the sharpening looks off. Both come down to order of operations. This free Photoshop tutorial resizes to the actual display width first, sharpens at that size with High Pass on desaturated layers set to Soft Light, Overlay or Linear Light, then exports through Save for Web, which converts to sRGB on the way out.
We publish a new free tutorial every week, each one with sample images and PSDs you can download and follow along with. Sign up and they land straight in your inbox, along with early word on sales, events and subscriber-only offers.

How to Sharpen and Save Your Photos for Web in Photoshop
Two problems show up over and over once a finished photo leaves Photoshop and lands on the internet: the colors shift because of a color space mismatch, and the image either looks soft or overly gritty because it was sharpened at the wrong size. Both are quick fixes once you know the order to do them in — resize first, then sharpen, then save with the right settings.
Getting Your Color Space Right Before You Start
A common complaint is that colors look correct in Photoshop but shift once an image is uploaded somewhere like Flickr or 500px. The usual cause is a color space mismatch between the large color space used for editing and the smaller one the web actually displays in.
-
Check Your Working Color Space
Go to Edit > Color Settings to see your current working space. Editing in a wide space like Adobe RGB 1998 is the better choice while you’re working, since it gives you access to a much larger range of colors than sRGB does — editing directly in sRGB means you’re cutting yourself off from colors before you’ve even started.
The wide working space stays in place through editing; the conversion to a web-friendly space happens later, during the save step.
Resizing to Your Actual Display Size First
Everything that follows depends on the image already being the size it will be seen at.
-
Check the Image Size Against Its Display Size
Go to Image > Image Size and compare the current pixel width to the width the image will actually be displayed at on the page it’s going to. A full-resolution file that’s several thousand pixels wide but will only display at a few hundred pixels needs to be scaled down before any sharpening happens.
-
Resize Down to the Display Width
Change the width in the Image Size dialog to match the image’s actual display size on the page — for example, 730 pixels wide for an image embedded directly in a blog post.
Why Sharpening Has to Happen at the Final Size
Sharpening filters operate relative to the pixel dimensions of the image they’re applied to. A sharpening radius that looks perfect on a small, resized image will do almost nothing if applied to the same photo at full resolution, and a radius that looks right at full size will often look excessive once the image is shrunk down afterward. Getting to final size before sharpening is what keeps the sharpening effect looking correct once the image is actually viewed at its real size.
Creating Multiple Sized Versions for Different Uses
If the same photo is going to several places, each destination gets its own file.
-
Duplicate the Layer for Each Version You Need
Right-click the layer and choose Duplicate Layer, sending each duplicate to a new document. Resize each duplicate to whatever size that particular use needs — a small profile picture at around 100 pixels wide, for example, and a larger version at 730 pixels wide for a blog post.
Sharpening each version separately, at its own final size, means every use of the image ends up looking correctly sharpened rather than sharing one compromise setting across sizes that don’t match.
Sharpening With the High Pass Filter and Blend Modes
High Pass sharpening lives on its own layer, which keeps it adjustable right to the end.
-
Duplicate the Background Layer
Press Cmd/Ctrl + J on the resized background layer to duplicate it.
-
Desaturate the Duplicate
Press Shift + Cmd/Ctrl + U, or go to Image > Adjustments > Desaturate, to remove color from the duplicate layer.
-
Change the Blend Mode
Set the desaturated layer’s blend mode to Overlay before applying the sharpening filter, so you can preview the sharpening effect as you adjust it.
Why Desaturate Before Applying High Pass
The High Pass filter combined with a contrast-based blend mode like Overlay can introduce unwanted color shifts if applied to a full-color layer. Desaturating first strips out the color information, so the blend mode only affects contrast and edge detail rather than tinting the image.
Comparing Overlay, Soft Light, and Linear Light
The radius sets how much detail the filter picks up; the blend mode sets how hard it hits.
-
Apply the High Pass Filter
Go to Filter > Other > High Pass and adjust the radius using the arrow keys — holding Shift moves by whole numbers, while pressing the arrow keys alone moves in smaller increments like 0.1 or 0.2. Watch the preview as the radius increases: too low and there’s barely any effect, too high and the image starts looking harsh.
Which blend mode to pair with the High Pass filter depends on how strong an effect you want: Soft Light produces the subtlest sharpening, Overlay sits in the middle, and Linear Light produces the strongest and grittiest effect. All three can be layered in combination rather than choosing just one.
Using a Layer Mask for Selective Sharpening
Not every part of a photo wants the same sharpening; on the fly in the video, the eyes looked better before and the fine hairs wanted more.
-
Add a Layer Mask
Hold Option/Alt and click the Add Layer Mask icon to add a black-filled mask, hiding the sharpening effect entirely.
-
Paint White to Reveal Sharpening Selectively
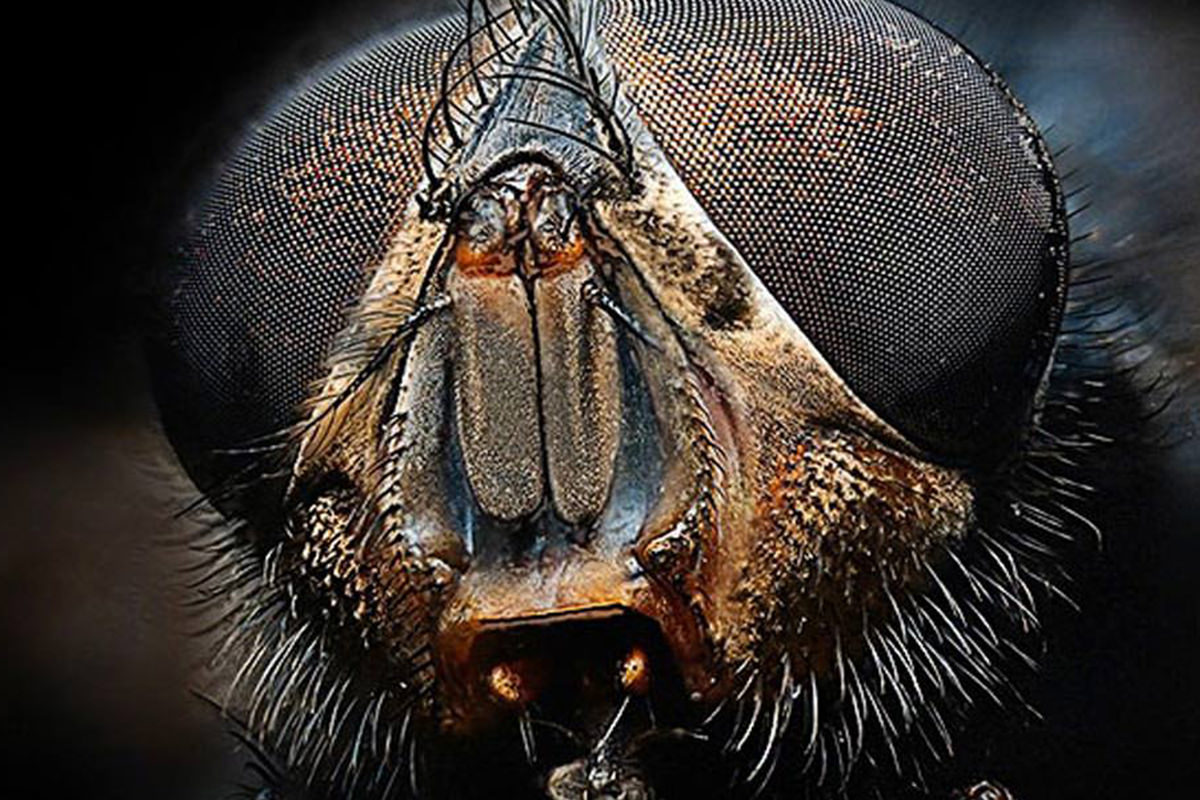
Paint with white directly on the mask over areas where you want the sharpening to show, such as the fine hairs on the fly, while leaving the rest unaffected. With a regular white mask, do the opposite and paint black over areas that looked better before, like the eyes.
Combining Multiple Sharpening Layers
Nothing says the sharpening has to come from a single pass.
-
Add Additional Sharpening Layers as Needed
Repeat the duplicate-desaturate-High Pass process with a different blend mode and radius on a new layer — for example, a Linear Light layer for strong, targeted sharpening on specific fine details, and a Soft Light layer for a gentler, more general pass across the whole image.
-
Adjust Opacity to Balance the Effect
Lower the opacity of any sharpening layer that looks too strong once viewed at full size, rather than removing it entirely.
These layers can be used in any combination, and not every image needs all of them — the goal is a combination of general and selective sharpening that looks crisp without looking artificial.
Saving for Web Instead of Save As
The last step is where the color space problem actually gets solved.
-
Use Save for Web Instead of Save As
Go to File > Save for Web (or Save for Web & Devices) rather than the regular Save As dialog when an image is headed to the internet.
Why the sRGB Conversion in Save for Web Matters
Save for Web automatically converts the image to sRGB, which is the color space web browsers like Chrome and Firefox default to displaying. Saving directly from a wider working space like Adobe RGB 1998 without this conversion is exactly what causes colors to look wrong once an image reaches the web — Save for Web handles that conversion automatically.
Balancing JPEG Quality Against File Size
Maximum quality is almost never worth what it costs in file size.
-
Choose JPEG and Adjust Quality
In the Save for Web dialog, select JPEG as the format and compare quality settings against the resulting file size — a quality of 100 might produce a file several times larger than a quality around 60, often with little to no visible difference in the actual image.
-
Save the Optimized File
Once the quality setting looks visually identical to the higher setting but with a smaller file size, save the file to your chosen location.
Why Smaller File Sizes Are Worth the Extra Step
A smaller file loads faster for every visitor, uses less bandwidth, and reduces the energy cost of storing and transferring it across the internet at scale. Multiplied across every image uploaded by every person, choosing a reasonable quality setting instead of defaulting to maximum quality adds up to a meaningful reduction in transfer costs and energy use, on top of the practical benefit of faster-loading pages.
Why This Approach Works
The order of operations here matters more than any individual setting. Sharpening filters like High Pass measure detail relative to the pixel dimensions in front of them, so resizing to final display size before sharpening is what keeps a chosen radius meaningful — the same 1.9-pixel radius that looks great on a 730-pixel-wide image would do essentially nothing on a full-resolution file. Desaturating before applying High Pass with a contrast blend mode keeps the sharpening effect limited to edges and detail rather than introducing color shifts, and stacking several sharpening layers at different strengths, masked selectively where needed, gives far more control than a single global sharpen pass. Saving through Save for Web rather than Save As closes the loop by converting to sRGB automatically, which is the color space browsers actually use, so the careful color work done throughout editing survives the trip to the web instead of shifting once it’s uploaded.
Final Thoughts
Getting an image ready for the web really comes down to three steps done in the right order: resize to the size it will actually be displayed at, sharpen at that size using whichever combination of blend modes suits the image, then save through Save for Web so the color space and file size are both handled correctly. It’s a small amount of extra effort that solves two separate problems — images that look soft online and colors that shift after upload — at the same time, and it scales down file sizes in the process, which benefits load times for anyone viewing the image.
Quick Reference: Keys, Menus and Settings
- Check color spaceEdit > Color Settings; edit in Adobe RGB 1998
- Resize firstImage > Image Size, width to the display size (730 pixels here)
- Duplicate and desaturateCmd/Ctrl + J, then Shift + Cmd/Ctrl + U
- SharpenBlend mode Overlay, Soft Light or Linear Light; Filter > Other > High Pass, Radius 1.9 px here
- Step the radiusArrow keys for small steps, Shift + arrow for whole numbers
- Sharpen selectivelyAlt/Option-click the mask icon for a black mask, paint white
- Save for the webFile > Save for Web, JPEG, Quality 60 (sRGB conversion on)
No AI, no generative credits.
Sharpening for the Web: Common Questions
Why do my colors look wrong after I upload a photo?
You are probably editing in a large color space like Adobe RGB 1998 while browsers such as Chrome and Firefox use sRGB. Keep editing in the larger space and convert to sRGB when you save for the web.
Where do I check my working color space?
Go to Edit > Color Settings. Aaron works in Adobe RGB 1998; editing in sRGB cuts you off from a lot of colors from the start.
Should I resize before or after sharpening?
Before. Sharpening works at the scale of the image, so a 1.9-pixel High Pass that looks right at 730 pixels wide would do almost nothing on a full-size file. Use Image > Image Size to get to the display width first.
How do I make different sizes of the same photo?
Right-click the layer, choose Duplicate Layer and send it to a new document, then size each copy for its use, like 100 pixels for a bio picture and 730 for a blog post. Sharpen each one at its own size.
Why desaturate the layer before High Pass sharpening?
So the sharpening doesn’t mess up your colors. Duplicate the layer with Cmd/Ctrl + J and press Shift + Cmd/Ctrl + U, or use Image > Adjustments > Desaturate.
What High Pass radius should I use?
Set the blend mode first so you can see the effect, then go to Filter > Other > High Pass and step the radius with the arrow keys (Shift for whole numbers). 1.9 pixels looked best on this 730-pixel image.
Overlay, Soft Light or Linear Light: which is strongest?
Soft Light is the gentlest, Overlay is in the middle and Linear Light is the strongest and grittiest. You can stack them on separate layers and lower opacity on any that are too much.
How do I sharpen only part of a photo?
Alt/Option-click the Add Layer Mask icon for a black mask, then paint white where you want the sharpening, like the fine hairs. On a white mask, paint black over areas such as the eyes.
What JPEG quality should I use for the web?
In File > Save for Web, compare settings. Here quality 100 made a 280 KB file and 60 made about 95 KB with no visible difference.
Master Photoshop, Lightroom and Photography
Join PHLEARN PRO for $12.99 a month or $99.99 a year. Cancel anytime, with a 100% money-back guarantee.





