
How to Master Sharpening in Photoshop
-

-
Add to
favorites
-
DifficultyMedium
-
Length3 hours
-
Software
Description
Master professional sharpening in Photoshop! Learn to enhance details, create contrast, and prepare your images for print, web, and social media.
THIS COURSE INCLUDES
- 18 Sample Images
- 1 Photoshop Action
Share
Table of Contents
-
01 - The Sharpen Tool10:07m
-
02 - Automatic Sharpening9:21m
-
03 - Unsharp Masks14:45m
-
04 - Smart Sharpen8:39m
-
05 - Sharpening with High Pass14:36m
-
06 - Reverse Sharpen7:25m
-
01 - Correcting Focus Issues with Sharpening8:49m
-
02 - General Sharpening12:11m
-
03 - Enhancing Landscapes with Sharpening19:54m
-
04 - Enhancing Portraits with Sharpening20:45m
Course Downloads
Master Sharpening


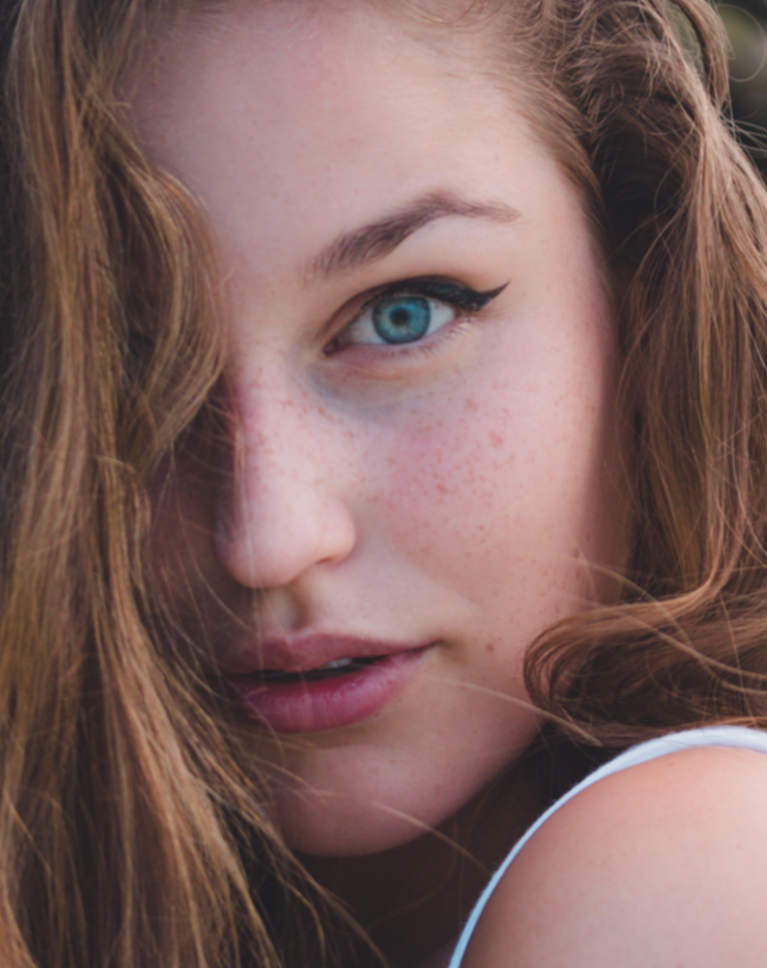
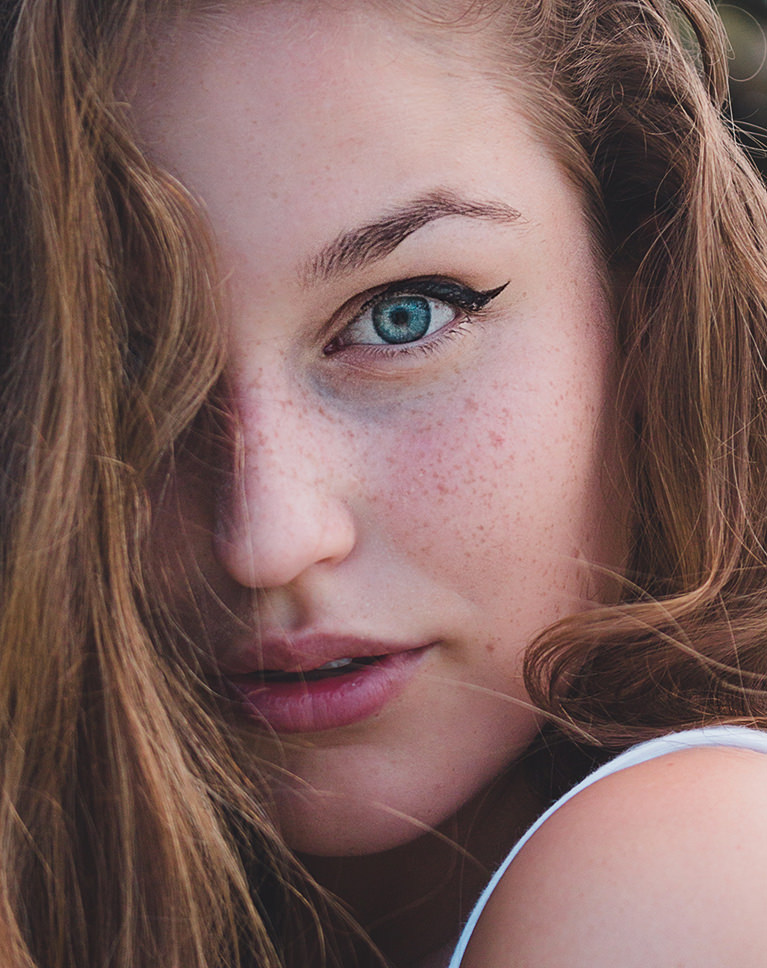
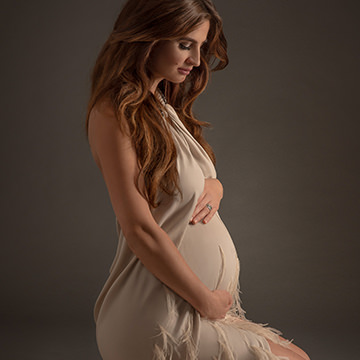
DRAW ATTENTION TO DETAILS LIKE EYES
ORIGINAL
Sharpen Any Image in Photoshop
Make any image clearer. Sharpening is an essential step that adds depth and dimension to a photograph. Master the tools and techniques the pros use to sharpen an image in Photoshop.
The Details that Matter Most
Have you ever wondered how to properly sharpen eyes in Photoshop? What about hair, lips, or clothing? Not only do we cover the tools and techniques to perfectly sharpen an image, we also teach you what parts of a photo will benefit most from some extra contrast and clarity.
Skills for Any Photographer
Bring out the details in a mountain landscape. Highlight the craftsmanship in a bride’s wedding dress. Accentuate the color and depth in a model’s eyes. No matter what type of images you create, professional sharpening will help them look their best.
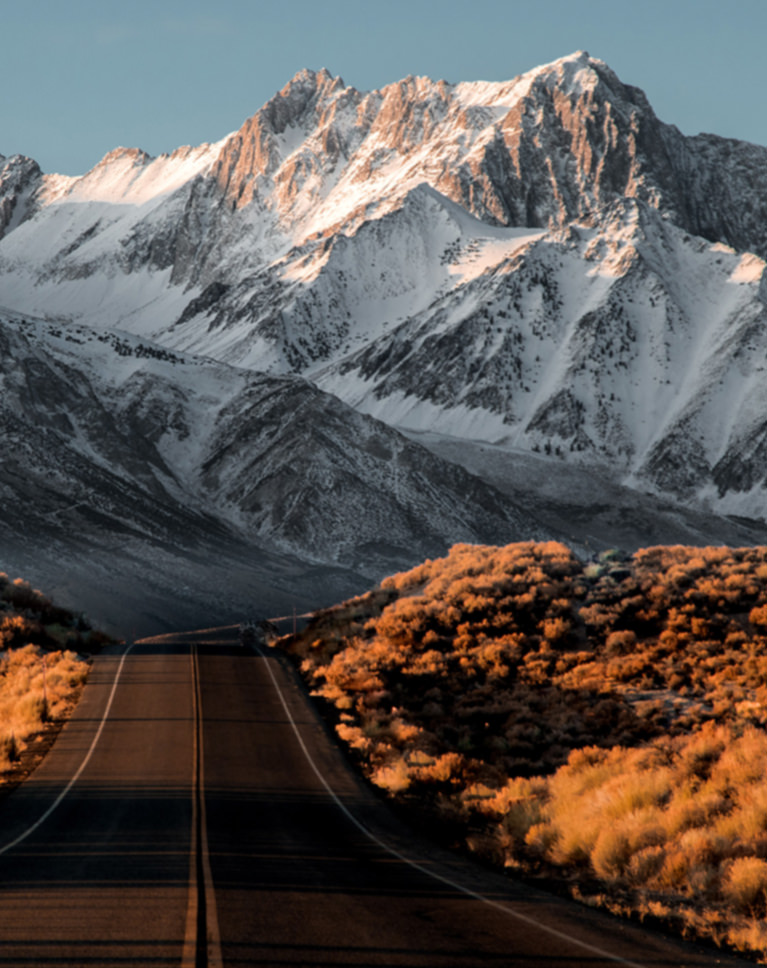
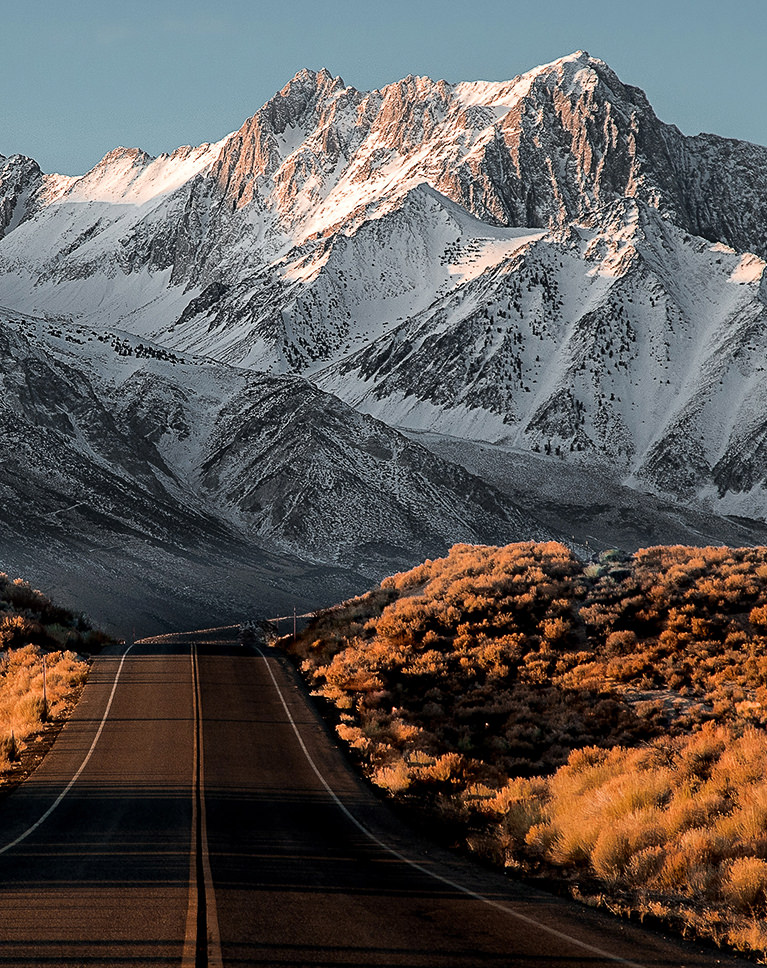
ENHANCE LANDSCAPES WITH SHARPENING
ORIGINAL
Rescue Photos
Photoshoots can be crazy and sometimes things go wrong. Missed focus? Need to get rid of some unexpected motion blur? Learn how to sharpen photos in Photoshop and take them from unusable to beautiful.
Add a Professional Finish
Give your photos the professional punch they need to catch a client’s eye or stand out on Instagram. Your photos deserve to be next to the best – we’ll help you get them there.
Work Faster with Our Sharpen Action
In the competitive world of photography and post-production, your time is valuable. Our exclusive Photoshop sharpen action will help you work faster and achieve professional results – without ever skipping a beat.
CORRECT OUT OF FOCUS AREAS
ORIGINAL
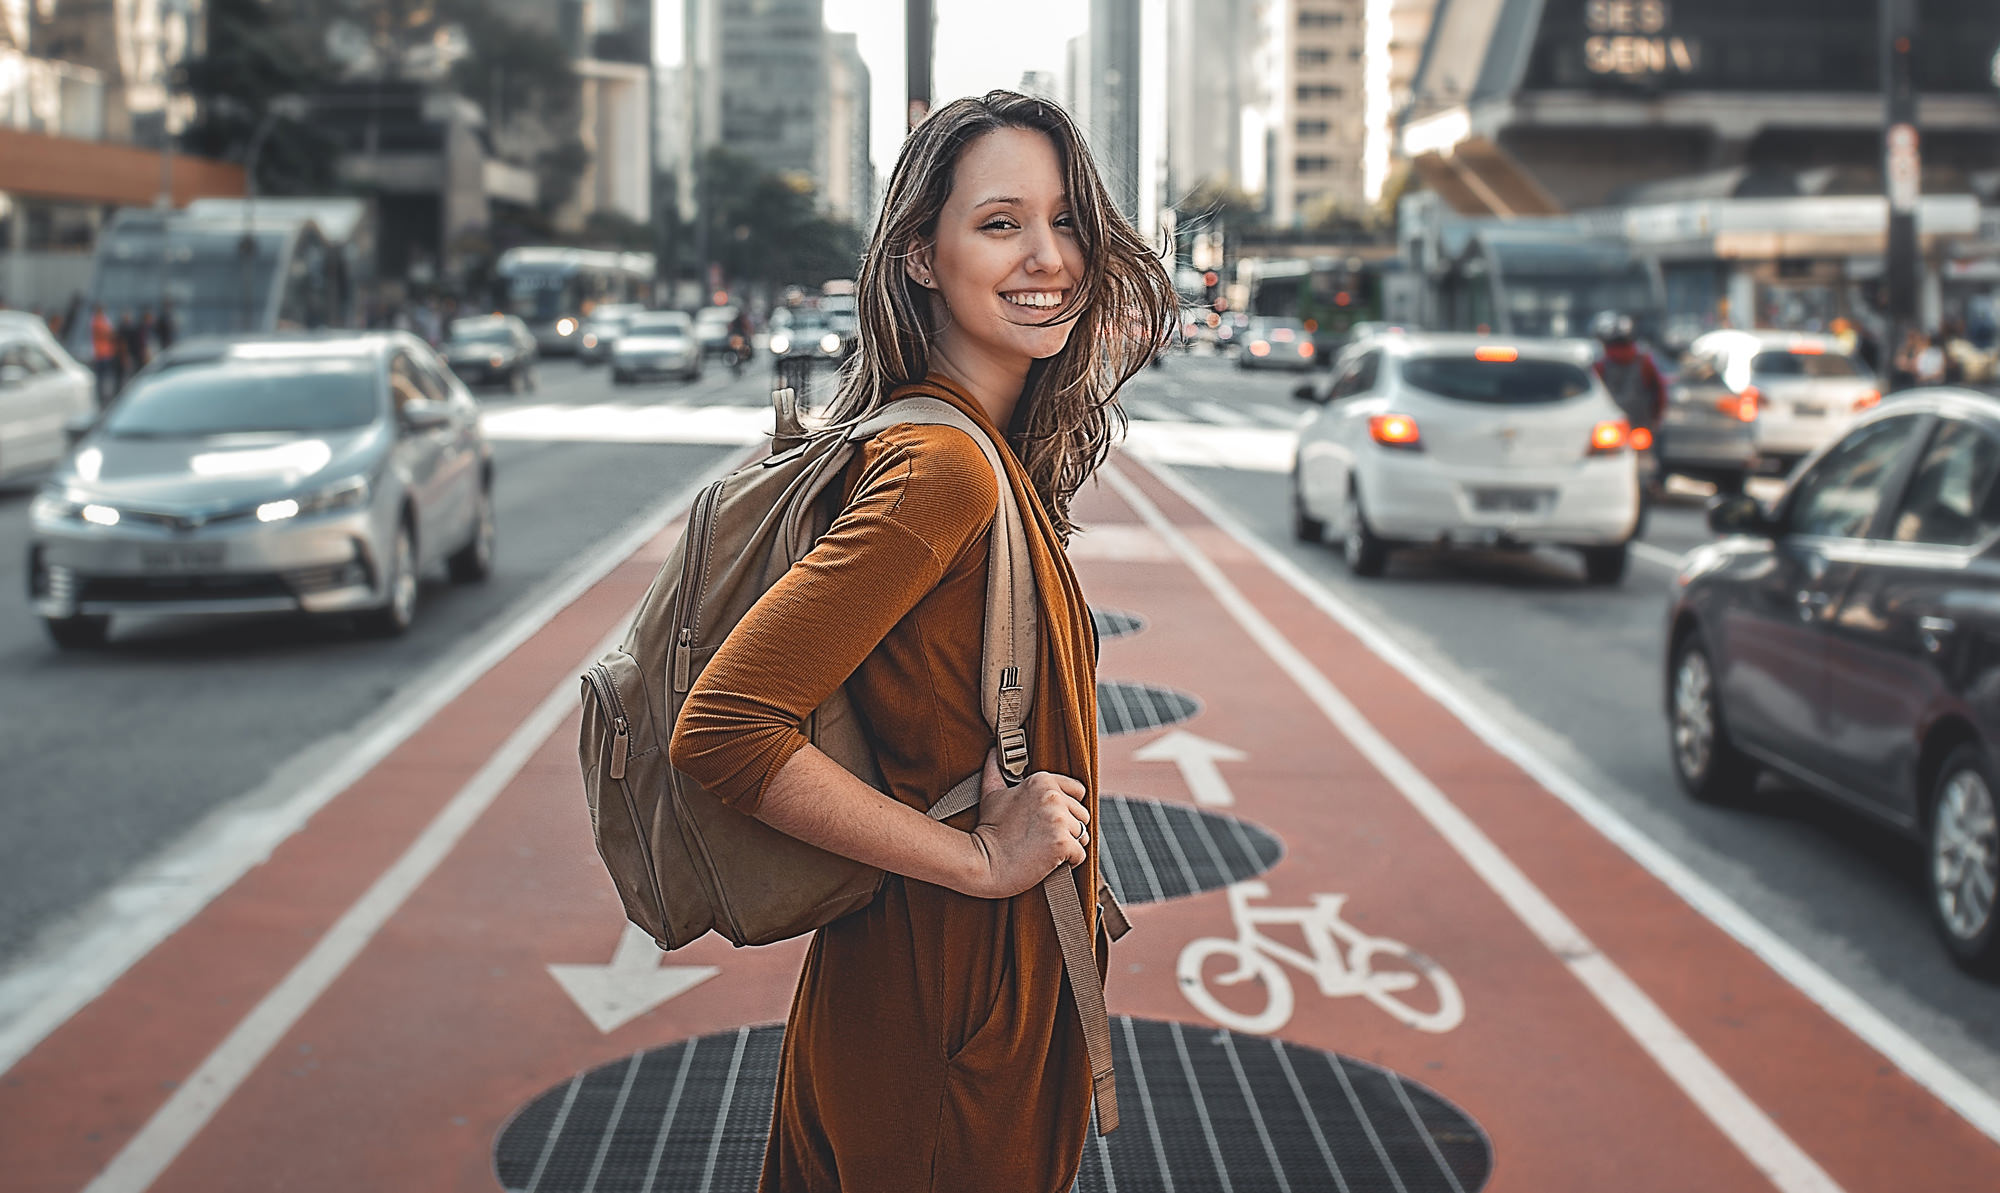
Guide the Viewer’s Eyes
Ever wonder how certain images pull you into a person’s eyes or guide you to the most important features in a landscape? Composition is key but sharpening can also have a huge impact on the photography. Learn to use sharpening to guide your viewer’s eyes to the things that matter most.
Crisp Edges, Stunning Contrast
Are your photos feeling flat? No problem! Use image sharpening to add contrast and depth to any picture. Separate your subject from the background or add a subtle dodge and burn effect to create shape and definition – all with the techniques that you’ll learn in this tutorial.
Photoshop Sharpening Tools
We start with the basics like the Photoshop Sharpen Tool. Then we walk you through using more advanced techniques like High Pass Sharpening and Unsharp Masks for even more flexibility and control.
Sharpen Any Image

AFTER
BEFORE
Bring Your Images into Focus
Beautiful details. Crisp edges. Stunning contrast. Give your photos a professional finish with sharpening in Photoshop.
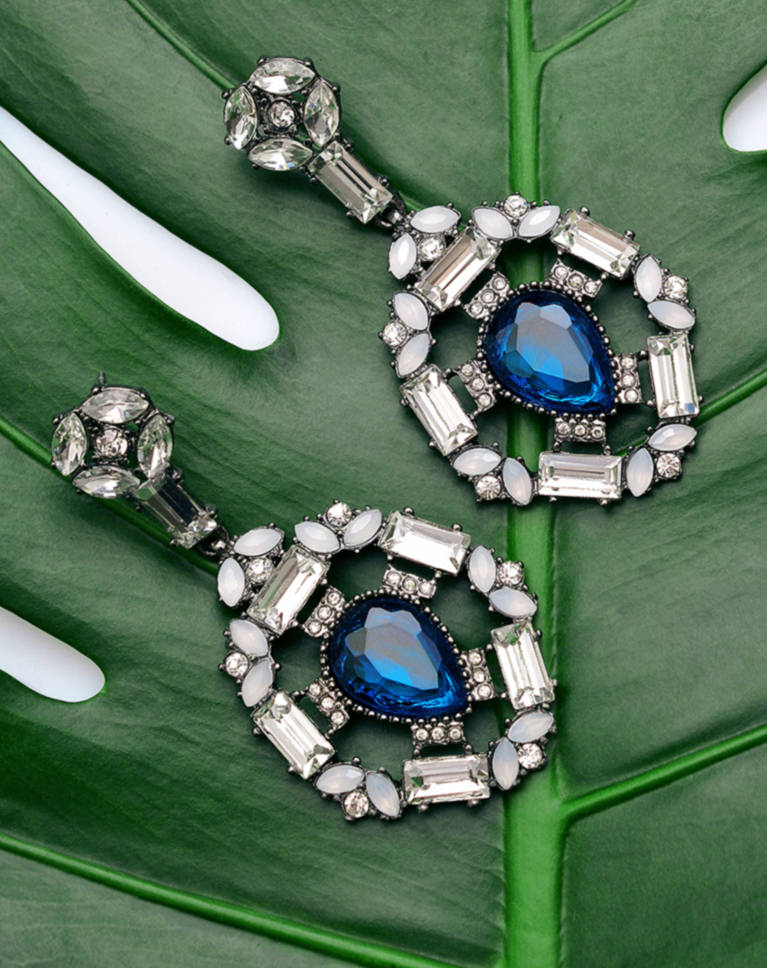

SHARPEN PRODUCTS FOR MORE IMPACT
ORIGINAL
Unsharp Masks
Threshold? Radius? Amount? What does it all mean?! One of the most popular tools for precision sharpening, understanding how to use Unsharp Masks will take your photos to the next level.
High Pass Sharpening
Learn Aaron’s preferred sharpening method. High Pass sharpening will give you the ability to apply several layers of subtle sharpening, each to different areas of a photo. Learn to sharpen hair, eyes, lips, and clothing, each individually and at different quantities.
Smart Sharpen
When you need speed and the conditions in your photos are right, Smart Sharpen can give you amazing results in a fraction of the time. Learn the ins and outs of some of the automated tools in Photoshop that can very quickly and easily get your images looking great.
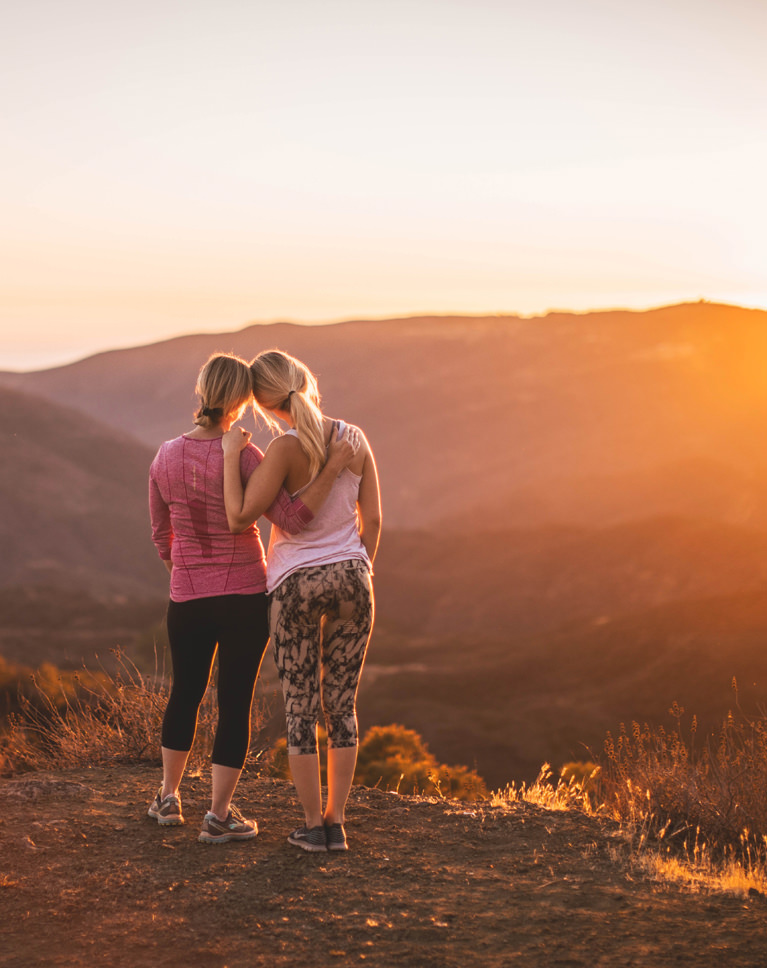
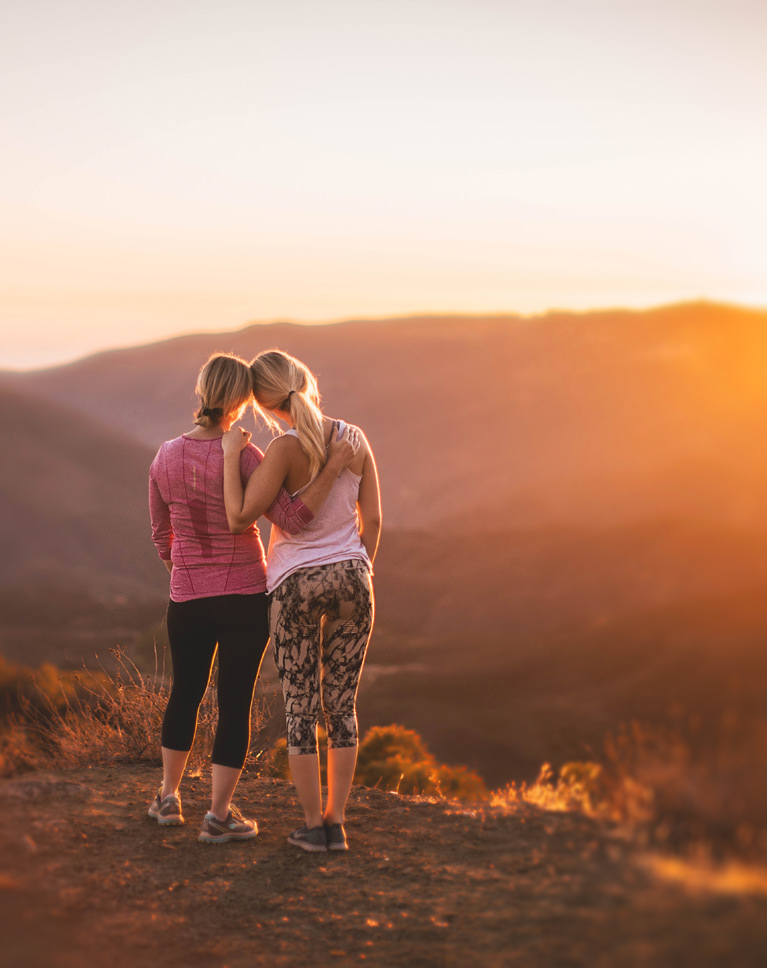
USE REVERSE SHARPENING TO DRAW ATTENTION TO SUBJECTS
ORIGINAL
Professional Workflow
As a working photographer, you know that half the battle is managing your time. In this tutorial, you’ll not only learn one of the most powerful photo editing techniques, but also how to fit it seamlessly into your workflow. From edit to export, we’ve got you covered.
Best Practices
If you have ever used image sharpening software that claims to deliver professional results, go ahead an uninstall it. Nothing comes close to professional Photoshop sharpening. Master the tools and techniques that your favorite photographers and image-makers use to bring their work to life.
Tips for Print & Web
Get your photos ready for the cover of your favorite magazine or impress clients with images that will look amazing on their website. No matter the application, our sharpening techniques will give your photos a professional edge.

Aaron Nace
PHLEARN Founder
Aaron Nace is a photographer, Photoshop artist and founder of PHLEARN. He is the #1 Photoshop instructor in the world with millions of YouTube subscribers.
Reviews


New & Popular Tutorials


Training Site in
the World
Tutorials!
Ratings
and Counting
Subscribers
These tutorials, methods, and action are incredibly accessible and effective. Thanks
Very nice one
Working my way through some Pro tutorials – been using Photoshop and following Aaron’s YouTube for years. I decided to up my game and become a member of Phlearn…again! 😂 In one and a half tutorials my mind has been blown with little tricks I didn’t know that my workflow will seriously benefit from. Like “Reverse Sharpen” 🤦♂️ What a winner!! I love a soft ethereal look for converting to watercolour art. I usually use my Lensbaby Velvet as a starting point and work from there; but quite often I’ll take shots with other lens’ and really wish I’d got the shot with my Lensbaby to get that ultra soft look. Reverse sharpen has totally opened that door to me for those images I’ve got on the fly through another lens that doesn’t quite create the softest bokeh or blur that I wanted. Seriously looking forward to putting this method into practise! Thank you 🙏
WOW! Aaron has forgotten more about sharpening than I will ever hope to know. As a bonus, it is worth watching just for the tips on layer masks.
There is so much I have learnt here. I use High Pass almost exclusively, but I did not utilise it the way you have shown. I have understood a lot more about sharpening now, Thank you. 🙂
I have been hable to learn so much new thing in spite I knew quite photoshop. Great tutorial. Also i would like to say, he speak very clear and i understanded all videos without problem.
Great tutorials!! Aaron does a great job at explaining every step but he does more than that! He explains why you would or would not want to use a certain tool. I’ve learned a lot so far and look forward to learning more!
fantastic inverse sharpening…great to know!!!!!!
Good
I have learned so much from this. I now want to redo every photo that I have ever taken! I have been using Photoshop every since it came out, but have always struggled with getting a great amount of detail without having the photo look over sharpened. I now feel that I am being pointed in the right direction. (Old guys can indeed learn new tricks!) I will be watching this several times.
Honestly great tutorial, I didn’t think I’ll learn that much cause I already used the High Pass method for sharpening, but I got so much useful and important information and learned so much, thank you guys, and Aaron, you are the best!
This is my first introduction to Phlearn and I am very happy with my decision! This course was a breeze to follow and it pushes me closer to my artistic goals. Thank you!
This is a fantastic tutorial. Very clear, concise, and very much to the point. I have a Bachelor’s degree in Publication Design and I’ve learned more from Aaron Nace over the past few months vs. 4 years of graphics classes and 65k later. PHLEARN is one of the most resourceful tools I’ve come across in online ed.
I participated in an Art Gallery after sharpening my image for a print. When it was displayed, it turned out to be over-sharpened. I wish I had watched this tutorial before participating in that Art Gallery. Great tutorial. Aron explained everything about sharpening in a concise and clear manner. His High Pass technique is amazing. Highly recommended for fellow photographers who would like to explore sharpening in depth.
I really really love this video. Helped me a lot to sharpen all kinds of images. Thank you so much for doing all those freaking amazing tutorials. You are the best!
Ohhhh momma! This tutorial is very interesting and so helpful! Great work Aaron; you’re great teacher and communicator, you know how to teach us and how to keep us curious! Much thanks for these tutorials!
As usual, really good tutorial. Give me an other approach of sharpening that I already applied on jewellery with very good results.
Aron this is incredable. Your an excellent teacher and communicator. Your kind spirit and bright smile are a delight. You take us through all these details with incredible clarity. The material is wonderful and after working through these numerous times with you, I have been seeing suprising improvments in my work. Thank you for all the work and time you invested into this training for all who join you here. Scott
Wow, this tutorial series was a total game changer! I can’t believe what a difference it has made to my workflow and how much better my images look. Thank You!
Aaron – your tutorials are so clear and detailed, you are just the best. I am always recommending you. I have learned such a lot and these sharpening tutorials are excellent. I love the way you repeat the learning so that it becomes so much easier to remember all the steps and become familiar with the techniques. This has really helped me to finish off my images. Thank you so much.
I love this tutorial!!! Thank you very much!!
Informative and helpful. Sharpening my images will never be the same again!
Very informative, learned so much more.
Great overview and very helpful. I’m also a fan of the Highpass filter to sharpen my images but I had no idea how useful it can be. This tutorial increases my sharpening knowledge a lot and my images gets a new quality. Thank you Aaron for your insights.
Great tutorial! Really useful tips on creating subtle yet dramactic emphasis. Great to have all the background information and then the actions to make faster, also found the workflow/format suggestions super helpful.
The instruction is well thought out and each step explained in detail. Makes it easy to stop and go back if I miss something or need to hear it again. Well done.
Learning about sharpening is new to my tool box…Arron is the best. This tutorial is super helpful!
This tutorial was SO helpful in understanding one of the most important aspects of post work and retouching. I’m sure I’ll come back to it again and again, thank you! One question – I get an error message when I try to adjust an existing high pass “Smart filters stacked on top of this filter will not preview while this filter is being edited. They will be applied after committing the filter parameters dialog.” Any idea why or how to avoid it? Cheers!
Aaron takes a technical topic and makes it accessible and understandable. Great tips on why and when to sharpen as well as considerations for various output formats. Reverse sharpening .. wow. Thanks to Aaron and the PhLearn team for another amazing tutorial.
Aaron is such a great instructor. Tutorials such as this are why I become a Pro subscriber. Each is thorough and practical. The website is so well crafted and accessing content is a breeze. Keep up the great work – please and thank you!
I’ve been sharpening with the HIGHPASS Filter for over a decade in conjunction with Overlay, Softlight, Vivid Light and Linear Light. I definitely feel great about knowing it is one of the best ways to sharpen. Unfortunately, I feel my workflow suffered a lot because I wasn’t sharpening at the end of my image’s post-processing. I can definitely understand and agree with Aaron’s suggestion that the end of the process is the best place. Sharpening at the end is one of several great takeaways I got from this tutorial. I had no idea or clue about inverting the HIGHPASS for a softening, glowing of parts of the image. That is one tool I know I will be using a lot in the future. In the past, I kept my radius to between .05-3.0 for small details. I see the power of using a much higher radius for sharpening larger details and an even higher radius for a general dodge and burn effect that can be controlled with the opacity slider. I also picked up some great tips on sharpening for web and print. I will be cognizant of not sharpening much at all when I decide to take many of my images to print. Thank you so much for a GREAT tutorial. I feel better adept at my HIGHPASS filter techniques now. I appreciate that you repeated much of the information in each tutorial. It really helped me remember techniques in navigating Photoshop to sharpen my images. Wayne S. Grazio aka fotograzio
This is just amazing, thank you for sharing your knowledge.. this is such a revelation to me! God bless!
Fabulous tutorial! You are my “go to” guy for all things Photoshop. Can’t thank you enough. Helene Anne Fortin
Great Job. I am so happy that the playback engine finally works without stuttering.
Fantastic tutorial. Using the smart objects and high pass filter enlighten my world on this 😀 Although I work with dogs mostly and your workshops samples mostly contains human (although I think I saw a dog in the background walking by in one of the chapters hahaha), I’m pretty sure I will benefit fully of this! Never thought of sharpening after applying the correct size, so that’s a big eye opener!
Adore PHLEARNing with Aaron, I learn so much each time. The sharpening master class gives me so many different options to think about as well as reinforcing all the short cuts to make them second nature is fabulous! Thank you for being you!
Fabulous tutorial…learned something new and I LOVE it in particular on my flower shots!
Awesome course. Learning about the saving for web and print was very interesting. Thanks for all the information and the great actions
This has made a huge difference in my final pics. Definitely one of those little things I was missing but couldn’t quite figure out how to adjust. Big thanks!
This is a fantastic example of why Phlearn is my go-to for improving my editing skills. The amount of practical and useful information and technique in this tutorial is beyond belief. No matter if you are just getting started in photo editing or if you have been at it for years… There is something new to be learned from this.
This is totally worth the annual membership! You speak very clear, and explain things very well and are not too fast. I also like how the keyboard short cuts keep appearing. For continuous practice. Great job and great teacher!
I love this tutorial and the reverse sharpening was amazing! Great Aaron! Congratulations!
Great Course!!!!!! Clear and practical. Thanks again for another great video . Love your instruction style.
Great tutorial. Never thought of this workflow before. Thank you Aron. By the way, are you using any shortcut keys to put one layer out of a group? I used to drag them out of the group but it’s difficult sometimes. You seem to do it almost in a fraction of a second.
Very useful tutorial. Great examples
Just love this tutorial, and the Revers sharpen which I’ll try on my photos. Lots of new things to try out.
Yasssssssssss, now i am special. At first i was like ok this is just going over other things that he talked about in other tutorials or tools people mention for free…. I’m currently half way through this tutorial and now i am mad that they took so long to create this tutorial. My Image quality is friggen amazing now. GET THIS TUTORIAL!
Another excellent Aaron tutorial. I thought had sharpening under control mainly using Unsharp Mask or Smart Sharpen. This tutorial showed me how much I was missing, and has taken my sharpening techniques to a new level. Highly recommended.
Really enjoyed the tutorial omn sharpening, I finally understand why I should sharpen photos and how. I really liked the reverse sharpening as well. I have been looking for a way to slightly blur areas of a photo for a long while.
Great learning from Aron – very happy 🙂
Thanks for this one. Great course. Answers lots of questions I’ve had around sharpening. At some point, I’d like to get a bit more info on your suggestions for sharpening (and processing in general) when you have a large number of photos to process, and you need to do that in a batch fashion. Again, thanks for all the great info.
Hey Aaron I love your tutorials, so easy to follow and I have learnt so much. One thing I did have a problem with in the reverse sharpen tutorial was the invert layer step. My version of PS which is CS6 did not let me do that command. Or should I say, nothing happened when I hit Cmd/I. Does this command not work in CS6 version?
Knocking it out of the park once again with this tutorial! A great detailed tutorial, that teaches you how to sharpen your images and create a great workflow, that is non-destructive. They even provide you with preset sharpening actions, that does most of the work for you. What more can you ask for?
Thank you so much I can’t believe how much this has improved my images. AND oh!! my!!gosh!!even and action included makes life so much easier. Great tutorial, esp like working along with the images you provided. I keep saying he can’t keep doing great learning videos and each one I come away with more info. Amazing
Re: General Sharpening tutorial. In my latest version of CC I can’t paint on a layer mask that is on a group without merging the group. Therefore I can’t paint on the mask and then reopen the group and change the high pass filter settings. Work around??
Loved this tutorial, really detailed, I finally have an understanding of sharpening as a subject itself. Keep up the good work PHLEARN
Hey Aaron, as always: professional workflows & presentation. Many thanks for sharing your knowledge !
I have learnt many thing.And Reverse Sharpening is something Cooool awesome .This is totally fantastic course .
High Pass sharpening used it many times but never thought about using it like you have shown in this video. Huge thanks, really enjoyed this video.
Another great tutorial! I like that Aaron went over the old sharpening tools, the only bad side of high pass filter sharpening is that it greatly increases the file size of the image. I really like the reverse sharpening method instead of relying on blur gallery. I also finally understand the sharpen and resizing for other media. Thanks!
Im soo excited to seee this .Thnk you aron