
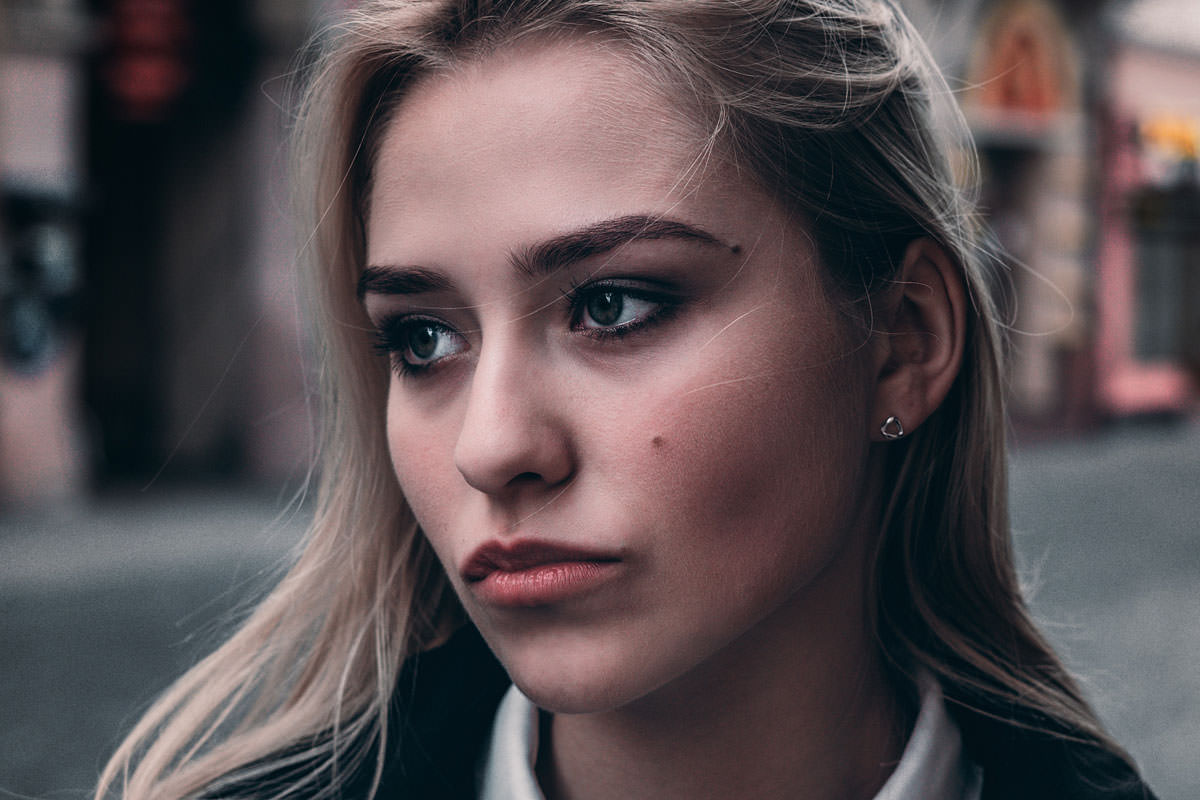
BEFORE
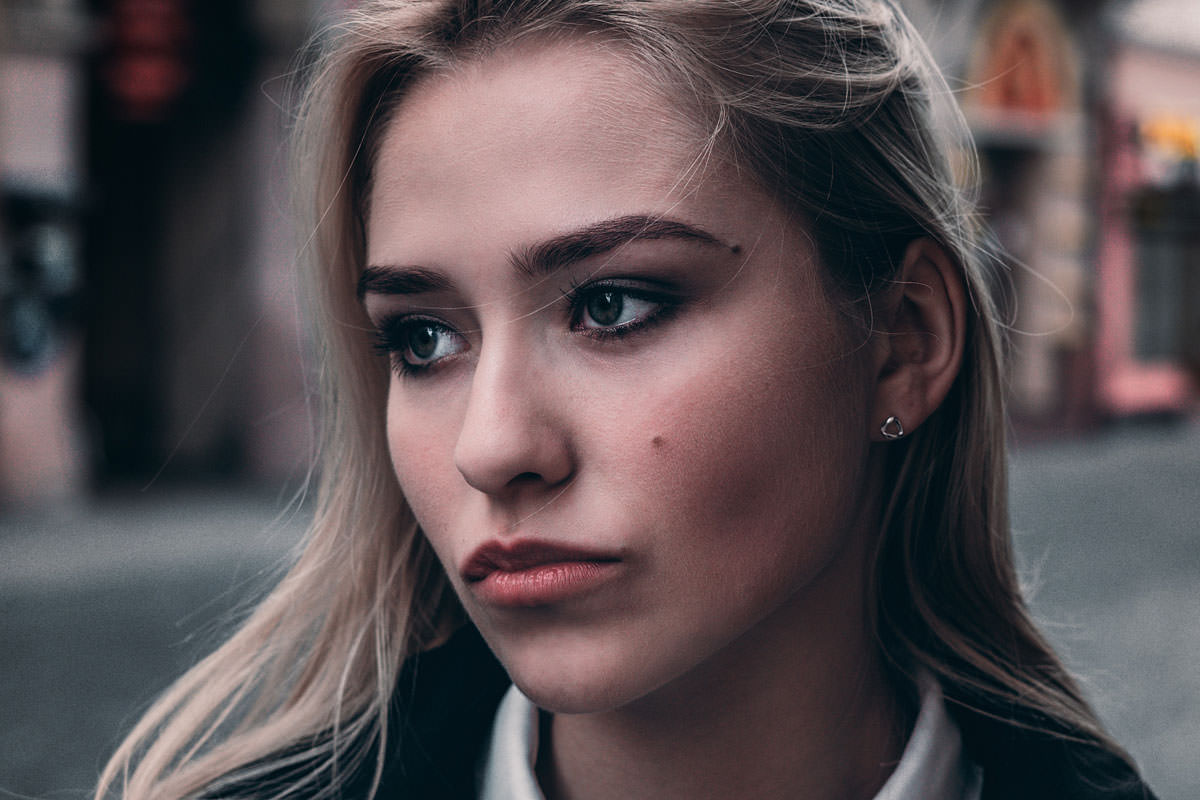
AFTER
Download Sample Images
Click the link below to download the sample images and follow along with this tutorial.
DownloadTutorial Description
Skin retouching doesn’t have to be a long and complicated process. Aaron shows you how to make short work of hair, fine lines, and larger blemishes as well as how to smooth out skin tones with a simple dodging and burning. Learn how to use the Spot Healing Brush Tool, Clone Stamp Tool, and Curves for professional, natural-looking results.
Ready for more? PHLEARN PRO gives you instant access to over 140 in-depth tutorials, teaching you everything there is to know about Photoshop, Lightroom, and photography.
From a comprehensive course guaranteed to take you from retouching beginner to a seasoned master, to a deep dive into pro techniques like Frequency Separation, PHLEARN PRO is your next step to creating extraordinary photos.
Flyaway Hairs & Fine Lines
Retouching skin is about making a bunch of small changes while preserving the more important details that make your subject unique. Flyaway hairs that cover the face and wrinkles around the eyes and mouth are two common types of distractions that, when reduced or removed, can help accentuate the parts of the image that matter most.
When working with small blemishes in Photoshop, the Spot Healing Brush Tool should be your go-to. With the Spot Healing Brush Tool active, make sure that Content-Aware and Sample All Layers are selected in the options. Content-Aware instructs Photoshop to use the image information around the area that you paint to fill and replace the contents within the area you paint. Sample All Layers simply tells Photoshop to use the information from all Layers in your project. This allows you to work on a new, blank layer without making changes to the original photo.
With those settings selected, create a new layer and then use the Spot Healing Brush Tool to paint over any hairs, lines, or small blemishes on the skin. You should only have to adjust the brush size to closely match the size of the area you’re trying to remove – Photoshop will handle the rest.
Larger Blemishes
Larger blemish removal works almost exactly the same way, you’ll only be using a larger brush and painting over a larger area. But painting larger areas with the Spot Healing Brush Tool, especially areas that have delicate textures like skin, can result in loss of texture and a blotchy appearance.
There’s two ways to work around this. First, you can use the Spot Healing Brush Tool to paint over that area several times until you get a result that looks good. If that’s not working, get as close as possible using the Spot Healing Brush and then use the Clone Stamp Tool to sample some skin texture from a nearby, unedited spot. You can then paint that texture over the Healing Brush to recover some of the detail.
Simple Dodge & Burn
Dodging and burning is a process of enhancing highlights and shadow areas to add definition and, in the case of skin retouching, even out skin tones. This can all be done using Curves Adjustment Layers and Layer Masks.
To begin with dodging, create a Curves Adjustment Layer and, in the Curves dialog, drag the midpoint up until the darker areas of the image are at a level that you like. Hit Okay and then hit CTRL or CMD + I to invert the Layer Mask of the Adjustment Layer, making it completely invisible.
Set the Blending Mode to Luminosity and then use the Brush Tool at a Flow of about 10% to paint white on the Curves Layer Mask. Paint over any dark areas that you want to lighten up – think dark under eyes and any distracting shadows. Your goal should be to reduce harsh shadows and bring out some of the detail.
Burning (darkening) can be achieved using the exact same process. In the Curves dialog, drag the midpoint down until the brightest highlights of the image are more even with the rest of the exposure. Invert the Layer Mask again, set the Blending Mode to Luminosity, and now paint on the highlight areas that you wish to smooth out.
These two Curves Adjustments Layers should combine to create a natural, smooth skin tone free of distracting shadows or highlight that are too bright.
Retouching Advice
We started off by saying that retouching doesn’t have to be a complicated process, but it certainly can be. Some edits might need dozens of Layers to accomplish the same goals that we set in this example. But these techniques are more than enough to get you started and we’re confident that you’ll see an immediate impact in your photos.
There are countless tools and techniques out there to take your retouching even further. Frequency Separation, retouching products, and more specific cases like retouching for athletes are all great examples.
No matter how much or how little retouching you decide to do, be sure to keep both your subjects and clients in mind. Your subject should still look like how you would expect them to look in real life. Preserving the qualities that make them unique and interesting should be a priority.
And always keep in mind where your final image will be going and how it will be used. You wouldn’t retouch an image for a magazine cover the same way you might retouch an image for your Instagram account.
Keep practicing, keep experimenting, and use the techniques taught here to help develop your own sense of taste and style.


