Frequency Separation: How to Master Retouching in Photoshop
-

-
Add to
favorites
-
DifficultyAdvanced
-
Length6.75 hours
-
Software
Description
Perfect skin. Beautiful portraits. Natural results. Frequency Separation is the go-to technique for professional retouchers. Learn the ins and outs of the powerful method as we show you how to remove blemishes, smooth out skin tones, and help your subjects look their absolute best!
THIS COURSE INCLUDES
- 7 Sample Images
- 2 Photoshop Actions
- 1 Photoshop Brush
Share
Table of Contents
-
01 - Introduction2:42m
-
02 - Working with Iulia David2:17m
-
01 - Manual Frequency Separation9:56m
-
02 - The Frequency Separation Action11:37m
-
03 - Brush Tool20:39m
-
04 - Healing Brush Tool7:22m
-
05 - Blur Technique13:04m
-
06 - Clone Stamp Tool9:31m
-
07 - Small Scale & Large Scale Retouching36:25m
-
01 - Small Details21:48m
-
02 - Large Details33:20m
-
03 - Dodge & Burn18:15m
-
04 - Color Correction24:49m
-
05 - Sharpening & Saving Out Multiple Versions11:02m
-
01 - Small Details15:41m
-
02 - Large Details11:25m
-
03 - Additional Retouch & Clean Up17:57m
-
04 - Dodge & Burn15:34m
-
05 - Color Correction & Enhancement13:51m
-
06 - Finishing Touches & Sharpening10:31m
Course Downloads
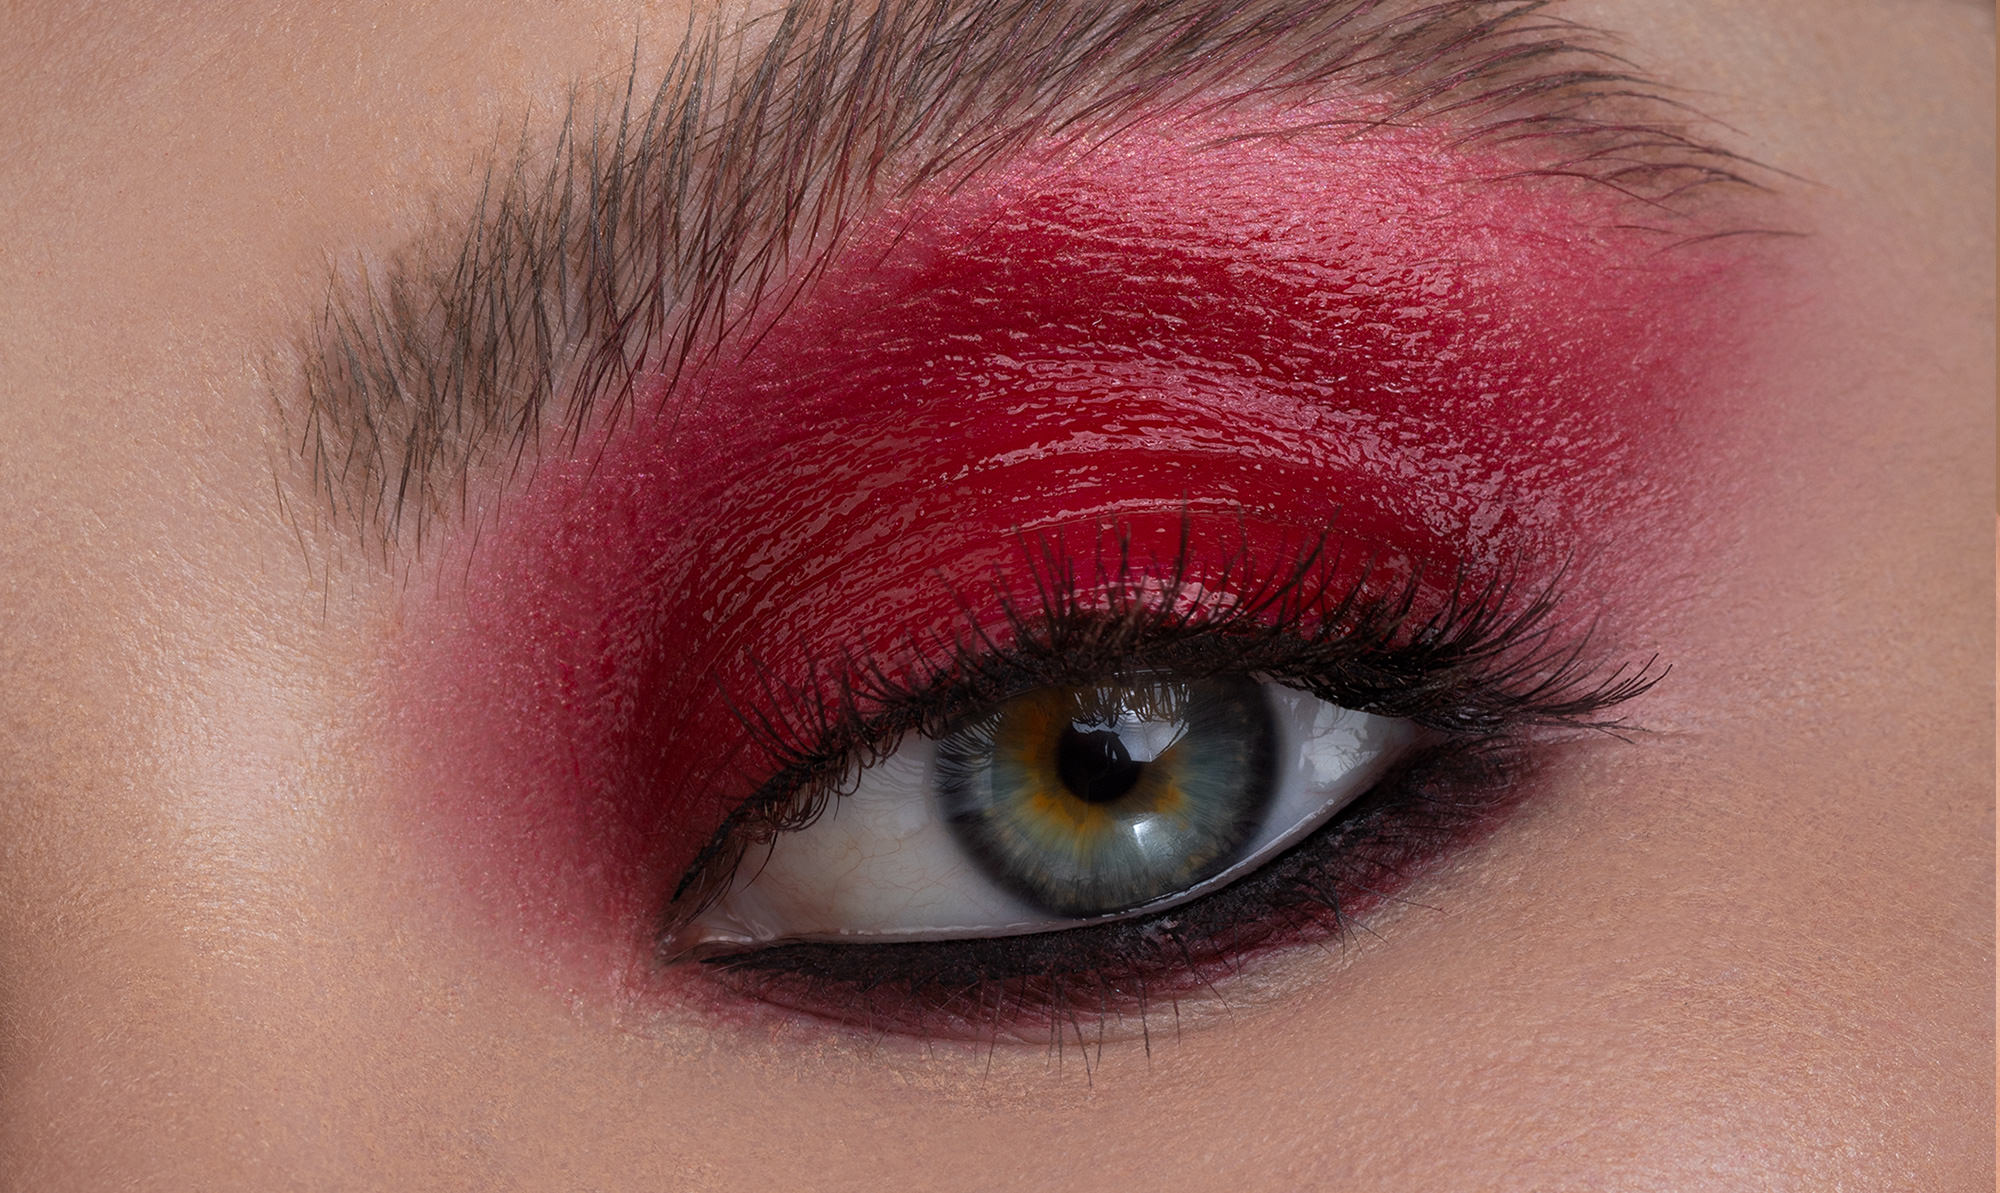
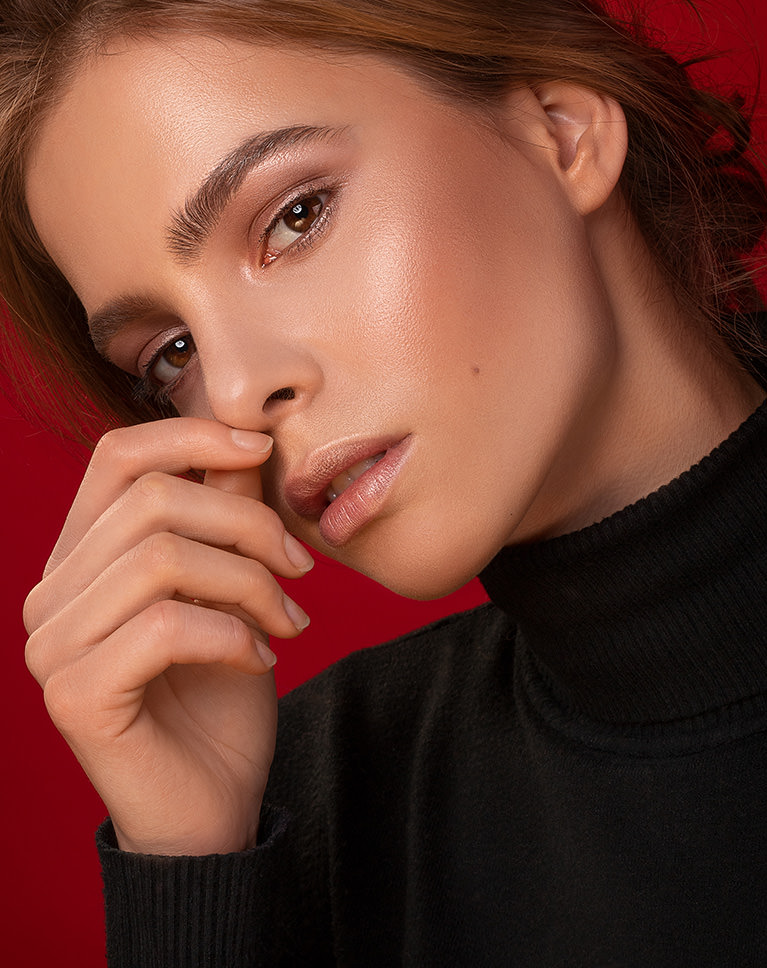
Beautiful Color, Perfect Detail
IMPROVE YOUR ENTIRE PHOTO
ORIGINAL
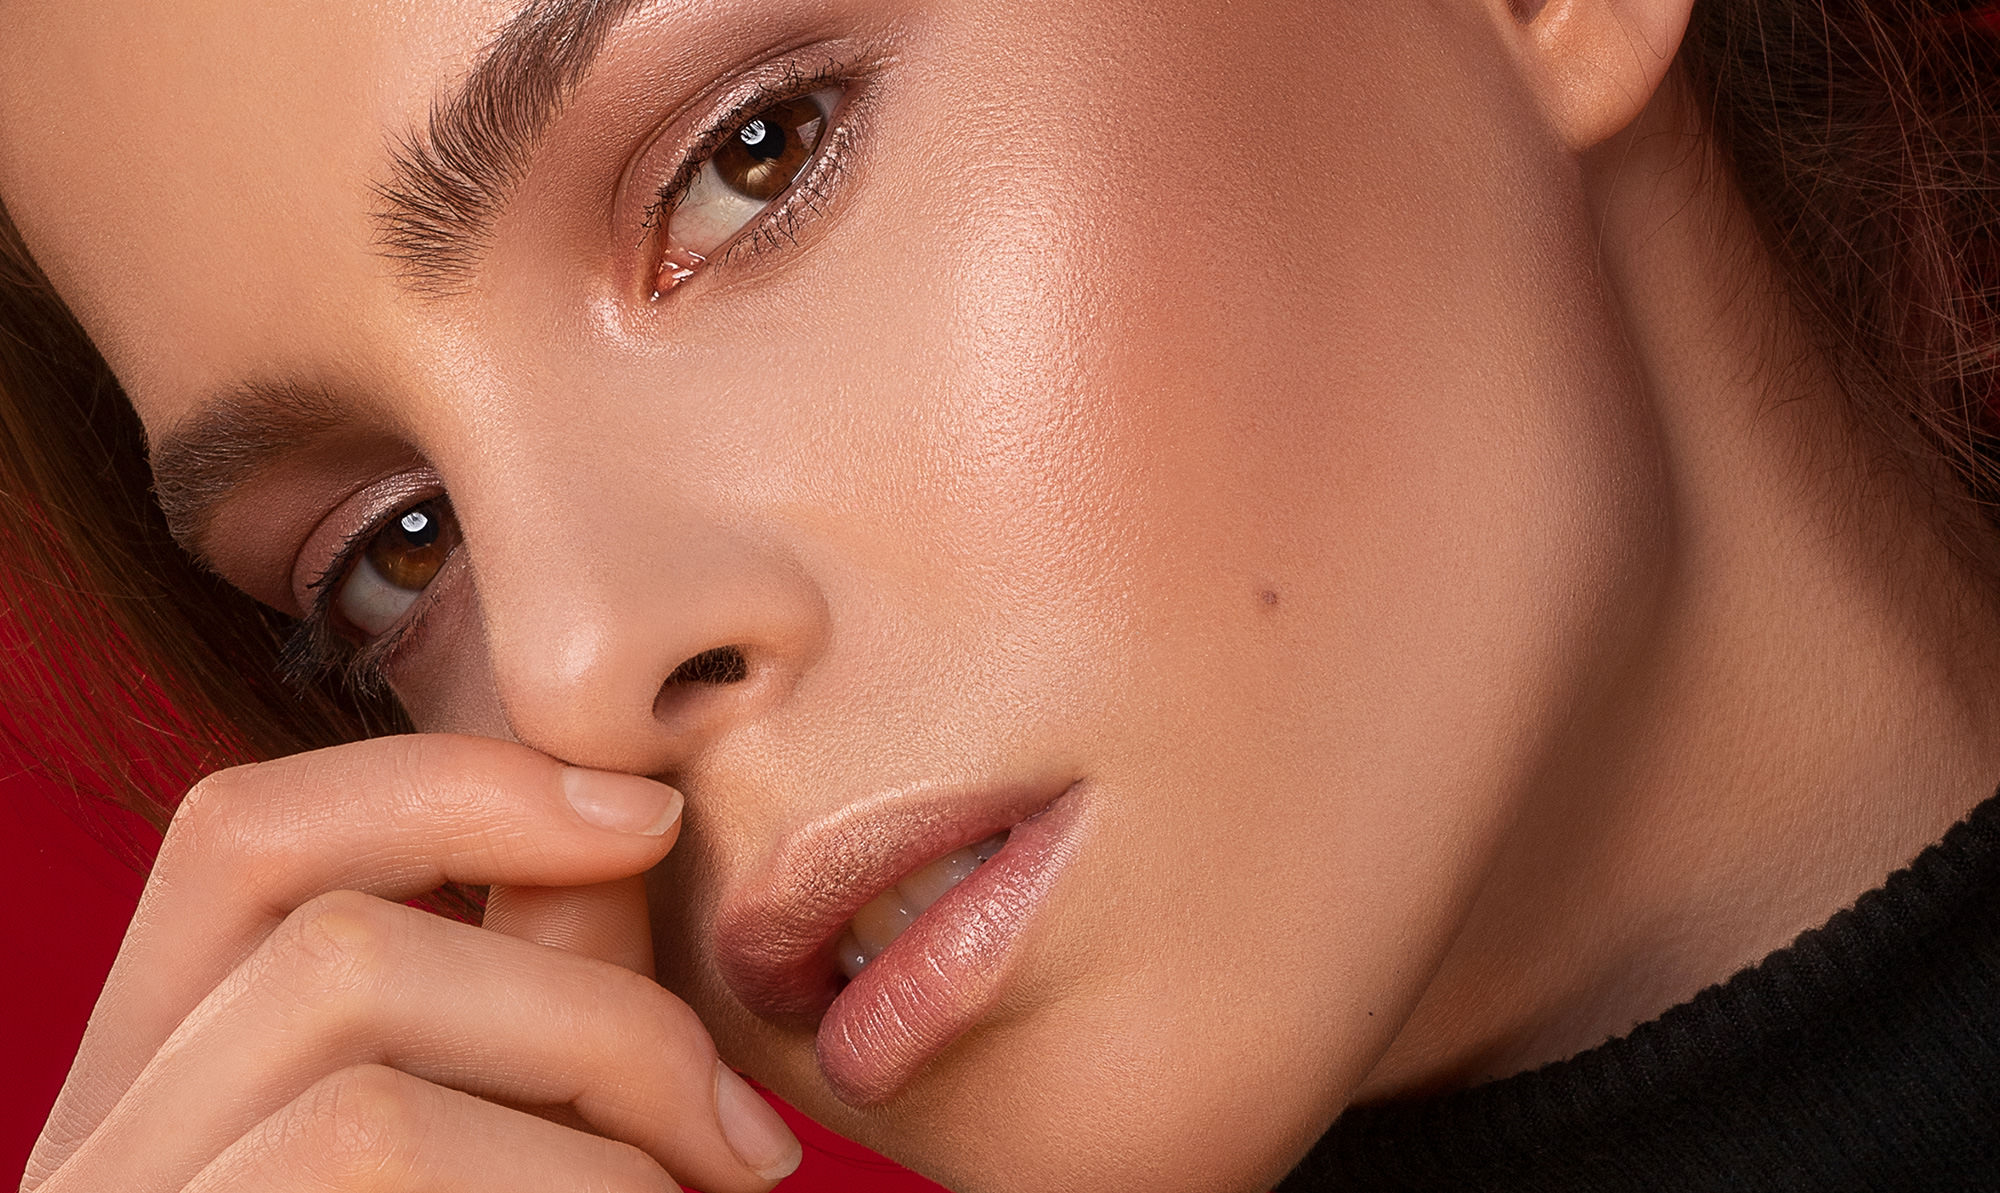
What is Frequency Separation?
Frequency separation in Photoshop is a modern process that gives you complete control over the delicate textures and color in your images. Retouching has come a long way in the digital age. Using the power of Photoshop, we can separate the fine details from the color information and then edit them independently.
Without the frequency separation technique in Photoshop, it is easy to reduce the quality of the subject’s skin tone. If you can master the frequency separation technique, though, you’ll be able to flawlessly soften skin tones and still preserve other skin tones. In other words, mastering this retouching practice in Photoshop will give your photos an instant boost of beauty and professionalism.
Step-by-step Guide to Frequency Separation:
Not only do we take you through the process of frequency separation step-by-step, you can follow along as we go through several examples of complete portrait retouching using 16-bit RAW images.
Frequency Separation Photoshop Action
Your time is valuable. The faster you can finish an edit, the faster you can get on to your next project or photoshoot. Our included Frequency Separation Photoshop action will automatically separate the high and low frequencies in any image, saving you time and getting you right into retouching.
ADD SHAPE & DEFINITION
ORIGINAL
High Frequency vs. Low Frequency
High frequencies are the smaller details in your images. Think skin texture, hair, or the stitching in fabric. Low frequencies include all of the color information in a photo like the transitions from highlight to shadow. Frequency separation is the process of dividing these two elements into separate layers which can each be adjusted without affecting the other.
Remove Blemishes
We all have them; small wrinkles, pimples, stray hairs–the tiny blemishes that easily show up on today’s high resolution cameras. Learn the proper methods for removing and reducing little distractions while keeping all the important details that make a person unique.
Smooth Skin in Photoshop
Dark shadows, uneven highlights, and skin redness will never be a problem again. Learn how to analyze and edit low frequency layers to smooth out color and areas of light and dark, creating perfect skin tone to highlight your subject’s natural beauty.
IMPROVE LIGHTING
ORIGINAL
Tools & Techniques
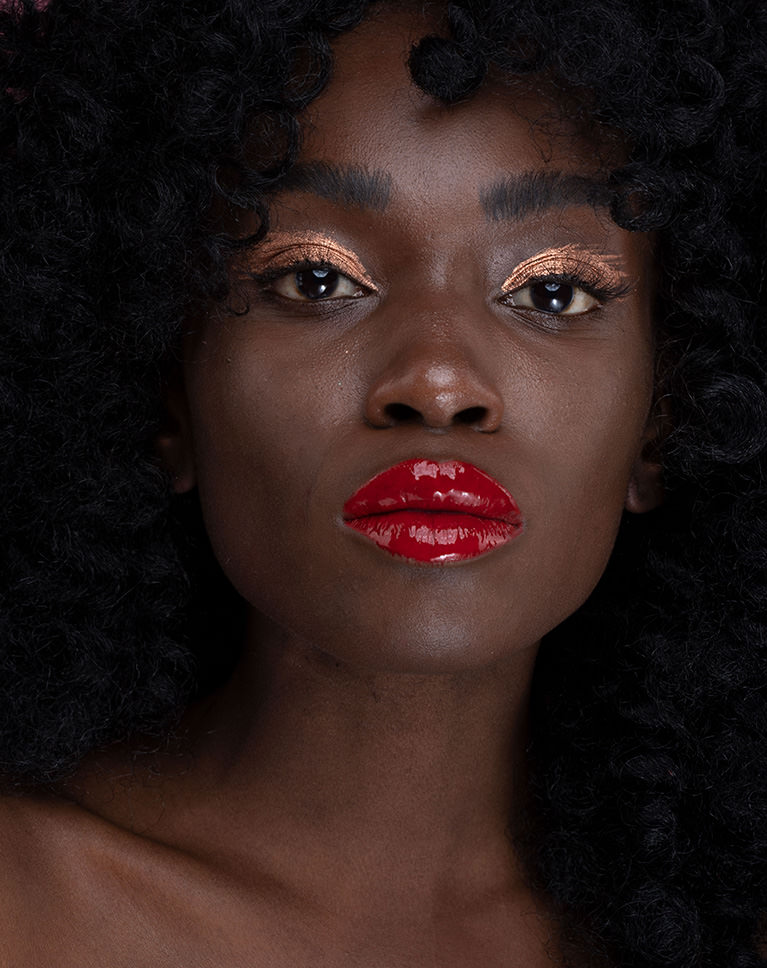
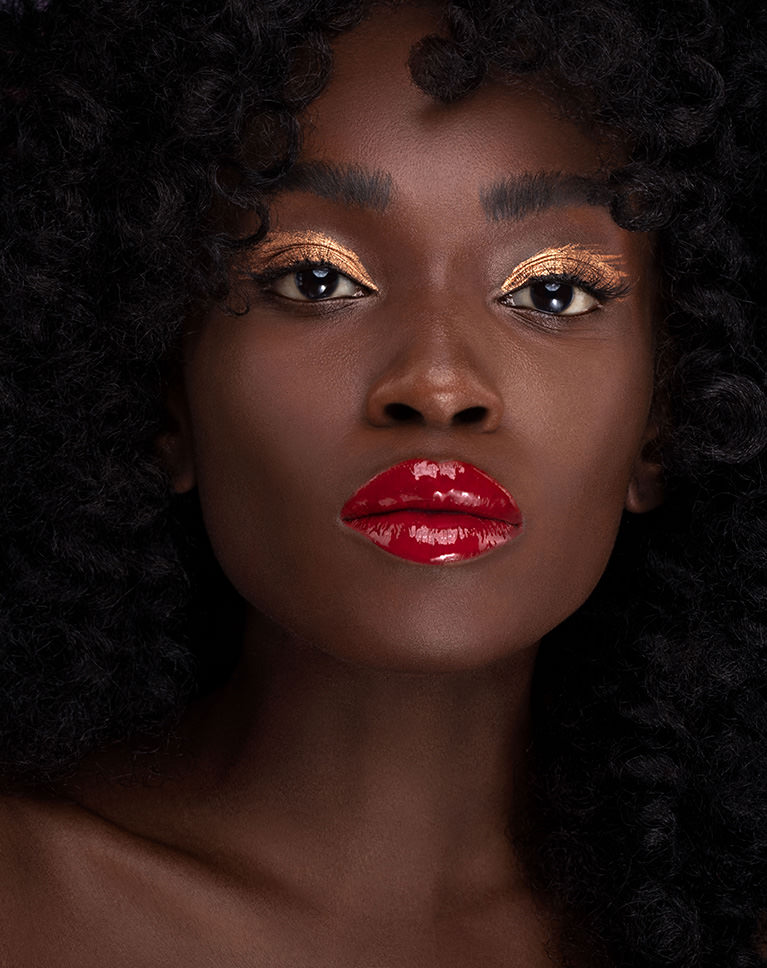
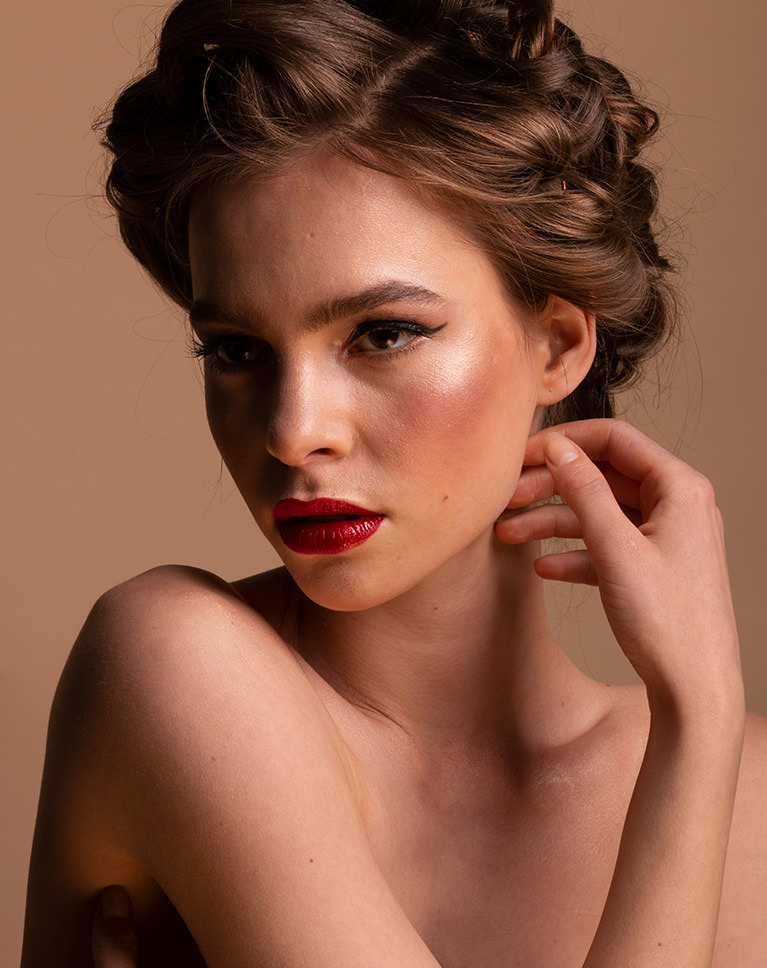
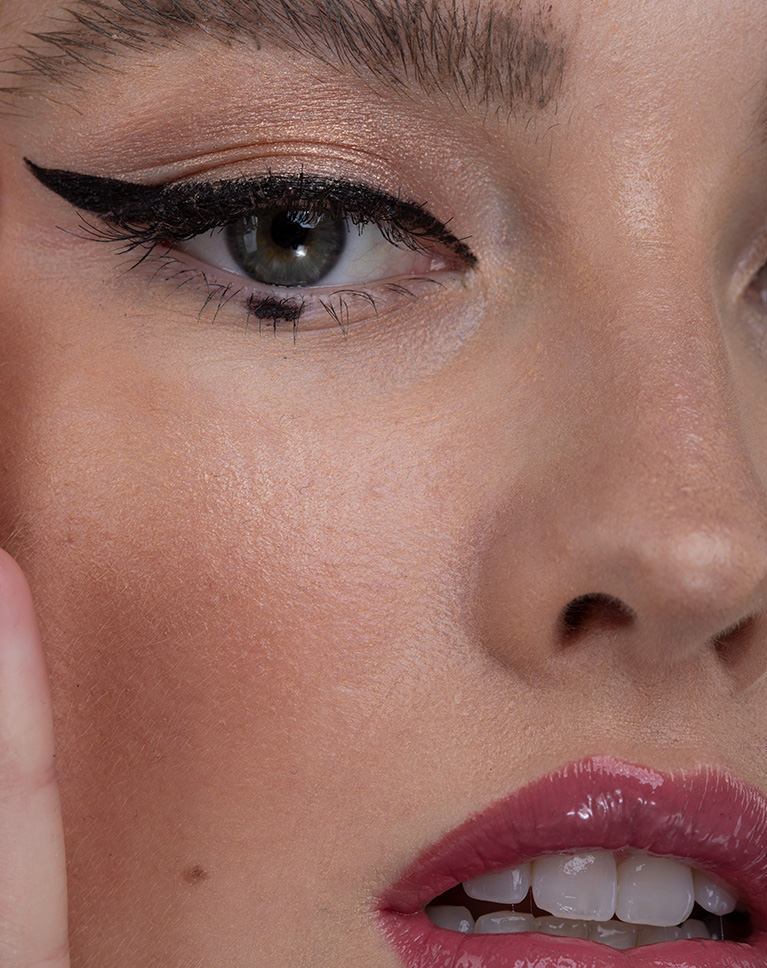
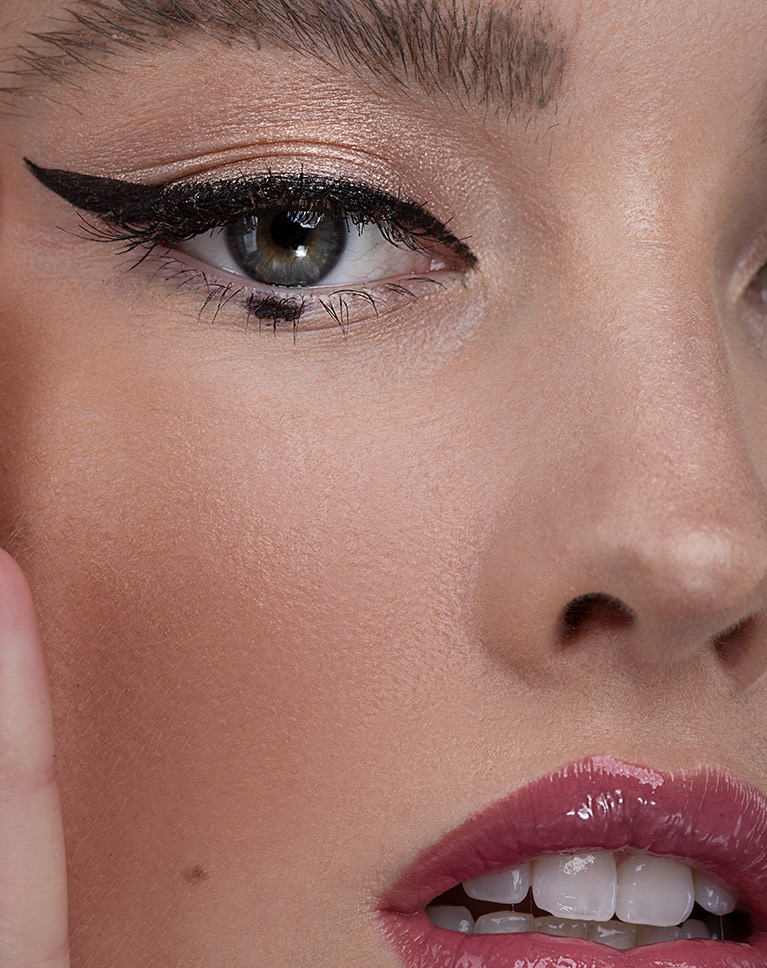
Using a combination of layers, brushes, blurs, and our powerful Photoshop Action, by the end of this tutorial, you’ll be fully equipped with every tool and technique you’ll need to master frequency separation. We start with the basics and then show you in-depth application using high-end, professional images from photographer Iulia David.
Professional Skin Retouching
We don’t just show you the power of Frequency Separation. We take you through a complete professional retouching workflow, including steps like dodging and burning, color correction, and sharpening.
Manual Frequency Separation
Learn how to separate the high and low frequencies of any image from scratch to soften skin, remove wrinkles, and professionally retouch beauty portraits. Once you’ve mastered all of the steps for Frequency Separation, load up our custom action to save valuable time with impressive results.
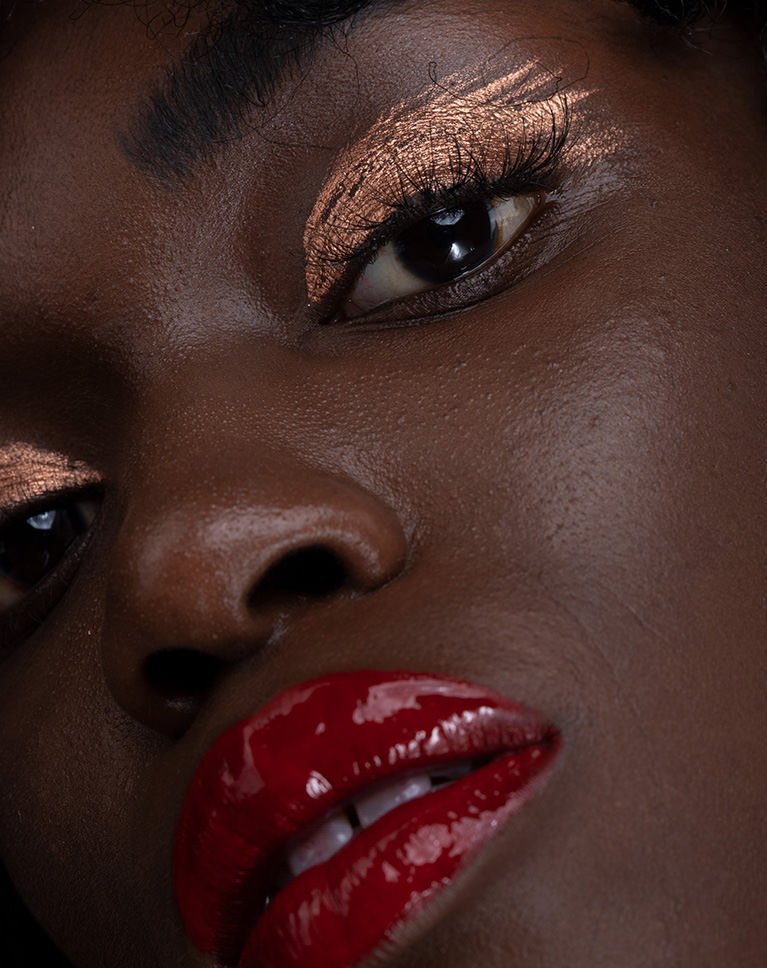
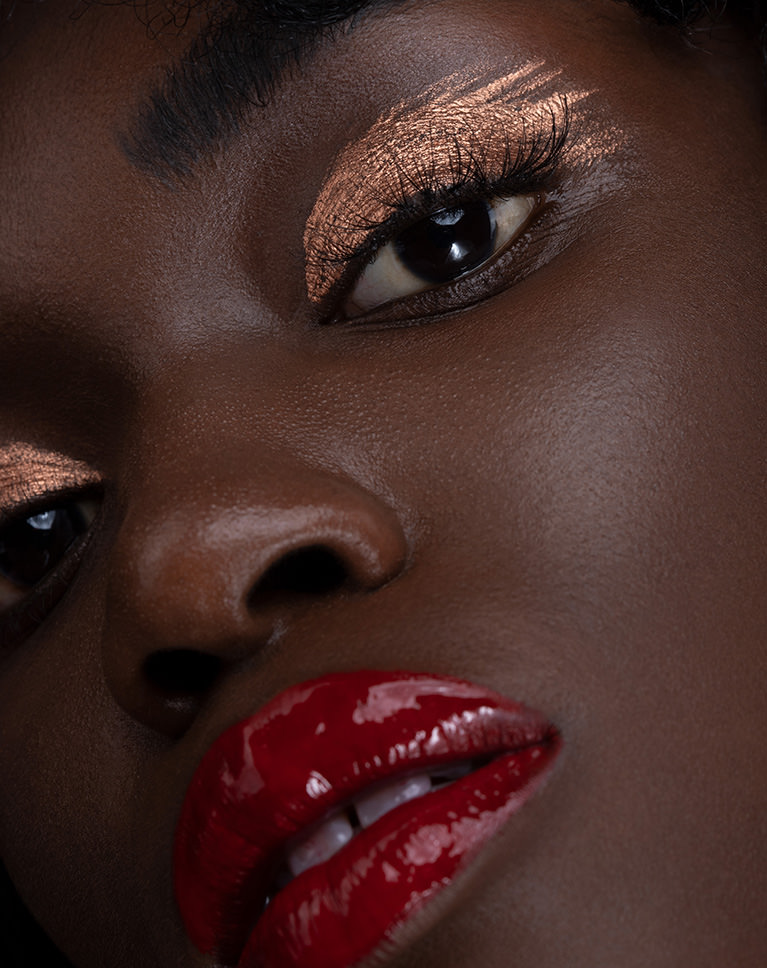
Learn Professional Retouching
AFTER
BEFORE
Unbelievable Results
From the smallest details like pores and hairs, to the large details like colors and tone, learn how to retouch every part of an image.
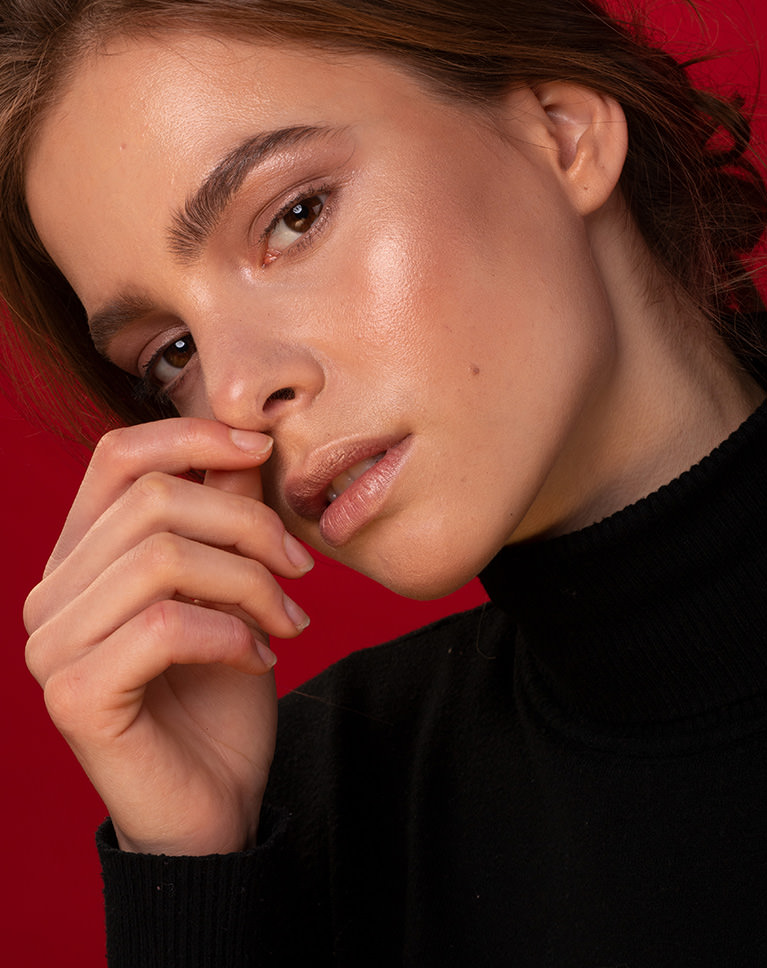
SMOOTH SKIN
ORIGINAL
Small Scale Retouching
Follow along as we dive in to the details of an image, focusing on the high frequencies and retouching tiny blemishes and distractions. The small scale elements in a photo can make a huge difference to an image overall, at any scale, and are essential for creating larger prints.
Large Scale Details
Seeing large scale details means you can identify how and where light falls on a surface and how it affects the overall color and tone. We zoom way out, demonstrating how you can smooth out shapes and color, creating flawless transitions between light, shadow, and color while preserving all of the original texture.
RAW & JPEG
Whether you’re working with RAW or JPEGs, you can utilize the power of frequency separation to improve your photos. We show you proper workflow with both file-types using our custom frequency separation action.
ADD HIGHLIGHTS & SHADOWS
ORIGINAL
The Brush Tool
Like most techniques in Photoshop, the Brush Tool will do most of the heavy lifting. Learn to adjust color, fix exposure, and take care of blemishes with some professional techniques and a few brushstrokes.
Blur Technique
Blurs may seem like one of the last tools you would turn to when doing detailed photo retouching, but they are a key tool in frequency separation. Learn how to use Gaussian blurs in Photoshop to isolate the color information of an image so you can smooth out skin and easily adjust highlights and shadows.
The Clone Stamp Tool
When retouching the fine details and textures in a photo, the Clone Stamp Tool should be your go-to. Learn how to use it to make changes to only the high frequency layer, sampling areas of texture you want and painting over textures you want to remove.

Aaron Nace
PHLEARN Founder – Class Instructor
Aaron Nace is a photographer, Photoshop artist and founder of PHLEARN. He is the #1 Photoshop instructor in the world with millions of YouTube subscribers.

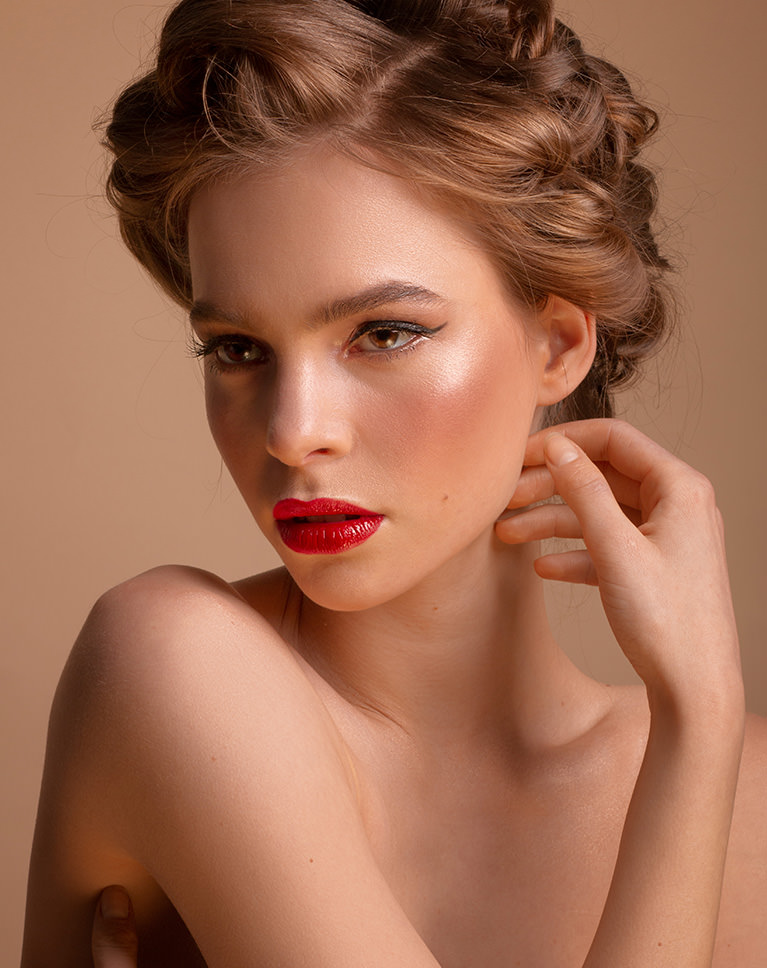
Iulia David
Beauty Photographer & Retoucher – Featured Artist
I am a London based photographer specializing in editorial, commercial and beauty portrait photography. Born in a family of artists I have always been surrounded by art and curious in knowing the latest trends. My style is simple and clean with an edge. I think it is all about a collaborative synergy, bringing the most out of my team to create beautiful, compelling photographs.


Reviews
New & Popular Tutorials


Training Site in
the World
Tutorials!
Ratings
and Counting
Subscribers
This series of lessons is pure gold. It has opened up new possibilities for me. Aaron Nace has a super style. I love his comprehensive explanations of tools and techniques. The worked examples are just what is needed. My only negative lies in the worked examples. For me, some of the sessions in the worked examples are a little slow moving. However, I do accept that some people may need this. So great work.
I learned a lot. Some parts I have to watch again, because there is so much knowledge in this tutorials. Love it!
Thanks a lot Aaron, I love your tutorials, and this one especially is a great tool to learn; I’m trying to develop a skill to clean up old color negatives and slides for myself and for future customers so it is so helpfull! I have a question: I find that working in the HF with the clone stamp, and only on the current layer, I also bring up a lot of colour and not only texture. Is this possible and should I look at a given setup that might be wrong? thanks a million
Love your tutorials and your puppy:) My question is if you mess up on texture layer and went far, besides endlessly pressing Cntrl+Z, what can you do? Like create duplicate layer of it before editing?
Hey there! If you mess up on a texture layer in Photoshop and went too far, beyond endlessly pressing Ctrl+Z, the best solutions involve non-destructive editing. You should duplicate the layer before editing, convert it to a Smart Object for flexible transformations, or use layer masks to hide portions non-destructively.Thanks for phlearning with us!
HI Aaron again a great tutorial well explained with all detail knowlegde I need for my own work. Thanks a lot. Dieter
Excellent tutorial, very informative, clearly explained and easy to follow.
Aron is a gem! His passion for photography makes him explain things in a very simple and engaging way.
Duuuudeeee this is one of the best decisions I have made! Aaron was my first Photoshop tutorial expert for over a decade and I wish I joined this master class sooner. I’m mind blown by the teaching and it’s not rushed. The Frequency Separation: How to Master Retouching in Photoshop is taking my work to a whole new level!!😃🔥🔥🔥🔥
Ottimo corso.
grazie mille!
I have grown leaps and bounds over the last few months thanks to Aaron and the Phlearn team. This frequency separation tutorial is so great and I’ve learned to ton. Can’t wait to try the other retouching courses. I’m gonna be an amazing photographer and retoucher because of all of the awesome information in all of these courses. Thank you!!!
Wow, I appreciate the author. Very detailed and easy-to-understand article. Keep it up phlearn.com Also visit: In 1 minute Remove Background in Photoshop: https://howphotoshop.com/how-to-remove-background-in-photoshop/
This was just….very…very great stuff…everything you need to know, front to back, with iterations just where you need it. 100% recommend this one!
Very, very good.
Honestly, such a good tutorial. I had some experience with FS but this solidified my understanding and workflow. By the third example, I was really moving along quickly with it. Thank you, Aaron.
This was a great a thorough class. Even though I looked for and tried different frequency separation tutorials from YouTube, none of them even came close to showing me what was possible like this course was able to do. I feel a lot more confident with my retouching and I’m really happy that I took the time to go through this course of the past couple of weeks. I will say, the last chapter to edit got really confusing towards the end in the color adjustment section. It was a lot of information to absorb and I’m still not sure what the main reason was for doing those color adjustments especially with the eye shadow. Maybe I’ll revisit it again in the future and I’ll understand it then. Aside from that, everything was great. I highly recommend this course.
Fantastic course, cracked it at last. Thanks for providing such an informative course with quality images. 6 Stars Phlearn
I was amazed really. I spent already a lot of money on individual beauty retouching courses, but they were never been direct and honest in my opinion, it just felt like they really want to keep their secret. Oke they were not useless for couple hundred$ BUT this course was the missing link for me that would really elevate my beauty works. I never knew how much should I blur and it turned out I never did enough. This course is full of useful tips – example the clone source window was a revelation 😀 Another plus for me was that we did 3 practice pictures after his demonstration and that really sticked. And lastly Aaron`s delivery style is just great love that guy, I think he is one of the best online educator. 🤍
Absolutely the best platform to learn Photoshop and related content. Top quality and really pleasing to watch
not bad
Best tutorial ever !!! Aaron is great Instructor !!! You should try this !!!
Super Tutorial. Es hat mich in einigen Dingen sehr erleuchtet ;0)
Finally, I understand Frequently Separation! I bought two courses, I am not mentioning any names, but they just added layers and pushed buttons and started to paint. I just copied that but had no idea why. Now I know why and what I am doing. I don’t feel dumb anymore 🙂
Amazing tutorial. I have learned a lot of things from this tutorial. Aaron you are the coolest tutor on the internet!!!
After enjoying the “30 days of photoshop” free tutorials, I found myself wanting more so I just bought a full year of the “pro” videos. I’m an old hand at photoshop but felt I was lagging behind, not having updated my photoshop in years, and repeating silly, old habits learned twenty years ago. Instead of the refresher course I was after, it seems I got myself a full blown re-education!
I discovered Aaron Nace via a Frequency Separation tutorial on YouTube… and man, am I glad it lead me to PHLEARN.com Aaron makes every tutorial fun, engaging and simple and I am blown away that learning these techniques in Photoshop could be such an exhilarting experience. PHLEARN is everything. Thank you Aaron.
Aaron I have learned a lot from you, At first I started with all your Youtube tutorials and I had to move it here to the Pro tutorials and I am amazed ..I just cannot miss a tutorial of yours …Thanks for being such a great mentor and sharing your knowledge with us ….You are a true Professional .
I am learning this technique for the first time. Honestly, I’ve never heard of it, but I am so glad that I checked it out! I wouldn’t have known how professional photo editors can accomplish this level of imagery. I wouldn’t have known what to ask for. I have to admit, this is a major game changer. THANK YOU for taking the time to reinforce all the tiny repetitive actions that you do, including all of the basic short cuts (verbal and with the visible icon). Although I am new, and I can do light editing, this class will elevate my skill level to professional looking results.
I LOVE YOU DUDE !!!
Thank you very much.A great tutorial.
Aaron you are best mentor, I have subscribed your pro tutorials in the lockdown and since then I found its a game changer for me. Highly recommend.
awesome
For so long I was avoiding learning this technique thinking it would be too challenging and time consuming. Turns out Aaron made it incredibly simple to understand yet again and I am never looking back. It has already changed how I work and saved me a ton of time.
Amaaazing course. I love that course because it have explained very well. Aaron Nace is my favorite teacher to improve my skills level in Photoshop. Highly recommended! Thank you Aaron sir and your team for providing nice videos lectures!
I like your tutorials! Don’t take my comment wrong way please ! Just one thing. I think there is too many repetitions in explaining simple things which were explained in previous chapter or previous video from the same chapter. And a second maybe ? I would also like to see separation for tutorials for advanced/intermediate Photoshop users where we are taken trough the tutorial in possibly quicker manner with straight information on example considering person already knows basics about using Photoshop brushes/actions/blend modes/blend if etc. I think we need to see how they are used in such and such environment to give us and edge. But this is just me and it can be only me with such silly comment. Still A BIG FAN OF YOU ARON ! ! ! ! ! ! !
Another A+++ tutorial. Not every lady is a fashion model to begin with. For family photos, by using these actions , and the training Aaron provides, one can easily take 10-20 years off the lives of grandmothers, and great grandmothers who, like everyone else, want to look a little younger in their faces. It makes them feel very good about themselves which makes the time spent editing their photos worth every second. Thanks Aaron. Patrick O’Bryan
I am absolutely shocked, I´m blown away by the the amount, dept and the quality of all of the PHLEARN tutorials. I decided to learn photoshop during these lockdown times and had expended a small fortune in other online tutorial and courses. Wish I had found PHLEARN before. No doubt the best and most comprehensive collection of photoshop you can find anywhere online.
Amazing tutorial but a very knowledgeable educator! This tutorial not only gives you the necessary tools but it also motivates the viewer to learn more. It empowers the viewer by feeding confidence via knowledge. The best tutorial to Phlearn 😉 Frequency and Separation! One more thing, his voice calms , the aura of this site is very positive, as I combat PTSD Army Veteran I attest to that! Thank you Phlearn!!!!!!!
Another great tutorial. Really did a great job of explaining FS. Thank you!
I’m loving this and I’ve learned to retouch portraits so much better thanks to this technique. I do however find it’s really easy to overdo and get an unnatural look. I also find it that you kind of have to know how to paint pretty well and see through painters eyes what parts need enhancing and what parts needs to be smoothened out. Sometimes if I try to run the action again the new group changes the image, is this because of different blur radius setting or something else? I haven’t yet understood when you can run it again and when not. Somebody also mentioned that it would be nice to know how to edit older skin and I’d be very interested in that as well. I suppose using clone stamp with a lower than 100% flow would help with this as you can still show the wrinkles but to a lesser degree? Would you do this kind of work on a copy of the high frequency layer? In an older free tuturial Aaron was using the gaussian blur technique for smoothing out color gradients on the low frequency and I still seem to get better results like that than working on a new layer with just the brush tool. Matter of practice I guess? Loving everything on Phlearn, really glad that I got the subscription!
Awsome stuff “MUST WATCH” Thanks Aaron
I learned so much watching this tutorial. Aaron made it very easy to understand. Can wait to learn more. Thanks!!!!!!!!
the sample images are not the ones he’s working on!!!
Always avoided learning about frequency separation because it sounded pretty complicated, but Aaron breaks it down into bite-sized chunks that are easily digestible. I think the hardest part is just setting up the image for editing and the action takes care of that, so then you have room to experiment on your own to see what suits your personal taste. And if you screw something up you can just start all over. If you think Aaron is funny at normal speed, you should try 2.5x or 0.5x…fan-tastic!
Awesome tutorials, i primarily edit on my iPad Pro, but every once in awhile i need the desktop for heavier editing like this.
Excellent tutorial. Very informative, and covers not only frequency separation, but also has sections on dodging and burning and color correction, amongst other topics.
Great ! I’ve learnt many things ! Your work is very progressive. And well explained ! Amazing job. Greetings from France (sorry for my English if there are mistakes 🙂 )
The best!
Wow…great!!
when i learn from PHLEARN very easy
Great in depth tutorial. I have been watching Aaron’s videos for 3 years now and I am never disappointed in what I am able to learn from him. Even tho he does have a tendency to move a little fast at times, there is always the option to stop the video pause and rewind as many times as necessary, I love it. Superb way to learn Photoshop. Thank you Aaron.
Absolutely fantastic tutorial, what a pleasure to watch, I learn something new in every section!!!!Appreciate the repetition to reinforce the knowledge! I only had one question, could you kindly mention the zoom value you do when you’re working on the High frequency level when working on the detailed retouch work. Thank you again
A really complete and thorough tutorial. This is the most detailed FS course out there, including on YouTube, and helped me understand the different sections of FS. I kept going back and forth watching various tutorials but it was this course that gave me that “aha” moment. All that’s left is to practice what I’ve learned with these FS tutorials on Phlearn.com.
Seeing Aaron work is a learning in itself, as he not only has the PS skills but also artistic sense of light and composition. That said, boy, does he belabor and regurgitate? He explained Frequency Separation and the usages of Brush and Clone Stamp tools so many times, I’m like “I got it, can we please move on”? Also, 10 minutes of deliberation “I think it’s too yellow”, “Nope, I think it’s not enough yellow” is enough to put anyone to sleep. His teaching style is great, and so is the content material, but the videos could really use tighter editing. Also, having a discussion forum for students to interact with each other and the teacher will be a good addition. I’ve questions, but no good way to get them answered.
Just wow… You make it very easy and enjoying
Excellent tutorial, video by video I am becoming more comfortable with skin retouching in Photoshop, Quick Question after making the blur layer I was not able to edit the other layer created above low frequency layer. How can i solve that?
Glad to hear that you’re feeling more comfortable with retouching!
As far as the issue you’re having, we’ll need a little more information to help you troubleshoot. Would you mind sending an e-mail to support@phlearn.com with a description of the problem? We have a Photoshop expert standing by to help!
Thanks!
Highway to master retouching….. Wow. Tried it on black and white portrait and it’s awesome results. Thank you bAaron! Cheers!!!
I’ve only gone through chapters 1-3 so far and feel comfortable doing a frequency separation retouch start to finish. I especially appreciated learning the technique of using an inverted layer mask and going back to brush in the desired edit to specific areas. That alone will help me refine my editing in the future for so many other things –not just frequency separation. The color correction section of chapter 3 was also very helpful, I feel like I learned another detail of Photoshop I never knew existed. I look forward to completing chapters 4 and 5 for even more practice using these new skills.
Amazing teacher. Amazing tutorial. Amazing skill. Nothing to say, i’m learning a lot, i’m improving my skill a lot with you. So really, thank you. Congrats.
Many thanks for such an elaborated view that cover every single aspect in frequency separation.
Should we blur the entire face for frequency separation or at the black and white intersection of image
One of the reasons these are all great is the way Aaron explains stuff. Very useful.
Well certainly learned a lot on this tutorial, thanks for taking the time to share this with us
Love you Aaron
Absolutely incredible! I’ve learned so much in this course. The hardest technique for me was the “brush technique” to smooth transitions. If I turn off the HF layer, I get a headache because the image is too blurry. I would love to learn more about this technique as I still don’t know how to use it effectively.
Excellent tutorial!! Frequency separation has taken my retouching to a whole new level!!
Loved it !
as always another great tutorial, thank you very much for this !
It’s a very good quality tutorial, I just wish my teacher didn’t force us to watch so many of these and take tons of notes and practically write a whole paper per chapter. I wish I could actually enjoy it instead of doing this as an awful assignment.
Aaron doesn’t charge nearly enough for his Pro tutorials. I’ve been using Photoshop since day one, and I continue to learn new techniques from Aaron.
Very Good, I have used it on my own images and it has been fantastic. That is before Model No 1. I have a difficult subject that has a lot of natural beauty. She is a teenager as a result the face is very pocketed and has a little acne but most of all lots of what look like white heads. I am in the process of working on her face. One of the most important features to me is the amount of and what to fix is a problem to me. Your tutorials are fixing those for me. Thankyou
Fantastic! Wonderful! In love
Been a fan for a long time. As a hobiest I find that I can learn at my current level and come back months later and pick up additional levels of knowledge. Your presentation style I find is easy to understand and straightforward. Keep up the good work.
No matter how skillful you are in Photoshop! Education is education. I love information. Thank you Aaron
Amazing tool and amazing tutorials, thanks Aaron for providing these. I have been learning a lot from you.
I have a tough time remembering things, but whenever I need to refresh my memory, this is my go-to, and I hope that eventually, I will ‘get’ it — a fantastic set of videos.