
Download Sample Images
description
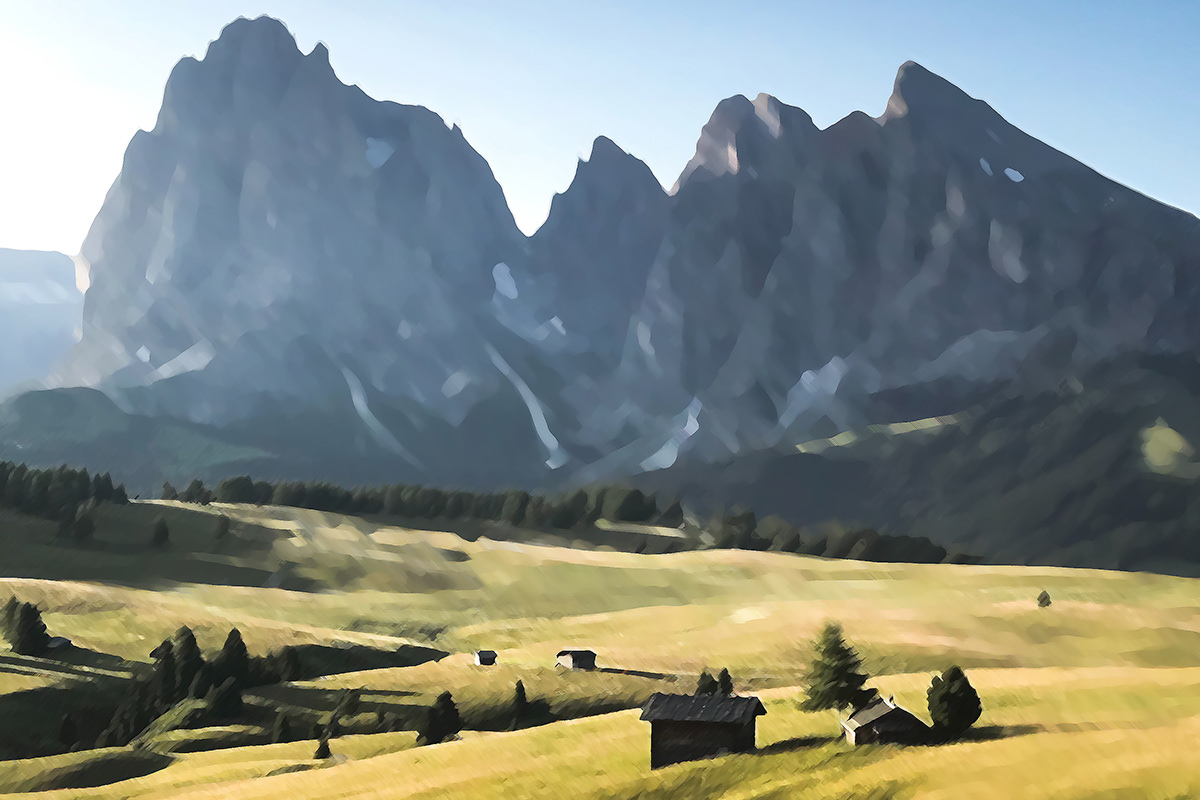
Turn any photo into a realistic painting in Photoshop! Learn how to use the Filter Gallery to stack multiple filters and effects that will recreate the soft look of paints on canvas. And best of all, this effect can be done in just a few minutes!
Enjoying This Free Tutorial?
We publish a new free tutorial every week, each one with sample images and PSDs you can download and follow along with. Sign up and they land straight in your inbox, along with early word on sales, events and subscriber-only offers.

TRANSFORM ANY PHOTO INTO A BEAUTIFUL PAINTING
BEFORE
Stack Two Filters, Then Take Detail Away Where a Painter Would
Photoshop’s one-click “painting” filters usually look like exactly that — a filter. The reason isn’t the filters themselves; it’s that they get applied uniformly across the whole frame, and real paintings are nothing like uniform.
Two changes fix it. Stack more than one filter so the brushwork has layered character rather than a single repeated texture, and vary the level of detail across the image so the background is looser than the foreground — which is what painters actually do.
Set Up for Non-Destructive Filters
-
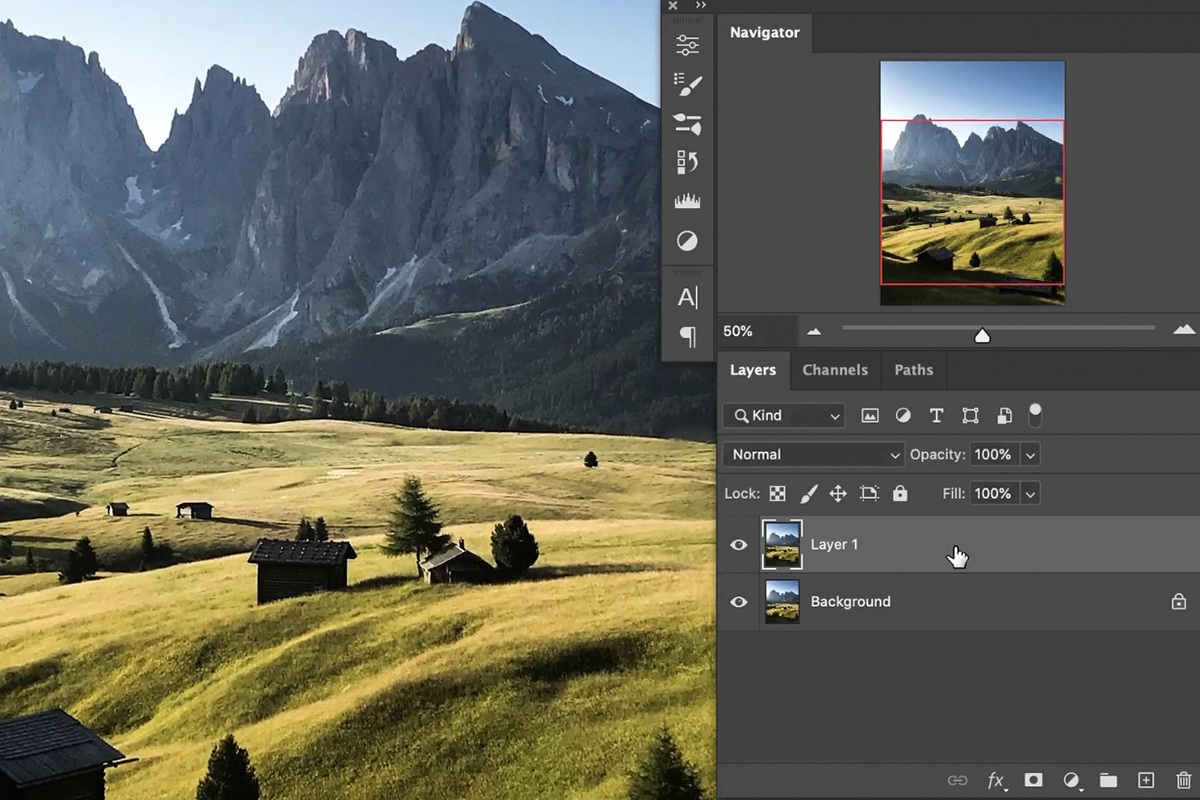
Duplicate the background layer
Cmd/Ctrl + J, so the original stays untouched underneath.
-
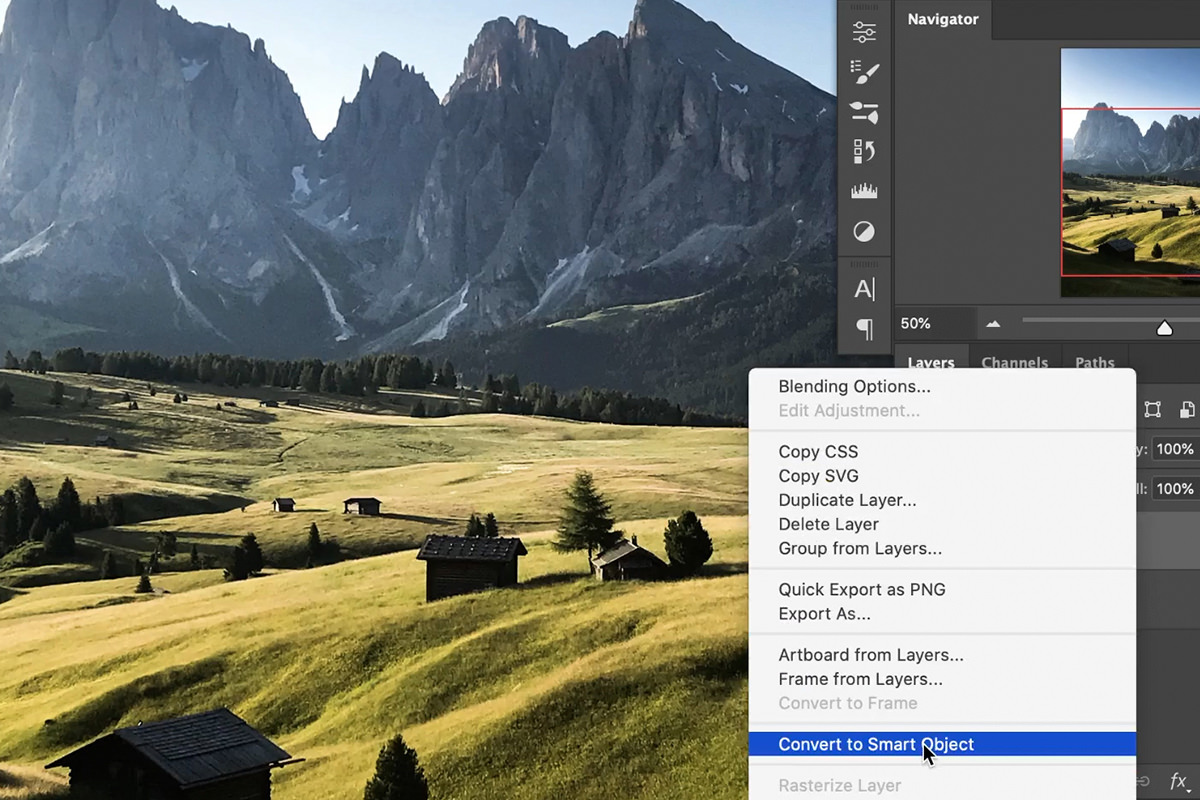
Convert it to a Smart Object
Right-click the layer and choose Convert to Smart Object.
This step is what makes the whole technique workable. Filters applied to a Smart Object become Smart Filters: double-click one in the Layers panel and the Filter Gallery reopens with every setting exactly as you left it. Given that this effect needs several rounds of adjustment before it looks right, applying filters destructively means starting over each time you want to change your mind.
Inside the Filter Gallery
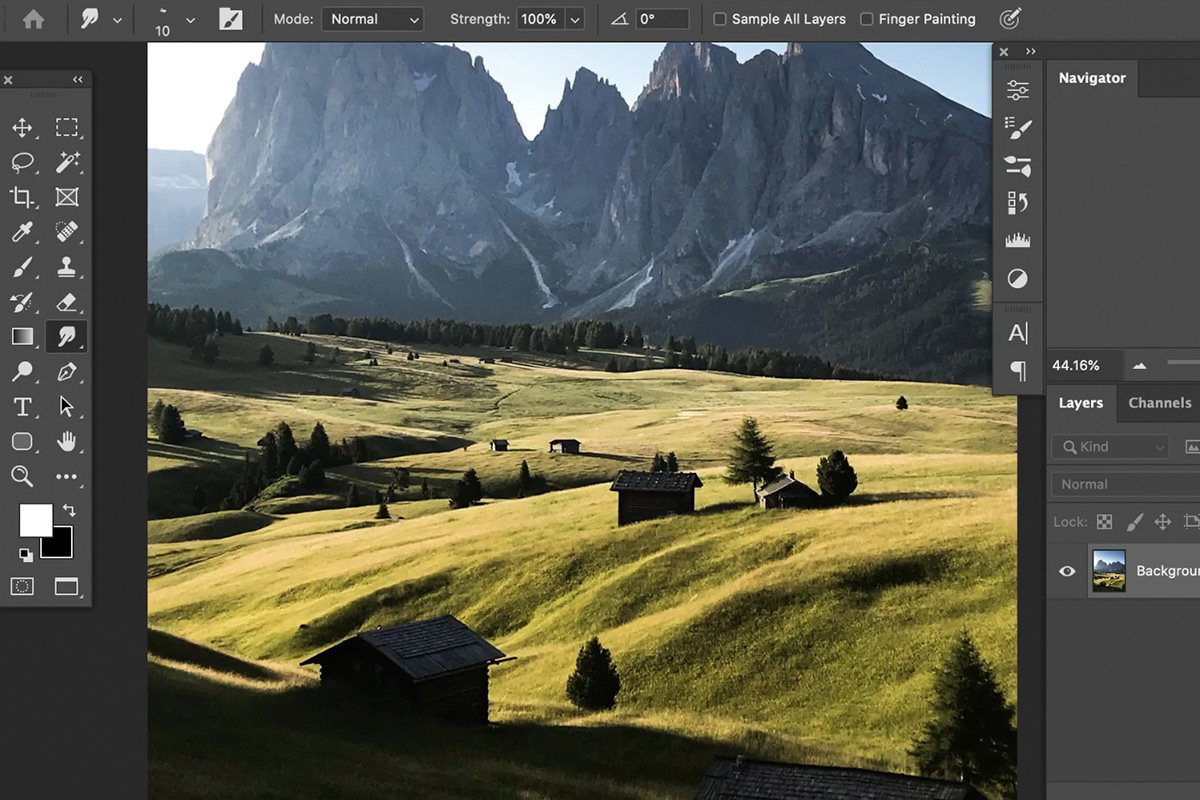
Go to Filter › Filter Gallery. It’s an odd corner of Photoshop that most people open once, click through and never return to — Plastic Wrap, Cutout, Poster Edges and a few dozen others.
The genuinely useful feature is hiding in the bottom right: a small “new effect layer” icon that lets you stack filters inside the gallery itself, in the same way you stack layers. That stacking is what separates a convincing result from an obvious one.
Building the Painting Effect
-
Start with Paint Daubs
Under Artistic. It rounds off fine detail and turns small features into blobs of color — the foundation the next filter builds on.
-
Set the Brush Size
Larger brushes destroy more detail. Zoom to 100% to judge this; the effect is invisible at fit-to-screen.
-
Click the new effect layer icon
Bottom right of the gallery, beside the trash icon. This adds a second filter on top rather than replacing the first.
-
Add Angled Strokes
Under Brush Strokes. This is the one that reads as painting. Because Paint Daubs has already softened the fine detail, Angled Strokes lays directional brushwork over simplified shapes rather than over photographic noise — which is exactly what produces the impressionist feel.
-
Toggle the eye icons to compare
Each filter in the stack has its own visibility toggle, so you can see what each contributes.
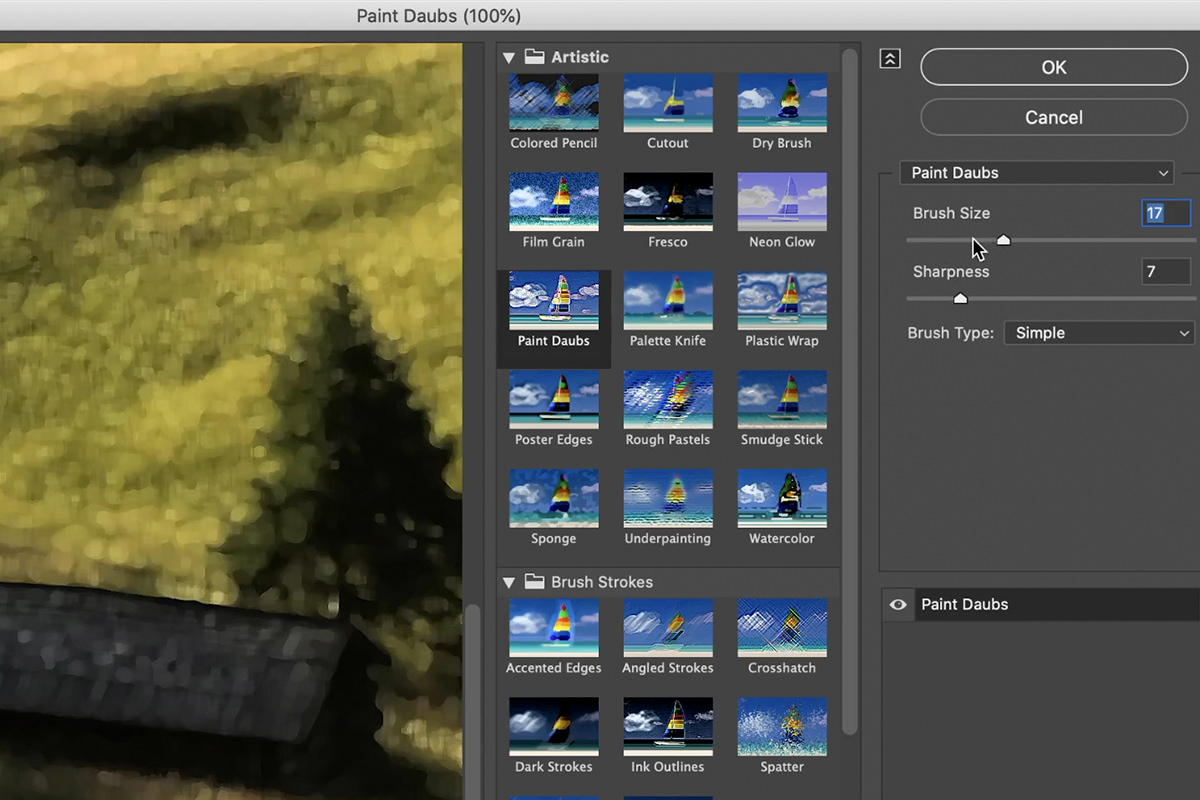
The order matters: Paint Daubs first to simplify, Angled Strokes second to add direction. Reverse them and you get strokes drawn over photographic detail, which looks like a texture overlay rather than paint.
Build a Second, Looser Version for the Background
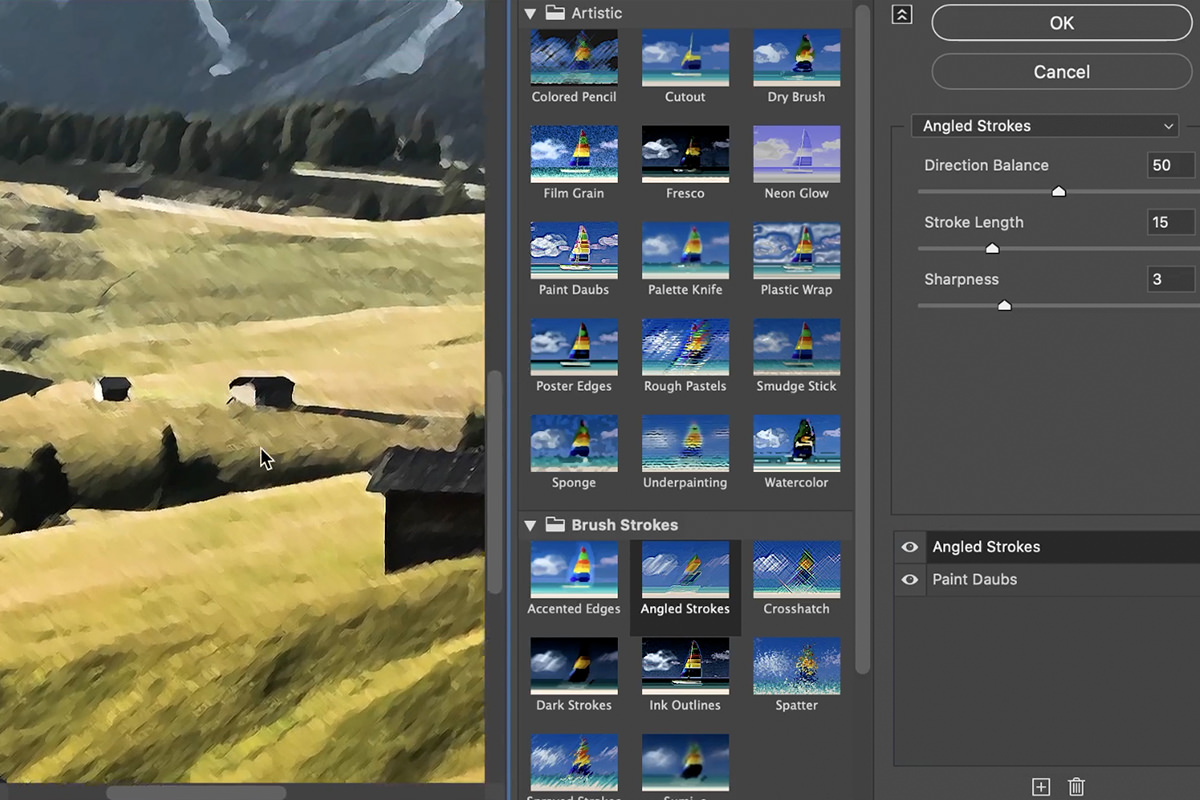
Here’s the idea that makes this look painted rather than filtered. Look at any landscape painting: the background carries far less detail than the foreground. Distant mountains are a few confident strokes; the subject is where the detail lives.
So make a second version of the effect with much less detail, and reveal it only where you want it.
-
Duplicate the Smart Object layer
Cmd/Ctrl + J. The copy carries its filter stack with it.
-
Double-click Filter Gallery on the copy
It reopens with your existing Paint Daubs and Angled Strokes intact.
-
Add a third filter — another Angled Strokes
Select the existing Angled Strokes and click the new effect layer icon. Stacking the same filter twice compounds it.
-
Increase the Stroke Length
Longer strokes mean less detail survives. Push Direction Balance to one side as well so the strokes run in a consistent direction.
-
Loosen the Paint Daubs too
Raise its Brush Size and lower Sharpness. Between them, the image collapses into broad, soft shapes.
Each adjustment takes a moment to render, which is worth expecting rather than worrying about.
Masking the Detail Where You Want It
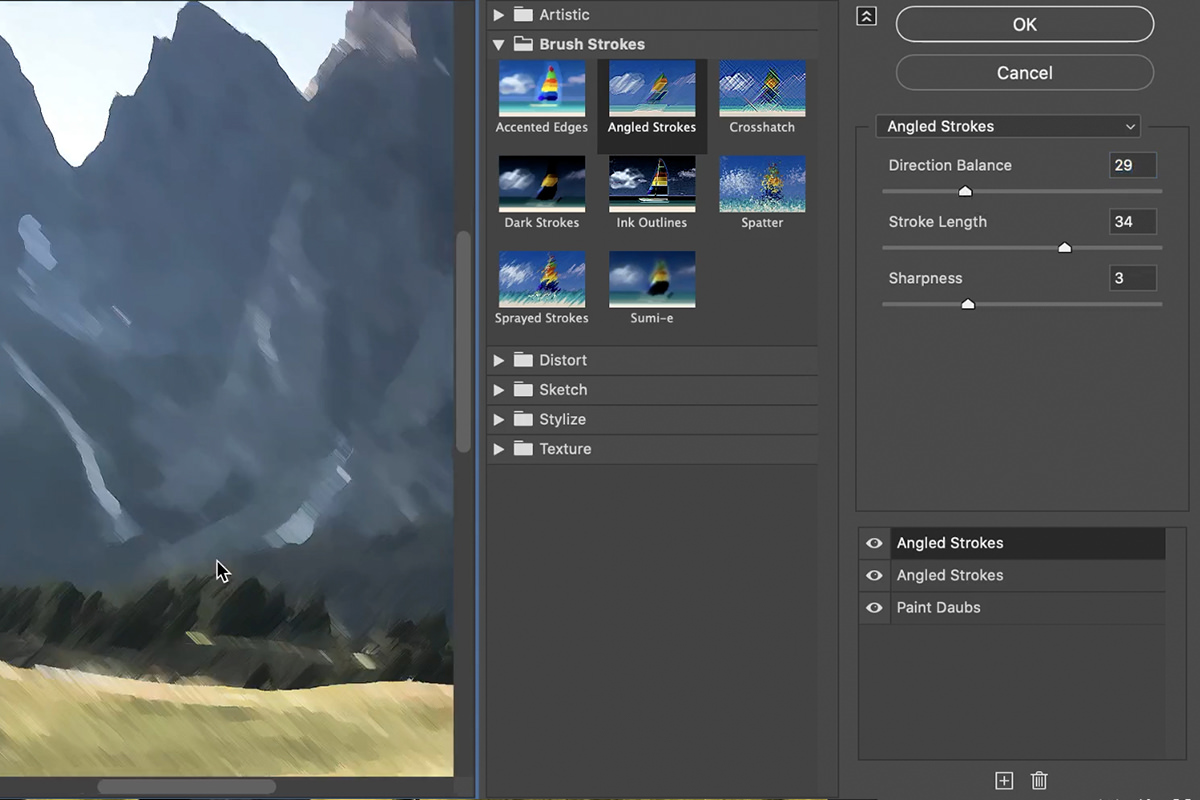
You now have two painted versions stacked: detailed underneath, loose on top. A mask decides which shows where.
-
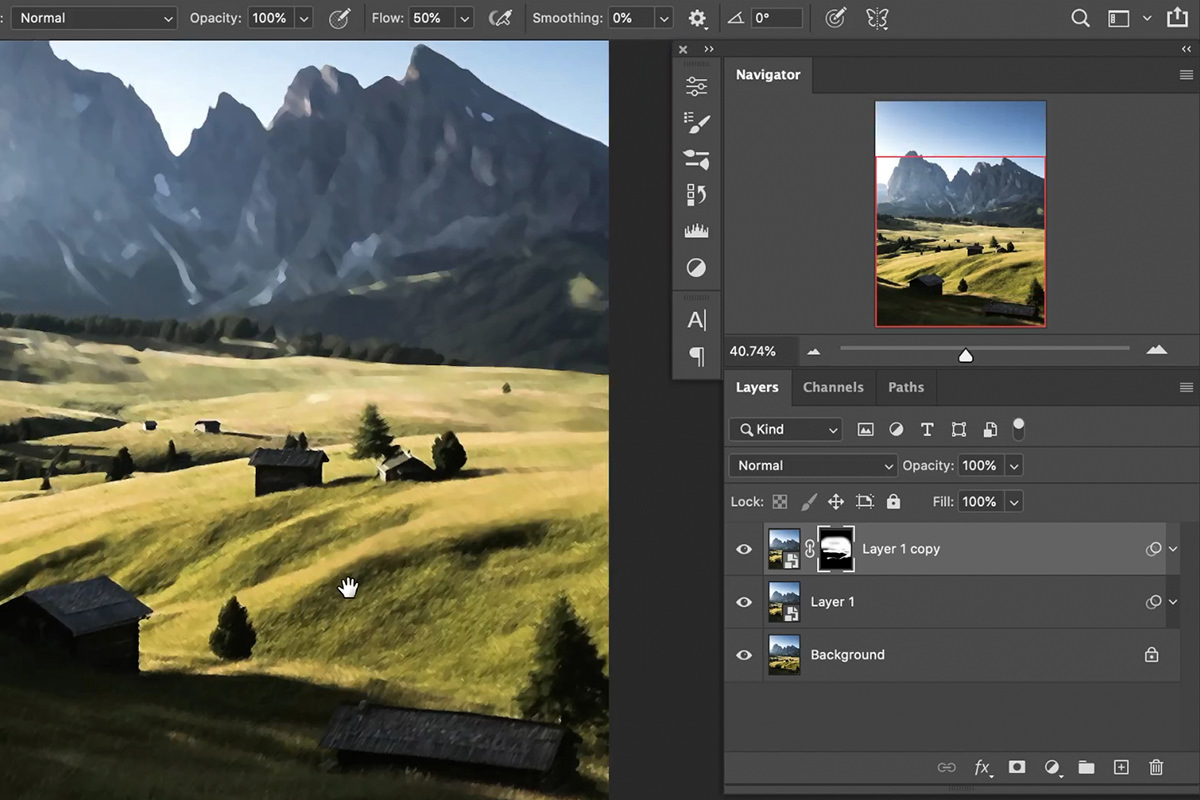
Alt or Option-click the layer mask icon
Holding the modifier creates a black mask straight away, hiding the loose version entirely. Much faster than adding a white mask and inverting it.
-
Take a large, soft white brush
Paint on the mask to reveal the looser version.
-
Paint the distant background first
Mountains, sky, anything far away. Detail drops away and depth appears immediately.
-
Use a smaller brush for middle distance
Areas between foreground and background want some of the looseness but not all of it. A soft brush at reduced opacity blends the two.
The result is an image whose detail falls away with distance — the same decision a painter makes standing at an easel, and the reason this reads as a painting rather than a Photoshop filter.
Where the Painting Effect Falls Down
Using a single filter
One filter across the whole image is the signature of a filtered photo. Two stacked, in the right order, is the minimum.
Applying it uniformly
Even brushwork across every part of the frame is what makes it look automated. Varying detail is the whole technique.
Not using a Smart Object
This effect takes several rounds of adjustment. Without Smart Filters, each round means starting from the original.
Judging it zoomed out
Brush size and stroke length are meaningless at fit-to-screen. Work at 100%, then step back to check the whole.
Pushing the sliders to their limits
Extreme settings produce mush rather than paint. The strongest results come from moderate settings layered on one another.
Starting from a cluttered photograph
Busy images become noisy paintings. Landscapes and portraits with clear shapes convert far better than crowded scenes.
More Free Photo Editing Tutorials
If this was useful, these go further in the same direction:
- How to Create a Composite in Photoshop — building the layered file first.
- Compositing Highlights, Shadows and Reflections — making an added element sit in the scene.
- How to Use the Select and Mask Workspace — cleaner cut-outs, which compositing depends on.
- How to Create and Use Layer Masks — confining an effect to exactly where it belongs.
- How to Make Realistic Shadows in Photoshop — the shadow that anchors an object.
- How to Use Select Subject in Photoshop — the selection engine behind most cut-outs.
More Free Effects Tutorials
- How to Create a Watercolor Effect in Photoshop — a more involved, hand-painted approach to the same idea.
- 5 Awesome Effects with Blurs — more Smart Filter work, same non-destructive habits.
- How to Master Adjustment Layers in Photoshop — masking and non-destructive editing properly.
- Creative Coloring with Gradient Maps — grading a painted image once it’s built.
Think Like a Painter, Not Like a Filter
The filters are doing the mechanical work here, but every decision that makes the result convincing is a painting decision: which areas deserve detail, which direction the strokes run, where the eye should land.
Try it on a portrait next. Keep the detail in the eyes and let everything else soften, and you’ll find the same principle applies — painters have always spent their detail where they want you to look.







Enjoying This Free Tutorial? Go Further with PRO.
Unlock Full Sample Files, PSDs, and Hundreds of Masterclasses!

Download full project assets, original PSDs, and RAW images for every lesson
Unlimited access to our complete library of PRO Photoshop & Lightroom courses
Instant 4K Ultra HD streaming on all devices, anytime, anywhere
Full access to our entire library of Photoshop Actions, Presets, and LUTs
Flexible monthly and annual membership plans
Cancel anytime with zero hassle or commitments