
Download Assets
description
Learn to transform bland skies in Photoshop! In this tutorial we’ll show you how to select and replace a sky, match the lighting and color using Levels and Color Balance, and create a seamless blend with a layer mask and gradient. We’ll even teach you how to match the sun’s angle and use Smart Objects for non-destructive edits.
Go PRO:
Dive deeper into the world of Photoshop with our in-depth PRO Photoshop Learning Path . Across 11 courses and 53 hours of engaging content, you’ll learn Photoshop’s ins and outs, master pro-level tools, and tackle fun and challenging projects..
Image Source
- Feyza Yildirim
Image sourced from Pexels.
Share
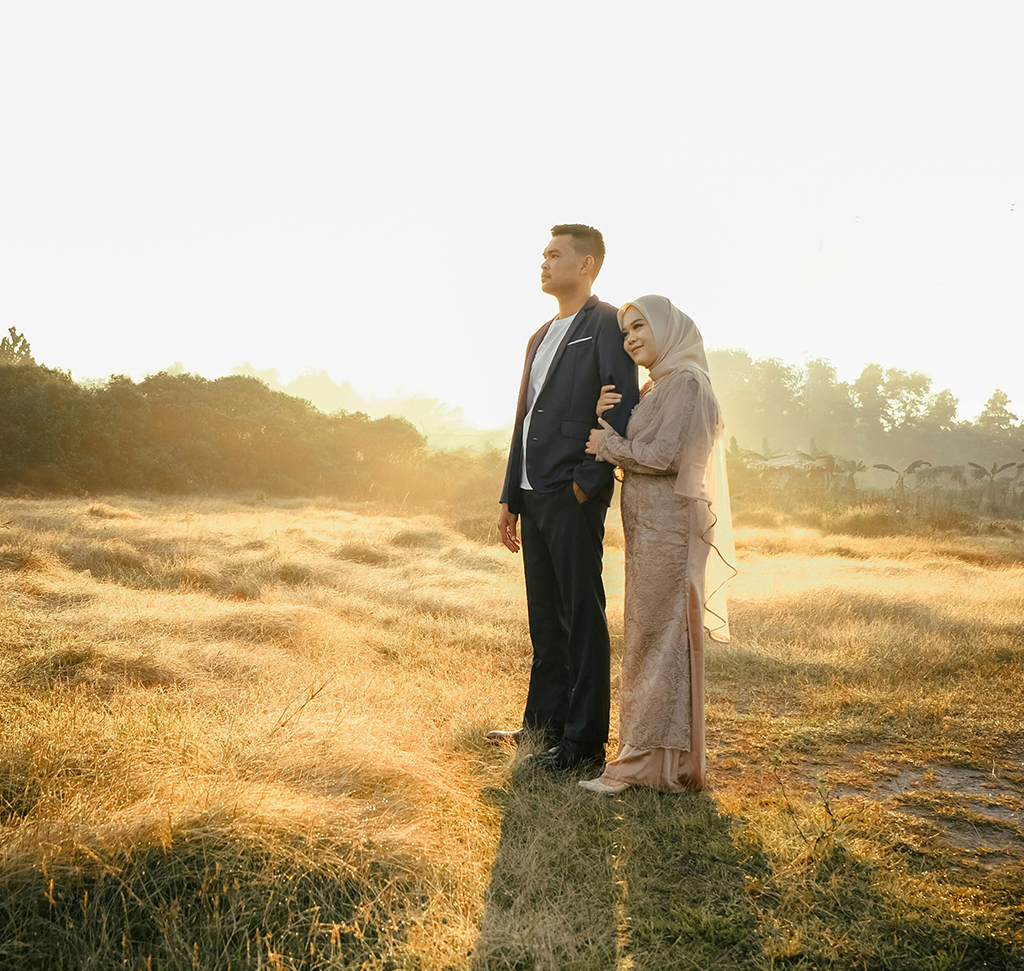

AFTER
BEFORE
Boring Sky? Not Anymore.
Even excellent photographs can suffer when the sky is completely washed out or lacking detail. The technique demonstrated in this tutorial provides a powerful, non-destructive method to swap a lackluster sky for a dramatic one. The secret to a successful replacement is less about the initial selection and more about meticulously matching the replacement sky’s light intensity and color tone to the existing photograph.
Select & Mask
1. Start by opening your image in Photoshop. Click on the background layer, then go to Select > Sky to automatically select the sky area.
2. Next, drag your desired new sky image into the document, making sure the light angle of the replacement sky matches the original image.
3. Group the new sky layer (Ctrl/Cmd + G), then click the Layer Mask icon to apply the active sky selection to this group.

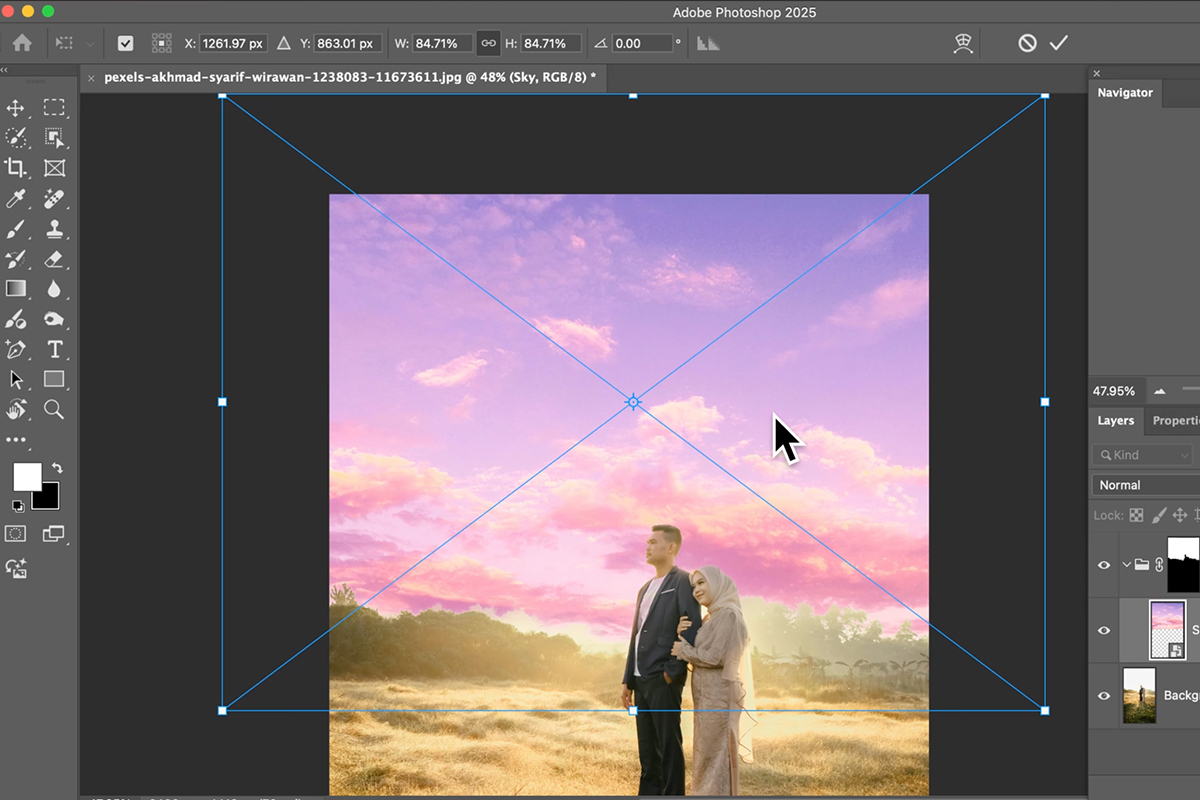
Position & Convert
4. With the new sky masked, use the Move Tool (V) to position the sky and adjust where the clouds or features sit in the frame.
5. If you need to resize the sky, hit Free Transform (Ctrl/Cmd + T). Before proceeding, ensure your new sky layer is a Smart Object (convert it if it’s not) to allow for non-destructive editing, which keeps your adjustments flexible.
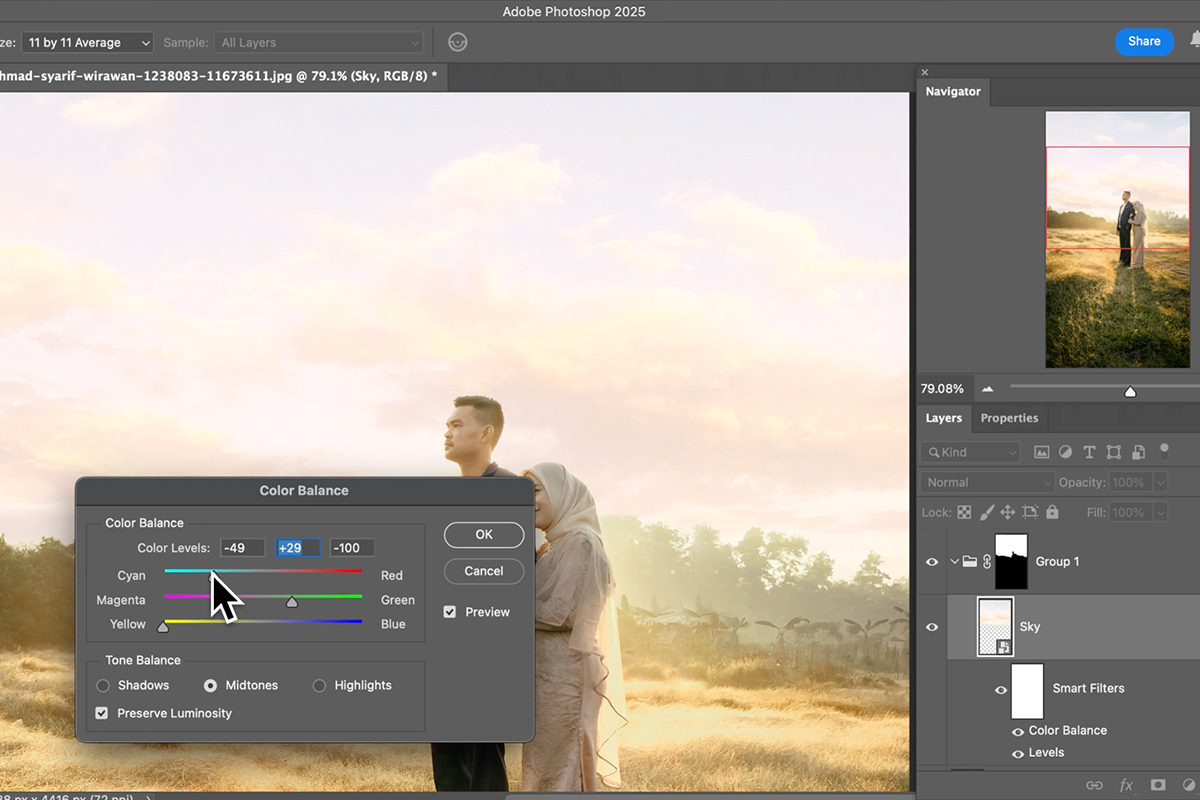
Adjust Light, Color
The most critical step is matching the atmospheric lighting.
6. Use Levels (Ctrl/Cmd + L) on the Smart Object to make the replacement sky brighter, as the original washed-out sky was likely very bright.
7. Follow this with Color Balance (Image > Adjustments > Color Balance) to introduce the primary colors of the scene (like yellows or greens) into the new sky, ensuring the light source appears consistent.
Smooth the Fade
To finalize the replacement, add a second individual Layer Mask directly to the new sky layer itself (not the group mask). Select the Gradient Tool (G), choose a black-to-white linear gradient, and drag down from the top of the sky area. This action helps the new sky subtly fade and blend into the original horizon and foreground elements, completing the realistic look.


