Download Assets
description
Learn how to create a stunning, colorful aura effect for your portraits in Photoshop! In this tutorial we’ll show you how to add professional motion blurs, use gradient tools for vibrant glows, and work with textures to build a magical atmosphere.
Go PRO:
Dive deeper into the world of Photoshop with our in-depth PRO Photoshop Learning Path . Across 11 courses and 53 hours of engaging content, you’ll learn Photoshop’s ins and outs, master pro-level tools, and tackle fun and challenging projects..
Image Source
- Hamed Farahpour
- Codioful
- Mohammad Alizade
Images sourced from Unsplash.
Share

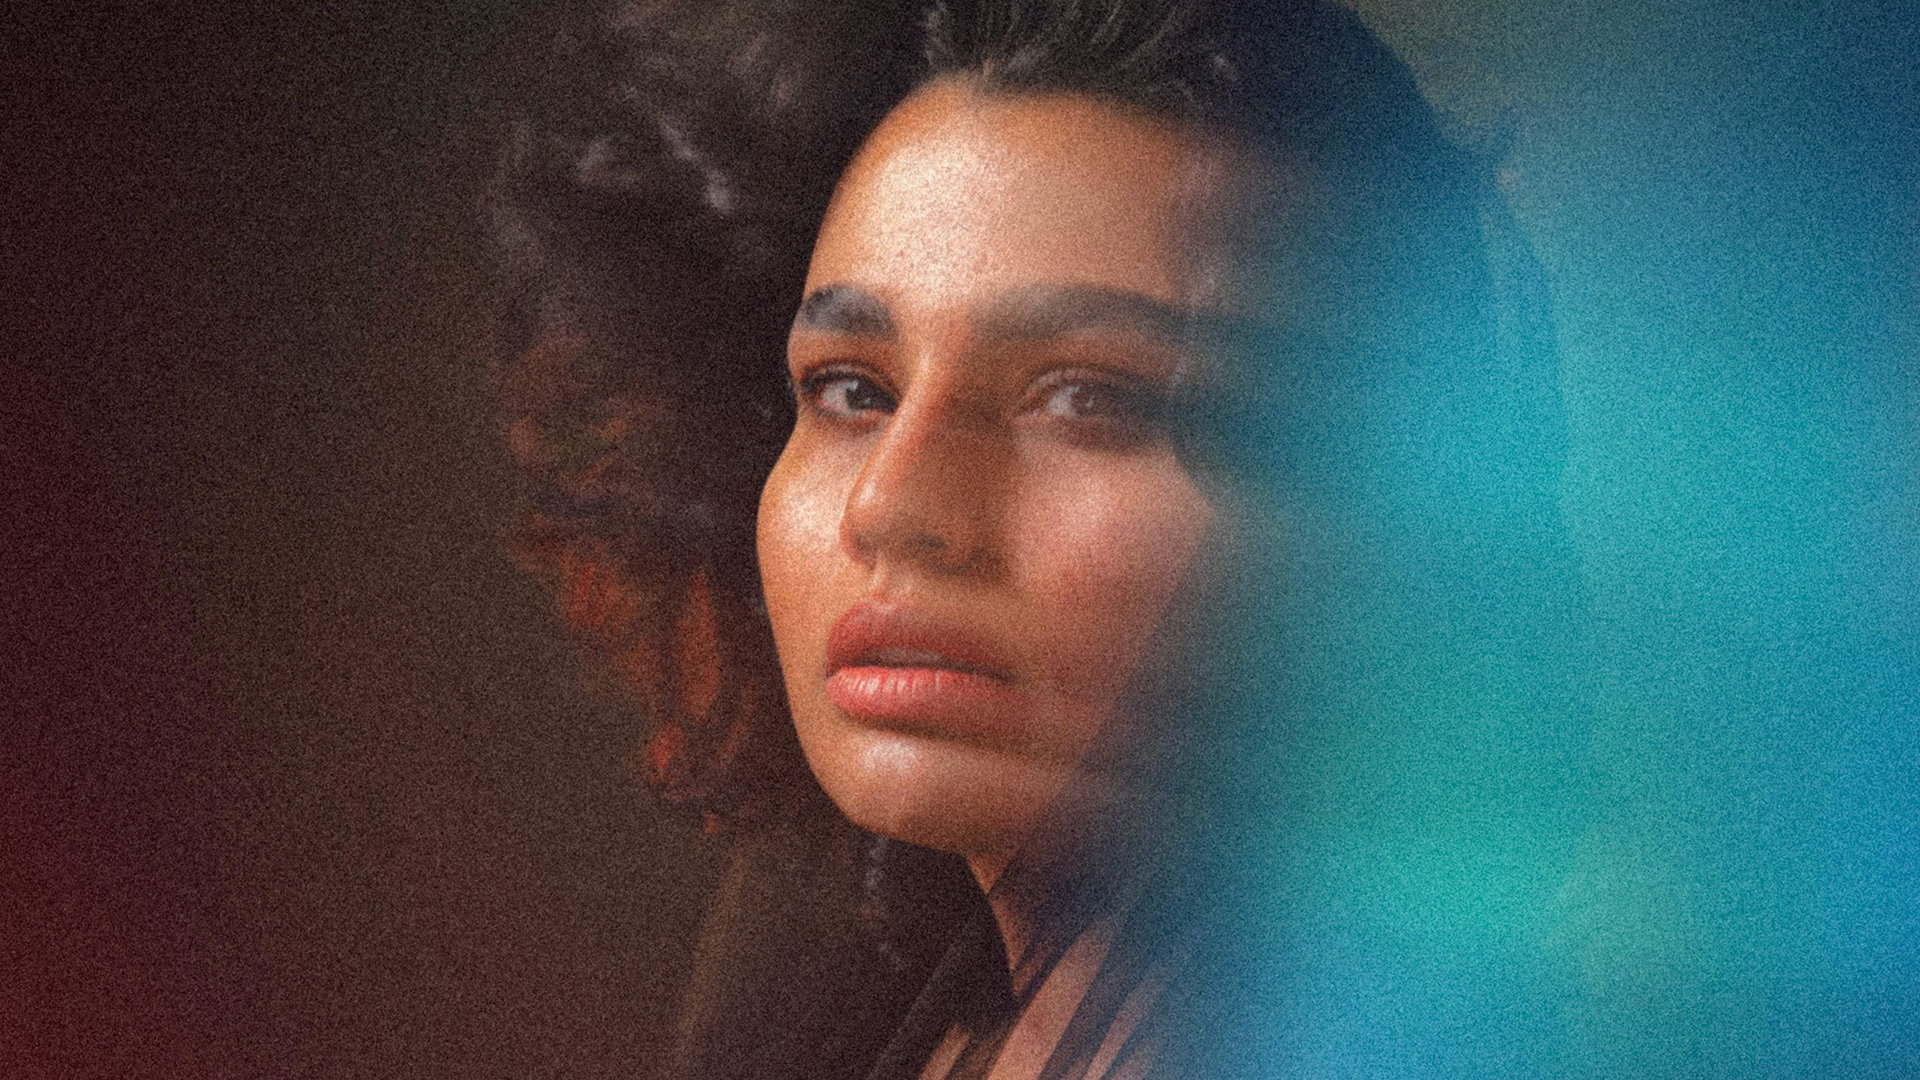
AFTER
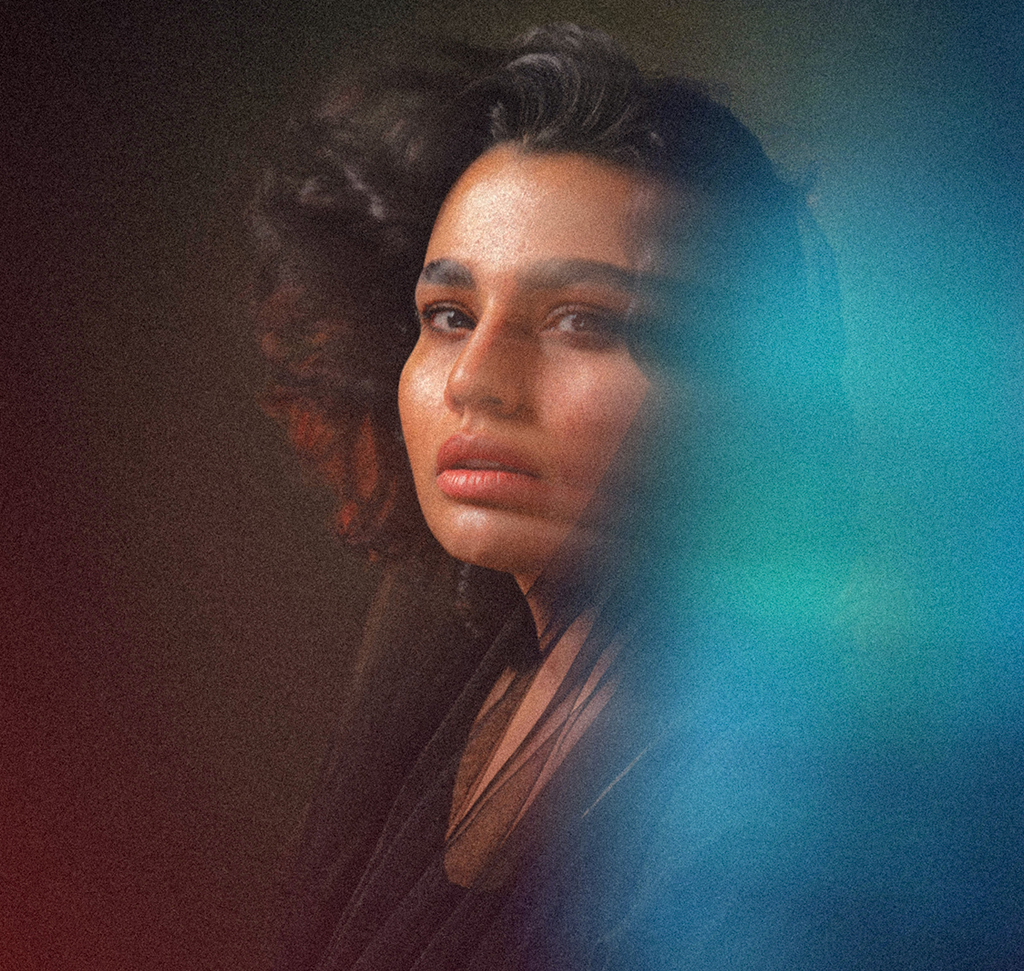
BEFORE
Stunning Aura Effects
Adding a beautiful, colorful touch to your images is a great way to make them feel more alive and expressive. By using soft glows and artistic blurs, you can draw focus to your subject while creating a dreamlike mood. This technique is perfect for anyone looking to add a professional, high-end finish to their photos with just a few simple adjustments.
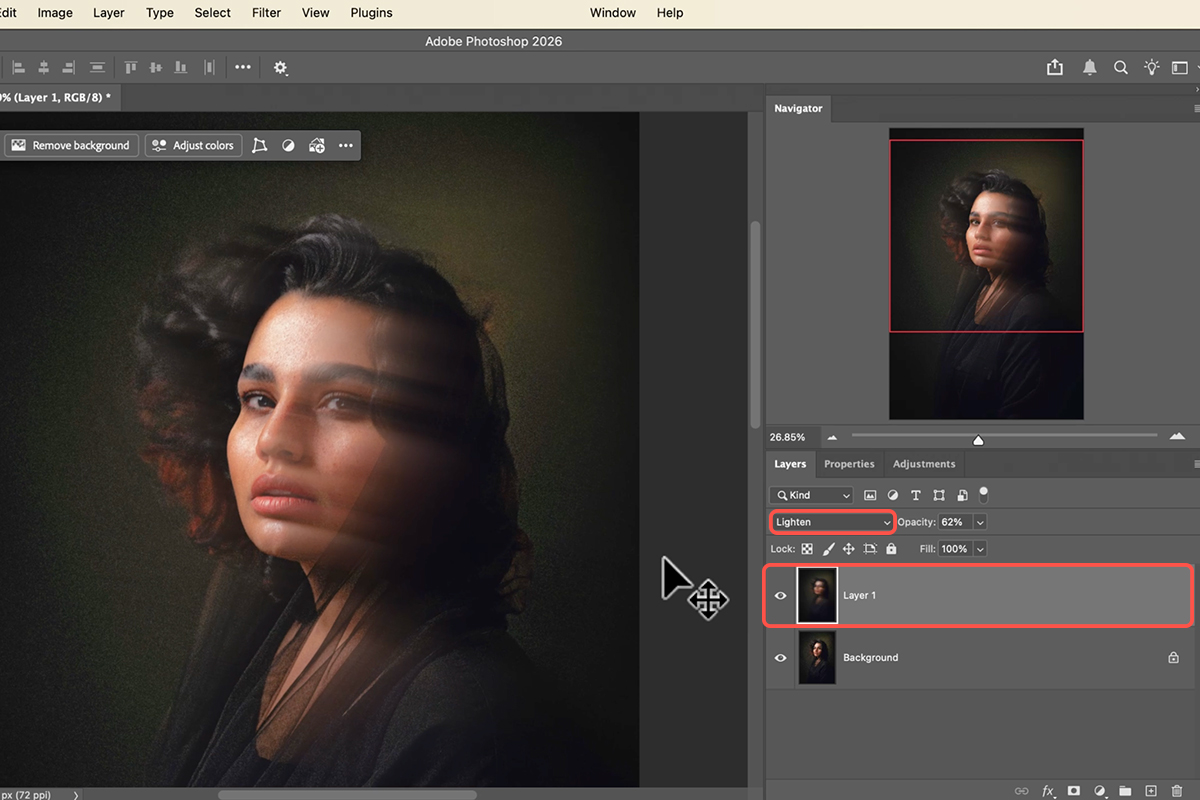
Blur the Background
1. Start by duplicating your main layer (Keyboard Shortcut “Ctrl/Cmd + J”).
2. Go to Filter > Blur Gallery > Path Blur to create a sense of motion. Use the tools to create an arched path, increase the speed and taper, and uncheck “Centered Blur.”
3. Once you are happy with the movement, change the layer blending mode to Lighten to integrate the blur smoothly over your subject.
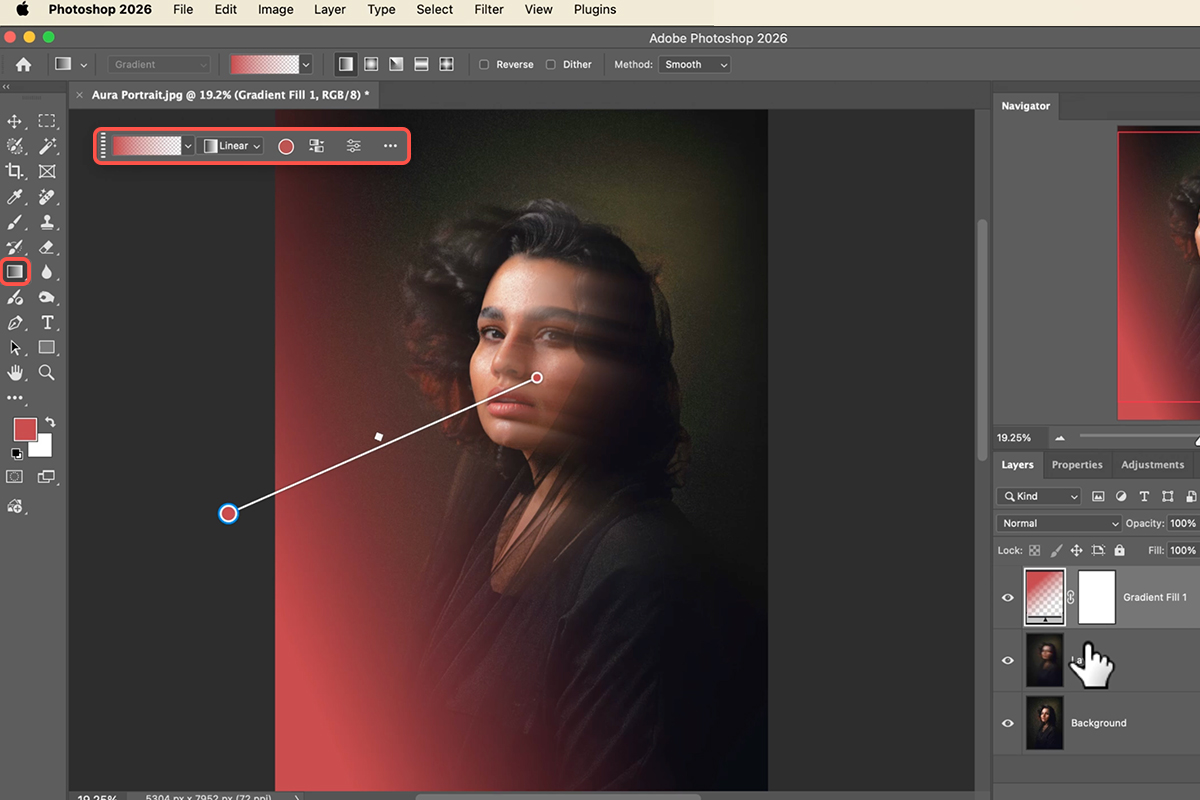
Add Gradient Glows
4. Select the Gradient Tool (Keyboard Shortcut “G”) and set it to a “Foreground to Transparent” style.
5. Draw a linear or radial gradient over your image using a bold color like red.
6. To make the glow look natural, change the layer blending mode to Color Dodge.
7. You can easily adjust the look by clicking the reverse icon or moving the gradient handles to change the light’s direction.
Apply Aura Textures
8. For a more detailed look, drag an aura texture into Photoshop. Use the Free Transform tool (Keyboard Shortcut “Ctrl/Cmd + T”) to rotate and scale it.
9. Change the blending mode to Screen to hide the black background.
10. If the edges are still visible, open Levels (Keyboard Shortcut “Ctrl/Cmd + L”) and drag the black slider to the right.
11. You can also change the aura’s color using Hue/Saturation (Keyboard Shortcut “Ctrl/Cmd + U”).

Final Polish Steps
12. To finish, create a composite layer of your work by going to Image > Apply Image.
13. Convert this to a Smart Object and open the Camera Raw Filter.
14. Add some Grain from the Effects tab to tie all the elements together.
15. Finally, use a vignette or a Radial Mask to brighten the center and warm up the colors for a professional, cohesive result.


