
Download Assets
description
Learn how to transform flat photos into images that really pop! In this Photoshop tutorial, we explore a “hidden” histogram trick for better contrast and show you why selective masking is the secret to perfect clarity. It’s a simple, effective workflow to give your work a polished, night-and-day difference.
Go PRO:
Dive deeper into the world of Photoshop with our in-depth PRO Photoshop Learning Path . Across 11 courses and 53 hours of engaging content, you’ll learn Photoshop’s ins and outs, master pro-level tools, and tackle fun and challenging projects..
Share

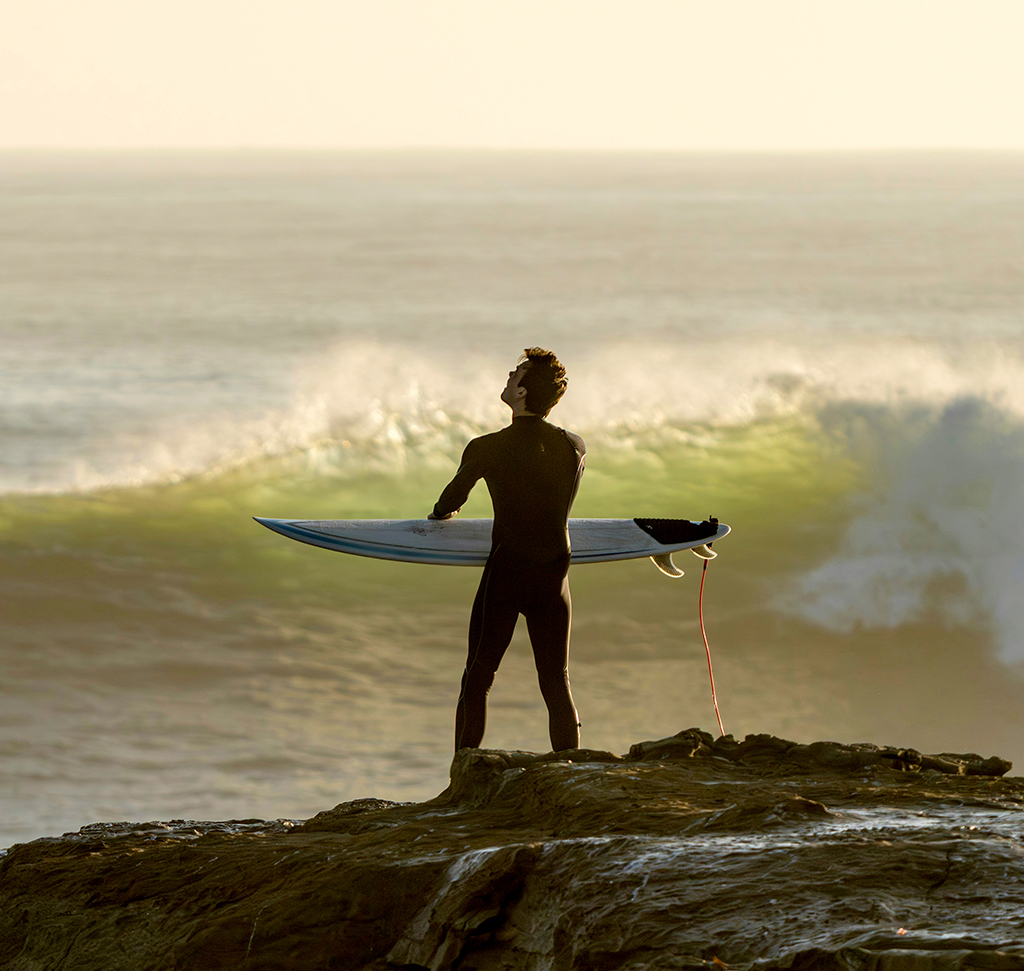
AFTER
BEFORE
Make Your Images Pop
Learning how to use contrast and clarity effectively is the difference between a photo that looks “edited” and one that looks professional. When applied globally, these tools can make an image look harsh or unnatural. By mastering selective adjustments, you gain the power to guide the viewer’s eye exactly where you want it, adding depth and dimension that makes your work truly stand out.
Getting Started
Before making any adjustments, ensure your workflow is non-destructive so you can change your mind later.
1. Start by selecting your background layer and go to Filter > Convert for Smart Filters. This turns your layer into a Smart Object, allowing you to re-edit your settings at any time.
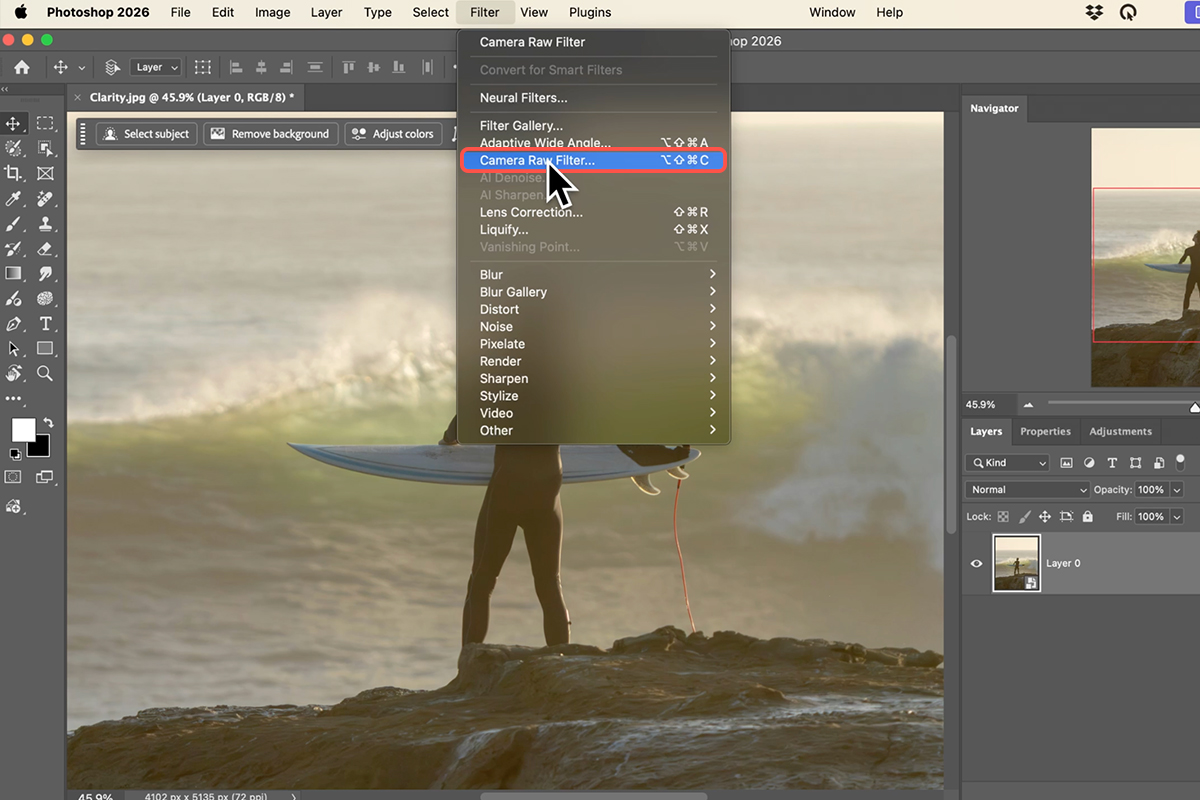
2. Once that is set, open the main editing interface by going to Filter > Camera Raw Filter.
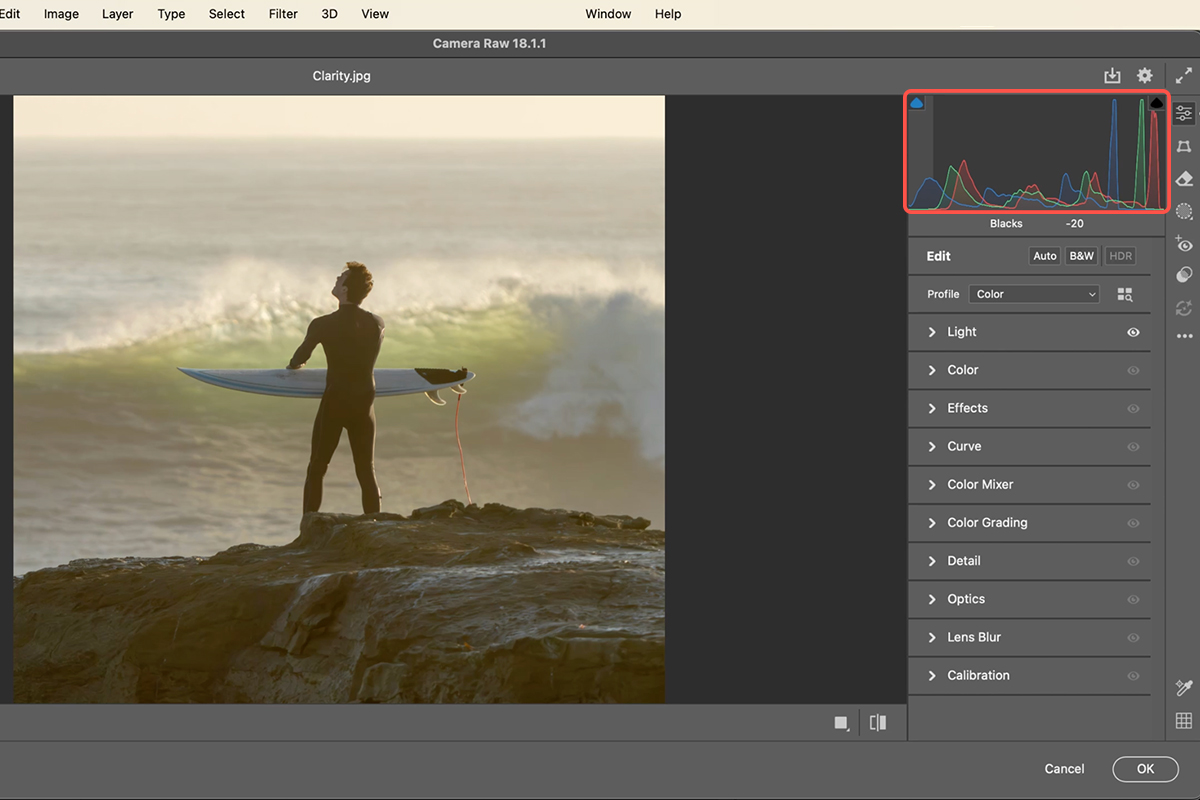
Master the Histogram
Instead of just moving sliders, you can gain much more control by clicking and dragging directly on the Histogram at the top of the panel.
3. Zoom in using Cmd/Ctrl + to see the details.
4. Drag the blacks and shadows to the left to add depth, and adjust the exposure and whites to bring out the light. This “hidden” method creates a more natural, punchy contrast than the standard contrast slider.
Apply Selective Clarity
Clarity adds mid-tone contrast, but applying it to the whole photo often looks messy.
5. Instead, go to the Masking tab and use the Landscape or Select Subject tools to isolate specific areas like the ground or your main subject.
6. Within the Effects tab of that mask, increase the Clarity and Texture sliders. This makes your subject pop against the background without affecting the entire image.

Review & Save
7. To see the transformation, toggle the eye icon next to your masks or use the before/after toggle in the bottom right.
8. Once you are happy with the results, hit OK to return to the main workspace. Because you used a Smart Object, your Camera Raw settings will appear as a sub-layer that you can turn off and on to see the night-and-day difference you’ve created.


