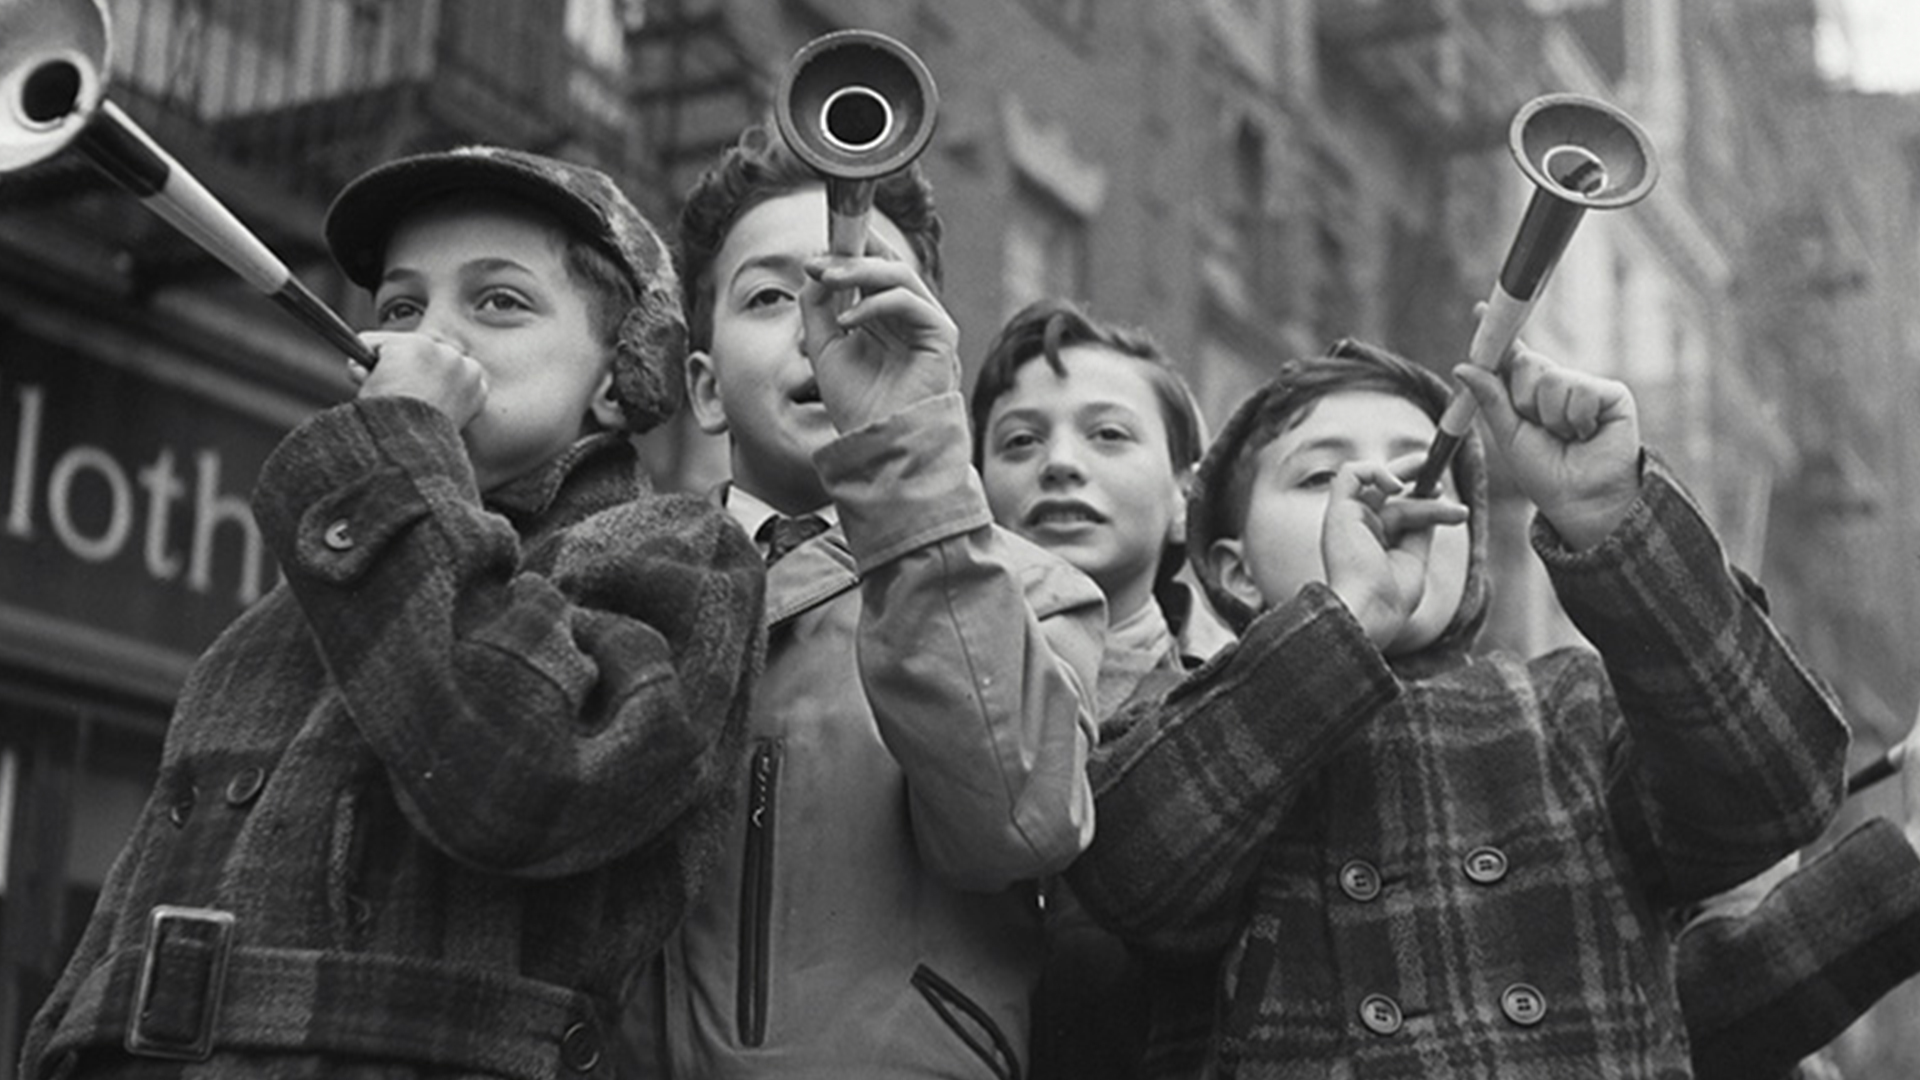

The new Upscale tool in Photoshop 2026 uses AI to rebuild detail rather than stretch pixels — 4x enlargement on old low-resolution photos that actually holds up.
Free practice files
Practice Files for This Tutorial
The sample image, the layered PSD and the 3-page PDF guide from the video, so you can follow every step on the same files.
This tutorial includes 1 sample image, 1 sample PSD and 1 PDF guide.


Create a free PHLEARN account to download, or log in if you already have one. One account gets you the files for every free tutorial.
description
Enjoying This Free Tutorial?

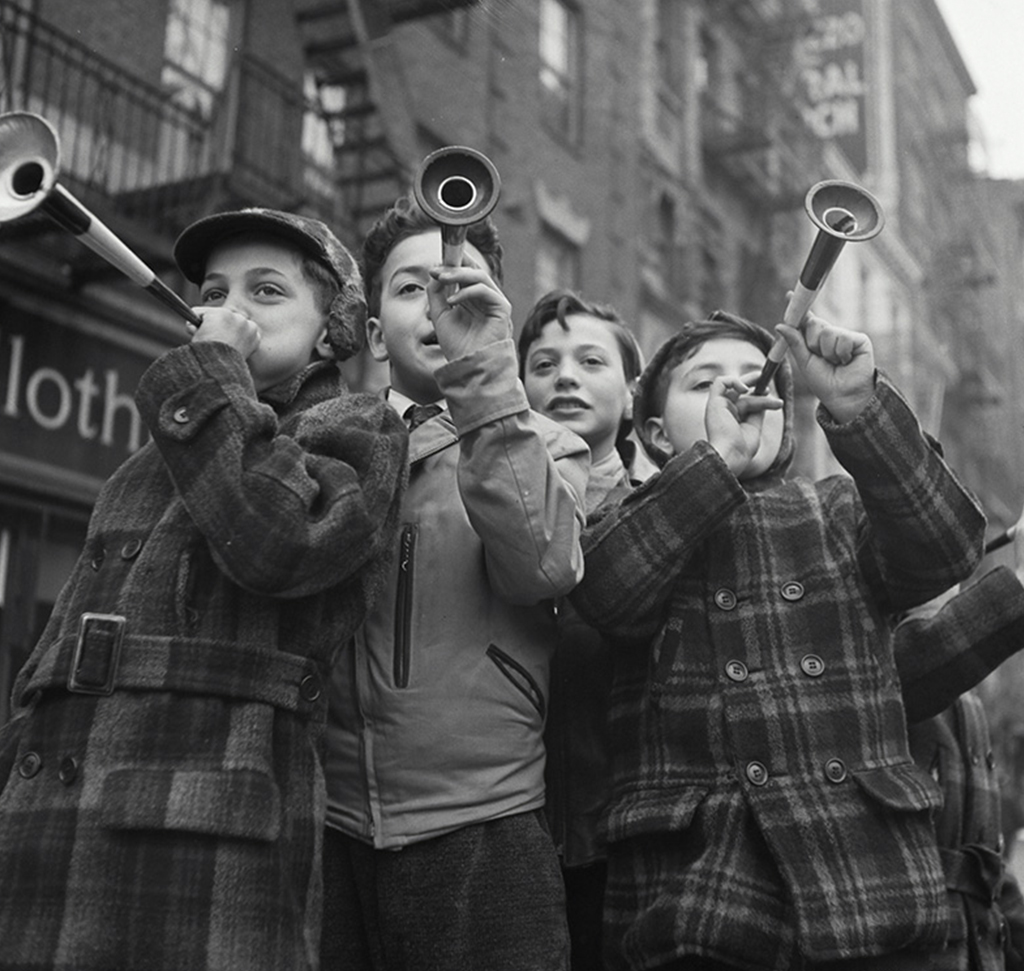
The Upscale Tool Rebuilds Detail Instead of Stretching Pixels
Enlarging an image used to mean choosing which flavor of blur you preferred. Bicubic Smoother, Preserve Details, whichever — every method was interpolating between pixels that were already there, so a 4x enlargement of a pixelated scan gave you a larger pixelated scan. The new Upscale tool takes a different approach.
Generative Upscale in Photoshop 2026 works differently. It uses an AI model to reconstruct detail that isn’t in the file, which is why it can take an old low-resolution photograph to four times its size and have it hold up. The catch is that which model you pick matters enormously, especially with faces.
What the Models Do Differently
Topaz Gigapixel Is the Realistic One
It reconstructs plausible detail while keeping the character of the original. For photographs of real things — and particularly for old family pictures — this is the one to reach for.
Firefly Upscaler Is the Standard Option
Solid, unremarkable results. Fine when the source isn’t badly degraded and you just need more pixels.
Topaz Bloom Changes Faces
It’s the most aggressive at inventing detail, which on a portrait means it can noticeably alter how somebody looks. Avoid it on people; it’s not a subtle difference.
See the Problem First
-
Open the Low-Resolution Image
Old scan, phone screenshot, a photo pulled off a website years ago — anything where the pixel count is the limitation.
-
View It at 100 Per Cent
Cmd/Ctrl + 1. This is the honest view. Judging an upscale from a fit-to-screen preview tells you nothing, because at 30 per cent almost anything looks acceptable. Look at the pixelation now so you have something to compare against later.
Run the Upscale Tool
-
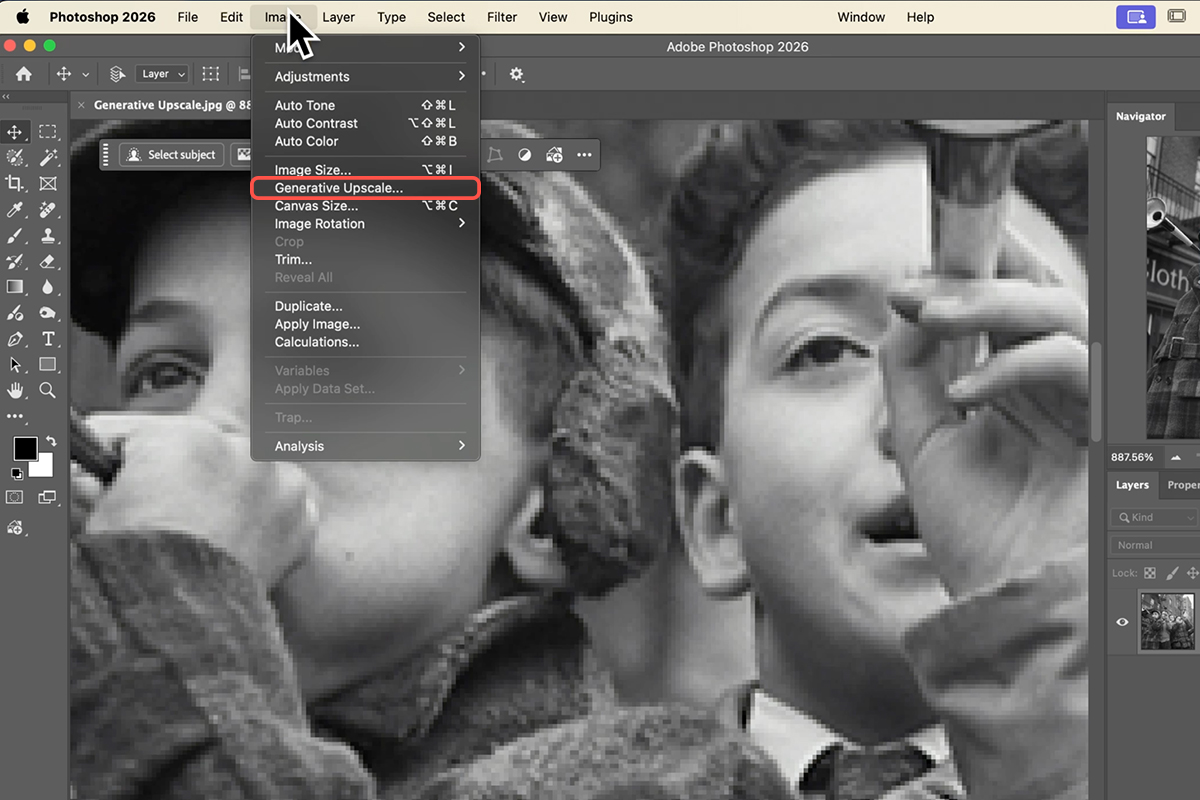
Image > Generative Upscale
It lives in the Image menu, not in Image Size where you might expect it. That’s worth knowing, because plenty of people never find it.
-
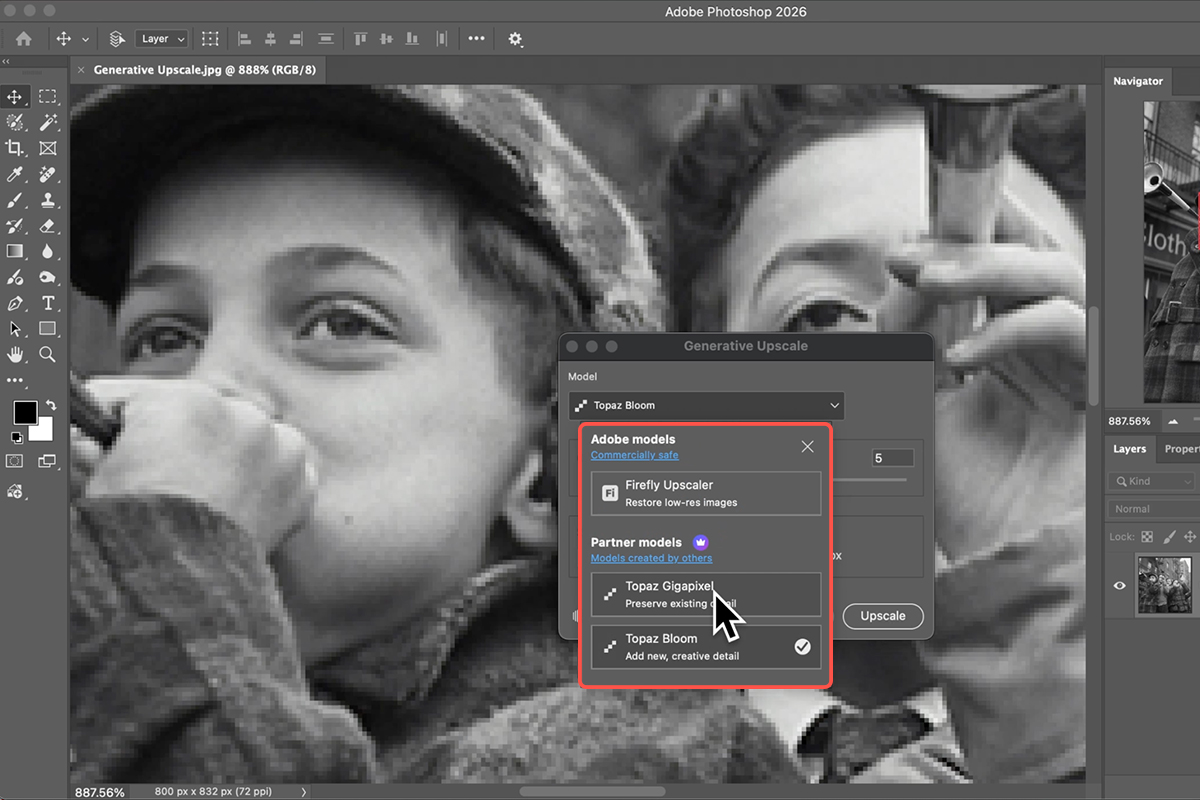
Choose the Model
From the dropdown in the dialog. Topaz Gigapixel for anything realistic, Firefly Upscaler for a standard result, and not Topaz Bloom if there’s a person in the frame.
-
Set the Magnification
4x is where the difference becomes dramatic on a genuinely low-resolution source. Smaller factors are available and are the right choice when the original is only slightly short of what you need.
-
Click Upscale and Wait
Processing takes a moment while the model reconstructs detail. Photoshop creates a new file rather than modifying the one you opened, so the original is safe regardless of the outcome.
Compare and Save
-
Fit to Screen, Then Go Back to 100 Per Cent
Cmd/Ctrl + 0 for the overall impression, then Cmd/Ctrl + 1 again to inspect properly. The second view is the one that tells you whether the model invented anything odd.
-
Toggle the Layer Visibility
Switching the upscaled layer on and off is the fastest before-and-after. Pay particular attention to eyes, teeth, text and fine repeating patterns — those are where AI reconstruction goes wrong first.
-
Save the High-Resolution Version
Cmd/Ctrl + S. Keep the original file too; if you later want a different model’s interpretation you’ll want the untouched source.
Where It Falls Down
Bloom on Portraits
It will give you a sharper picture of a slightly different person. For anyone you actually know, that’s a bad trade.
Judging From a Zoomed-Out View
Everything looks fixed at fit-to-screen. The artefacts live at 100 per cent, which is also where the image will be printed or cropped from.
Expecting Text to Survive
Small lettering in a low-resolution source often comes back as convincing-looking nonsense. Check any signage or writing carefully.
Upscaling Before Cleaning Up
Dust, scratches and compression artefacts get reconstructed as if they were detail. Clearing them first — our free guide to the updated Remove Tool covers the fast way — gives the model a cleaner starting point.
Reconstruction Is Not Recovery
It’s worth being precise about what this tool does. It isn’t recovering detail that was lost — that information is gone. It’s generating detail that is statistically plausible given what remains.
For a family photograph you want printed larger, that’s a genuine gift. For anything where accuracy is the point — documentation, evidence, product photography where the customer will receive the actual object — a plausible invention is not the same as a fact, and it’s worth saying so when you hand the file over.
Try It on an Old Photo
Open the file, Cmd/Ctrl + 1 to see the pixelation honestly, Image > Generative Upscale, pick Topaz Gigapixel, set 4x, run it, then toggle the layer at 100 per cent before saving. Download the free sample image and PSD and work through the exact example — then dig out a genuinely old family scan, which is where this tool is most worth the processing time. To go further across Photoshop, our PRO Photoshop Learning Path is where to go next.
Quick Reference: Keys, Menus and Settings
- Open the toolImage > Generative Upscale
- Pick a modelTopaz Gigapixel (the one that won Aaron’s test), Firefly Upscaler, or Topaz Bloom
- Scale4x, then Upscale; the result opens as a new file
- CompareToggle the upscaled layer over the original and zoom in
- AvoidTopaz Bloom for photos of people: it invents a different image
Recorded in Photoshop 2026.
Image source
Photo by Marjory Collins (1943), Library of Congress, via Unsplash

Free Downloads
Follow Along on the Same Photo
Get the vintage sample image, the PSD with all three upscales to compare, and the PDF guide. Free with a PHLEARN account.
Generative Upscale: Common Questions
What does Generative Upscale do?
It enlarges a small or pixelated photo and uses AI to fill in detail that wasn’t there, so an old low-resolution scan comes out sharp at four times the size.
Where is it?
Image > Generative Upscale in Photoshop 2026. Choose a model and a scale, click Upscale, and the result opens as a new file alongside the original.
Which model should I choose?
Topaz Gigapixel. Aaron ran all three on the same vintage photo: Gigapixel gave the most detail, the Firefly Upscaler was better than the original but softer, and Topaz Bloom produced sharper pixels but changed the people into different people.
Why not Topaz Bloom?
Because it isn’t really upscaling. It rebuilds the image so heavily that the faces no longer match the original. Higher quality, different photo.
What scale did you use?
4x. That took the pixelated scan to a size with real detail in the faces and clothing.
How do I judge the result?
Put the upscaled layer over the original, zoom in and toggle it. Look at faces first: the detail should be more of the same person, not a new one.
Does it use credits?
The video doesn’t show credit use for the upscale. Generative tools usually spend them, so check the credits icon in Photoshop for your plan.
Are the sample files free?
Yes, with a free PHLEARN account. You get the sample image, the PSD with all three upscales, and the PDF guide.
Master Photoshop, Lightroom and Photography
Join PHLEARN PRO for $12.99 a month or $99.99 a year. Cancel anytime, with a 100% money-back guarantee.





