

Download Assets
This tutorial includes 1 sample PSD and 1 PDF guide. Downloads are free with a PHLEARN account.
- Download the sample images and PSDs from every free tutorial on PHLEARN
- New free tutorials published every week
- One free account — sign up once, then download anything
Free PDF Guide · 3 Pages
This Tutorial as a Step-by-Step PDF
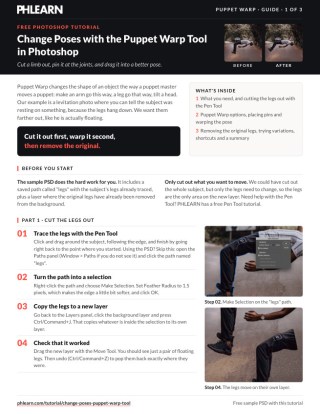
The guide walks through tracing the legs with the Pen Tool, Make Selection with a 1.5 pixel feather and Ctrl/Command+J, then Edit > Puppet Warp with Density on Normal and Expansion at 0, pinning the joints, dragging the feet out, healing out the original legs and comparing versions. Keep it next to your keyboard.
description
A levitation photo falls apart when the subject’s legs hang straight down instead of trailing as if they were genuinely floating. This uses Puppet Warp to fix exactly that: cutting the legs out with the Pen tool, placing anchor points where the joints would be, warping them into a more convincing pose, removing the originals, and trying several variations non-destructively before committing to one.
Enjoying This Free Tutorial?
We publish a new free tutorial every week, each one with sample images and PSDs you can download and follow along with. Sign up and they land straight in your inbox, along with early word on sales, events and subscriber-only offers.
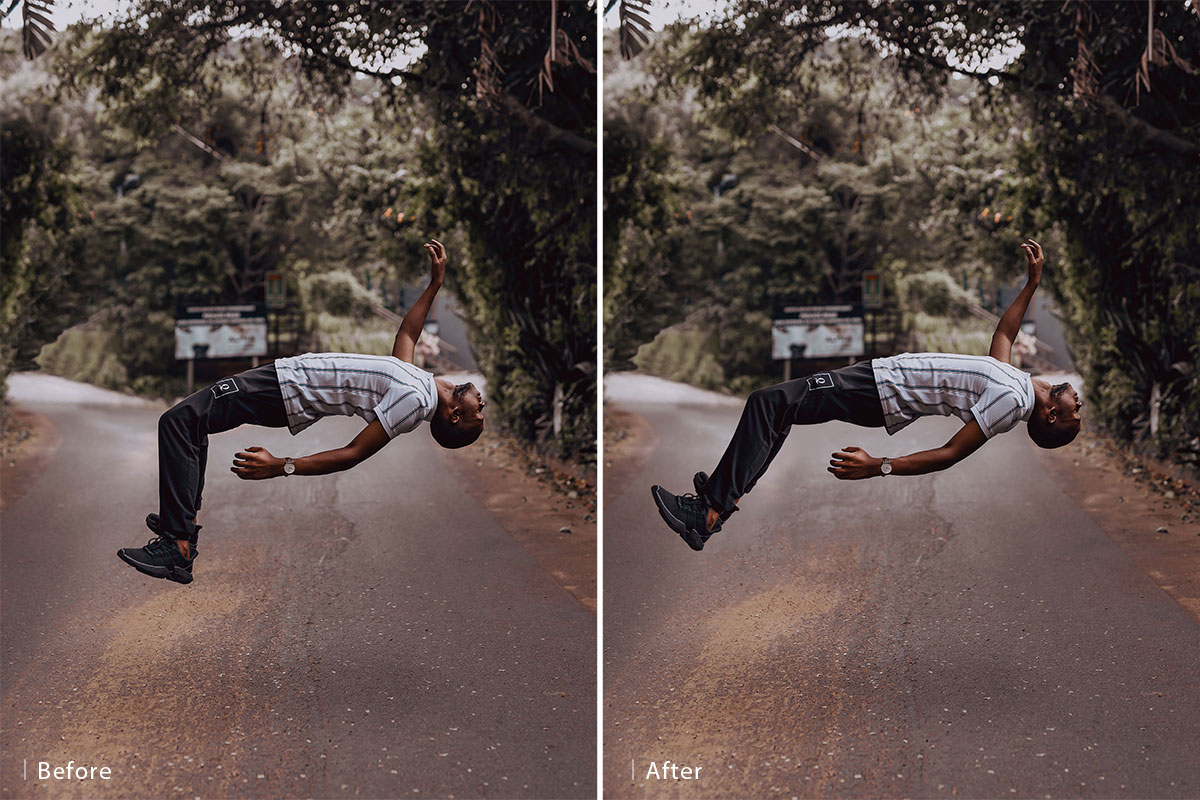
Change Poses with the Puppet Warp Tool in Photoshop
This tutorial uses the Puppet Warp tool to fix an awkward-looking levitation photo where the subject’s legs are hanging down rather than trailing outward as if genuinely floating, repositioning them into a more convincing pose after cutting them out with the Pen tool. A PSD with a saved “legs” path and the original legs already removed from the background is available as a free download to follow along without redoing the pen work from scratch.
What the Puppet Warp Tool Does
Puppet Warp lets a cut-out object be reshaped like an actual puppet, bending an arm, a leg, or any other flexible part into a new position by placing and dragging pin points, which makes it especially useful for adjusting body poses after a photo has already been shot.
Cutting Out the Subject’s Legs with the Pen Tool
Before anything can be puppet warped, the part that needs to move has to be cut out from the background first. Using the Pen tool, click and drag around the edge of the subject’s legs to build a path, then right-click and choose Make Selection, adding around 1.5 pixels of feathering to soften the resulting edge slightly. With that selection active on the background layer, press Command/Ctrl+J to copy just the selected legs onto their own new layer, leaving the rest of the subject untouched on the original layer. Anyone who needs a refresher on the Pen tool itself can check out the free tutorial linked below; those following along with the provided PSD will already have this path saved under the name “legs” in the Paths panel (Window, then Paths, if it isn’t visible).
Understanding Puppet Warp’s Options
With the legs isolated on their own layer, go to Edit, then Puppet Warp, to open its options bar. Show Mesh overlays a visual grid across the selected shape, which helps visualize how the warp will behave, and Expansion controls how far the effect extends beyond the actual selected edge, set to zero in this case.
Choosing the Right Point Density
The Density setting controls how many mesh points Puppet Warp generates automatically: fewer points suit large, simple areas, while more points give finer control over small, detailed areas, though Normal density works well for a typical limb like a leg.
Placing Anchor Points Like Joints
Click directly on the image to place a pin point, which acts as an anchor. Thinking of the shape like an actual puppet’s limb helps decide where to place points: a point at every joint, like the elbow and the wrist on an arm, allows that specific section to move independently, while a few points placed on a section that should stay put anchor it firmly in place so the rest of the movement looks controlled rather than chaotic. For the legs, the video clicks a few points where the legs meet the body to lock them, then adds one point toward the knee and one at the bottom of the feet.
Fixing and Adjusting Points
If a point ends up in an unhelpful spot or a bend looks unnatural, that point can simply be deleted and a new one placed somewhere better; adding an extra point near a joint that’s bending in an unrealistic way is often the fix for an odd-looking warp. In the video, the warp actually worked better once the knee point was deleted, and the version with fewer points looked the most natural.
Warping the Legs into a New Pose
Once the joint points are placed, click and drag any point to reshape that part of the leg while the anchored points stay fixed. Small, gradual adjustments tend to look far more convincing than large ones, since pushing a limb too far quickly starts to look unnatural rather than like a subtle change in pose. Press Enter to commit the transformation once the new leg position looks convincing, and the Liquify tool remains available afterward for any additional subtle reshaping if needed.
Removing the Original Legs
Because the puppet-warped legs sit on their own layer above the background, the original, unmoved legs are still visible underneath and need to be removed. Create a new layer above the background and use the Spot Healing Brush tool to paint away the original legs from the background photo, filling that area in with a plausible continuation of the surrounding scene.
Cleaning Up with the Clone Stamp Tool if Needed
If the Spot Healing Brush leaves any awkward or unresolved patches behind, the Clone Stamp tool is a reliable follow-up for manually sampling and painting in cleaner material to finish the cleanup.
Trying Multiple Variations Non-Destructively
Since the entire technique starts from a saved Pen tool path rather than a one-time selection, that same “legs” path can be turned into a fresh selection and duplicated to a new layer as many times as needed, each copy then puppet warped independently into its own pose. Comparing a few different variations side by side, hiding and showing each layer to judge which one reads as most convincing, often works better than committing to the very first attempt, and in practice a version with fewer, more deliberate points can end up looking more natural than one with many small adjustments.
Final Thoughts
Puppet Warp turns fixing an awkward pose into a straightforward process: cut the part that needs to move out with the Pen tool, place a few thoughtful anchor points at the joints, drag them into a new position, and remove what’s left of the original limb from the background. Because the whole approach relies on a reusable Pen tool path rather than a single destructive edit, it’s easy to try several pose variations and simply keep whichever one looks the most convincing.
Quick Reference: Keys, Menus and Settings
- Path to selectionPaths panel (Window > Paths), right-click “legs” > Make Selection, Feather Radius 1.5 pixels
- Copy to a new layerCmd/Ctrl + J on the background layer
- Open Puppet WarpEdit > Puppet Warp: Density Normal, Expansion 0, Show Mesh on
- Pin and dragClick to add a point at each joint; click a few times to lock an area; drag a point to move it
- Remove a pointClick it and press Delete
- Commit the warpEnter/Return or the check mark
- Heal out the originalsNew layer above the background, Spot Healing Brush, then Clone Stamp if needed
No AI, no generative credits.
Free Downloads
Follow Along on the Same PSD
Get the levitation PSD with the saved legs path and the original legs already removed, plus the 3-page PDF guide. Free with a PHLEARN account.
Puppet Warp: Common Questions
What does the Puppet Warp tool do?
It changes the shape of an object the way a puppet master moves a puppet. You place points on a cut-out layer and drag them to bend an arm, a leg or a head into a new position.
Where is Puppet Warp in Photoshop?
Select the layer you want to reshape and go to Edit > Puppet Warp. Its options (Show Mesh, Density and Expansion) appear in the bar at the top.
Do I need to cut the subject out first?
Yes. Trace the part you want to move with the Pen Tool, right-click and choose Make Selection with a 1.5 pixel feather, then press Cmd/Ctrl + J on the background layer to copy it to its own layer. Only cut out what needs to move; here that is just the legs.
What Density and Expansion should I use?
Use fewer points for really large areas and more points for small detail areas. For the legs the video leaves Density at Normal and sets Expansion to zero.
Where should I put the pins?
Think like a puppet and put a point at every joint, like the elbow and the wrist on an arm. Click a few times on any area that should stay put, such as where the legs meet the body, so it holds still.
The limb bends in a weird way. How do I fix it?
Click to add another point where it looks wrong and drag that area back. If a point is in the wrong place, click it and press Delete. In the video the warp worked better without the knee point.
Why can I still see the original legs?
The originals are still on the background. Create a new layer above the background layer and paint them out with the Spot Healing Brush Tool, then fix anything left over with the Clone Stamp Tool.
How do I apply the warp?
Press Enter or click the check mark in the options bar. If the shape still needs a small change afterward, you can use the Liquify tool.
Can I try more than one pose?
Yes. Because the path is saved, turn the “legs” path into a selection again, press Cmd/Ctrl + J for a fresh copy and warp that. Turn the versions on and off to compare; the one made with fewer points looked the most natural.
Are the sample files free?
Yes, with a free PHLEARN account. You get 1 sample PSD and 1 PDF guide: the levitation photo with a saved “legs” path and a layer with the original legs already removed, plus the step-by-step guide.
Master Photoshop, Lightroom and Photography
Join PHLEARN PRO for $12.99 a month or $99.99 a year. Cancel anytime, with a 100% money-back guarantee.





