Download Sample Images
Download the complete PSD here:
Sample PSD
description
We all know that if you want to composite multiple photos together, you need to make sure the lighting and the color match. But that’s not all! Perspective plays a big part in how realistic a final composite will look. Follow along as we show you how to place any object into a photo in perfect perspective.
Learn how to cut out an object, use the Vanishing Point Filter to place it in perspective, and then match the lighting and color using some professional compositing techniques. We even include a sample PSD so that you can see how every Layer and adjustment come together to create the final effect!
Share
PLACE ANY OBJECT WITH REALISTIC PERSPECTIVE
Picture-Perfect Perspective
Getting Started with Perspective
Perspective can be tricky to deal with, especially when you’re not the photographer capturing the images for a composite. So what do you do if you have a single product photograph and a client that wants to see the product in a bunch of different environments?
We’re going to show you a quick and easy method of cutting out an object, placing it into a new scene captured from a completely different perspective, and seamlessly integrating it into the new environment!
Don’t believe us? Well, follow along and see how it’s done!
Cutting Out an Object in Photoshop
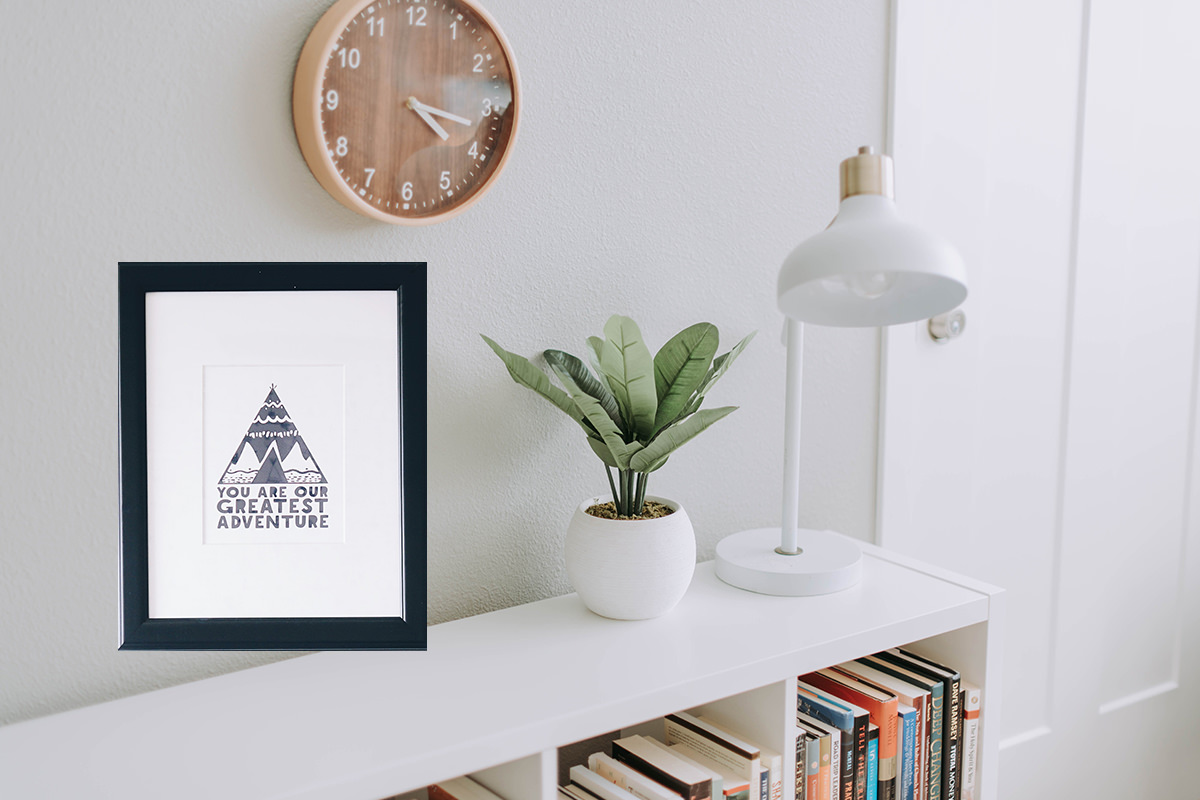
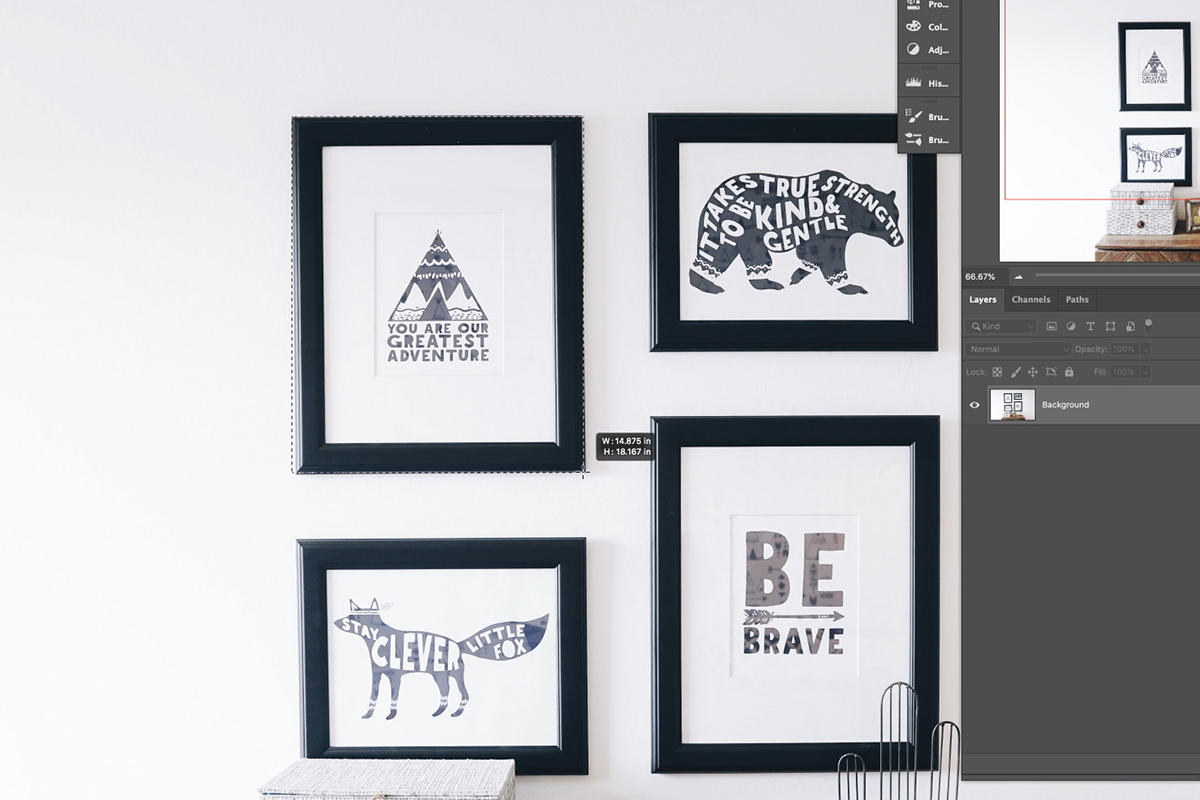
We’re keeping our example relatively simple. We have a photograph of some framed art on a wall and a photograph of a wall and bookshelf. Notice that the framed art photo was captured straight-on, and the wall and bookshelf was captured from an angle. Our goal is to move one of the framed art pieces into the bookshelf scene and place in perfect perspective, and that all starts with making a simple cutout.
If there’s one thing Photoshop is great for, it’s cutting stuff out. Learn how to master this important skill in How to Remove Backgrounds, our PRO course that covers everything you need to know about cutting people and objects out and placing them in new environments!
Fortunately, this isn’t too hard. The frames are photographed straight on and art almost perfect rectangles. That means this is relatively quick work for the Rectangular Marquee Tool. Just Create a Marquee around the edges of one of the frames and don’t worry about it being perfect. We’ll refine the shape and edges in a bit. Just try and keep the Marquee along the inside edges of the frame to minimize the amount of white wall in the selection. Once the selection is made, Duplicate it so that a copy of the selected frame appears on a new Layer. Move the new frame Layer over to the bookshelf image, and we’re ready to start compositing!
Refining the Selection
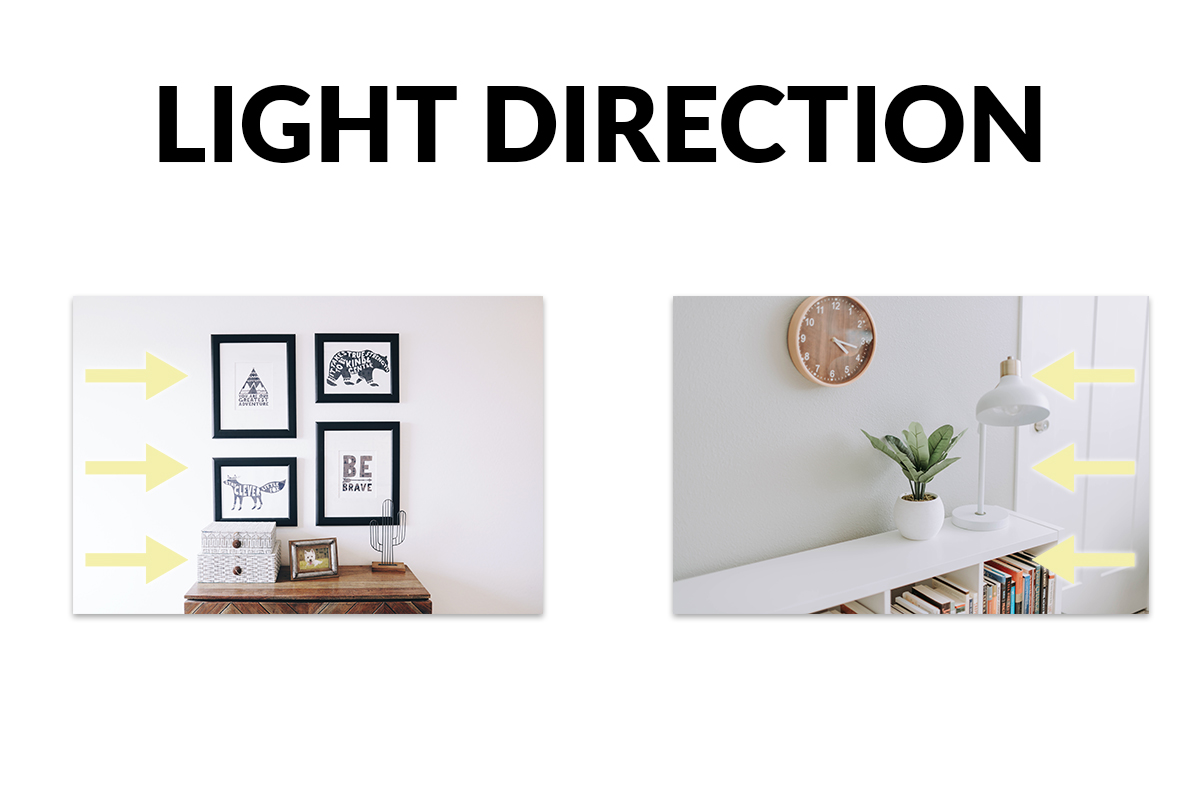
With the frame now present in the bookshelf photo, we can start refining the frame Layer and then matching it to the perspective of the environment. First, let’s analyze some of the differences between the frame and the bookshelf photo. The first thing that tends to stand out in composites is lighting mismatches. The lighting from the environment is coming from the right, while the lighting on the frame is coming from the left. We have a trick that will make fixing this a breeze!
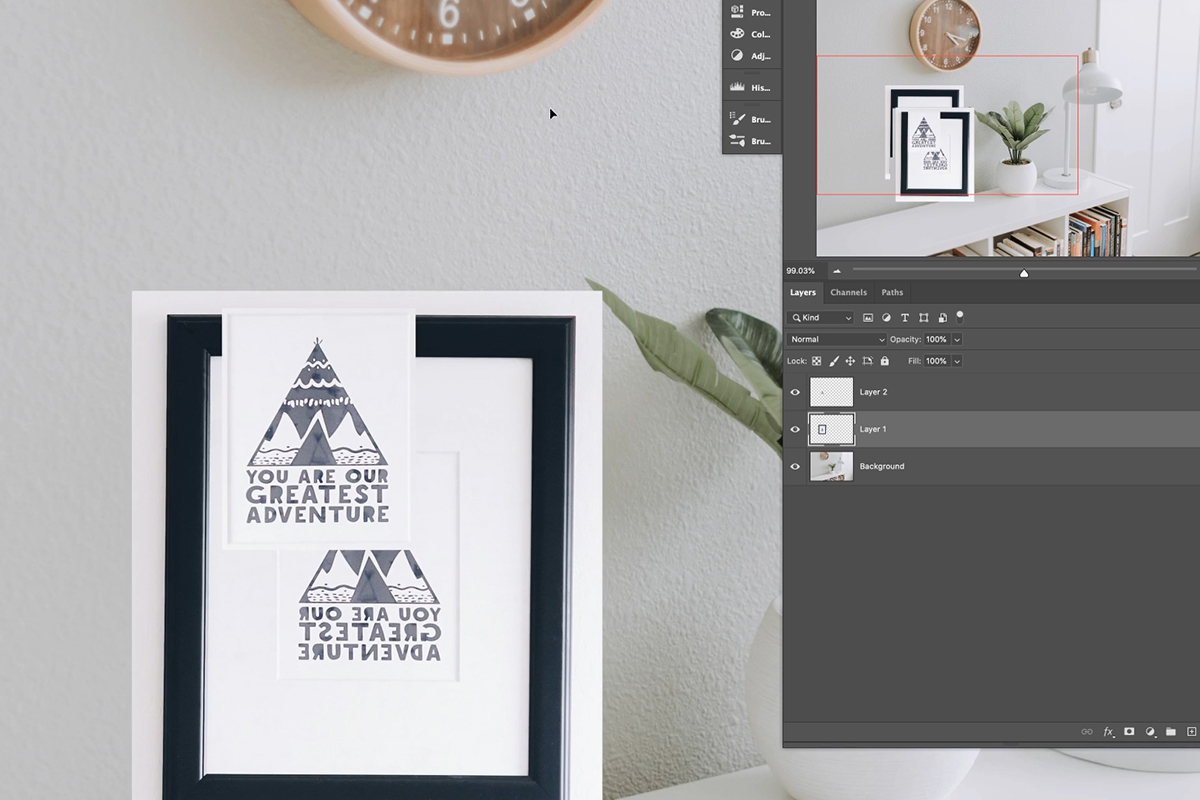
We can switch the direction of the lighting on the frame by simply flipping that Layer horizontally. But what about the text? Won’t it appear backwards then? The answer is yes, but we have a workaround for that. Using the same method we did to select and duplicate the frame, we can create a Marquee Selection around the text, Duplicate that area to place it on its own Layer, and then flip the frame Layer underneath horizontally. Now we have all of the lighting coming from the same direction and the text is still readable!
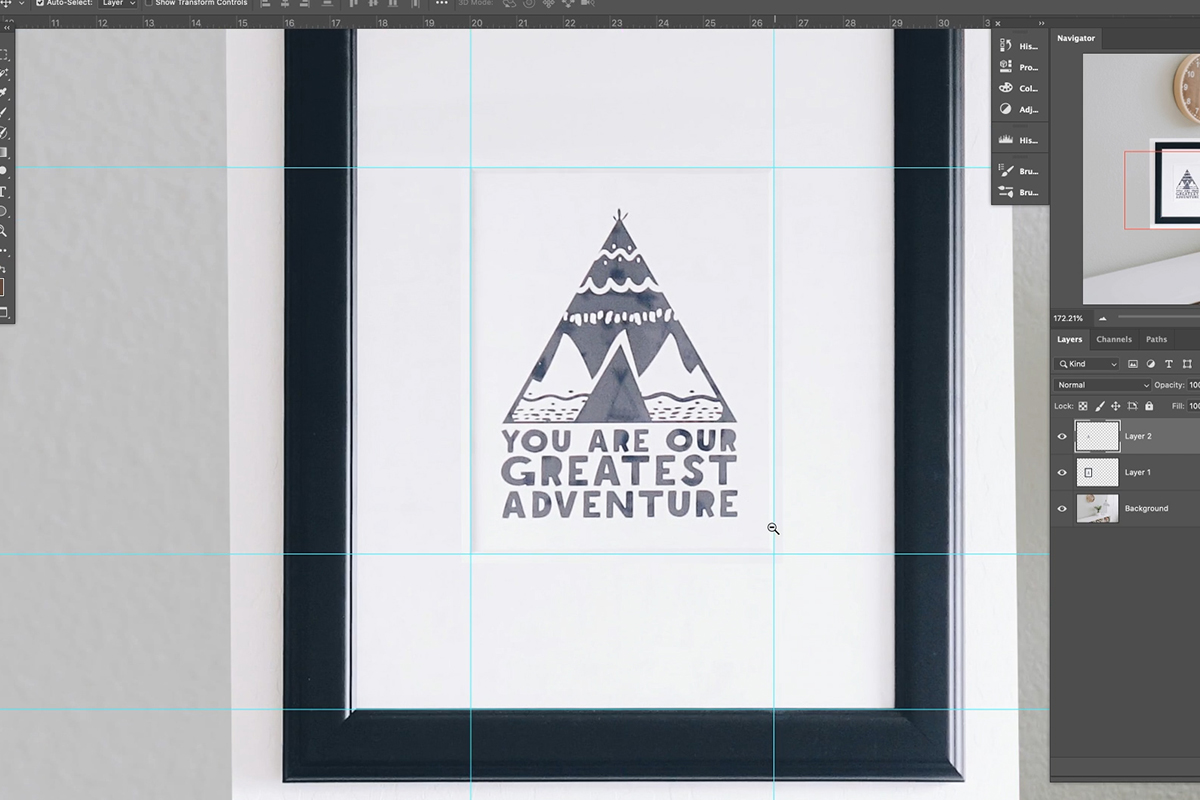
With the lighting taken care of, now let’s fix the shape and edges of the frame. We need to make sure that all of the edges of the frame are perfectly straight both horizontally and vertically before we try and place it into a different perspective. You can use Guides to help with this. Create a set of horizontal Guides along the top and bottom edges of the frame, and then two vertical Guides along the left and right edges. Try to match them up as closely as possible to each corner of the frame, but not all of the corners will line up perfectly. With the Guides in place, use the Transform Tool while holding CTRL or CMD to carefully move any corners of the frame so that they sit flush with the corresponding corners of the Guides.
Once everything is lined up, you can use a Layer Mask and the Rectangular Marquee Tool to clean up any areas of wall still showing from the frame Layer’s original background. After any refinements, go ahead and select the Layer Mask of the frame Layer and choose Apply Layer Mask to permanently apply those changes.
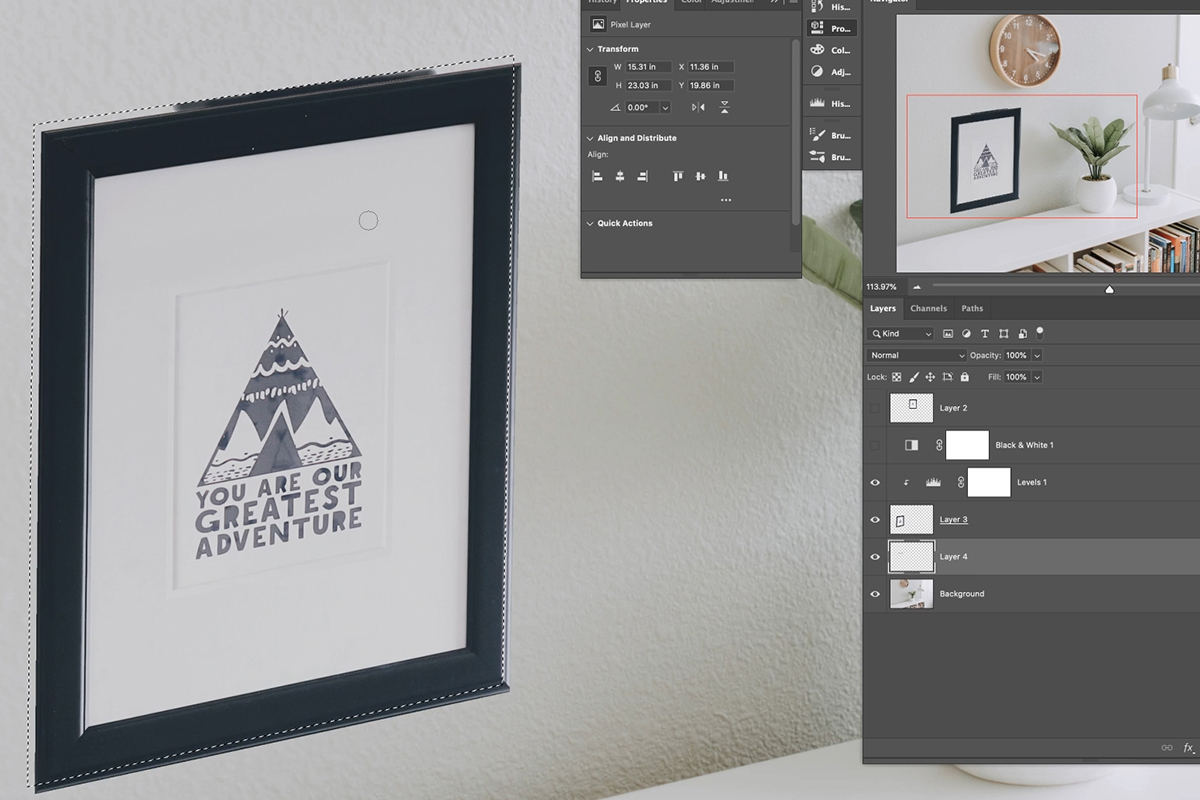
Now the frame is perfectly cut out and straight, the lighting is coming from the same direction, and the text is still readable. Select all of the frame Layers and adjustments and Merge them together. With everything combines, we can now place it into the proper perspective!
The Vanishing Point Filter
Getting the right perspective in Photoshop has never been easier than with the Vanishing Point Filter. This tool allows us to define a perspective and then copy and paste a Layer into that perspective. To start, we need to get the frame Layer onto our computer’s clipboard. Nothing fancy here, this is just regular old copying and pasting. Whenever you copy something with CTRL or CMD + C, that information is stored on your computer’s clipboard and available to paste in a new location.
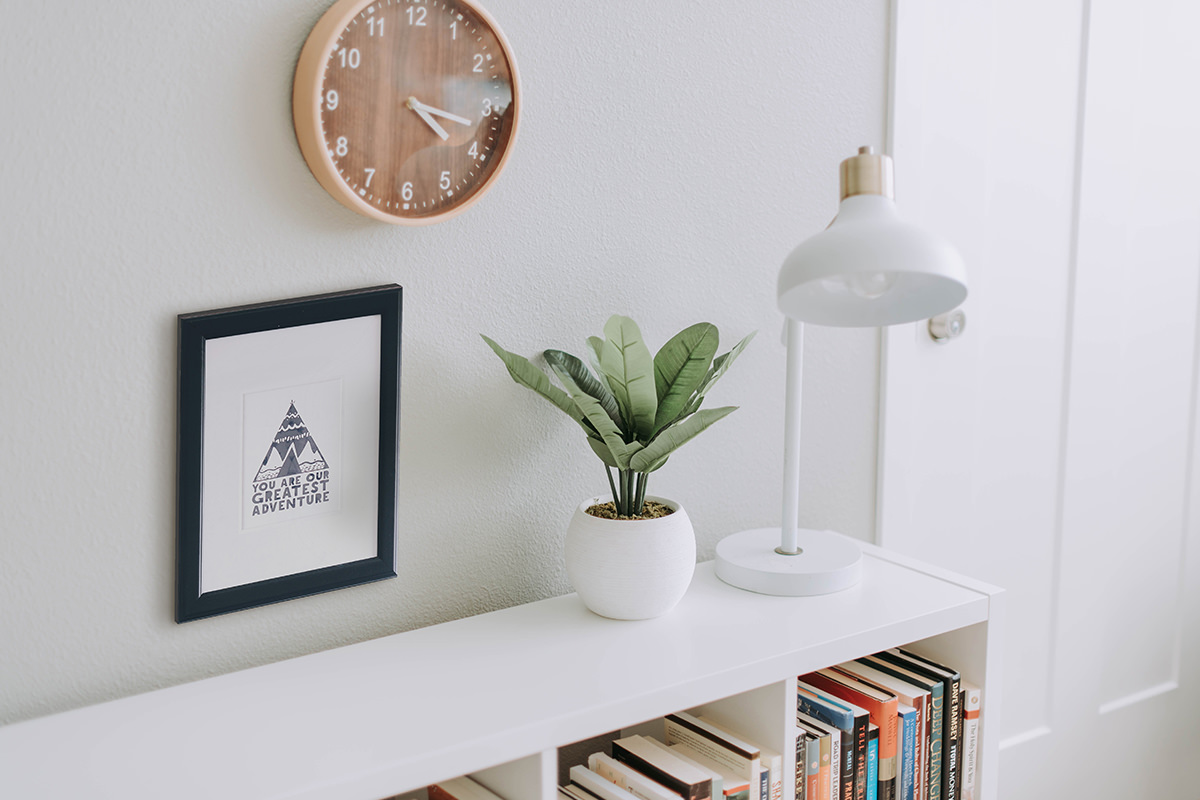
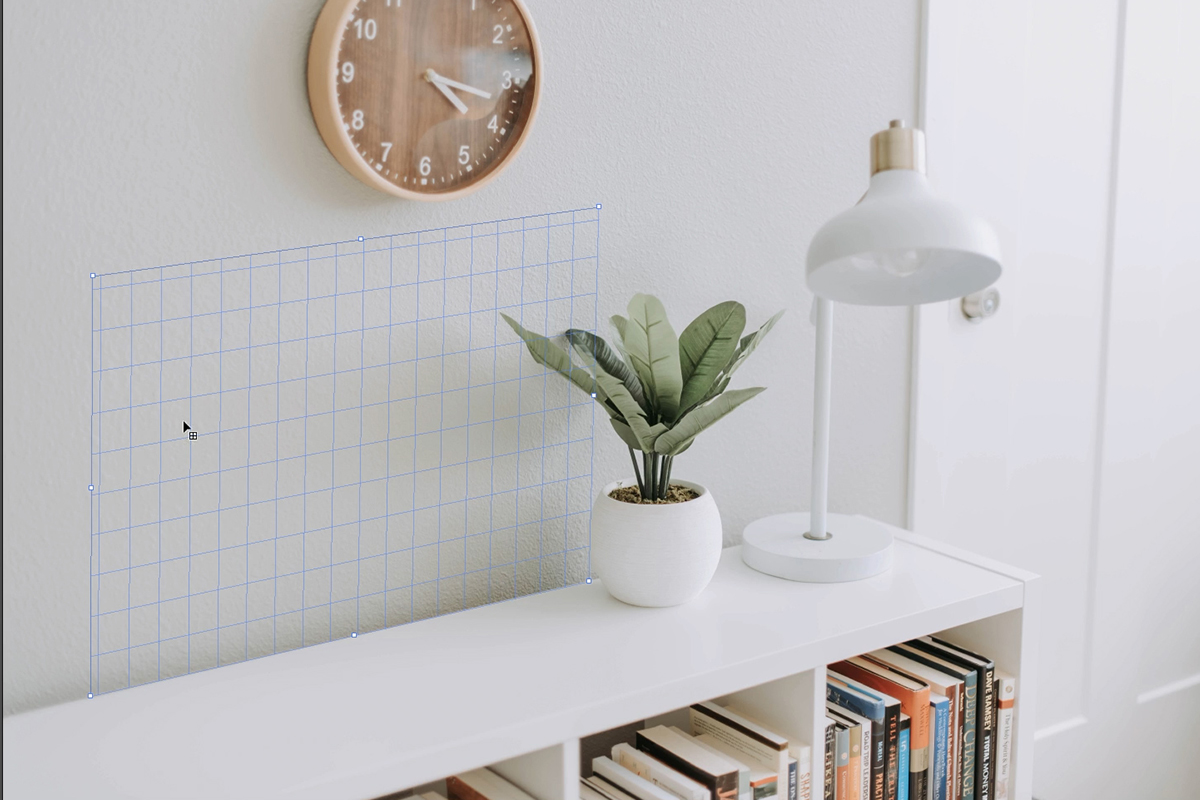
Select the frame Layer and then hit CTRL or CMD + C to copy it. But don’t paste it yet! We need to get the Vanishing Point Filter first. Click on the Filter Menu and then Vanishing Point. The Vanishing Point dialog will appear. To use it, simply click on any well defined corners and edges in the photo where you want to place the frame. Once you create four corners, a grid will appear in the perspective that you defined. We placed two corners along the back edges of the bookshelf, and then two corners above that create a line parallel to the back edge of the bookshelf. Be sure to make it large enough to hold the picture frame that we’re about to paste in!
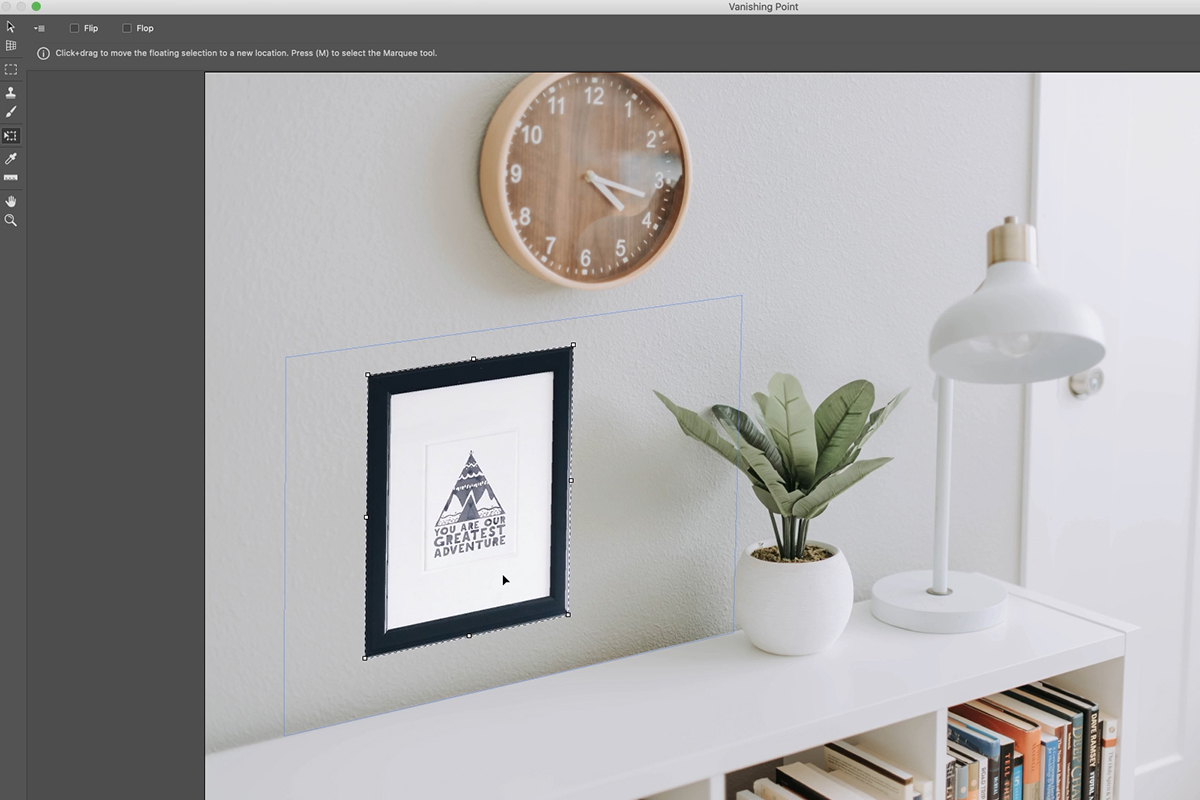
Once the grid is made, hit CTRL or CMD + P. Photoshop will automatically paste the frame into perfect perspective! If it doesn’t look perfect, you can move and adjust those points you made until it’s right.
Adding Depth & Dimension
We’ve got the frame in the right perspective, but it’s still doesn’t quite fit with the bookshelf image. For starters, the frame still looks like a two-dimensional object–since we’re seeing it from an angle now, some of the side and top edges should be visible. We can add the illusion of top and side edges by simply painting them in.
Creating Edges
Create a new Layer below the picture frame Layer. Then hold CTRL or CMD and click on the frame Layer to create a Selection around it. Use the Move Tool to carefully nudge that Selection up and to the left until it’s about the same distance away from the frame as the edges would be thick.
Then, click on the Layer that we created below the frame, grab the Brush Tool, Sample a color from the frame nearby where you’re going to paint, and then paint in the edges! You can use the Polygonal Lasso Tool to connect the corners and fill in those areas with the Brush Tool to complete the effect.
Creating Shadows
Where there’s light, there’s shadow. Looking at the bookshelf image again, we have light coming from the right side and shadows being cast to the left from the various objects in the scene. Our goal is to give the frame a shadow that closely matches the shadows from those objects. How can we do it? Well, let’s keep it simple and use the tried-and-true Drop Shadow Layer Effect.
Since we’ve added some Layers to the frame (the edges we painted in), we need to make sure the shadow reflects those areas as well. Fortunately, you can add Layer Styles to entire Groups. Group all of the frame Layers together, and then click the fx icon below the Layers Panel. The Layer Style window will open and you’ll find the Drop Shadow option at the bottom of the left panel.
Again, the goal is to match the shadows of the other objects in the scene, so it’s just a matter of dialing in settings that achieve the same look. Use Opacity, Distance, Spread, Blending Modes, and you can even try and sample a color from an existing shadow using the color picker.

We found that the settings above worked well for the effect. Shadows made easy!
Completing the Composite
We’ve come a long way, but it doesn’t stop here! Compositing involves a lot more work, like matching light levels, hue, saturation, and adding additional light and shadow effects. We cover all of them in the video above, and we have several great courses on compositing fundamentals like How to Match Light & Color (30 Days of Photoshop) and Intro to Photoshop Compositing for Beginners .
Take your time and practice with this exercise! Not only will you be able to place any object into another scene in perfect perspective, but you’ll be well on your way to mastering professional compositing skills.