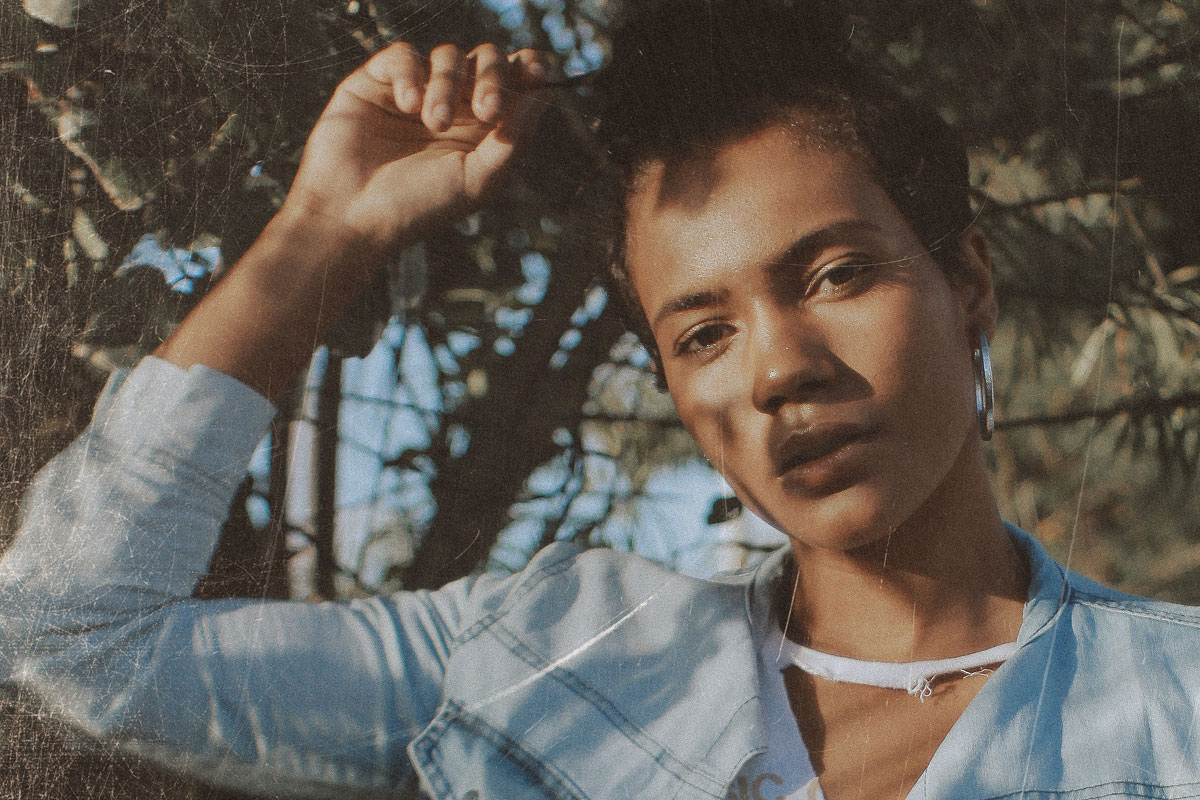

ORIGINAL
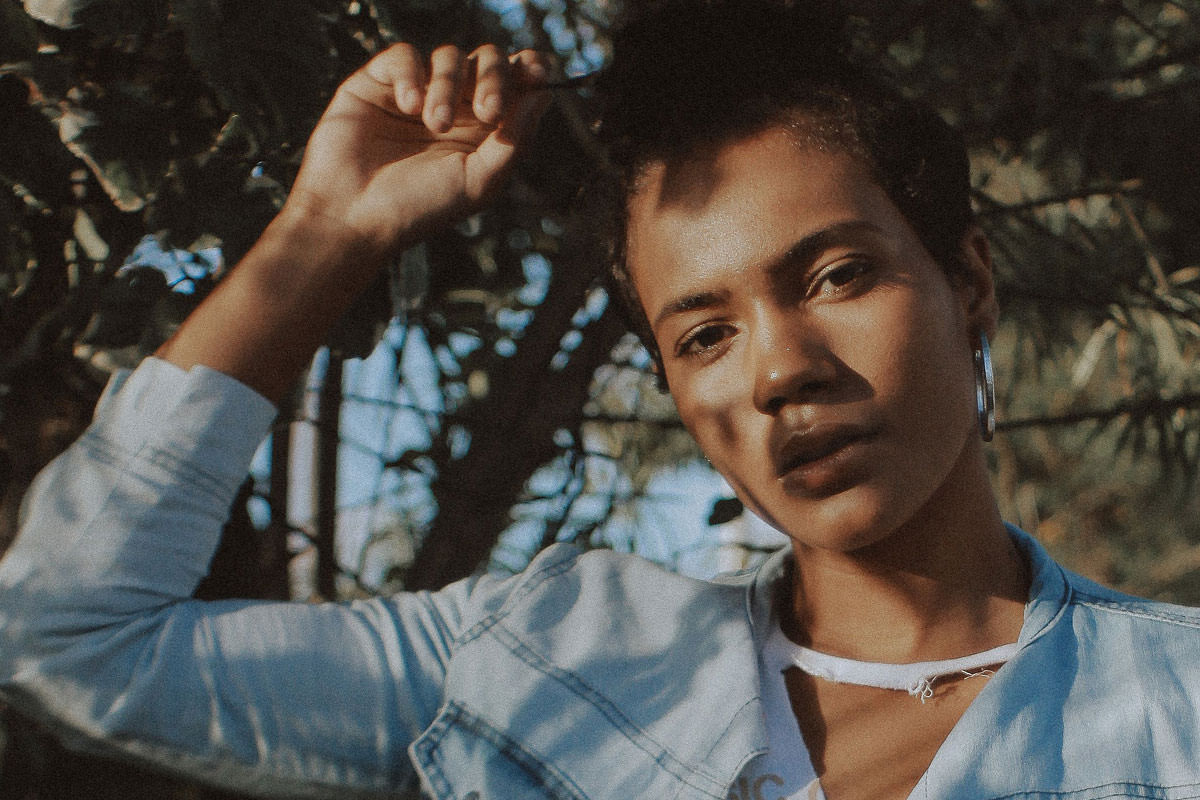
AFTER TEXTURE
Download Sample Images
Click the link below to download the sample images and follow along with this tutorial.
DownloadTutorial Description
Give a wedding photo a romantic feel by adding a vintage, weathered look. Add some grit and grunge to an album cover by adding scuffs and scratches. Help a business stand out by adding some theme and character to their logo. Adding textures can often be a great finishing touch when creating memorable pictures and, in this tutorial, we’ll show you how to do it. In addition to a sample image, we’ve included two custom textures that you can start using to experiment with your own photos!
If you love those, try our exclusive Dust & Scratches Texture Pack!
Add Textures to Your Photos in Seconds!
Adding textures can give an image an entirely different feel. It’s up to you to decide when using a texture is appropriate but it can be done to almost any type of photo and there are countless types of textures to try!
Applying textures in Photoshop is incredibly easy! Once the texture is loaded as layer in a Photoshop document, simply change the Blending Mode to Screen. For further refinement, use the texture in combination with layer masks, clipping masks, and tools like Blend If to get the exact look that you want! You can even combine multiple textures in a photo to make it even more unique.
Step-by-Step Tutorial
Download the Sample Image and Textures
DownloadOpen the Sample Images and Textures in Photoshop
First place the Photo Scratches-1.jpg, Photo Scratches-2.jpg, and How To Add Textures Into Photoshop.jpg into Photoshop by going to File and Open… or by dragging and dropping the files into the workspace.
To apply the texture to the main photo, select the Move Tool, which is located in the Tool Bar on the left side of the workspace. The Move Tool is the very first item in the Tool Bar and has four arrows pointing in different directions. Hold SHIFT and click and drag both textured images to the main image. The textured layers should appear as the top layers.
Add the Texture to Your Photo
While the main image is selected, hit F for Fullscreen on the keyboard to only view your main image with the textures.
If the textured images are larger than the main image, hit CMD or CTRL + T and hold SHIFT while clicking and dragging the mouse.
To maintain the aspect ratio while resizing, hold SHIFT + OPTN or ALT and click and drag the mouse until the layer is fitted.
Apply a Screen Blending Mode to the Texture Layer
Locate the Layers Panel on the right side of the workspace. In the Layers Panel, the Blending Mode is currently set to Normal. Change the Blending Mode from Normal to Screen to remove the dark background of the textured layer. When an object is light on a dark background, use the Screen Blending Mode, which makes the dark areas disappear and the light areas visible. In this instance, the dark background will disappear but the white textures will stay on the image.
To make adjustments to the textured layer, add Levels by hitting CMD or CRTL + L.
Notice the Levels window reveals how much light and dark aspects are in the image. Underneath the Input Levels graph are three small sliders, one located on the left, middle, and right side. By dragging the leftmost slider to the left or right, the textured layer will become darker or lighter. By doing this, the textured background becomes darker and the original image is easier to see. For this layer, move the left slider to the right to 17 and click OK.
Add a Second Texture for Variety
Now, apply the same steps for Layer 2 as you did with Layer 1. Locate Layer 2 in the Layers Tab and make the layer visible. Like before, change the Blending Mode from Normal to Screen.
To make any adjustment to the Layer 2, load a Levels Adjustment Layer by hitting CMD or CRTL + L.
Change left slider to 16 and click OK.
Apply a Layer Mask and Blend
Notice how Layer 2 has some scratches intersecting with the main focus of the image. To customize the layer, add a Layer Mask, which allows changes to the selected layer without completely deleting the information. To add a Layer Mask, locate the bottom of the Layers Panel and click on the rectangle with a circle in the middle. This symbol represents the Layer Mask. Be aware that with whichever layer is selected is the image that will have a layer mask added to it.
Once the Layer Mask is added to the selected layer, notice a white box appear next to Layer 2 in the Layers Panel.
To temporarily erase aspects of the selected layer, hit B on your keyboard to select the Brush Tool in the Tool Panel.
Now, to make sure you are painting on the Layer Mask, select the white box next to the image in the Layers Panel.
On the bottom of Tool Panel, notice how there are two colored boxes. The color on top represents the foreground color and the color behind it represents the background color.
To change the colors, double-click on either the foreground or background colored box. The Color Picker (Foreground Color) or the Color Picker (Background Color) window will appear depending upon which one was selected. Select black as the foreground color and white for the background color. Once you have selected the color for both the foreground and background, click OK.
With the Brush Tool activated, notice the different ways to customize the Brush Tool at the top of the workspace. In this case, set the Brush Mode to Normal and the Flow to 20%. Selecting a lower number for Flow is a great way to blend an effect.
To hide texture that is covering the subject in the image, paint while using black. To reveal texture that was hidden, hit X on the keyboard to switch colors and paint with white. Notice the Layer Mask reveal where black or white was painted.
Add Color to the Texture Layer
The provided textures are black and white but Hue/Saturation makes it possible to add color to your texture.
First, turn off Layer 2 in the Layers Panel and select Layer 1.
Hit CMD or CTRL + U on the keyboard to select Hue/Saturation. The Hue/Saturation window should appear with an array of different options to apply color to the selected layer.
In this case, make sure the Colorized box is checked in the bottom right corner of the window.
Try moving the slider under Hue and notice as the slider moves the color changes in the textured layer. To warm up the image, choose an orange tint or type in 27 next to Hue.
Bring the Saturation slider down to 18 and click OK.
To see a before and after of the textured layer, hit CTRL or CMD + C. By adding color, the texture blends more into the image.
Notice how the color blends in better in the image.
Add a Texture to a Logo in Photoshop
To add a textured layer to a logo, go to File and down to Open….
Select Textures on Logo.tif and click Open in the bottom right corner of the window.
Now, transfer the textured layers to the logo layer by holding SHIFT and click and drag while using the Move Tool.
To resize the textured layer, hit CMD or CTRL + T and hold SHIFT and click and drag until the texture fits the image.
To maintain the aspect ratio, hold SHIFT + OPTN or SHIFT + ALT and click and drag to scale down.
Use a Clipping Mask to Apply the Texture to the Logo
To only apply the textured layer to the logo instead of the entire image, use a Clipping Mask.
Deselect the visibility on Layer 3 in the Layers Panel.
Right click on Layer 2 and select Create Clipping Mask. Notice how the textured layer is only visible on top of the center.
Now, make Layer 3 visible by clicking on the empty box on the left side of Layer 3.
To add a Clipping Mask to Layer 3, simply right click and select Create Clipping Mask.
Use the Move Tool to move the textured layer to the desired spot.
Change the Texture Blend Mode to Screen
Next, go to Blending Mode and change the Blending Mode from Normal to Screen for Layer 3 and Layer 2. Now the textured layer is on top of our vintage logo.
To resize the textured layer, hit CMD or CTRL + T and hold SHIFT and click and drag.
Adjust Levels to Change Visibility
To adjust the Levels, hit CMD or CRTL + L and slide the left slider in the Input Levels to 30 and click OK.
By doing this, the darks become darker and the layer becomes less visible.
Rotate a texture by hitting CMD or CRTL + T until satisfied.
Located the Layers Panel and lower the Opacity to 34%.


