Download Sample Images
description
Photoshop is full of both automatic and manual techniques that can help us cut out subjects from their background. But which method is better? You’ll have to watch to find out! (Just kidding, the answer is that both are great, especially when used together.)
Learn how to use Select Subject, the Pen Tool, Channels, the Brush Tool, and a free custom Photoshop Brush to make accurate selections and cutouts in just a few minutes.
Share
FAST & ACCURATE SELECTIONS
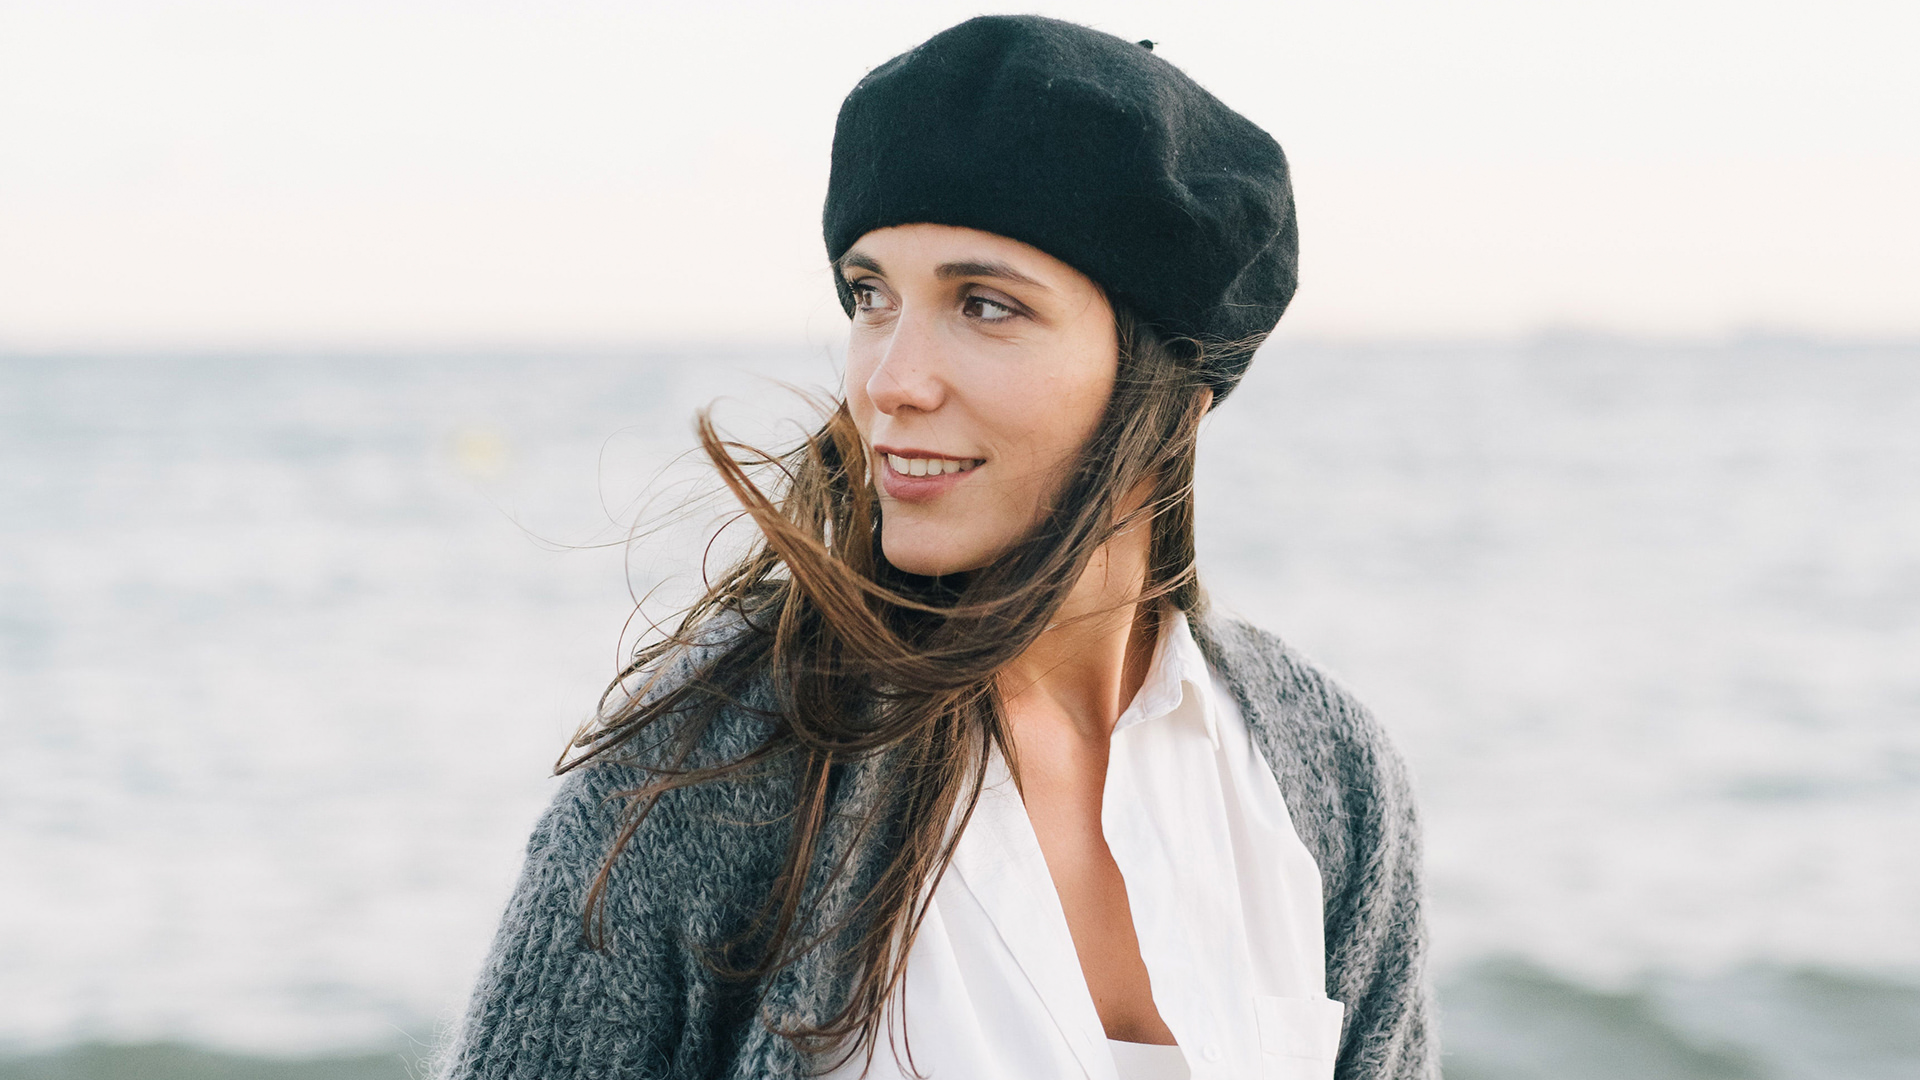
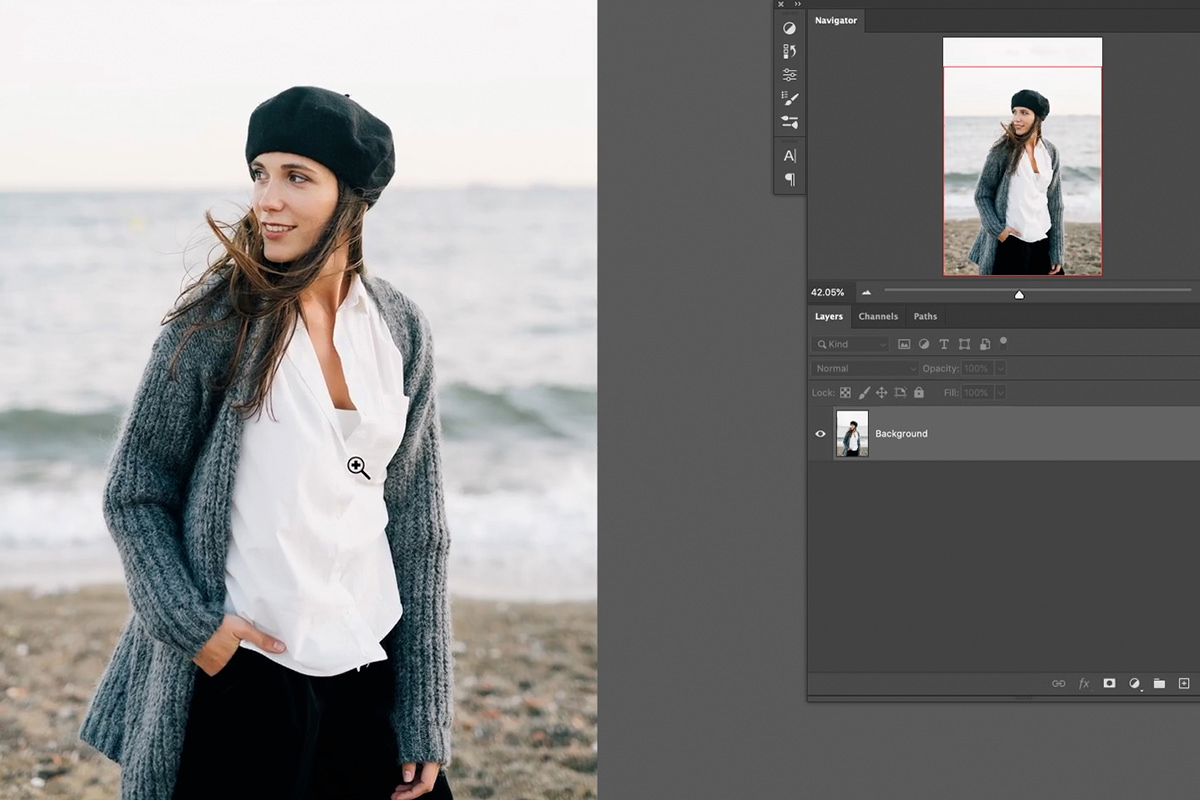
BEFORE
Remove Any Background in Photoshop
What are Selections?
Selections are one of the core features of Photoshop. They allow us to define an area in a photo that we can edit, remove, or mask away.
If you want to a cut person out from their background, you’ll need to first make a selection of that person. Sounds easy, right? Well, it can be. Photoshop has added a variety of automated selection tools over the years, tools that use machine learning and A.I. to determine what it is you want to be selected.
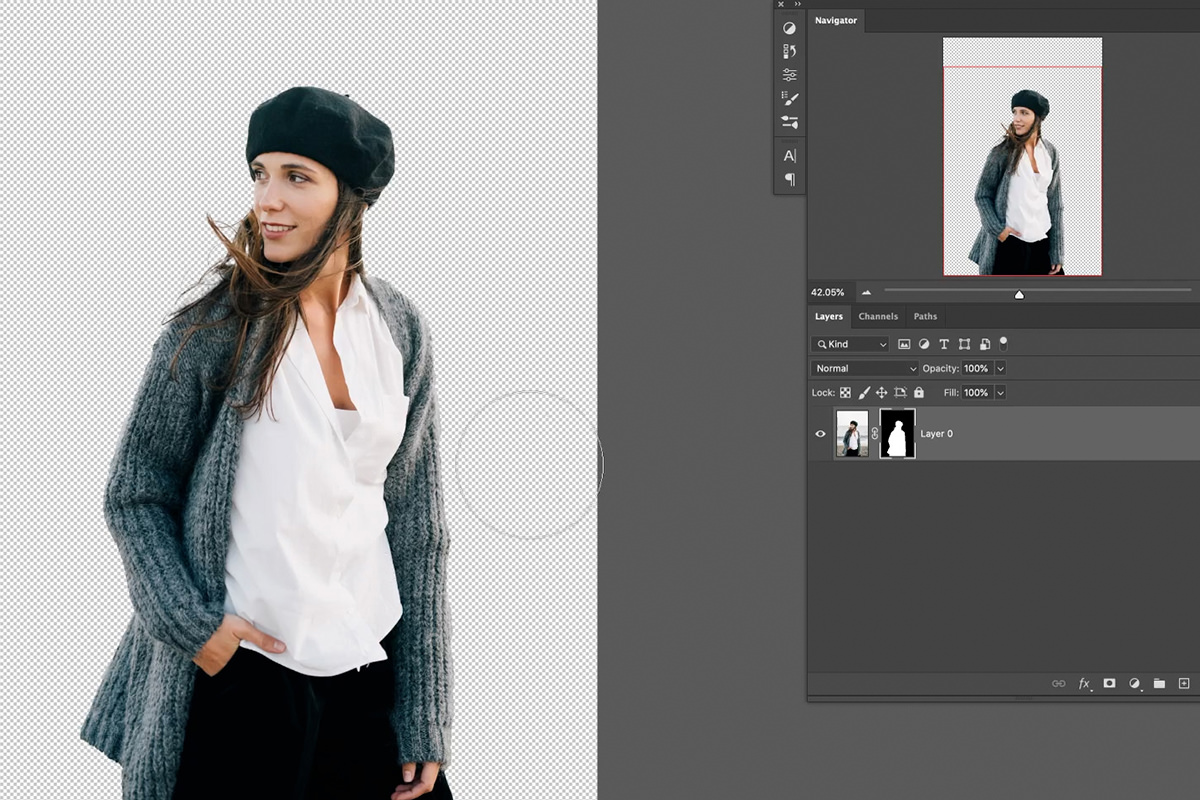
One of the automated tools we’ve grown fond of is Select Subject. You can find it by opening the Select menu and clicking on the Subject option.
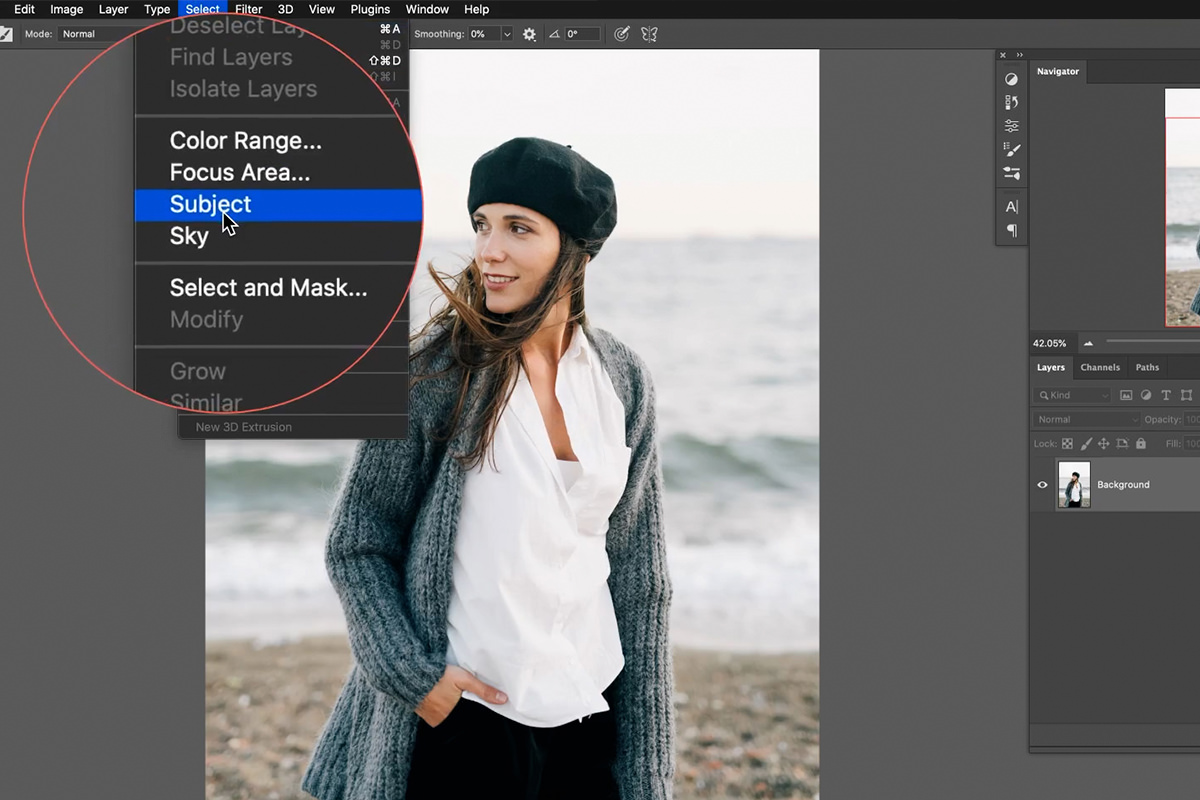
Select Subject could not be easier to use. Simply open a photograph that has a relatively well-defined subject, like our example portrait, click on the Select Subject option, and Photoshop handles the rest.
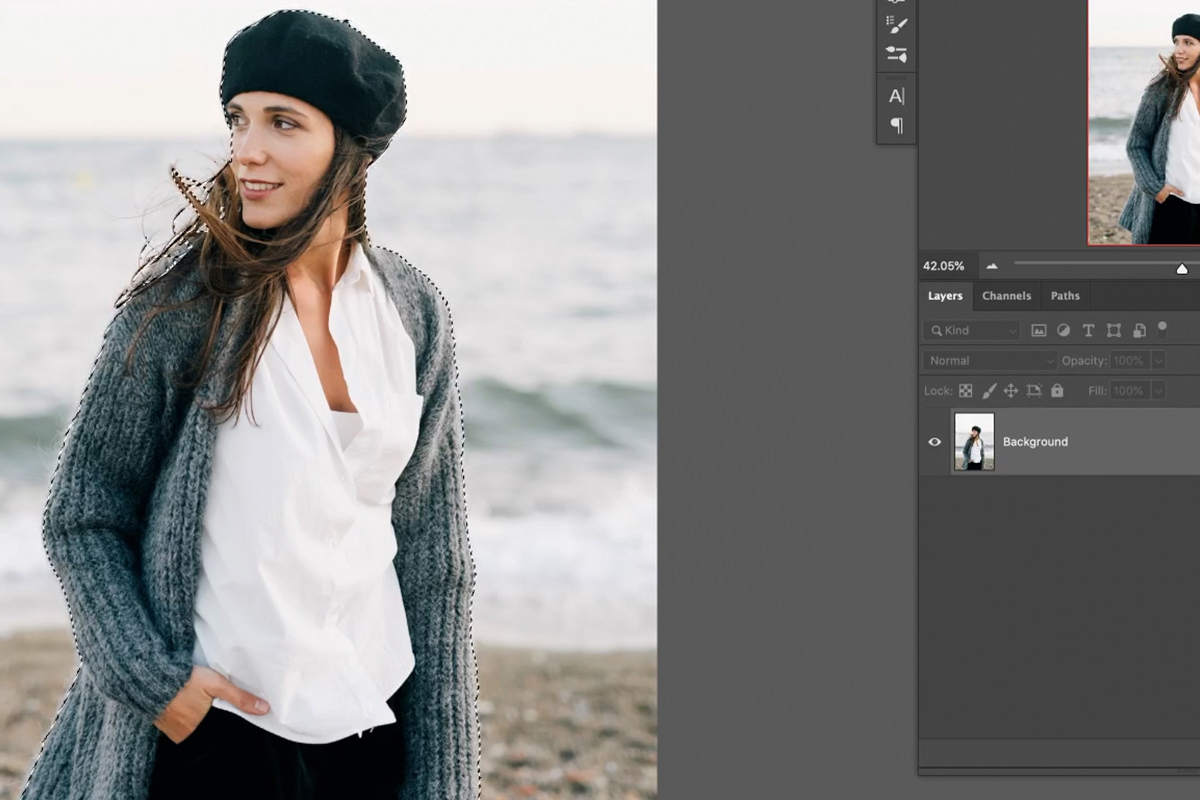
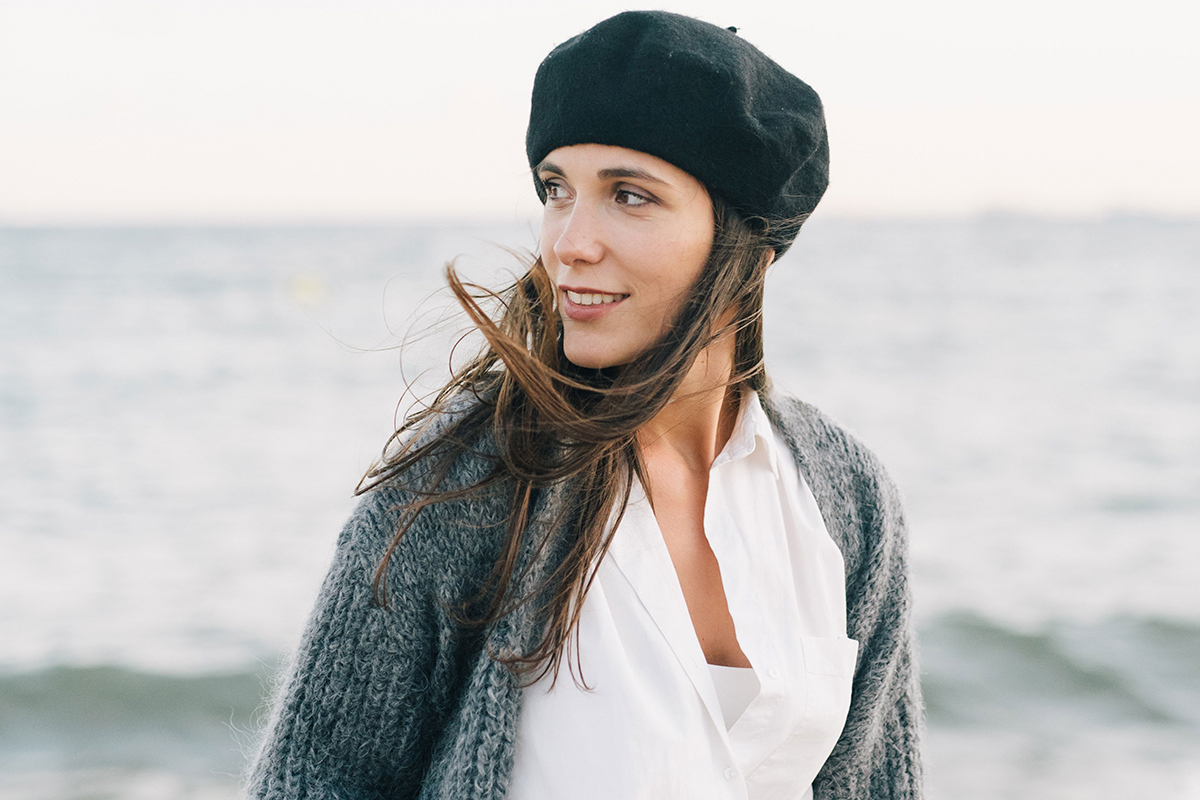
But, how well does it do? While zoomed out, it appears like it did a pretty decent job of making an accurate selection of the subject. Let’s take a closer look.
The most difficult, and often time-consuming, part about making selections is getting all those little details right around the edges of whatever it is you’re trying to select.
Hair is a very common culprit, so much so that we have an entire PRO course that covers this challenging task. Select Subject is great start, but if you need an accurate selection for professional work, this tool alone won’t cut it (ba dum tss).
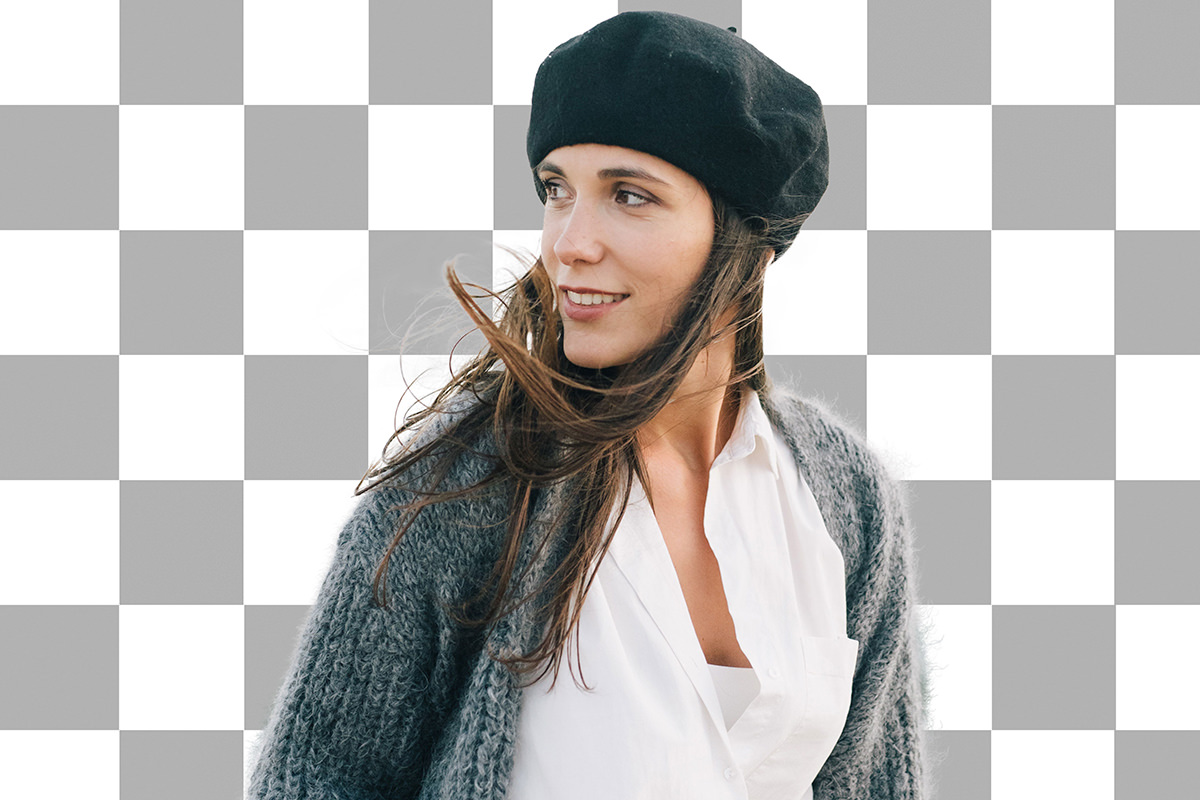
If, however, you’re just looking for very quick and rough cutout, Select Subject might be all that you need. Convert the selection made by Select Subject to a Layer Mask and, zoomed out, it might be passable if you place the subject on a new, relatively light background. A lot of the detail is missing, but it just might not be noticeable depending on how you plan to use the image.
So, what do you do if you need to capture those fine details in a selection?
Selecting Fine Details
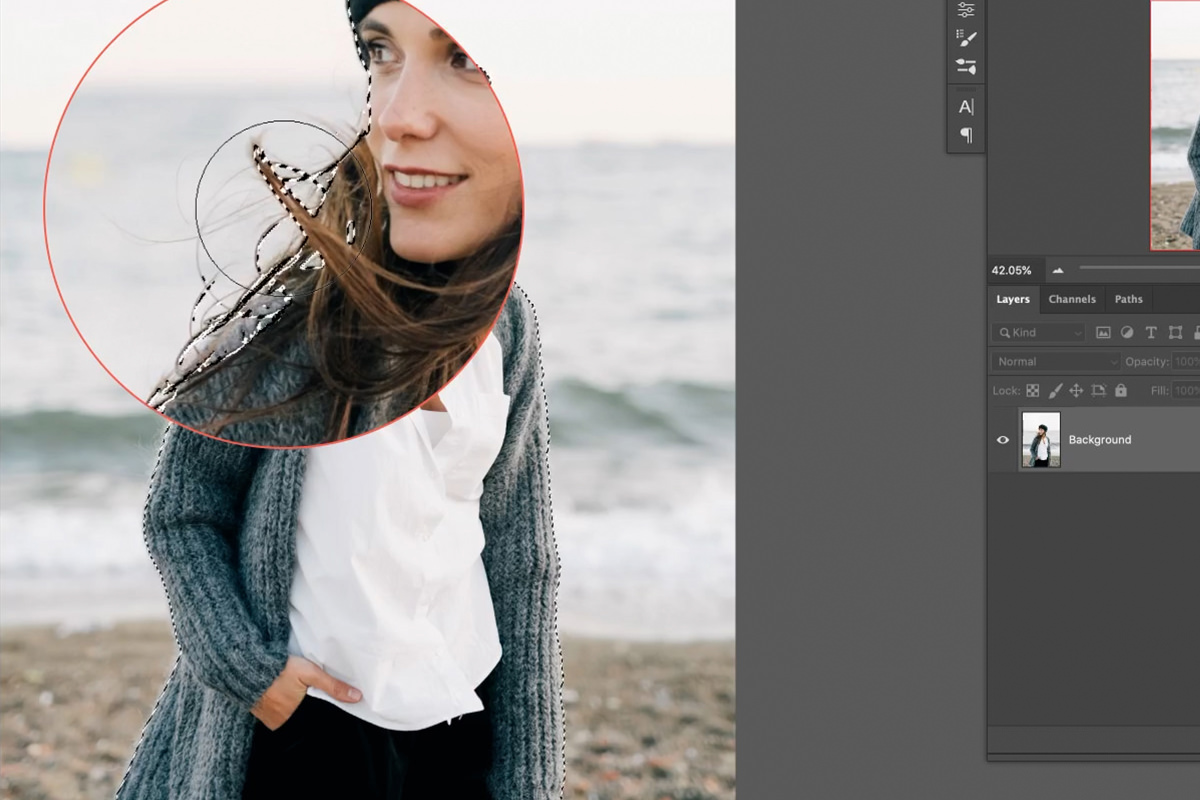
Let’s zoom in a bit and start taking a closer look at the edge details around the subject.
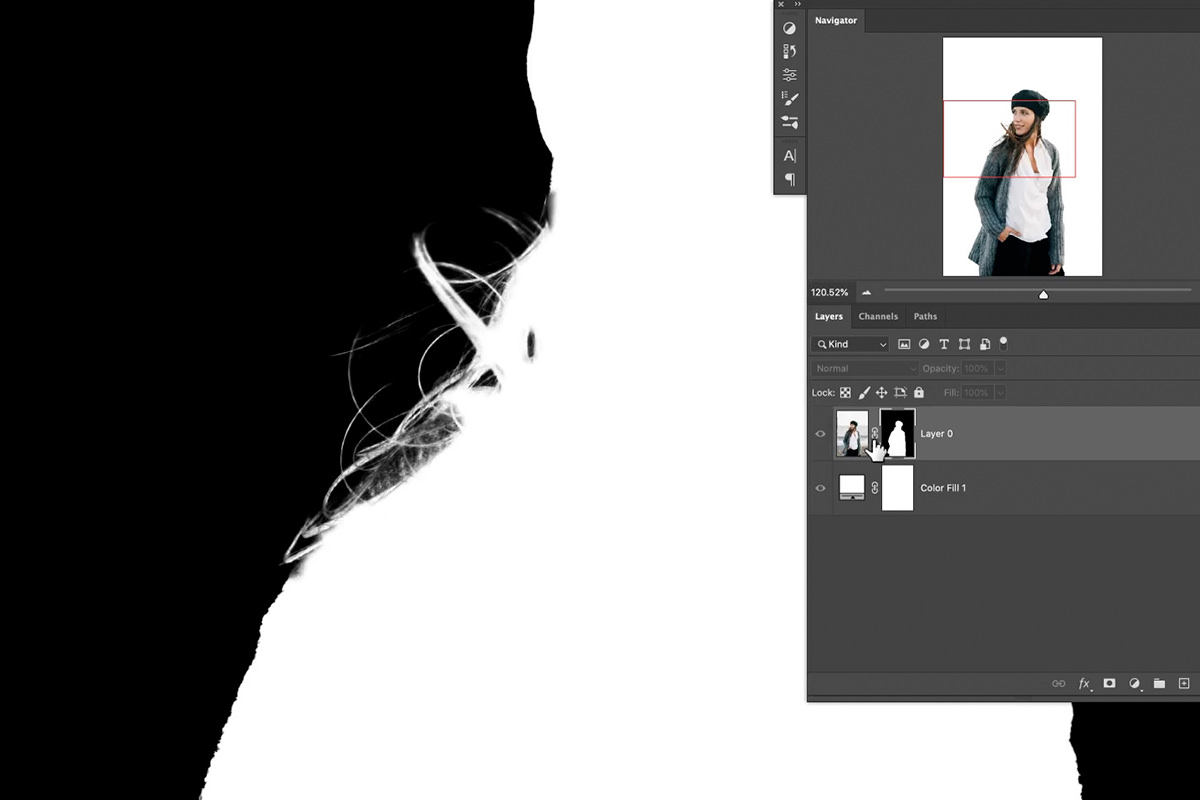
Hold ALT or OPTN and click on the Layer Mask we just created. Zoom in a bit on the hair and take a look at what Select Subject was able to capture. It did a decent job, but it’s easy to tell that many of the loose strands were cut off, and the selection overall is a lot muddier in areas of the hair closer to the body.
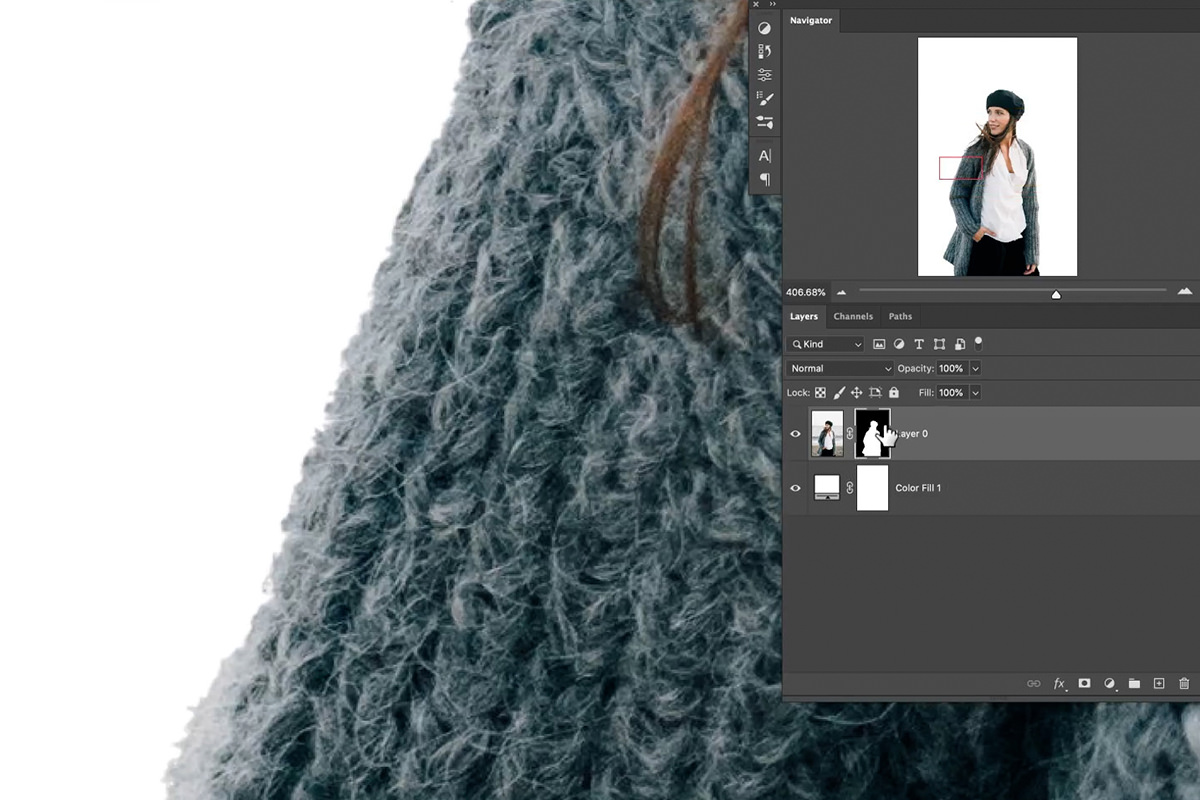
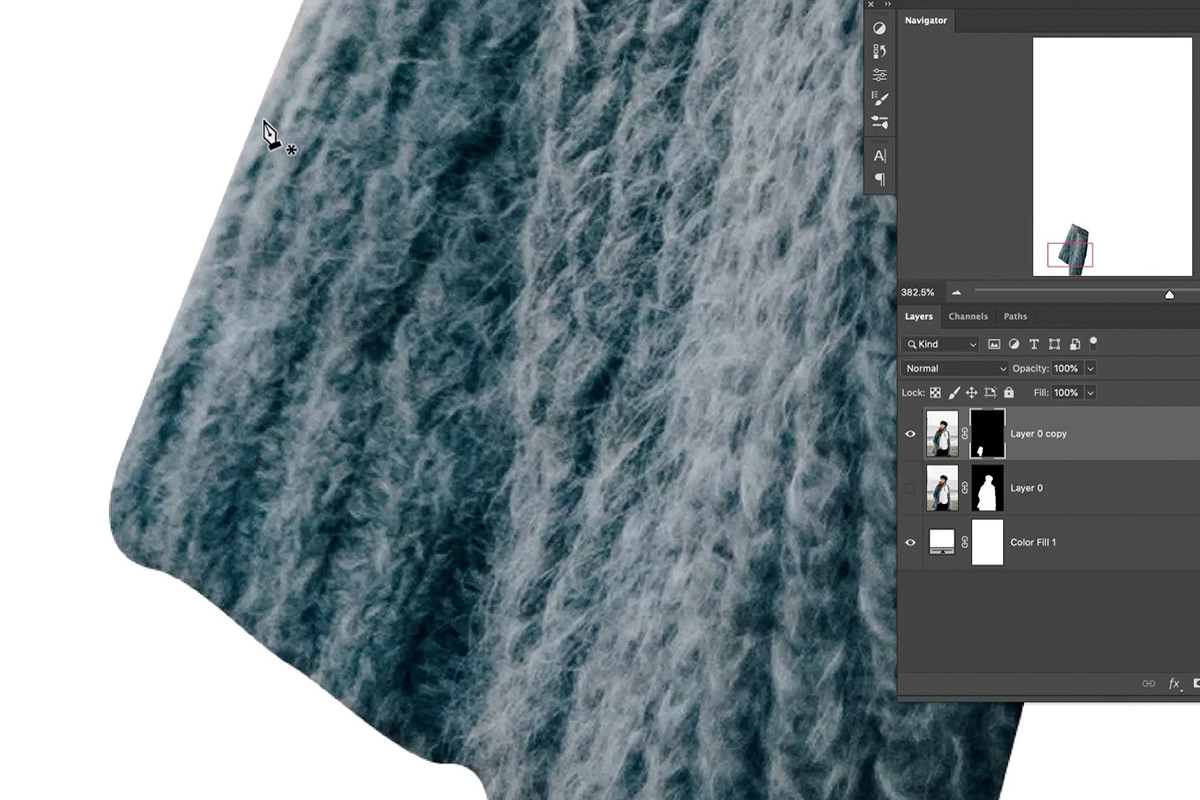
Next, return to the normal view of the Layer and move down to the edge of the subject’s sweater. Select Subject did have some issues capturing the the true edge of the material, but the inconsistent edge actually ended up looking pretty close to the natural texture.
Disabling the Layer Mask will reveal the natural edge of the sweater. There was quite a bit of information cut off–all of the loose fibers that extend out slightly from the fabric.
It’s up to you to determine if small details like this are important to include in your final image. Oftentimes, you can get by just fine with the work that Select Subject did to create a somewhat natural-looking edge.
If you do want to preserve as much of the tiny, original details as possible, we’ll soon take a look at how you can recreate them using some handy Photoshop tools.
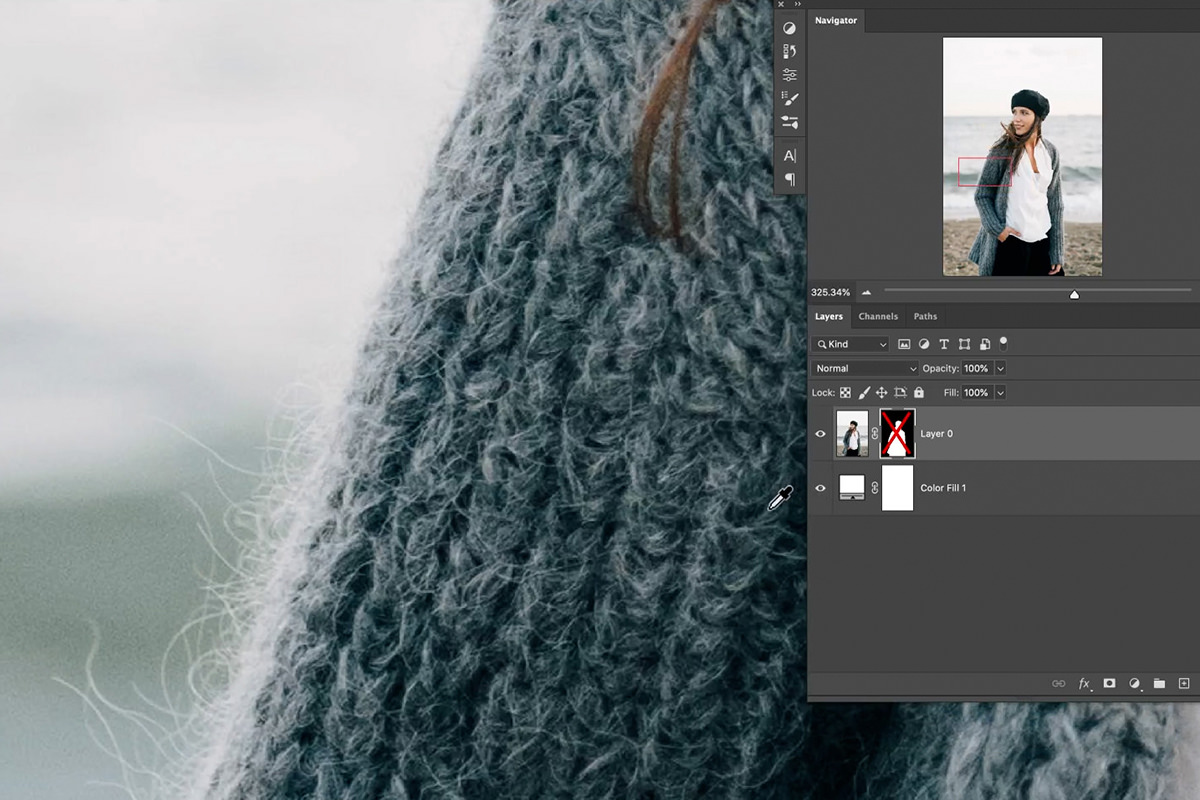
But first, let’s see what happens if we use an ultra-precise, manual tool to create a selection of the sweater.
Manual Selections with the Pen Tool
We’ve covered the Pen Tool extensively in both free tutorials and PRO courses, so we won’t go into much detail on how to use it here.
Just know that it requires more time and effort than many of the other selection tools, but often yields the most accurate results.
Given how precise a tool it is, let’s try using it to make a different selection of the subject’s sweater.
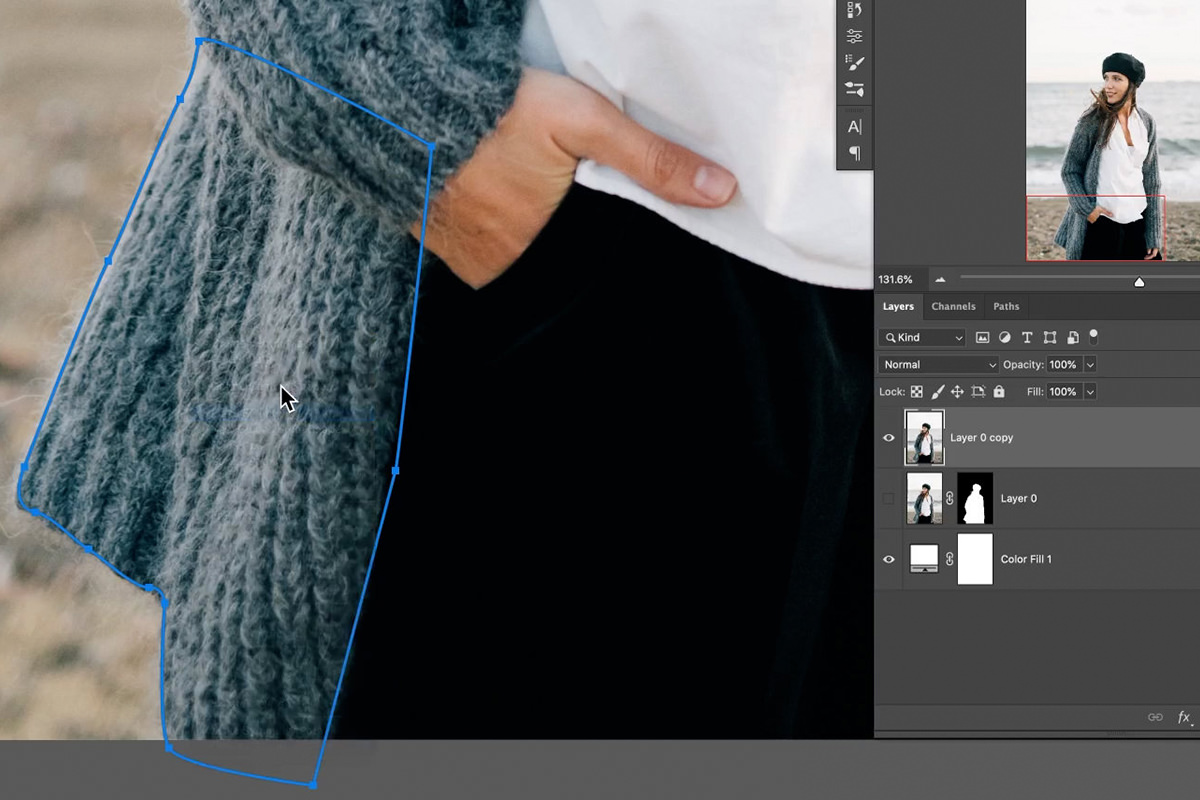
Trace around the edge of a relatively small area of the sweater. Don’t worry about it being perfect or accidentally including unwanted parts (like the subject’s hand, for instance). This is just a test to see how it handles those detailed edges.
Once the Path is finished, right-click and choose Make Selection. Convert that selection to a Layer Mask and take a look at the edge of the subject’s sweater.
That doesn’t look right, does it? The Pen Tool is a powerful option for many selections, but when it comes to soft edges and tiny details, it is far from the best choice.
In this particular comparison, Select Subject did the better job. Even though, technically speaking, Select Subject was less accurate, it accidentally created a more natural-looking edge along the selection of the fabric.
Recreating Fine Details with the Brush Tool
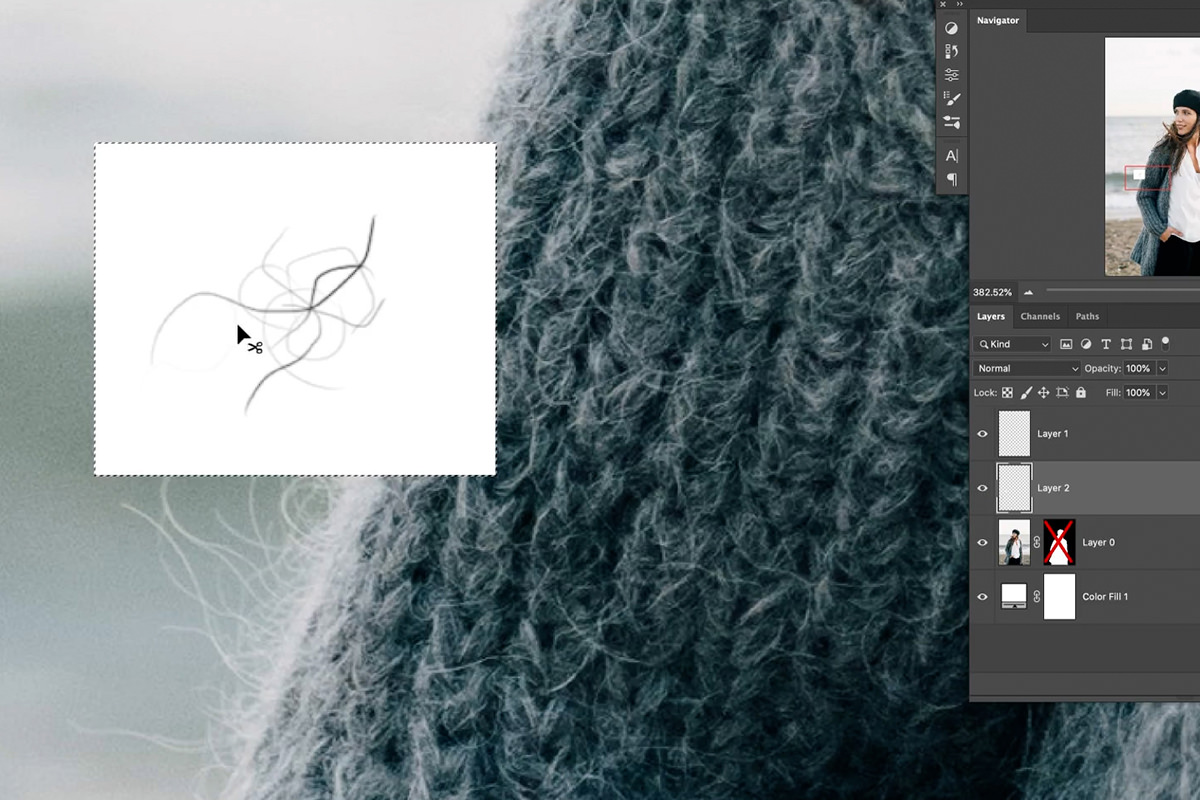
Back to what we mentioned earlier: how can we recreate those fine details that have been missed by our selection attempts thus far? The trick here isn’t to try and capture them (although it is certainly possible with some selection tools), but to recreate them.
Rather than painstaking effort to get an absolutely perfect selection around the edges of a subject, you can use custom Brushes in Photoshop to recreate natural edges and natural variation found in clothing and hair.
Refer to the video for the step-by-step process (and the final Brush is included in the download for this tutorial) of creating the custom Brush. The goal when creating a custom Brush like this is to try and match the size and detail of the material you’re trying to replicate.
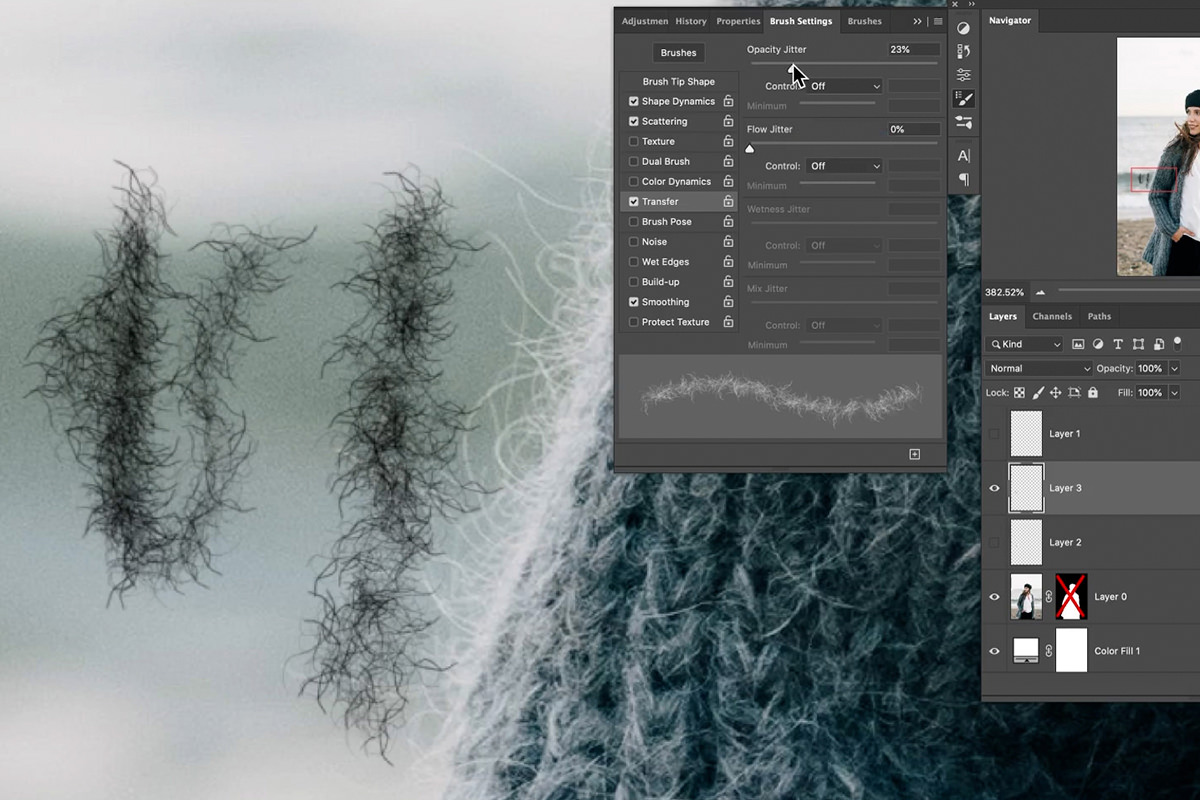
And then, using the Brush Settings Panel, adjust the settings so that it has a natural randomness to it.
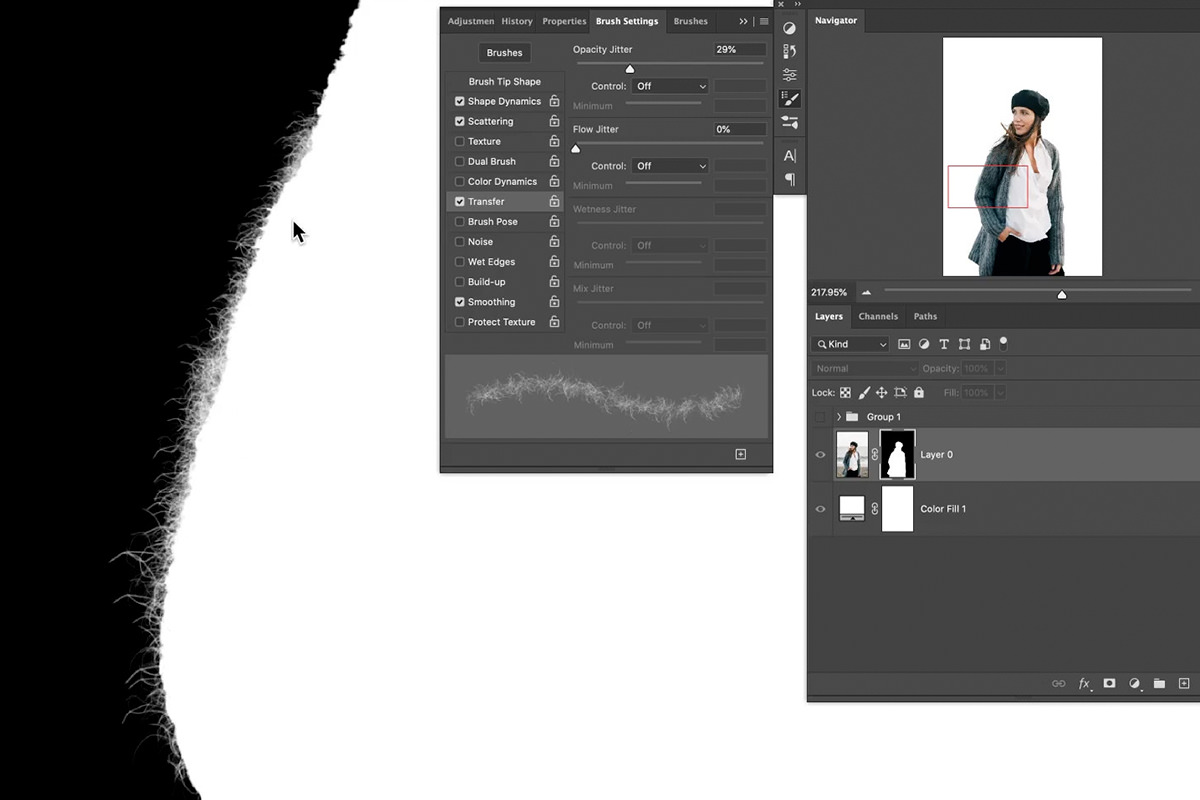
You can use this Brush to paint white on the Layer Mask along the edges of the original selection. This will make any edges that were cut off visible, while adding in a texture that matches the original.
Refine a Selection with the Brush Tool
Sometimes automated tools will accidentally trim off a little too much from the edges of important areas, like faces and body parts.

One of the simplest ways to refine a selection is to simply zoom into the image and paint with white/black on the Layer Mask to recover/remove areas.
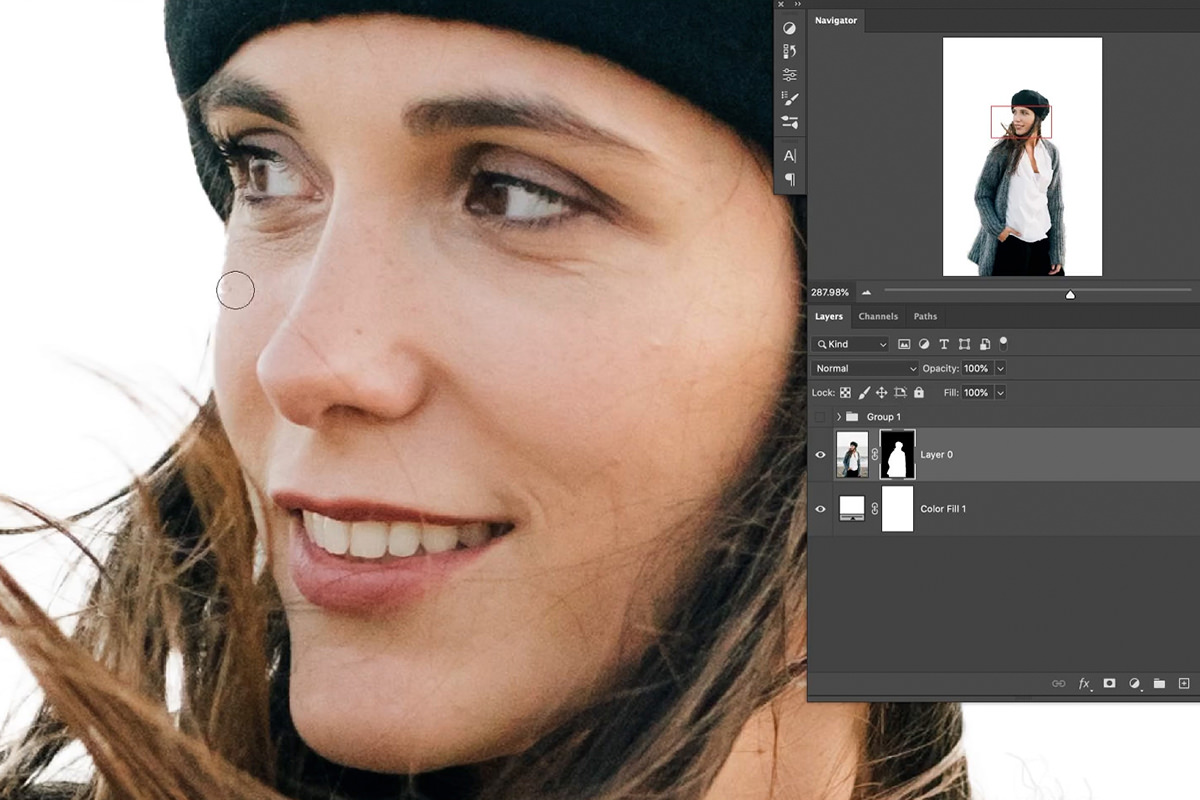
While it isn’t the best option when working with soft, detailed areas like hair or textured fabric, it can be a great option for relatively flat, somewhat soft edges like skin.
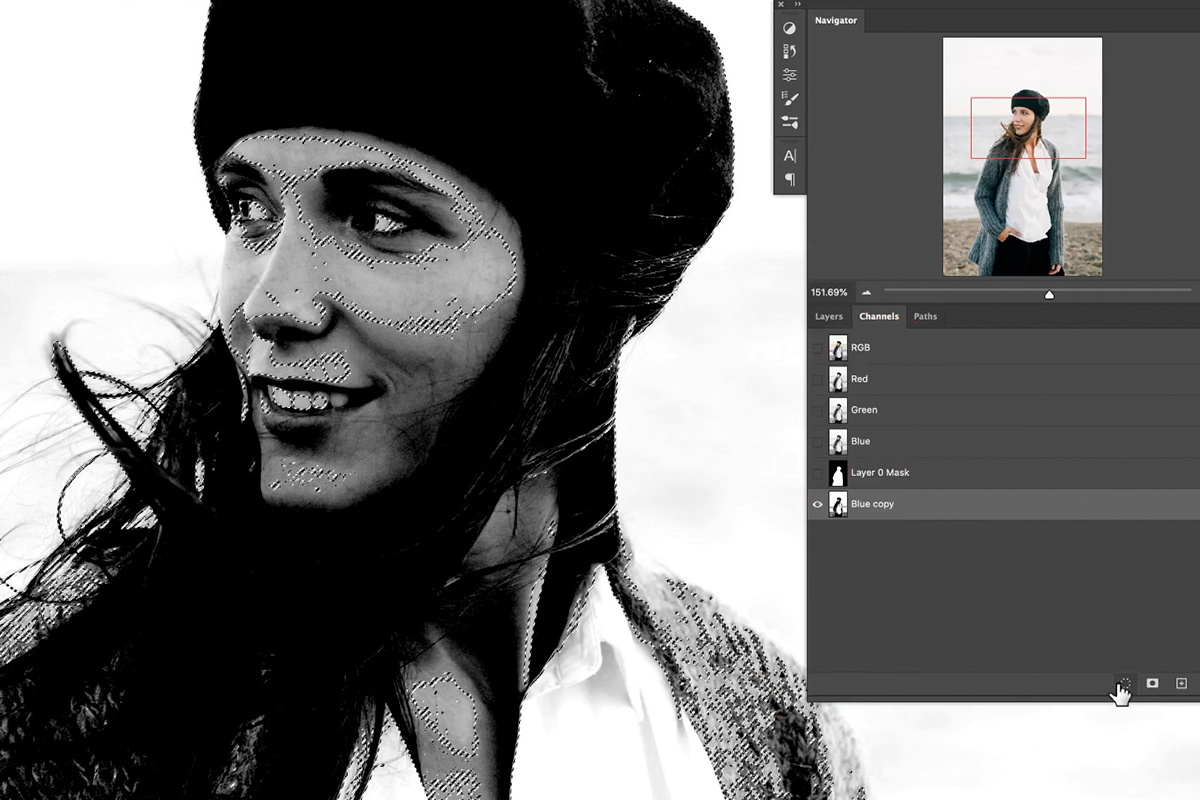
Select Hair with Channels
When you want to make a detailed selection of hair (or any soft, amorphous object), there’s no better tool for the job than Channels.
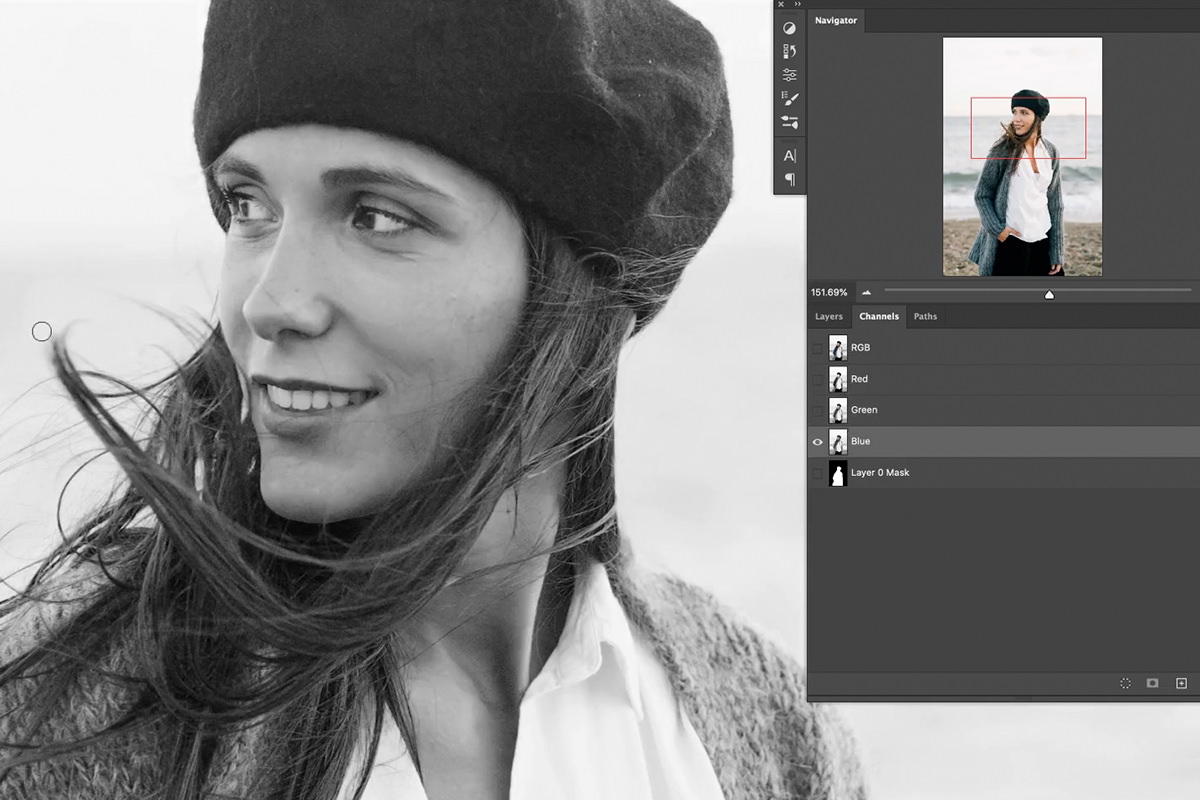
Channels allows us to make a selection based off of the contrast in an image. So, in order to get an accurate selection as possible, we need to find the Channel with the most contrast, and then enhance that contrast.
Under the Channels tab, click on each of the color channels, paying close attention to the contrast of the subject versus the backround. In our example image, the blue channel contained the most contrast for us, especially around the face and hair.
Once you’ve found the channel with the most contrast, duplicate it (Never make changes to the originals as it can distort the colors in your project). Then, with the duplicated channel active, hit CTRL or CMD + L to apply a Levels Adjustment.
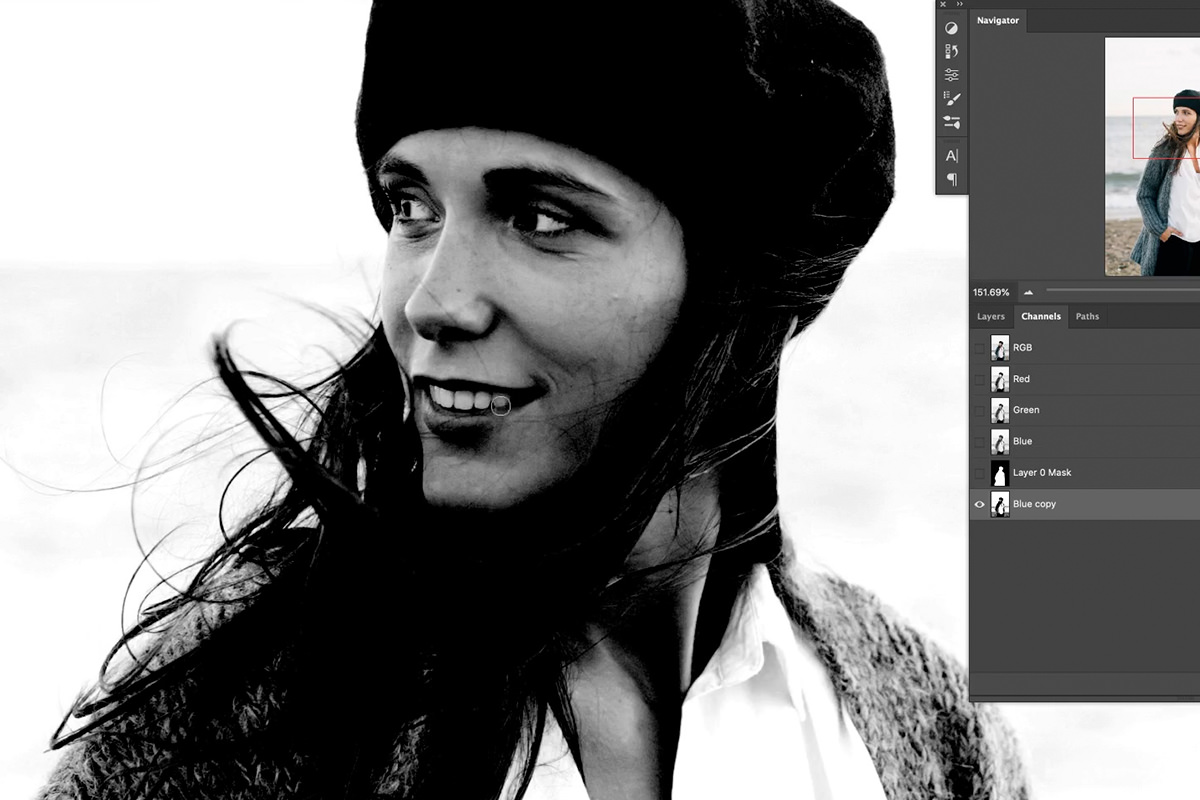
Use Levels to exaggerate the contrast. We want as much separation as possible between the background and the details that we’re trying to select.
Then, hold CTRL or CMD and click on the duplicated channel. This will create a selection of the lighter areas. Hit CTRL or CMD + SHIFT + I to switch to the inverse of that selection (to select the darker areas, or the hair in our example).
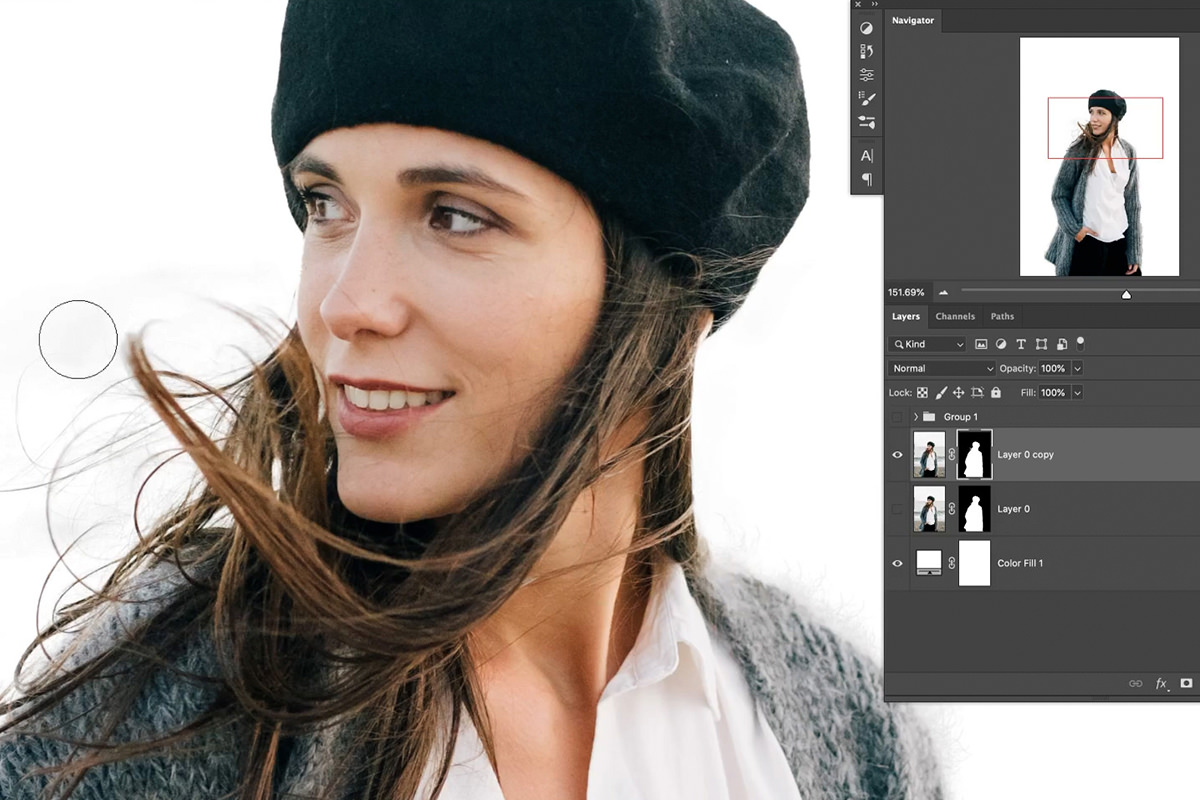
Then, with the new selection active, click on the Layer Mask of the image you’re working on. Paint with white over the hair and watch as all those fine details appear with much great precision than before!
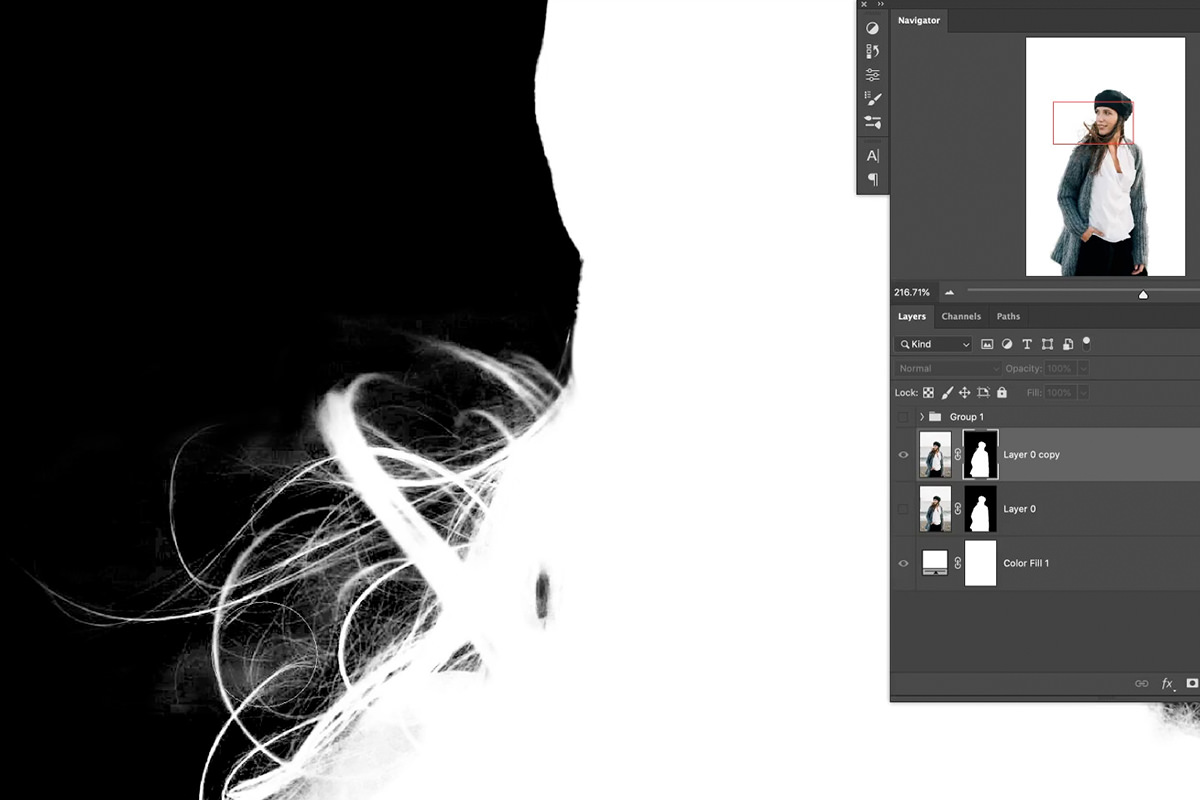
Taking a look at the Layer Mask, it’s easy to see the difference between what Select Subject captured versus what Channels was able to capture.

Create a Solid Color Fill Layer behind the subject and zoom out a bit. You should have an ultra-precise cutout of the subject with all of the beautiful, natural details that otherwise would have been lost.
Automatic or Manual Selection Tools
Rarely is there a “one-size-fits-all” tool in Photoshop. This is especially true of selections due to the sheer variety of objects, textures, surfaces, and details we end up working around in photographs.
If you want the best possible selection, use every combination of tools at your disposal! Start with automated tools, as they can ultimately save you a ton of time. Then look at the results and use more manual processes to fix and refine the selection until you get a detailed, professional result.