Download Sample Images
description
Join us as we break down the differences between sharpening in Photoshop versus Lightroom! Learn multiple techniques to sharpen to your photos in both programs, from the Sharpen Sliders and Adjustment Brush in Lightroom, to the the Sharpen Tool and High Pass Filter in Photoshop. Which method do we prefer? Watch to find out!
Sharpening has never been easier than with our exclusive PHLEARN Sharpen Action. Take your sharpening skills to the next level, and do it in a fraction of the time!
And if you want to learn professional sharpening from scratch, check out our PRO tutorial How to Master Sharpening in Photoshop.
Share

LEARN SHARPENING IN LIGHTROOM & PHOTOSHOP
A PHLEARN Sharpening Showdown
Why do we Sharpen?
Let’s say we’ve taken a photograph, a portrait, and our subject is perfectly in focus. Sure, we can go through the process of editing the image, adjusting exposure, color, and maybe removing some distractions and blemishes. But why would we need to sharpen? The subject is in focus after all.
For starters, unless you’re shooting with extremely expensive and high-end gear (which nobody should have to worry about using unless you’re shooting top-end commercial work), cameras and lenses will almost never provide perfectly sharp in-focus areas. So most photos we take could use just a bit of general sharpening in post-production to compensate.
But more importantly, most steps in the photo editing process revolve around one key goal: to guide the viewer’s eye to the central subject of the image. And our eyes are naturally drawn to certain characteristics in a photograph. When we look at a photo, we tend to first look at areas that are brighter, areas that are more colorful or saturated, and areas with higher contrast. What we’re most concerned with today as that last bit.
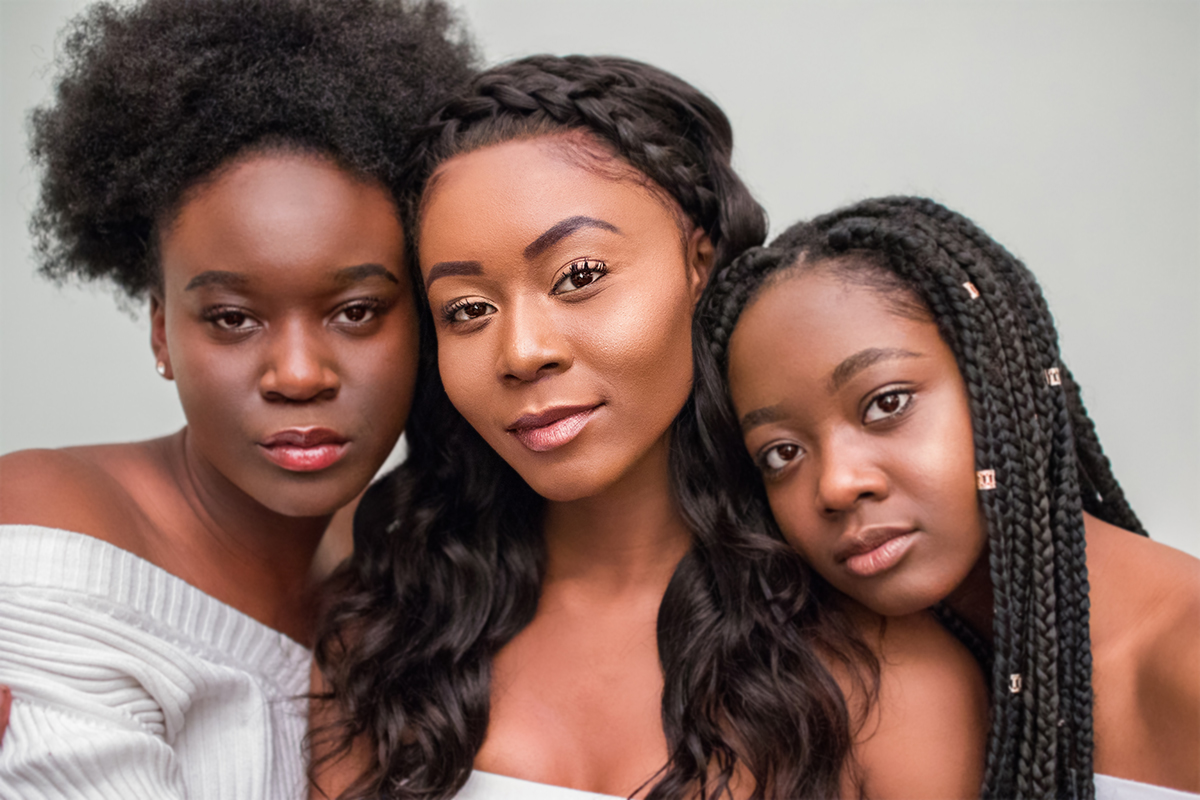
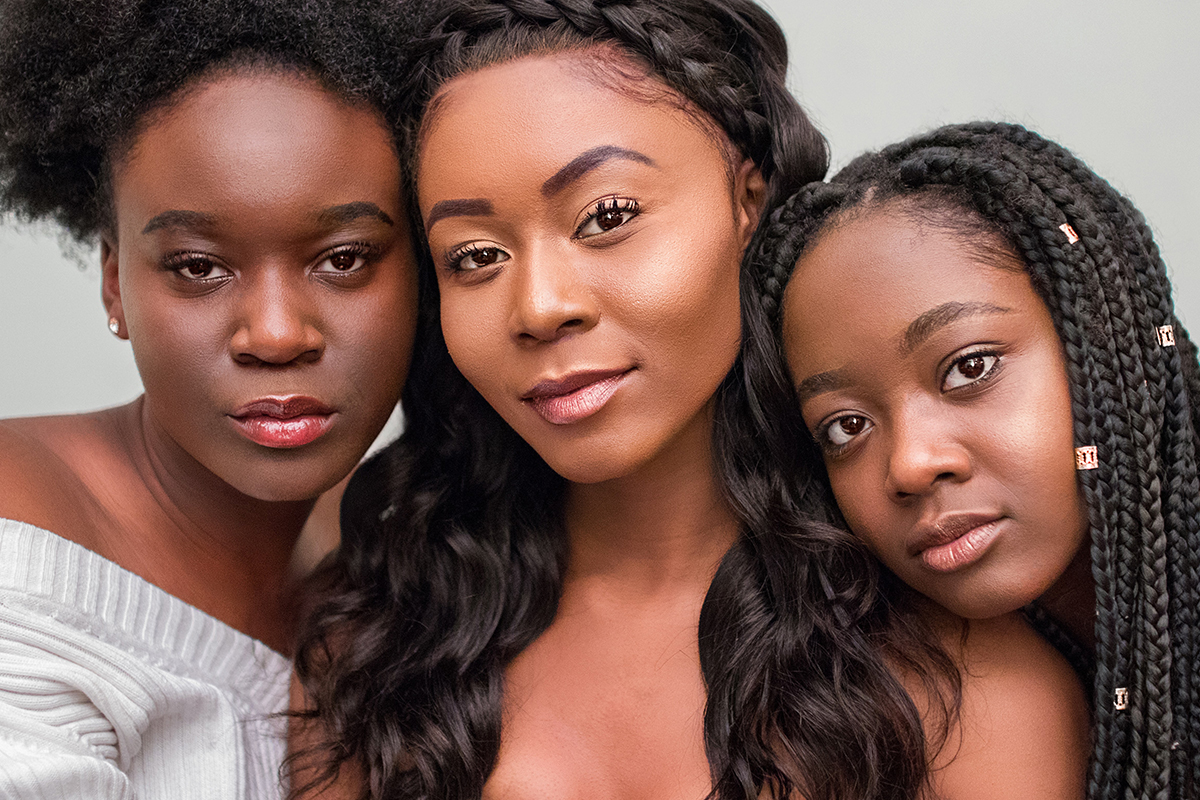
Which face does your eye see first? This example is exaggerated, but the woman in the center has sharpening applied to her face, while the other two women have a slight blur. Our eyes immediately try to find the sharpest part of an image, so we tend to see the center woman first.
Sharpening is simply the process of carefully increasing the contrast of particular areas of an image. So once you’ve adjusted the exposure and color to fit the photograph, sharpening is your final step to making sure that attention goes exactly where you want it to.
How to Sharpen a Photo
We’ve all likely seen sharpening tools before. Not only are there several options in both Lightroom and Photoshop, but every photo app on your phone has sharpening options as well. We’re sticking with Lightroom and Photoshop because they’re what most people will be using when they want a professional-grade finish. But we can still break down the different tools each software offers, and also answer the ever-important question: which program does it better?
Sharpening in Lightroom
Many professional photographers spend most of their post-processing time in Adobe Lightroom. Not only is it a powerful editing software, but it’s also the best solution for quickly importing, organizing, and culling hundreds, or thousands, of images at a time.
Where Lightroom tends to lack in comparison with Photoshop, is in it’s ability to make small, carefully targeted adjustments. It certainly has tools for both global (the entire image) and local (a smaller portion of the image) editing, but they’re just not as quick and flexible as their Photoshop counterparts.
Let’s take a look at the sharpening process and Lightroom and see if this comparison holds true.
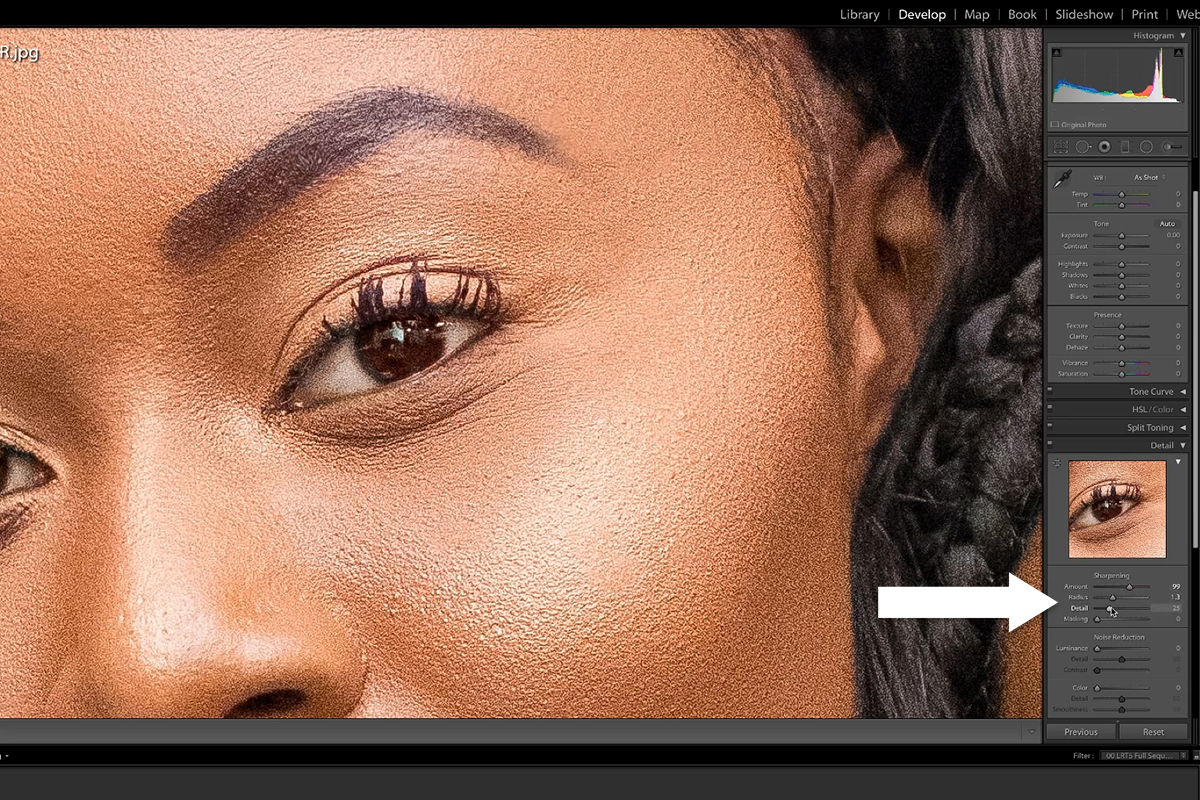
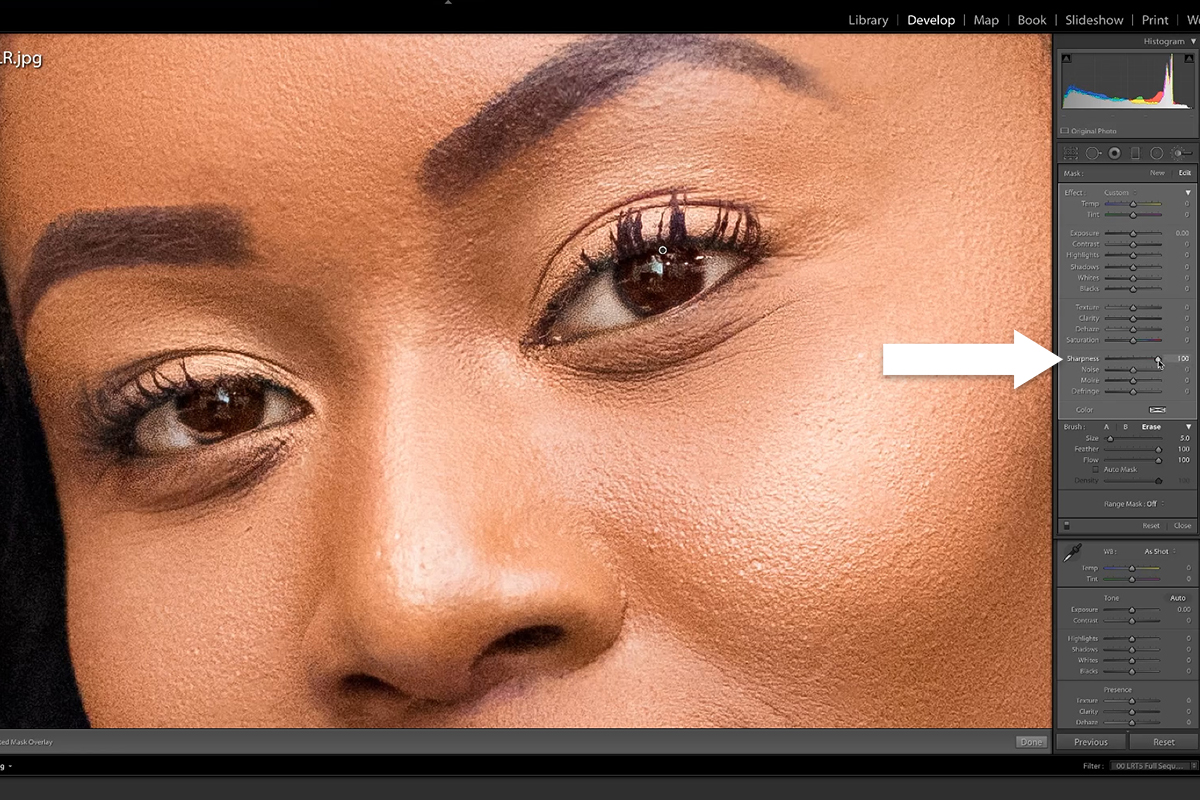
General Sharpening in Lightroom
Basic sharpening in Lightroom is pretty easy. Navigate to the Develop Tab and then scroll down the right panel until you find the Detail section to find the Sharpening options. You’ll see a series of sliders, each providing a slightly different level of control. They are:
- Amount: Raise or lower this slider to control the overall amount of sharpening in the image.
- Radius: This option allows you to control what size details you want to sharpen. A higher radius will sharpen larger details, a smaller radius will sharpen smaller details.
- Detail: Adjusts sharpening, but on a much more granular, pixel-by-pixel scale.
- Masking: Will sharpen detailed areas in a photo (like eyes or hair), while avoiding smoother areas (like skin).
And it’s as simple as that. The Sharpening sliders will give us some amount of control as to how the image is sharpened, and they will sharpen the entire image. This is fine for general sharpening, but what if you want more control? Well, let’s check out the Adjustment Brush.
Local Sharpening in Lightroom
The Adjustment Brush in Lightroom is sort of like their answer to Layer Masks in Photoshop. That is to say, the Adjustment Brush allows you to apply edits to small portions of an image. We mentioned earlier that sharpening is there to help us guide the eyes of the viewer to the more important areas of a photo. So what are those more important areas?
Take a portrait photograph for example. We have a subject sitting in front of a plain background. Isn’t it already pretty clear what we want the viewer to look at? Well, sort of. Usually when we take a portrait, there are particular details of the subject that we want to stand out. The big ones, not surprisingly, are the eyes. The eyes are often what draw a viewer into a portrait, and anything we can do to help the eyes pop off the page (or screen) can help the image as a whole.
And that’s where the Adjustment Brush can help us out! With the general Sharpening panel, we can only sharpen the image as a whole. Great if we want to set a certain baseline of sharpness, but it also doesn’t help anything stand out–it still results in relatively flat contrast. The Adjustment Brush allows us to paint over sections of any image and then apply sharpening to only those areas. This means that we can create different levels of contrast across an image to help make certain areas stand out.
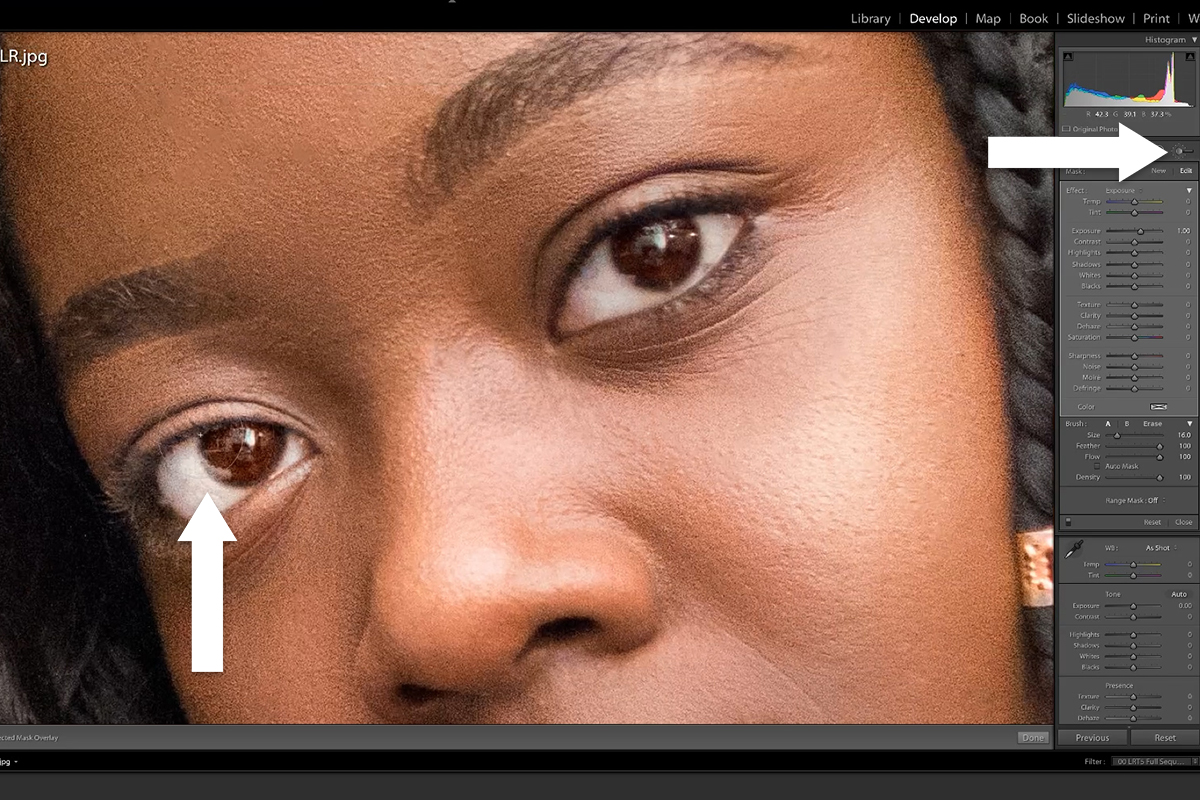
Back to our portrait example, now we can help those eyes take center stage. We can use the Adjustment Brush to paint over the eyes, and then we have a Sharpening slider that will allow us to increase the sharpening in only those spots. Notice that we don’t have the same options that are available in the Detail Panel of the Develop Tab. We have more control over where the sharpness appears, but less control over the level of sharpness.
In a lot of cases, these sharpening tools will certainly work for both casual and professional work. But let’s hop over to Photoshop and see what Lightroom’s sister program has to offer.
Sharpening in Photoshop
Photoshop is a software designed to make it easy to edit, adjust, or completely transform images on both a large scale or even extremely small scales (down to the pixel-level, for instance). The Layer and Group system is what makes it all possible. The ability to stack new adjustments on different Layers, hide or show parts of those adjustments with Layer Masks, and add or remove Layers at anytime make Photoshop extremely flexible.
Let’s take a look at some sharpening processes in Photoshop and see if we can take advantage of that flexibility.
The Sharpen Tool in Photoshop
The most basic tool in Photoshop for sharpening is the Sharpen Tool. It’s a simple to use as creating a new Layer (remember to take advantage of new Layers to work non-destructively), selecting the Sharpen Tool, and then painting over the areas of the image that you want to sharpen.
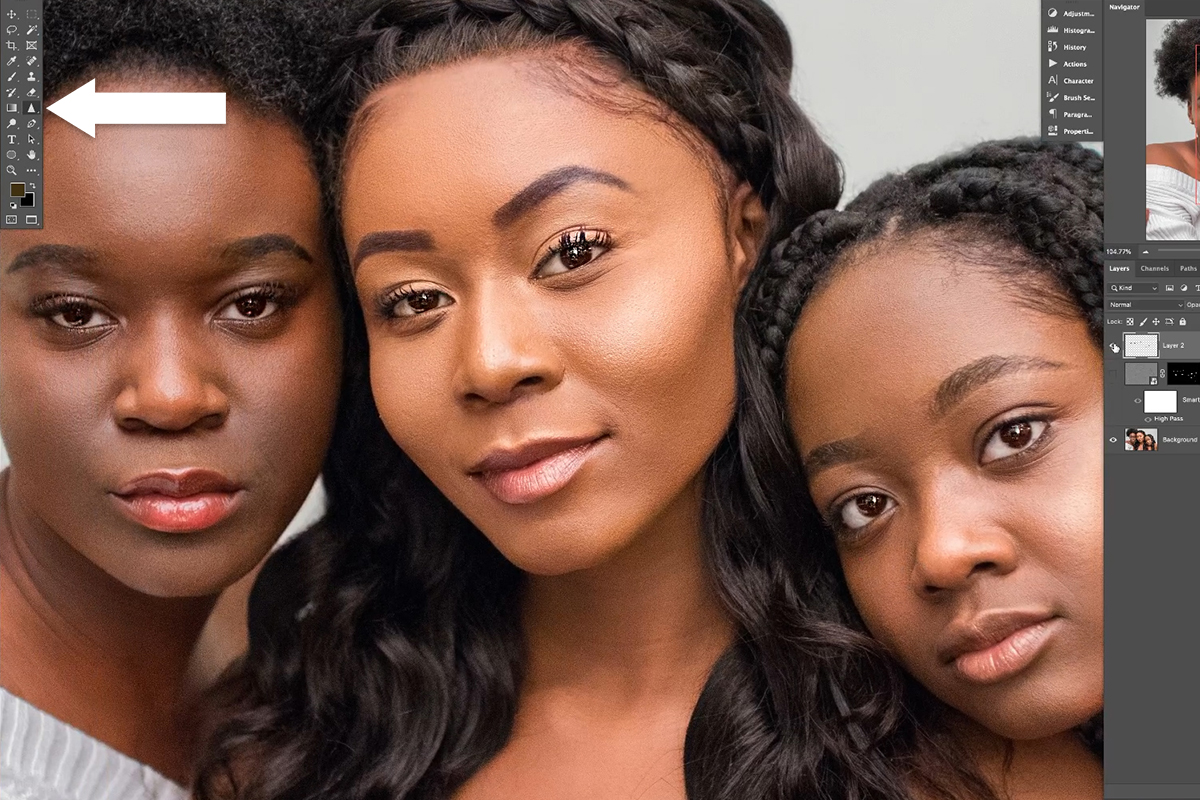
This method is easy to use and, in our opinion, a little more ergonomic workflow-wise than what you’d get in Lightroom. But it still has some drawbacks. First, you don’t have a ton of control over the amount of sharpening. If you paint over an area too much, you can try lowering the Opacity of the sharpen Layer, but if that doesn’t work, you pretty much have to start over. But if you work carefully, this can be a quick and easy option that delivers a fine result.
High Pass Sharpening in Photoshop
Not to give it away too early, but High-Pass sharpening is what we’ve always used here at PHLEARN for the absolute most control and flexibility when sharpening a photo. This method allows us to precisely control the amount of sharpening, precisely control where it’s applied, apply different levels of sharpening to different areas, and, best of all, every element can be adjusted or removed at any time! Sounds impossible? Well, we’ll show you how it works.
To get started, you’ll need to do one of two things:
- If you’re sharpening a single image on a single Layer, just duplicate the main image Layer. We just need a copy of the image on a new Layer to start the sharpening process.
- If you have an edited image with a number of other Layers and adjustments, you’ll need to copy the main image with all of the adjustments applied. You can do this with Apply Image. Create a new Layer, go to the Image menu, then to Apply Image. A dialog box will appear. Just hit Okay. This will create a copy of every visible Layer, adjustment, and image and stamp it onto the Layer you just created. Now we have an exact copy of the photo that’s ready for sharpening.
In our example, we have a single photo that we want to sharpen so we just duplicate the background Layer. Next, we need to desaturate the new Layer, reason being that we don’t want the sharpening to affect color–only contrast. Then Set the Blending Mode of the desaturated Layer to Overlay. Convert it to a Smart Object and now we’re ready to apply the High Pass Filter. Go to the Filter menu, select Other, and then select High Pass.
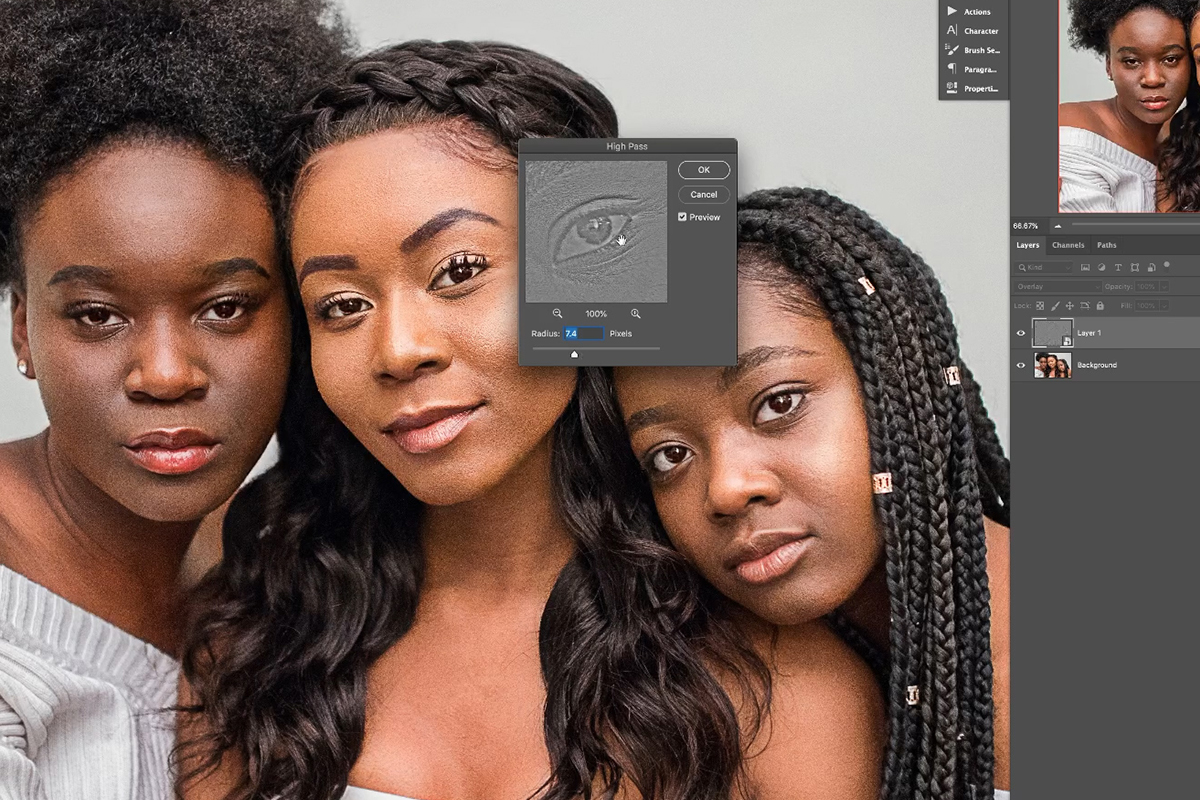
The High Pass dialog will appear with a preview of the effect. What it’s doing is converting this Layer to show only areas of contrast. We can control how much contrast is shown by adjusting the Radius. Basically, a larger Radius will introduce more sharpening into the image, and a lower Radius will introduce less.
Here you can dial-in the exact amount of sharpening that you want, but that’s not what makes this method so magical. Remember that we want to apply different levels of sharpness to different areas of the image. So our first High Pass Layer might be focused on finding just the right level of sharpness for the eyes. Set the Radius to a level where you think the eye detail is perfect and hit OK. The effect is visible everywhere, but we only want it visible on the eyes. How do we fix this? With Layer Masks! Select the Layer Mask of the High Pass Layer, Invert it, then paint with white over the eyes to make it visible in those areas.
You can repeat this process as many times as you want for as many different areas as you want. We often create a High Pass Layer for a general sharpening effect of the entire image, another for less important details, and another for the most important details. As you create multiple High Pass Layers, each is also completely adjustable after they’ve been made. You can duplicate them to increase sharpness in those areas, lower the Opacity to reduce sharpness, and you can double-click on the High Pass Filter (since we made the Layers Smart Objects) at any time to change the Radius.
It may seem like a complicated process at first, but once you’ve practiced it a couple of times, it becomes second nature. We also have powerful Photoshop Actions available that are designed to take the busy work out of the process so that you can focus on creating the best image possible.
This is the result of applying detailed High-Pass sharpening to the image.
Our Final Thoughts
So what software wins? Well, if we had to answer, High Pass sharpening in Photoshop gets our vote for its flexibility and control. But photo editing is highly subjective, both creatively and with workflow. If you have a process that works for you, stick with it! We only suggest trying to learn multiple different methods to solve a single problem. Doing so will give you more options and flexibility in your creative and professional work and will help you become more fluent in the many tools of the trade!


