
Professional Beauty Retouching in Photoshop
-

-
Add to
favorites
-
DifficultyAdvanced
-
Length4 hours
-
Software
description
If it’s your dream to create beautiful portraits for advertising campaigns and magazine covers, then this is the tutorial for you! Learn the art of beauty retouching with advanced techniques like dodging and burning, frequency separation, sharpening, and more.
Follow along with 4 RAW images captured by professional beauty photographer Iulia David!
THIS COURSE INCLUDES
- 4 Sample Images
- 1 Sample PSD
- 1 Photoshop Brush
- 2 Photoshop Actions
Share
Table of Contents
-
01 - Importing & RAW Adjustments (LR & PS)13:42m
-
02 - Image Markup12:56m
-
03 - Combining Exposures18:09m
-
04 - Liquify (with Apply Image)21:45m
-
05 - Blemish Removal13:10m
-
06 - Frequency Separation43:01m
-
07 - Additional Cleanup37:52m
-
08 - Dodge & Burn23:29m
-
09 - Eyelashes & More31:56m
-
10 - Sharpening14:24m
-
11 - Saving for Different Formats6:48m
Course Downloads
Master Beauty Retouching
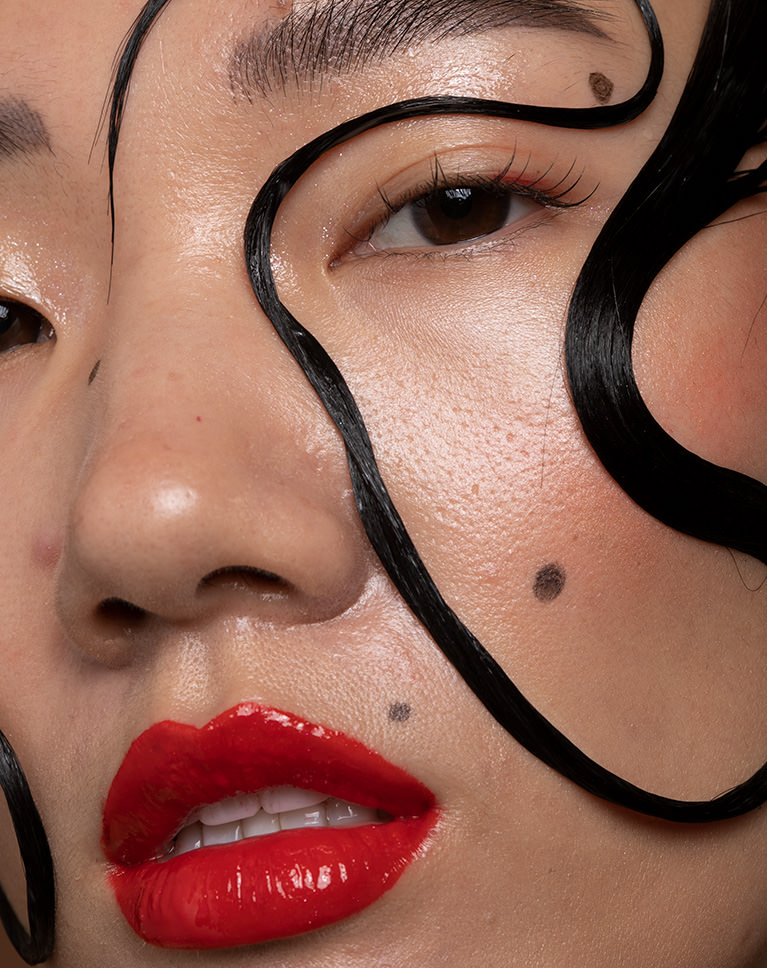
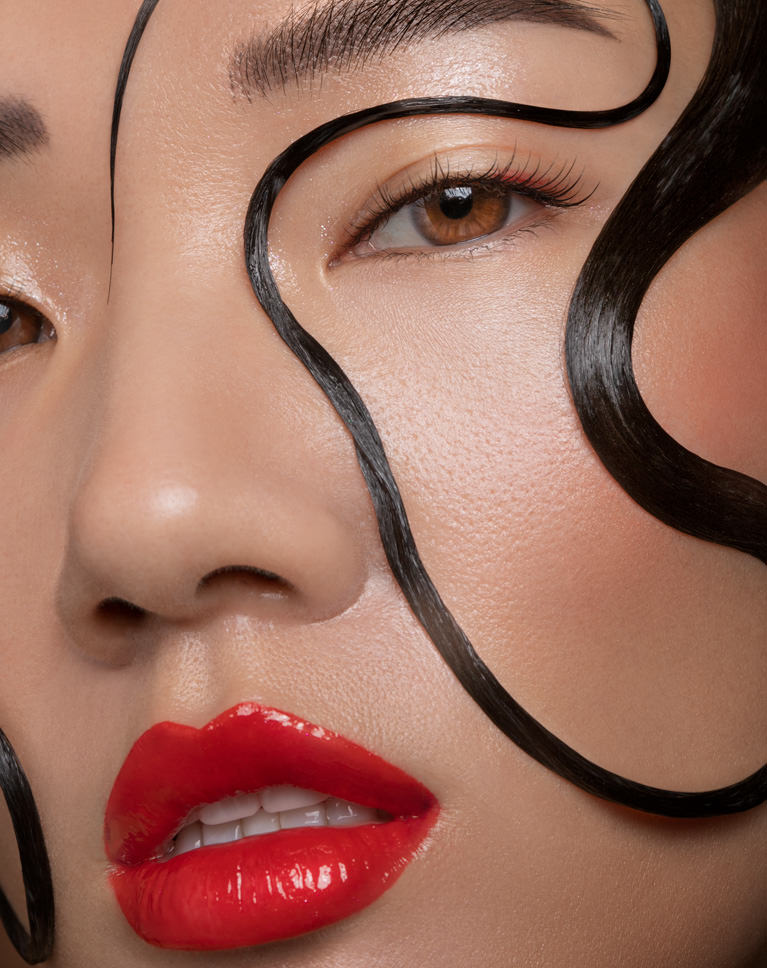
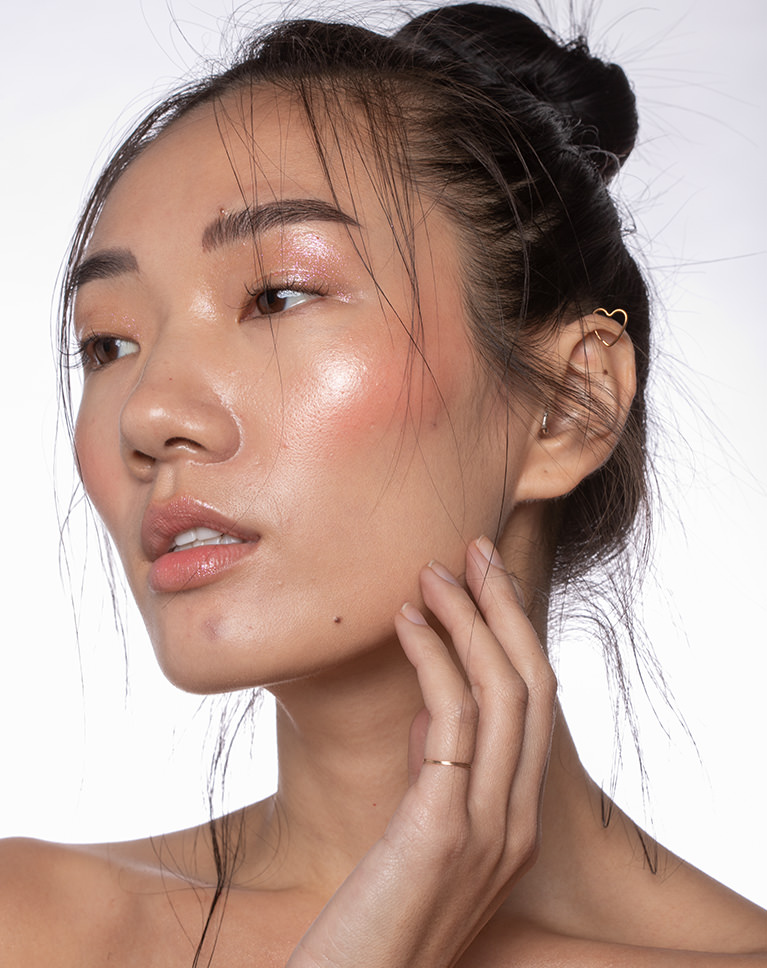
REMOVE BLEMISHES & PRESERVE NATURAL SKIN TEXTURE
ORIGINAL
Beauty Retouching
Beauty retouching is all about removing distractions and inconsistencies so that a person’s natural features stand out. Learn from one of the best on how to make subtle, yet powerful, edits to help your subjects look their very best.
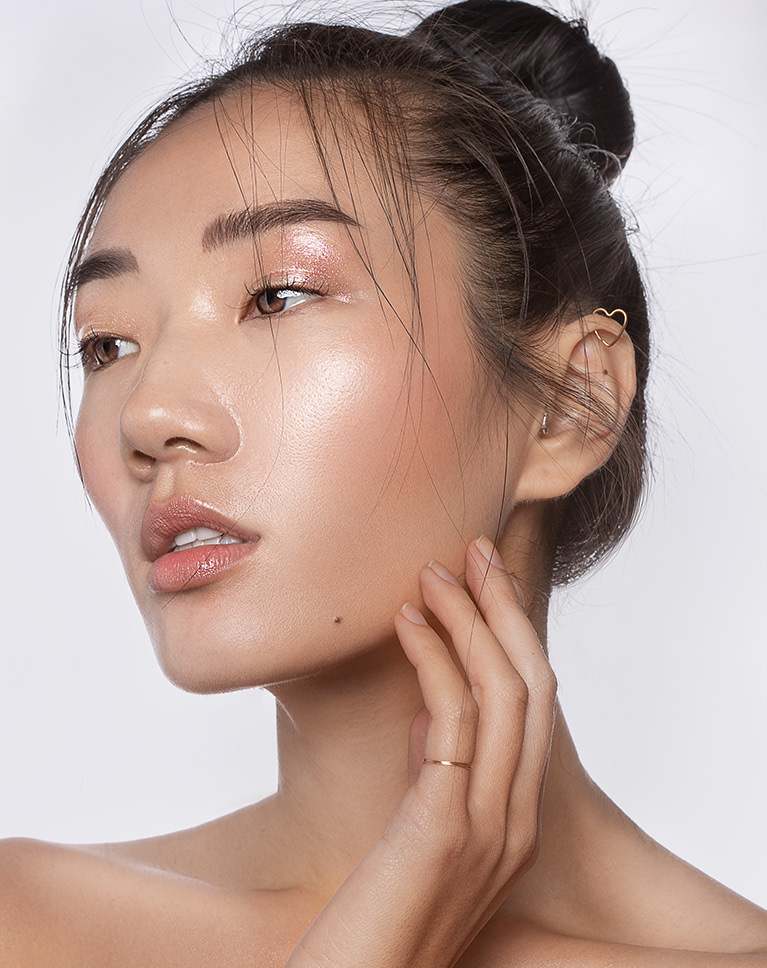
Smooth & Silky Skin
Remove minor blemishes, smooth out skin tones, and enhance all of the natural details of a subject. Skin can be tricky to retouch, but we show you a tried and true method that will help skin look it’s best with all of the authentic texture and color.
Beauty, Fashion & Editorial
From billboards, to magazine covers, to social media advertising, beauty retouching is in high demand. Master a professional approach to retouching and learn the nuances of working with people and portraits in Photoshop.
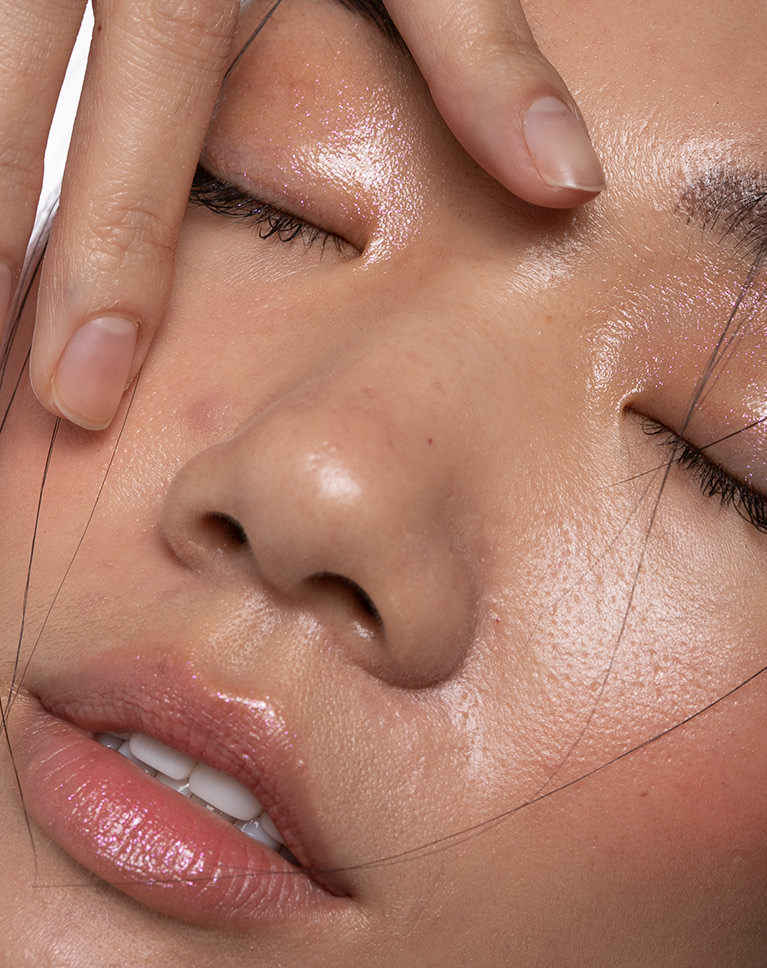
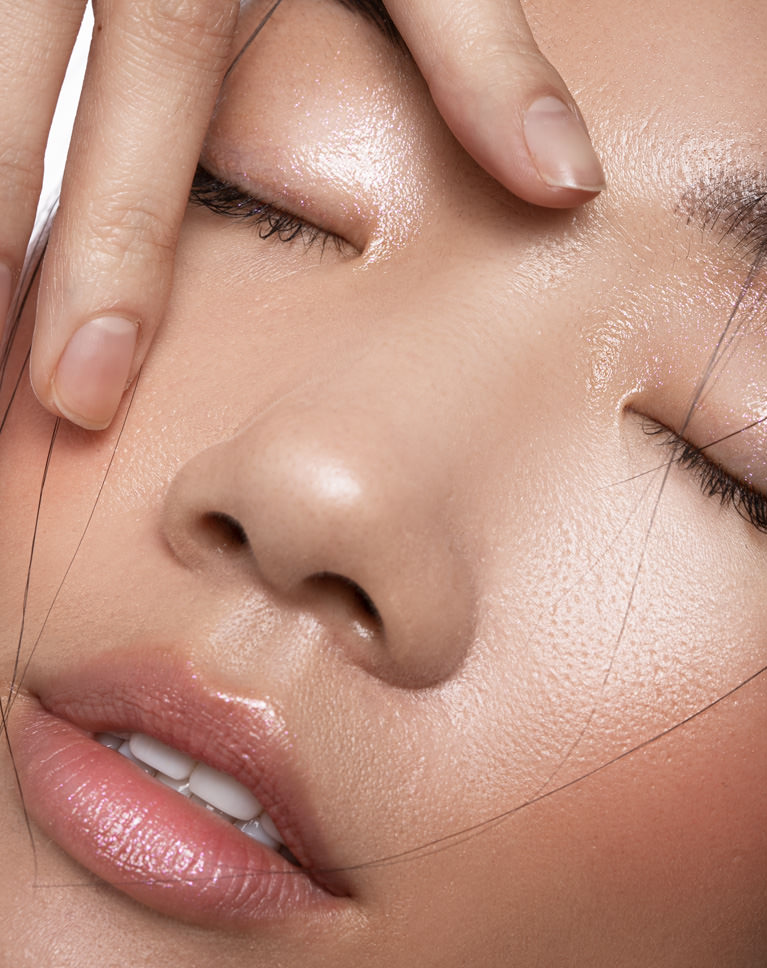
GIVE SKIN A HEALTHY SHINE
ORIGINAL
Professional Workflow
The retouching process can be long and complicated. Dodging and burning, coloring, sharpening, and blemish removal are all important parts of the edit. So where do you start? We walk you through a complete beauty portrait retouch while showing you every step, in-depth.
Step-by-step Guide
Great editing not only involves knowing what techniques to use, but when and how to apply them. Follow along as we show you a complete portrait retouch, from the planning stage all the way to exporting for the web.
Blemish Removal
From stray hairs to small pimples, we show you how to remove minor skin blemishes that we all deal with. Learn to use tools like the Spot Healing Brush, Clone Stamp, and techniques like Frequency Separation to help your subjects shine.
Pro Tools & Techniques
Make Every Detail Count
Retouching is all about reducing distractions while enhancing the natural details in a photo. Learn how to remove small blemishes, reshape hair, and preserve delicate skin texture.

ADD SHAPE AND DEFINITION WITH DODGE & BURN
ORIGINAL
Sharpening
Professional sharpening will help the important details stand out while guiding the eyes of the viewer to the areas that matter most. Learn how to apply precision sharpening and how to sharpen different areas of a portrait separately.
Dodge & Burn
Add shape and definition to a portrait with dodging and burning in Photoshop! Learn the tools and techniques that will allow you to enhance the highlights and shadows in an image, adding contrast and emphasizing the natural shapes and form of a subject.
Frequency Separation
If you want to be a professional retoucher, mastering the art of frequency separation can help you get there. Learn how to separate the colors and tones of an image from the texture and details. Then edit them independently of one another, for perfect skin textures and smooth tones.
CLEAN UP HAIR & SKIN
ORIGINAL
Photoshop Actions
Not only will you learn our professional retouching workflow, but we also include two custom Photoshop Actions that will help you work faster than ever! Try our Frequency Separation Action which allows you to edit skin color and skin texture separately and then use our Sharpening Action to enhance the details in an image before you export!
Included PSD
We’ve also included a PSD file that contains every edit Aaron makes throughout the tutorial. See how a pro organizes a project and explore how each layer helps to improve the image.
Non-destructive Editing
Editing non-destructively means that you can get back to your original, unedited photo at any time. It also means that you can go back and make small adjustments to the edits you’ve made without having to redo the work from scratch. Save time and frustration with our non-destructive editing workflow!
Class Instructor & Featured Artist

Aaron Nace
PHLEARN Founder – Class Instructor
Aaron Nace is a photographer, Photoshop artist and founder of PHLEARN. He is the #1 Photoshop instructor in the world with millions of YouTube subscribers.
Iulia David
Beauty Photographer & Retoucher – Featured Artist
I am a London based photographer specializing in editorial, commercial and beauty portrait photography. Born in a family of artists I have always been surrounded by art and curious in knowing the latest trends. My style is simple and clean with an edge. I think it is all about a collaborative synergy, bringing the most out of my team to create beautiful, compelling photographs.


Reviews
New & Popular Tutorials


Training Site in
the World
Tutorials!
Ratings
and Counting
Subscribers
I loved this tutorial! I have been watching Aaron for a very long time–I used his free YouTube tutorials to learn everything I know about Photoshop when I started 10 years ago! I recently decided to get back into photography and do retouching professionally, and this tutorial really helped me nail down a proper workflow that I can get in the habbit of doing. Thanks, Aaron, for always stickling to your mission statement, “We make learning Photoshop and photography fun!”
I really enjoyed this tutorial. I have learned more in the past week of watching this tutorial than years of watching free videos on youtube. The level of detail and professional instruction given in this tutorial was definitely worth upgrading to PHlearn pro subscription. I know that this course will definitely help me in my retouching career. Thank You Aaron!!!
Excellent! What a treat to have such a tutorial! thanks
Throughly enjoyed this tutorial. I’ve added it to my favorites as I am sure I will be going back to review certain areas. One area I found most rewarding was the vary start … combining images. as soon as I saw that I had to give it a go on one of my recent images and bam! Instant better image. I take good images as far as light goes, in that I rarely completely blow out the highlights. This section showed me a quick and easy way getting that detail out of my images. That in itself made it watching this tutorial worthwhile… I watched to complete tutorial and felt my time was well spent. Thank you.
Thank you for sharing your knowledge with us! Very good teacher!
I am so grateful that I found your channel on Youtube and after watching just a few free videos I knew right away that the best thing I can do to upgrade my skills is to get the PRO subscription ! Totally love your structured approach to anything from small details to a large scale: for example grouping videos in learning paths and tables of contents which help you to quickly navigate through the class and your workflow in general! Your are a great teacher and my kind of person, love your sense of humor and absolute perfectionism 🙂 Thank you for your work and for making the price affordable for everyone!
I found this tutorial just at the right time. I think is brilliant. I was starting to retouch some beauty images and I was struggling using my portrait retouching techniques. This workflow really makes a difference. I suggest you consider to include it in Lightroom, since it’s export capability is really advanced, and is great to handle all images in a single database/catalog, and maybe do the file format section in Lightroom too. I learned a lot. It would me interesting to have a similar tutorial for hairstyle retouching.
Very good Teacher! Thank you a lot!
Great course, thank you! I tried to retouch photos by myself and spent a lot of time on it and the result was really low. I realized that if I want to get a high-quality retouch, I have to spend at least half a year studying how to do it properly. I decided to consult professionals from digitalbeautywork.com . It was my first experience and I was impressed with their work approach. If you have no time or lack of experience, and you need a high-quality photo or video retouching, I recommend them.
Amazing as always, not a lot new for those who already watched Frequency Separation tutorial for example, but it pretty much covers everything, use it if you need practice or a reminder, but if you are getting started this is a all-in-one retouching tutorial that will teach you all that needs to be known! Aaron as always the best.
Aaron is such a great instructor, thank you, man! 🙂
PHLEARN is simply the best place to learn photoshop image retouching
As always great tutorial… Phlearn is the best place to learn photoshop I am really proud of choosing phlearn thank you phlearn team and specially Aaron Sir
Excellent course! Aaron Nace is best teacher ever in Photoshop. I have learnt much knowledge about photoshop to make my life easier. Thank you Aaron Sir!
Nice tutorial as usual! Just to note (since you asked for the feedback 🙂 – as this was stated as an advanced tutorial, I don’t think you need to go in the details like explaining the tool you use or masking, every step basically. .
Just finished this tutorial and it was a fun ride! Thanks!
Aaron, thank you so much, it is an amazing tutorial. I understood everything even with my level.
Absolutely smashing great tutorial.
This was a VERY helpful tutorial brother! I have one suggestion, I don’t take to photoshop very quickly so I have to go over lessons many times, with that being said is there anyway to get the scrubber to show me where you are in the lesson so I don’t have to guess. Aside from that your classes have renewed my confidence in the crazy world of photoshop. Thanks again…
Thank you, I’ve been doing all of my learning online, and this is by far the best tutorial I’ve experienced, Aaron you are a joy to listen to thank you 🙂 Looking forward to more.
Love it! And I own that workflow now!
Mind blowing!
i am always having fun and learning something new thanks Aaron Nace chapeau bas . step by step i begin to work like a pro and all because of those great tutorials
So many “small” techniques that boost the skill level to over pro+. Magnificent tutorial! This will further develop my skills and techniques. Thank you so much for this wonderful tutorial!
I’m now a true believer. This class is so detailed that my kids can become pros. The step by step instructions rtuctions are phenomenal. I’ve gone thru this class 3 times and each time I learn something more.
There is no limit to information! learn, practice unlimited. I bought 2 products. Satisfied.
This is an exceptional masterclass, covering the perfect sequence to create stunning beauty. Thank you!
What a great tutorial! So many processes that can easily be used across other projects too. LOVE IT
I loved this Beauty Retouching tutorial! I love how Aaron walks you step-by-step throughout the whole process. After watching this tutorial, I decided to finally get the Wacom Tablet, so I’m able to take my retouching work to the next level! Thank you so much Aaron!
Amazing as usual. Aaron is the gift that keeps on giving. I truly enjoy all his tutorials. However I don’t seem to find the images to download on this tutorial. Any clues? thanks in advance. Carlos. PS Keep up the good work!!!!
Such a great tutorial! Shows you in detail the whole process of retouching from start to finish. Aaron makes learning easy and enjoyable. Definitely recommend!
This is a very great guide. I have not seen such a good tutorial. Thank you 🙂
Most efficient Retouching tutorial available. Most of the techniques in the shortest time. Love the “Plan” phase .. amazing how much there is to see and learn. Perhaps a tutorial focusing on “Plan” for a variety of images without the need to show the detailed editing of each? Could also include “approach” .. for this aspect of the Plan, will use dodge & burn, frequency separation, etc.
Fantastic tutorial that reviews workflow and technique for high end portrait retouching. Easy to follow and to practice.
As always, this is a great tutorial that summarizes the entire process of high-end retouching from beginning to end. For the PHLEARN Pros who have been around for a while, this is a condensed version of the entire retouching course that you could use as a review.
Hello Aaron. This was well done and I learned a lot. Besides the image you work on it would be helpful (for me anyway) to have a few other out-of-the-camera images to practice on. Images that you think would be good to practice on that is. To be clear not asking you to check my work so no extra work for you. Not only for this tutorial but others as applicable. Thanks for considering this. Cheers.
This is an amazing tutorial! Thank you for the great knowledge and easy learning!
Excellent tutorial so far, not quite finished yet. There are 2 x Freq Sep chapters shown but only 1 will play (2.06), every-time I click on Chapter 2.07, it plays 2.06 again. I’ve tried different computers and browsers.
This was a great and easy to follow tutorial. I love that the PSD file was included. It’s great to go in and see each and every layer to completely dissect the image. I definitely recommend this to anyone looking to enhance their beauty retouching skills!
165/5000 Hi Aaron, I’m Brazilian and my English is not so good, but its calm pronunciation helps a lot. Very useful the content proposed by you. Congratulations. Ueliton Silva
This is such a great tutorial! I highly recommend it.
I have been waiting for a tutorial like this, i loved it. I really was hoping you would go into detail on all the images as repetition is the best way to learn. Maybe with setting up skip points for quick reference
Good tutorial, I’ve got Wacom tablet and have the brush rezise Ctrl+Alt on one of my penn buttons and can rezise and soft it faster.
Love it so far, will do a “real” review afterwards, but just fyi: in the freq sep at 30:17… the “editor” didn’t hear you, I guess. 😀 Will delete this soon, just didn’t know how to tell you any other way. Again, great content so far!
Aaron, another great tutorial. It does help explain the purpose and role of frequency separation better. I would like you to explain, when you are doing the markup, not only what you are looking to retouch , but WHY. I seem to look at an image and can only see about half the things you pick out.
OH MY GOD!!!!!!!! I’ve only seen the trailer and am already in love with this class – I am SO excited! Please continue posting classes like this so my retouching skills continue to improve and modernize with today’s editing technology! THANK YOU!!!
hi . why caption( Subtitle) not available in this tutorial ?