
Conceptual Compositing Using Blending Modes in Photoshop
-

-
Add to
favorites
-
DifficultyMedium
-
Length2.25 hours
-
Videos8
-
Software
Description
Explore the power of Blending Modes in Photoshop! In this tutorial, you’ll learn to create conceptual images by using these modes to easily add texture and light, make artistic double exposures, and build captivating composites. We even include a PDF guide to help you understand how eight special blending modes use Fill and Opacity in unique ways, letting you create truly impressive visual effects.
THIS COURSE INCLUDES
- 22 Sample Images
- 7 Sample PSDs
- 1 PDF Guide
Share
Table of Contents
Course Downloads
Blend. Create. Amaze.

AFTER
BEFORE
Blending Modes Explained
A Blending Mode controls how two layers blend their pixels together. Photoshop uses your chosen mode to check overlapping areas and decide the final look. In this tutorial we’ll teach you everything you need to know so you can add new elements, make vibrant composites, and build creative scenes that stand out.
Opacity & Fill
Layer blending in Photoshop begins with Opacity and Fill. They both affect the transparency of a layer in exactly the same way, the difference being that Fill will not reduce the transparency of any Layer Styles. We’ll guide through different examples to show you how to use Fill and Opacity to create stunning, advanced effects.
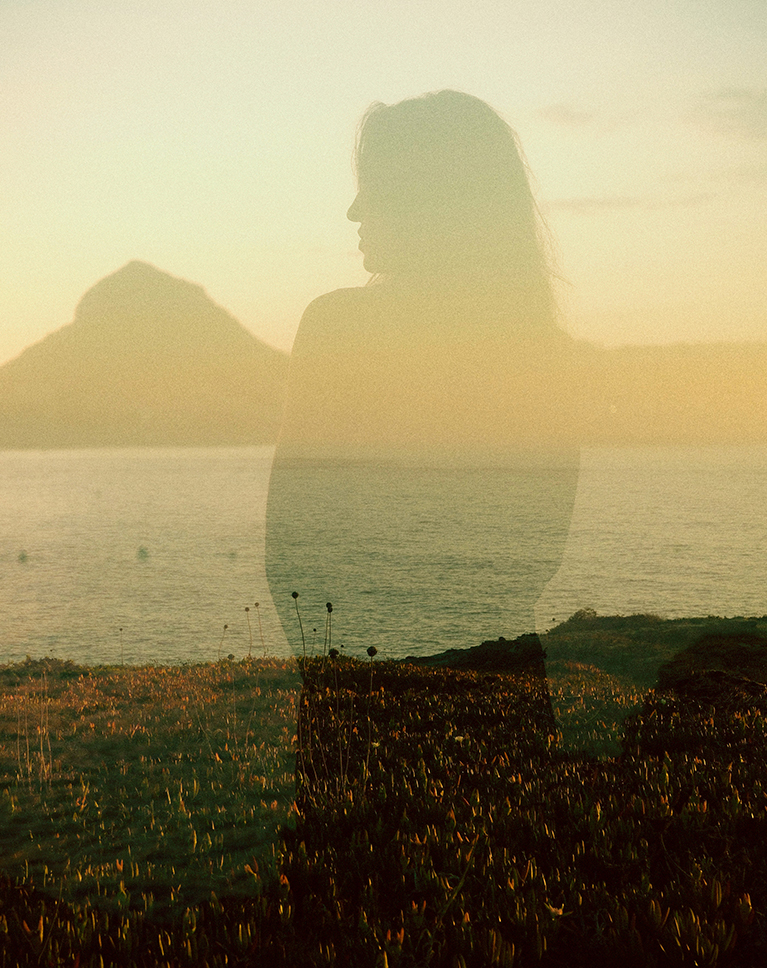
Double Exposure
Learn how to combine two images to create a double exposure effect. We’ll show you how to use Screen mode to elegantly merge light from both images, resulting in a captivating artistic portrait that combines your subject with a dramatic scene.


AFTER
BEFORE
Multiply Mode
One of the most used Blending Modes in Photoshop, Multiply has near endless applications. Learn to add detail and contrast to washed out areas of an image or if you’re a product photographer, learn to use it to remove a white background so you can place products in any environment.
Combining Tools
In this tutorial, you’ll learn to combine the precision of Blending Modes with the powerful finishing capabilities of Adobe Camera Raw. Applied as a Smart Filter, ACR unifies the image by adding texture (grain) and adjusting color grading across shadows, midtones, and highlights. This step ensures the blended images are cohesive, making the final artistic portrait look polished and complete.
Layer Masks
Layer Masks are essential for refining blending modes, letting you control where the effect is visible. By using tools like Select Subject and Select and Mask, you can precisely hide the blended layer from your subject while keeping it visible in the background, creating a seamless conceptual composite where elements are positioned exactly where you want them.
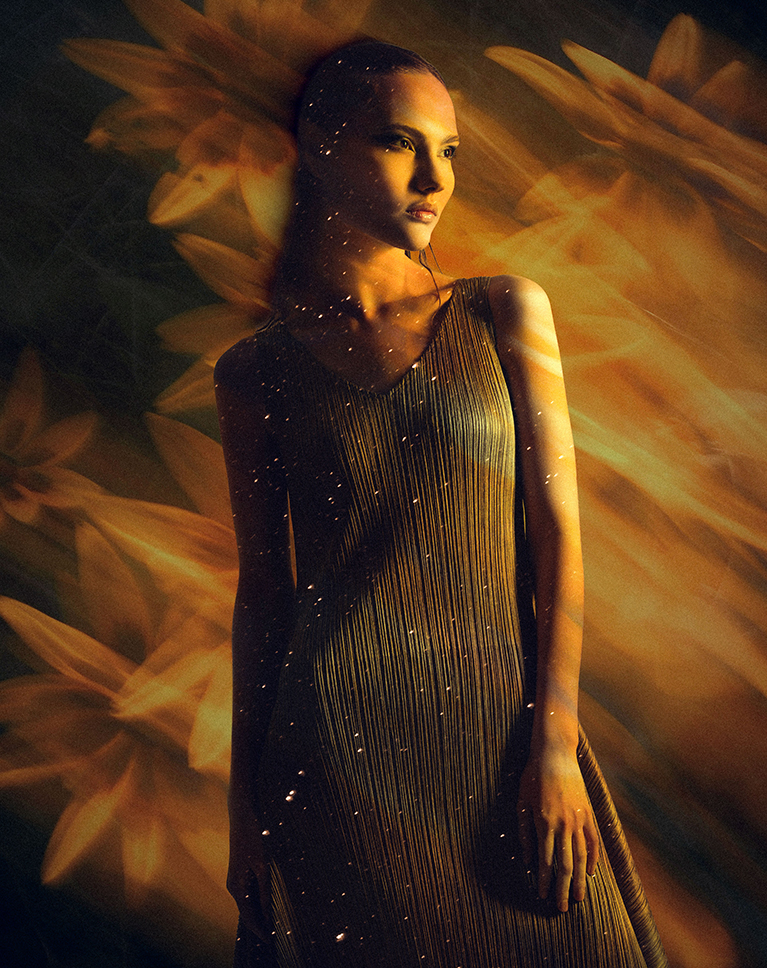
Composites Made Easy

The Next Level of Blending
Use Blending Modes to seamlessly merge multiple images, adding texture and light to build professional, complex composites in no time.

AFTER
BEFORE
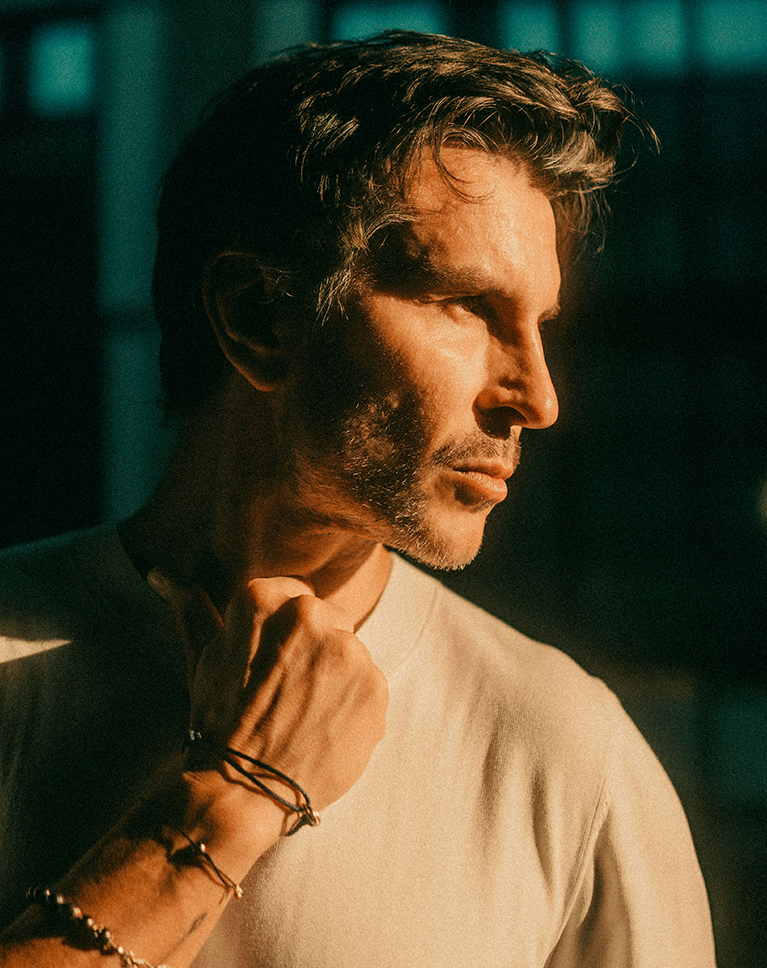
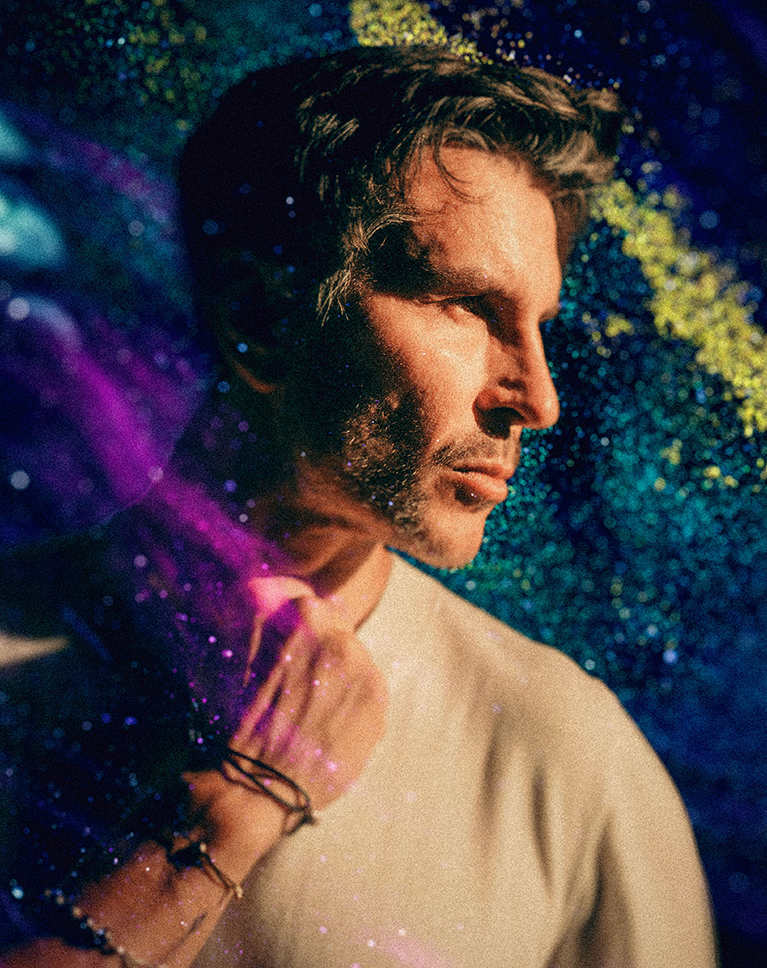
Combining Modes
Learn how to combine different Blending Modes, such as Screen, Difference, and Lighten, to build rich, multi-layered conceptual composites. Each mode is selected to strategically blend different images and textures, allowing us to control light, create contrast, and introduce funky, colorful effects that unify the final artistic portrait.
Adding Textures
Creating an effective compositing relies on smart image selection, where textures can be added to visually complement the base portrait’s existing color palette. In this tutorial, we’ll teach you not only how to select the best images, but also how to use Blending Modes to seamlessly merge your chosen textures for a cohesive final image.
Remove Distractions
Effective compositing often begins with Object Removal using tools like Generative Fill. We’ll show you how to quickly eliminate unwanted original background elements, such as harsh lines or distracting features. Cleaning the background first ensures a smooth, abstract canvas, making it much easier to seamlessly blend new textures and maintain a cohesive, artistic final image.
AFTER
BEFORE
Your PDF Reference
We know you’ll learn a lot as you work through this tutorial but we also hope that it can act as a reference for you in the future. That’s why we’re including a PDF guide that explains how Blending Modes operate and contains the secrets to using the eight special modes that interact differently with Fill and Opacity.
Hands-On Learning
This tutorial includes an incredible learning package! You’ll have over 20 sample images at your fingertips, giving you a huge variety of subjects to practice on. Plus, with our downloadable PSDs, you won’t just learn how to create these effects; you’ll get a behind-the-scenes look at exactly how they’re built, layer by layer. This hands-on resource is designed to help you master every technique, making your own photo editing journey faster and more effective.
Compositing Learning Path
Explore more on conceptual compositing with our Magical Compositing Learning Path. From mastering light and color with stock images to exploring mind-bending creations by guest artists, and even discovering some of our most classic composites, this learning path empowers you to bring your wildest visions to life.

Aaron Nace
PHLEARN Founder – Class Instructor
Aaron Nace is a photographer, Photoshop artist and founder of PHLEARN. He is the #1 Photoshop instructor in the world with millions of YouTube subscribers.
View More Classes by Aaron Nace
Special thanks to Julen Rey Azcona, Elisa Kerschbaumer, Jay Soundo, Nikita Pishchugin, Jordon Conner, Pure Julia, Aperture Vintage, Karan Suthar, Schayan Kasmaei, Solen Feyissa, Ahmet Yuksek, Karolina Grabowska, Lorin Both, Solen Feyissa, Tony Frost, and Victoria Alexander
Images for this PRO course were sourced from Unsplash .
Reviews
New & Popular Tutorials


Training Site in
the World
Tutorials!
Ratings
and Counting
Subscribers
This was an excellent introduction to blending modes to create interesting portraits. For someone with only basic Photoshop experience, I appreciate the way Aaron repeats the basic learnings from previous lessons in subsequent ones (with enough repetition it starts to stick!). The course also reinforces a lot of basic photoshop concepts (masking, shortcuts, adjustment layers, adjustments on smart objects, camera raw filter) that have much wider usefulness. I played along with my own images rather than the supplied ones and found the only additional information that would have been helpful was how to select your own images for compositing – but I see that is covered in another course! All in all this course was very rewarding – short enough to be able to finish and watch a second time to pick up anything missed, and be able to actually apply the concepts to create something reasonably pleasing of your own by the end.
Fantastic, will have to take part in it a few dozen times but it will sink in. Now on to the next lesson Thanks
Great classes! I learned so much. I plan to rewatch it.
Great tutorial, learned a lot of artistic techniques like in ACR adding Grain, in the Blur section alternatively painting-in background blur and subject focus. Also creativing a S,O, copy of the original S.O. ACR layer and trying different color and Blur treatments. Terrific use of high-fashion models and effects, Give us more High Fashion stuff, especially use of Adobe Firefly 26 AI including Gemini Nano Banana, and Flux Max, Ultra and more to create these type of High Fashion with creative background images.
Terrific; the Course includes all the “Manual” techniques of compositing developed before the advent of AI. I’ve been using PS for over 12 years and never have used the “Fill” slider on any BM. But after viewing your tutorial I’m going to just forget the “Opacity” slider and only use “Fill” for increased effects.
Another fantastic tutorial .. always something new to learn. I’d never thought about using ‘Fill’ as well as ‘Opacity’ before when blending, plus using the ‘Lens Blur’ in ACR to soften the entire image .. genius tips from Aaron! I’d love to see a tutorial on using ‘Calculations’ for creating Black & White images (as well as for complex masking) .. a bit old school I know! 🙂
I have just started this tutorial and have seen only the first section so far, but already I want to give a 5 star thumbs up. The focus of this tutorial is something very useful to what I do with photography. In addition, as with all your other more recent PRO tutorials, I am learning so many new things about Photoshop that I didn’t know before despite having worked with both Photoshop and Lightroom for so long and subscribing to you for years. In particular, in the first section, you show how to adjust the layout of the tools windows in Photoshop, something that always had been a trial and error mystery to me. You demonstrate using ACR at any point within the Photoshop editing workflow as a way to perform all the useful tasks that I normally only do in Lightroom as a first or last editing step, such as color grading and vignetting. This is so useful. And I am grateful for your demonstration of the differences between Fill vs Opacity. The use of Fill has always been a mystery to me, but now I am going to make use of it more. I also never knew that the opacity and blending mode of individual filters in a smart object could be adjusted. Looking forward to the rest of this tutorial, and whatever you come up with next.
Love this tutorial! I’m currently very interested in the different things that can be accomplished with textures. Thank you for what you do.
Dear Mr. Aaron Nace My name is Nagib, and I’m writing to express my deepest gratitude for the incredible work you’ve done through Phlearn and for the inspiration you’ve shared with creatives like me around the world. Since joining your community, my understanding of Photoshop and photography has completely transformed. Your way of teaching — patient, passionate, and full of genuine care — has helped me not only improve my technical skills but also fall in love with the creative process itself. Every tutorial feels personal, as if you’re speaking directly to me, guiding me step by step with kindness and clarity. Because of you, I’ve gained confidence in my design abilities and taken my creativity to the next level. Thank you for dedicating your time and energy to helping others learn, grow, and believe in their potential. Your impact reaches far beyond your videos — you’ve inspired a generation of artists, including me here in Switzerland. With sincere appreciation, Nagib Thun, Switzerland
I really loved this one, where you can generate some nifty effects in the background and have it wash over the subject to do other outcomes. The only negative i can see and its super minor was in tutorial 2 Aarron don’t wear that black with white dotted shirt as it was distracting a little as there was a little flicker localised to the shirt. I think it was down to the camera. Overall, what can i say but more please loved it.