

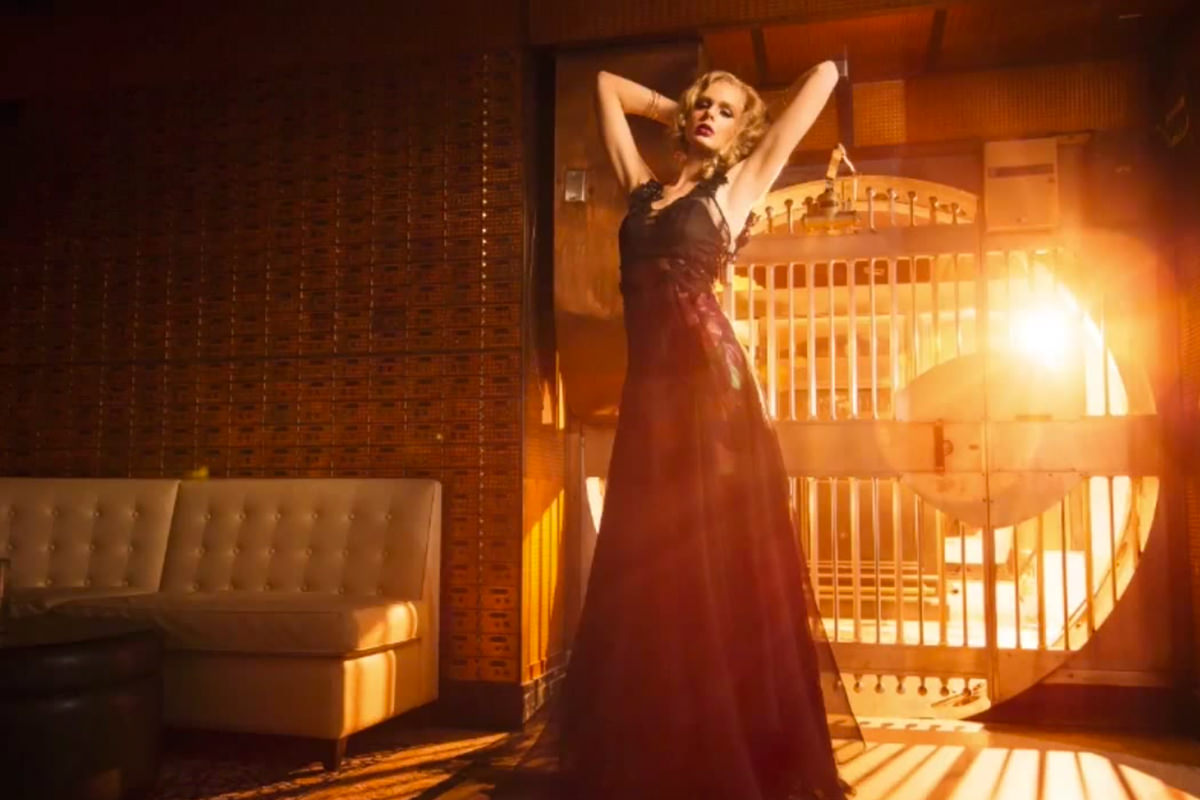

Creating a Lens Flare/ Lighting Effects
This tutorial is perfect for those images that have a strong backlight, such as when you are shooting into the sun. We show you how to enhance a Lens Flare and create Lighting Effects that will make your image more interesting. These techniques only take a couple of minutes and can be used on any image with a backlight.
Use Curves Adjustment Layer
We start by changing the atmosphere Colors around the Light, bringing the black Levels up on the red and green Channels in a curves adjustment layer. This step adds a nice base for the Lighting Effects.
After creating the base we create another Curves Adjustment Layer and brighten it up. We then use a large hard edged Brush to create some flare. This is a great time to play around and place the flare wherever you want.
Next we create a Spatter Pattern on a Layer Mask of another Curves Adjustment Layer and use the Radial Blur to simulate Light streaks. This is a $500 technique that we are giving away for free.
To finish off the image we create a double Vignette, making the area around the subject lighter and darkening the edges of the image.








Enjoying This Free Tutorial? Go Further with PRO.
Unlock Full Sample Files, PSDs, and Hundreds of Masterclasses!

Download full project assets, original PSDs, and RAW images for every lesson
Unlimited access to our complete library of PRO Photoshop & Lightroom courses
Instant 4K Ultra HD streaming on all devices, anytime, anywhere
Full access to our entire library of Photoshop Actions, Presets, and LUTs
Flexible monthly and annual membership plans
Cancel anytime with zero hassle or commitments