Download Sample Images
Sample PSD
Download the sample PSD for this tutorial!
description
Skin is one of the most difficult things to work with in photo retouching. With so much fine detail and naturally-occurring texture, it might sound impossible that you can recreate it from scratch.
But it’s not!
Learn how to create skin texture in Photoshop as we completely remove a tattoo from a person’s arm, and then use a combination of professional techniques and the included Photoshop Brushes to fill that area in with ultra-realistic skin texture.
Share
CREATE PHOTO-REALISTIC SKIN IN PHOTOSHOP
Create Realistic Skin Texture
Working with Skin in Photoshop
Skin is a delicate area with a lot of natural variation in both color and texture. One of the biggest challenges for new retouchers is removing distractions and blemishes from skin without leaving it blotchy or without detail. As you develop your skills, you might turn to advanced techniques like frequency separation, allowing you to work with both color and texture independently of one another so that you can worry less about the retouching of one damaging the other. But, sometimes even the advanced techniques need a little bit of support, and if you’re relatively new to retouching, you might need some techniques to repair skin that might have had some of the original texture removed.
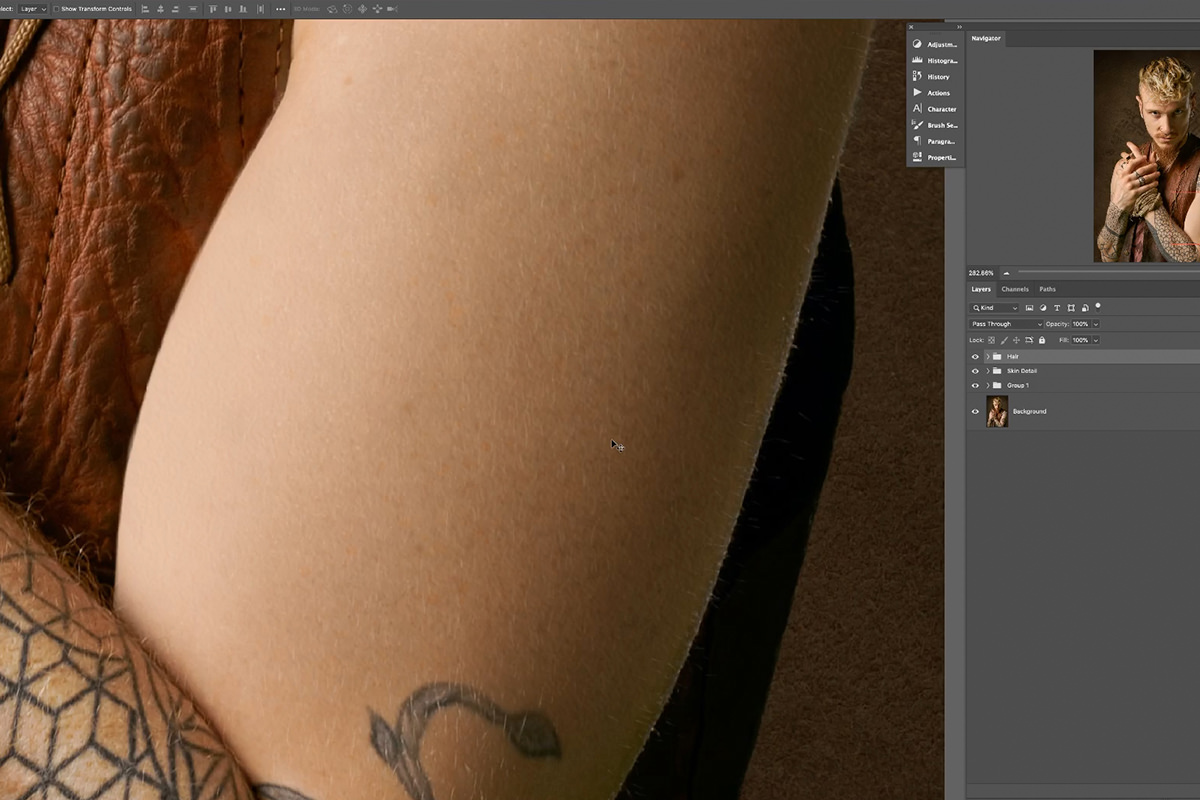
In our example, we’re going to go through the process of removing a tattoo from a subject using the Brush Tool. The Brush Tool allows us to pretty easily fill an area with colors that match its surroundings but, while those areas will match color, highlight, and shadow, they will lack all of the original details of the person’s skin. This creates the perfect opportunity to recreate the original skin texture from scratch using just a couple of powerful Photoshop tools.
Creating Skin Texture from Back to Front
Whether you’re creating a detailed composite image or recreating skin texture, you should get used to the idea of building elements in a scene from the back to the front. As we make new skin texture, we’ll be doing just that. We’ll start with the color, highlight and shadow, then add texture, then add some freckles and spots, and then add some fine hairs. Working in this way will help each element appear more natural while also creating the depth necessary for it all to look realistic.
Removing a Tattoo with the Brush Tool
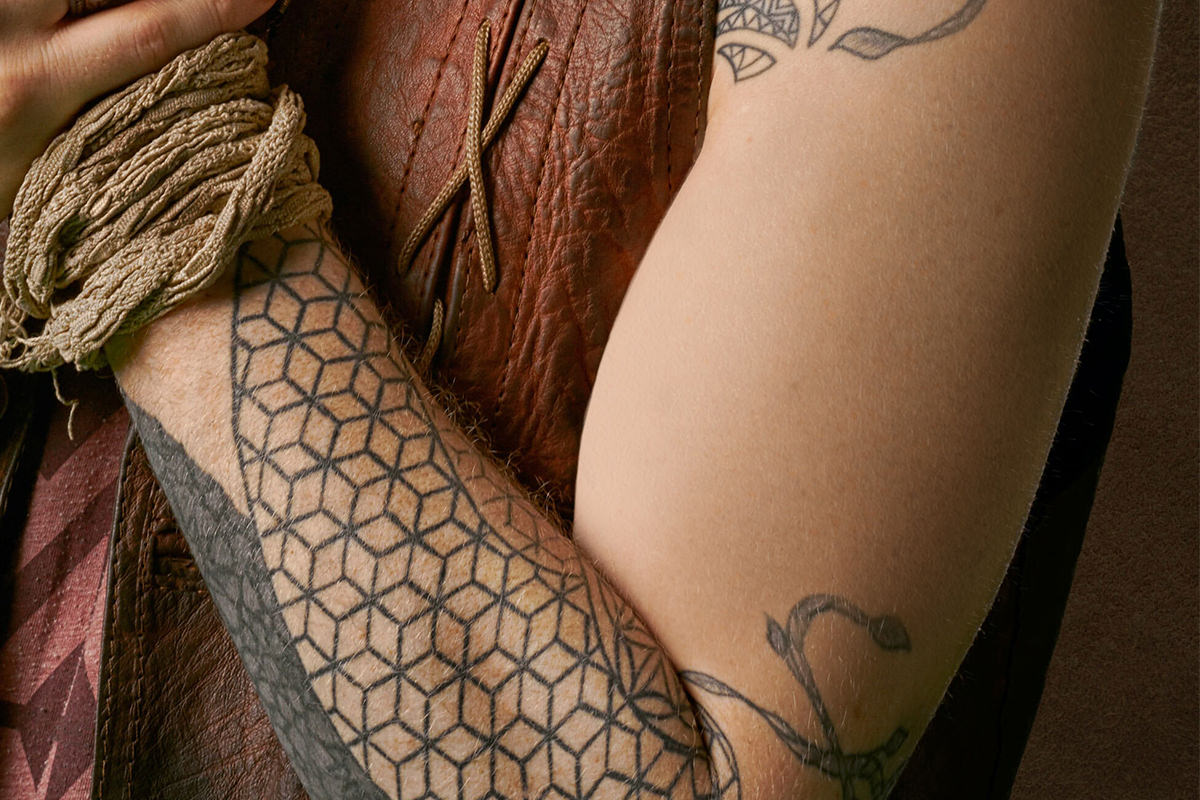
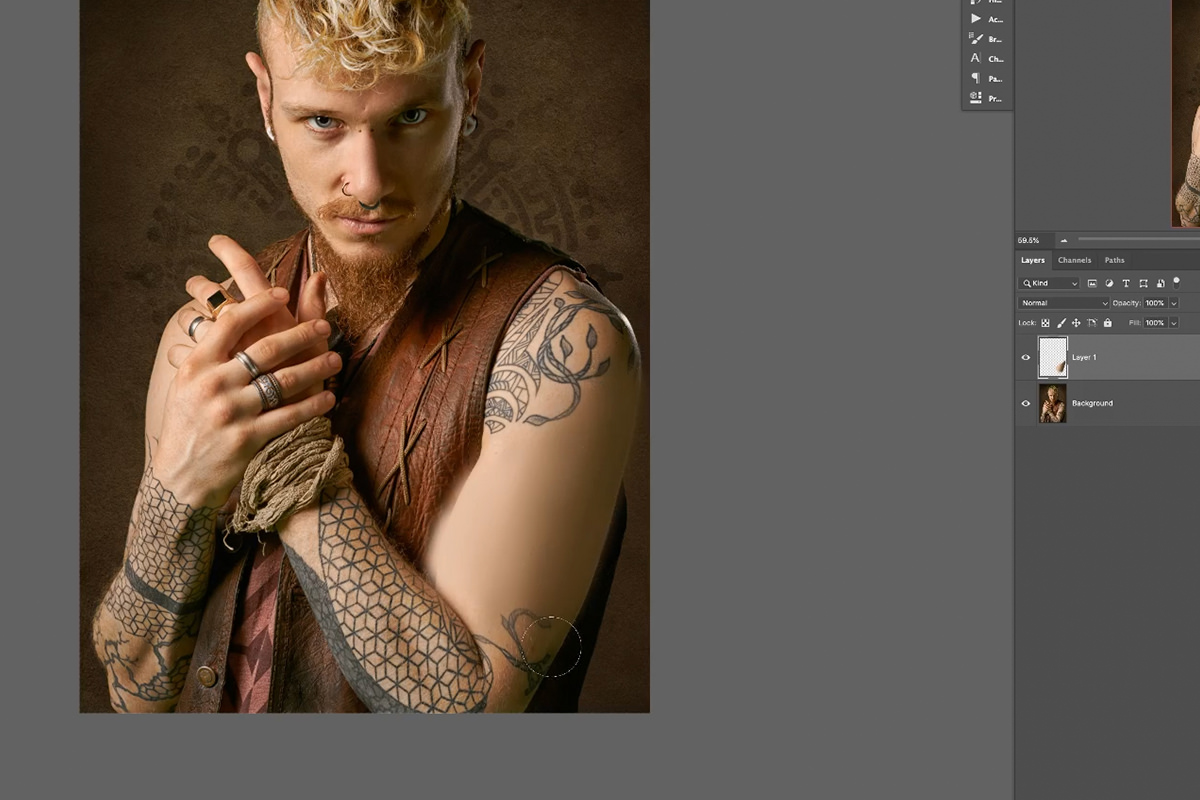
Our example image has a subject covered in tattoos. While tattoos are a perfectly normal thing to appear in a photo, and sometimes are what make a photo unique and interesting, we’re going to remove a tattoo to create a circumstance where we would need to recreate skin texture to fill in that area.
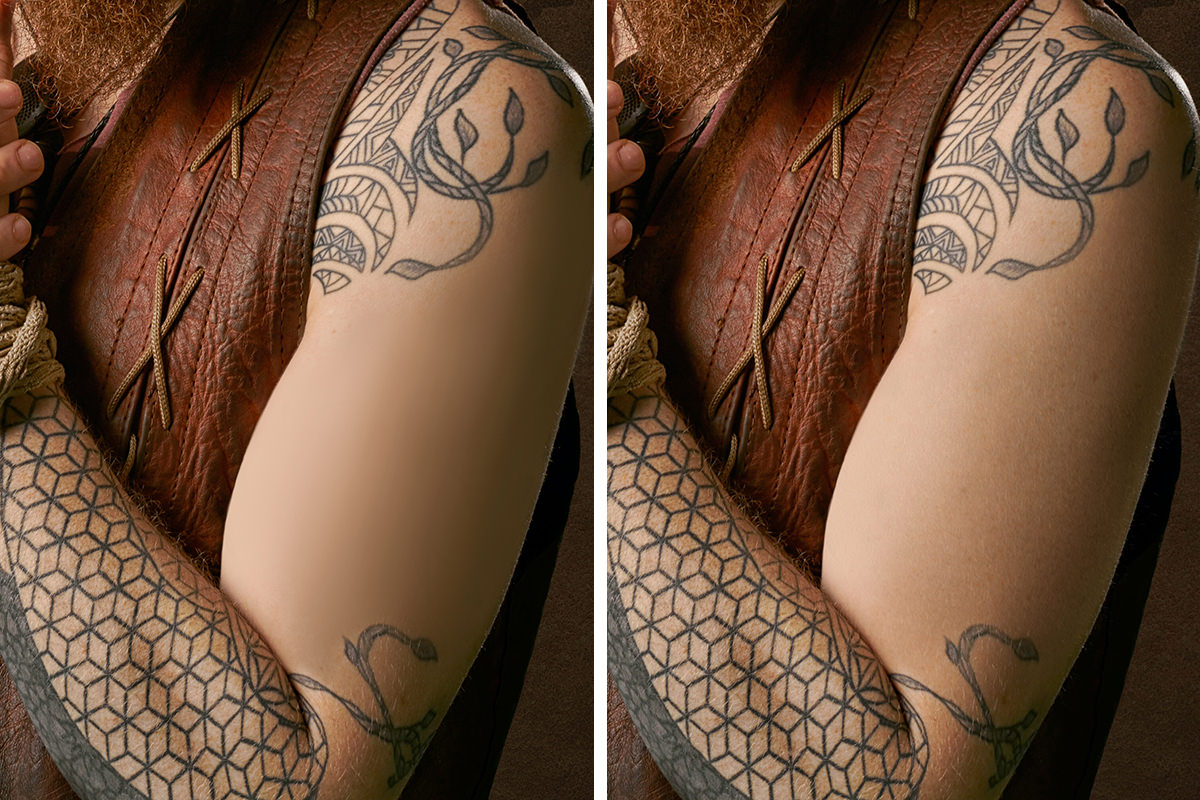
The process of removing a tattoo with the Brush Tool is relatively simple, especially since we’re not concerned with skin texture at the moment. First, create a new Layer. Then, select the Brush Tool and make sure that you have a large, soft brush set to a low Flow. This will make the blending process much, much easier. Once everything is set, begin Sampling colors from the subjects arm and begin painting over one of the tattoos.
The important thing to remember here is to follow the natural colors, highlights, and shadows that are visible around the area that you’re painting. In our example, there is a light source coming from camera-left creating shadows on the subject on camera-right side of their face and body. So painting will involve using brighter, highlighted skin tones along the left edge of the skin and darker tones along the right side.
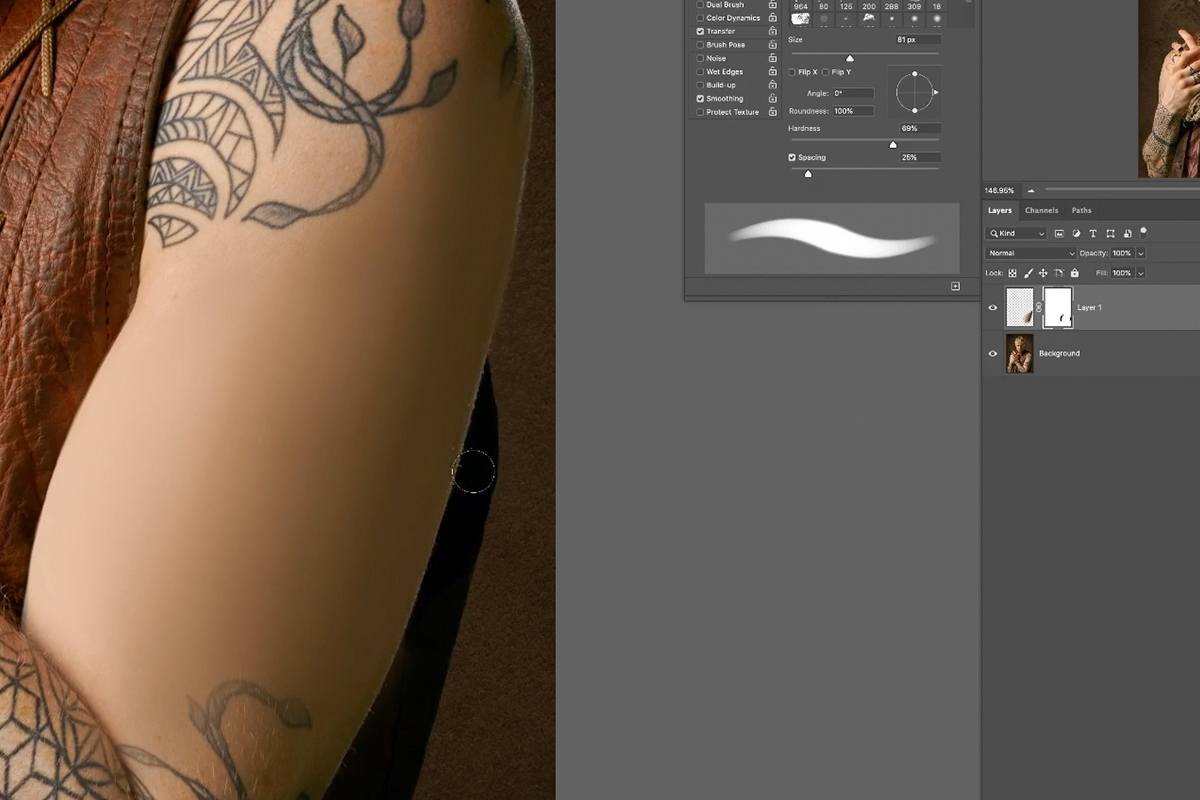
As you paint, don’t worry about painting outside the area of the subject’s skin. If you do, just hide any unwanted paint using a Layer Mask once you’ve finished. You should end up with two Layers: the background Layer (the original image) and the Brush Layer which covers up a tattoo, matching the color and lighting from the rest of the arm.
Be sure to zoom out as you work and as you check your work! A zoomed out view will make it much easier to tell if the lighting and color is matching and blending correctly with the rest of the image.
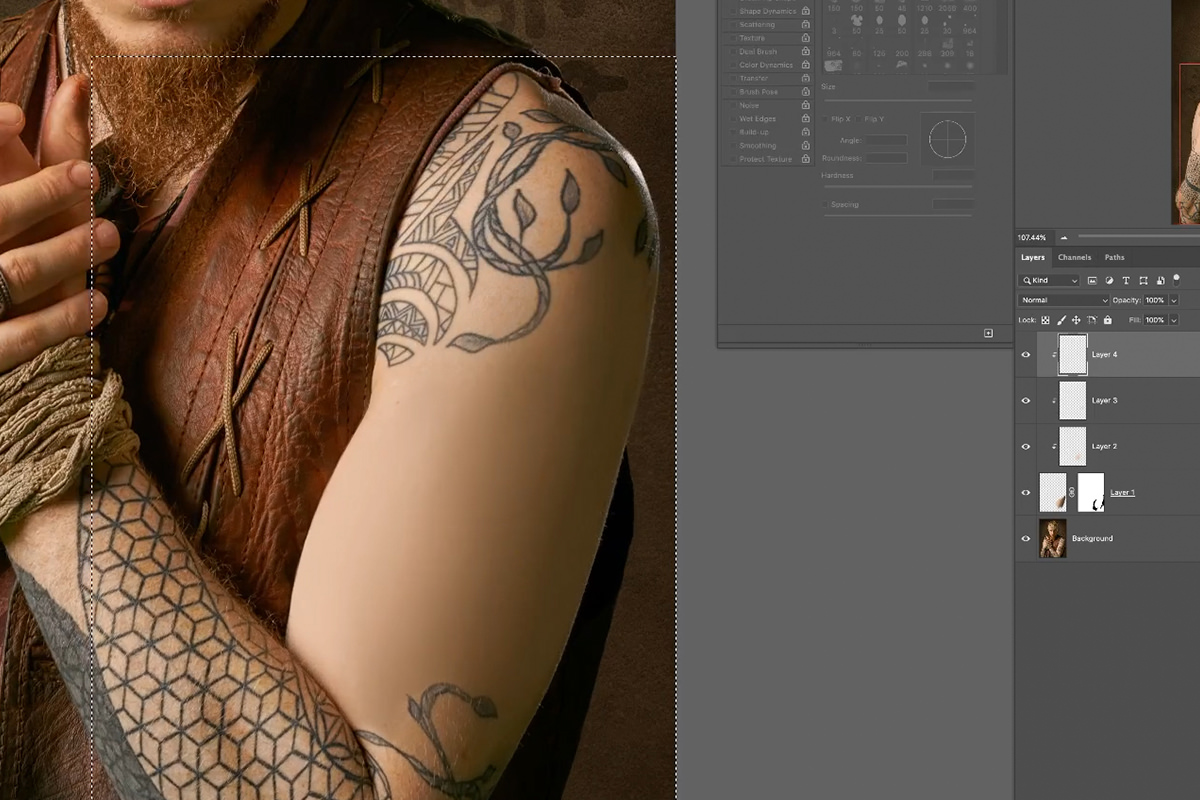
A Note About Clipping Masks
Before we move on to creating the skin texture, it’s important to note that almost every new edit we add will be on a new Layer that is above and clipped to the Brush Layer we made in the first step. When a Layer is clipped to another Layer, it will only appear where that Layer appears. So every new edit we make will only appear where you painted. Make sure that the Brush Tool Layer is perfectly formed to the arm and doesn’t overlap any unwanted areas.
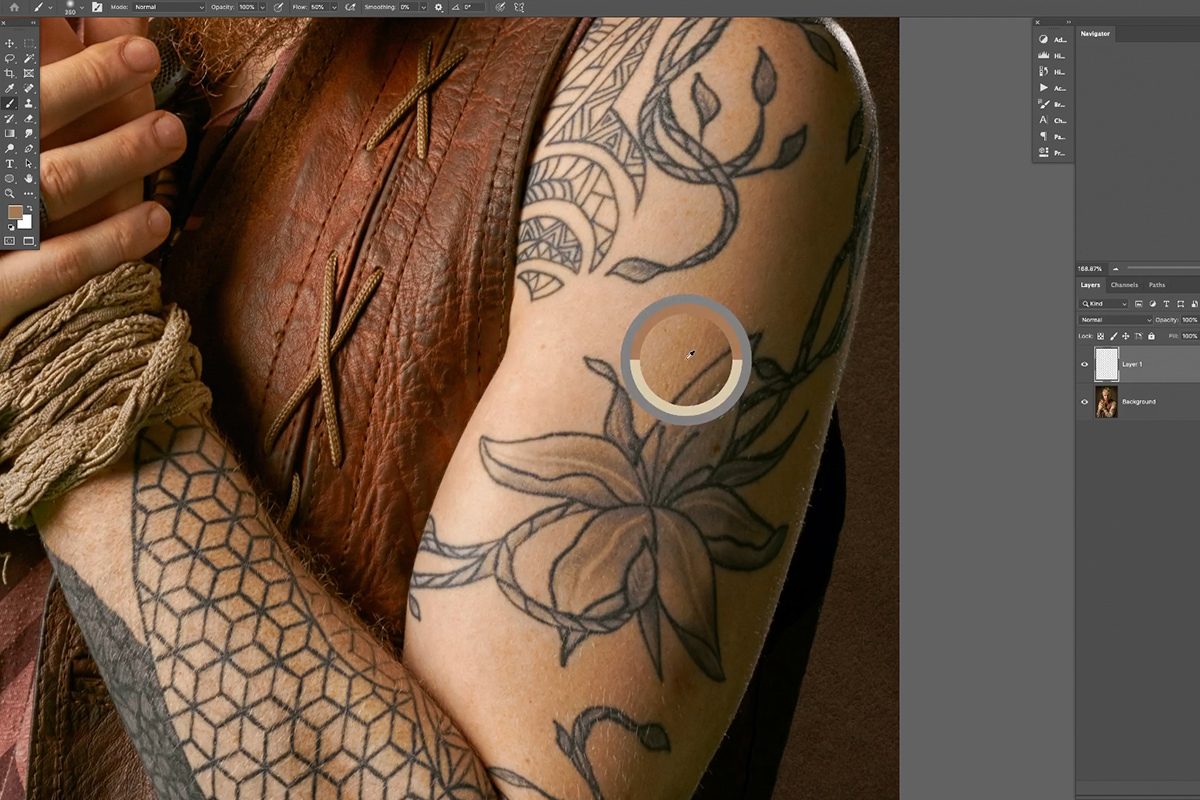
Create Skin Texture with Noise
Creating skin texture from scratch honestly isn’t that difficult if you’ve made it this far. In fact, we can use a relatively automated tool and some small adjustments to recreate skin details in just a few clicks.
First, create a New Layer and clip it to the skin color Layer. Grab the Rectangular Marquee Tool and create a selection around the part of the arm that you want to add texture to. Once the selection is active, go to Edit, then to Fill, and fill that area with 50% gray. (Noise can’t be applied to a blank Layer, so we need to fill the area with something first. We’ll be able to hide this gray in moment.)
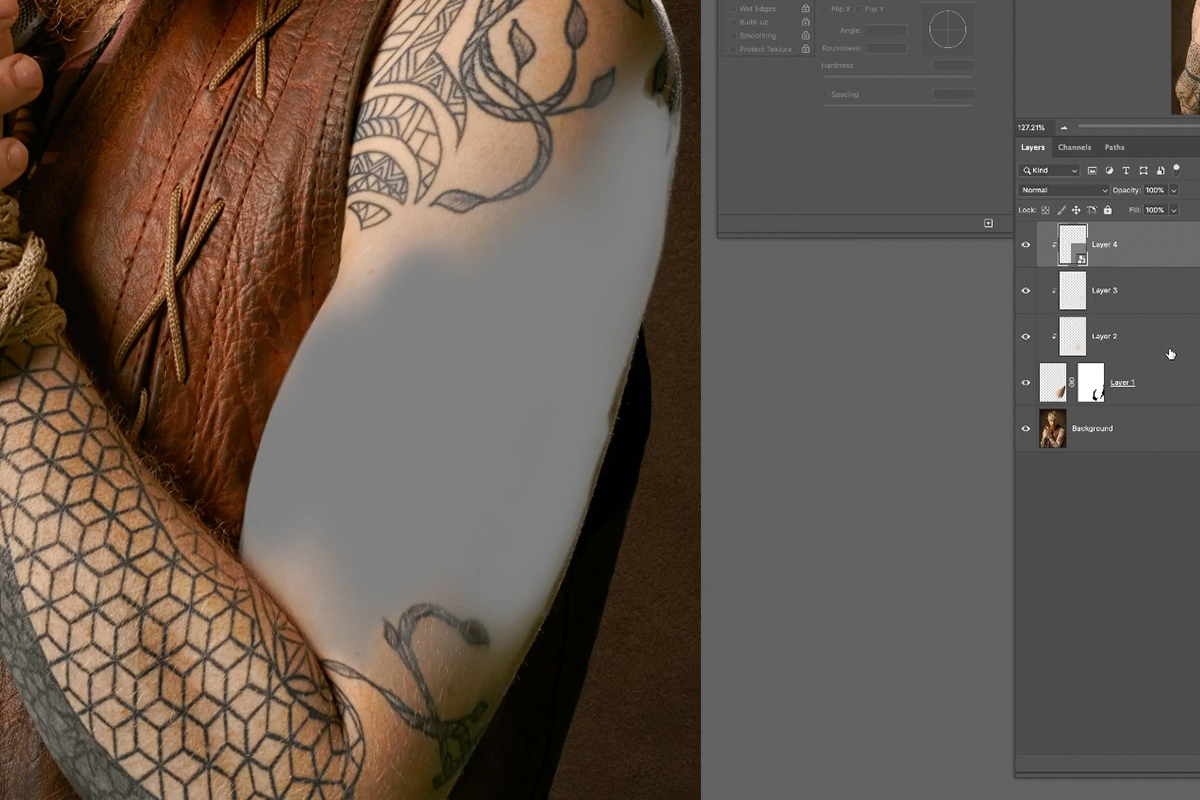
After the selection is filled with gray, change the Blending Mode of the Layer to Soft Light. Soft Light will hide any values that are 50% gray. This gives us an area where we can apply noise without doing anything weird to the color of the subject’s skin.
Before going any further, right-click on the new Layer and select Convert to Smart Object. Smart Objects allow us to use Smart Filters, which are just Filters that can be changed and adjusted at any time (instead of being permanent). Noise is a Filter, so this will help us dial in the exact look we need without having to worry about starting over if we mess it up.
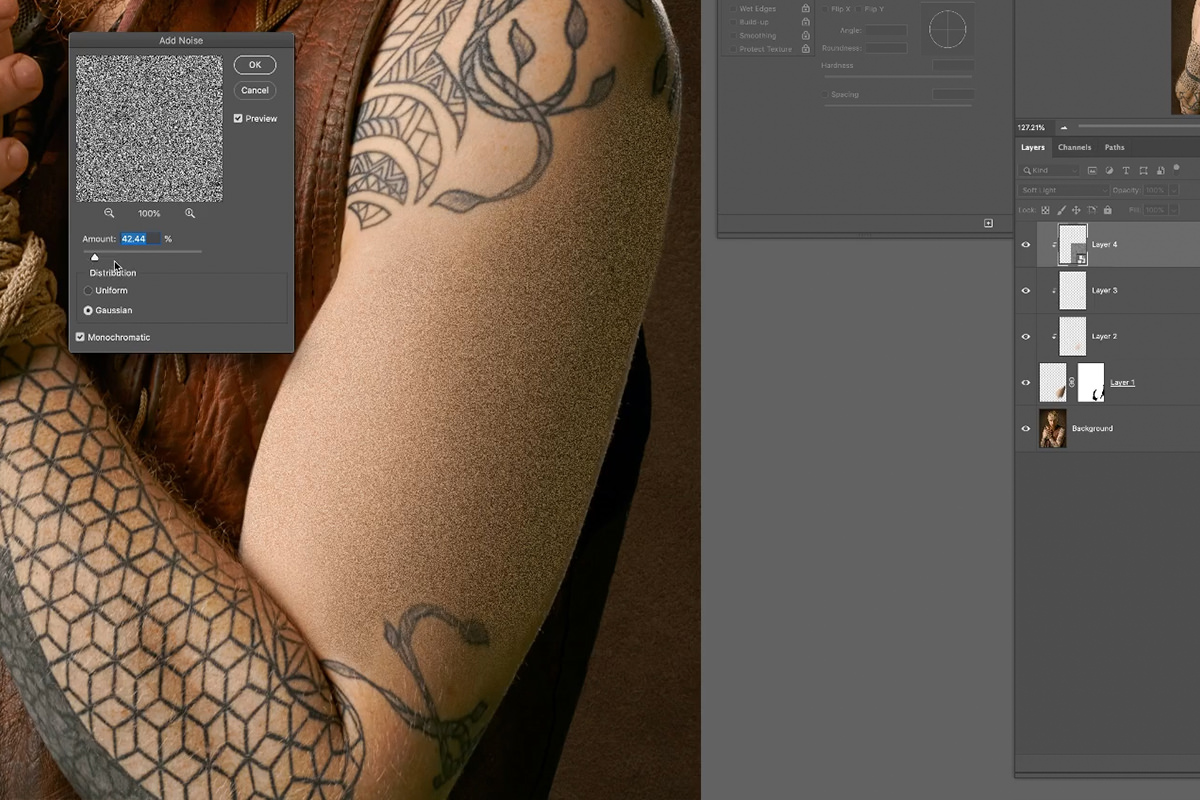
Now that we have Smart Object Layer where Noise can be applied, go to Filter, Noise, and Add Noise. You’ll get a live preview of what the Noise effect will look like–try and get it close, but don’t worry about it being perfect yet. We have a couple more Filters to apply before we’ll be able to see the complete effect.
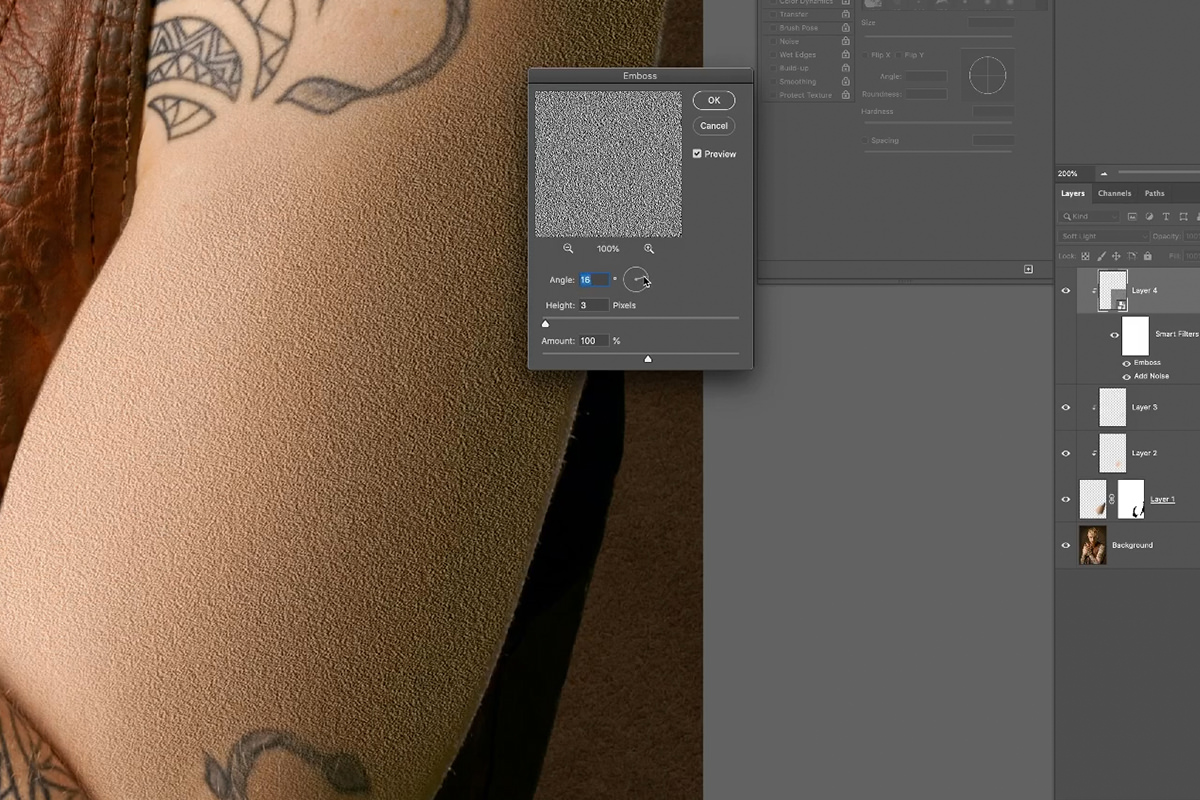
Next, go to Filter again, then to Stylize, and select Emboss. Emboss will add contrast to fine edges, giving the appearance of more texture and depth. Again, get it close, but it doesn’t have to be perfect yet.
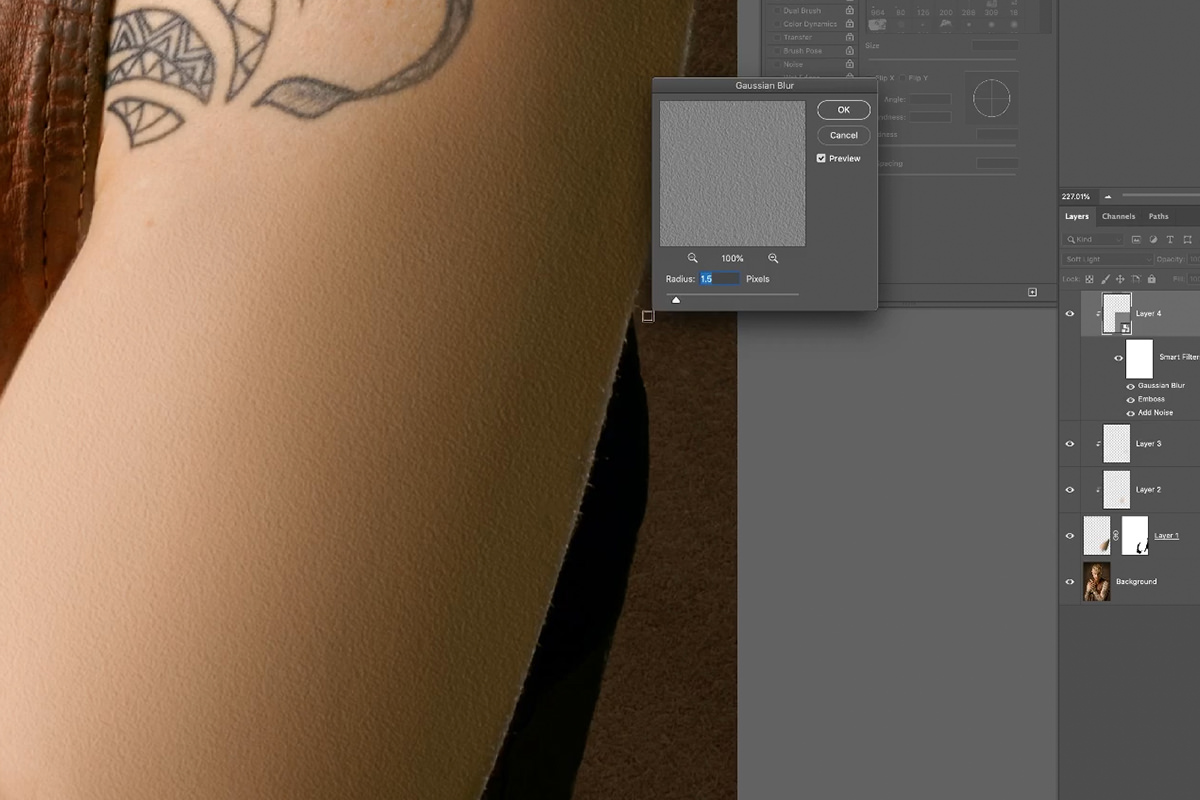
Lastly, go to Filter, then to Blur, and choose Gaussian Blur. Apply enough of a blur so that the texture isn’t as harsh, and so that the texture starts to blend in with the photograph.
Now that these 3 elements are set, go back and dial each in until you get something that closely matches the natural skin texture from the surrounding areas.
Adding More Detail with Custom Brushes
We’re looking pretty good, but it doesn’t look like real skin just yet. Skin has spots, tiny imperfections, freckles, color variation, and hair. That’s a lot of detail that we’re missing. So where do we even start trying to recreate it?
Custom Photoshop Brushes are an amazing tool for creating randomness and variation when you need it. Included in the download for this tutorial are the three custom Brushes we created to complete this edit. Two of the brushes are for adding skin detail, like spot and freckles, and the other one is designed to create fine, realistic hair. Watch and follow along if you want to learn how to make them, but feel free to use them straight away if you want to save some time.

Use the Brushes to create spots, freckles, and color variations in the skin.
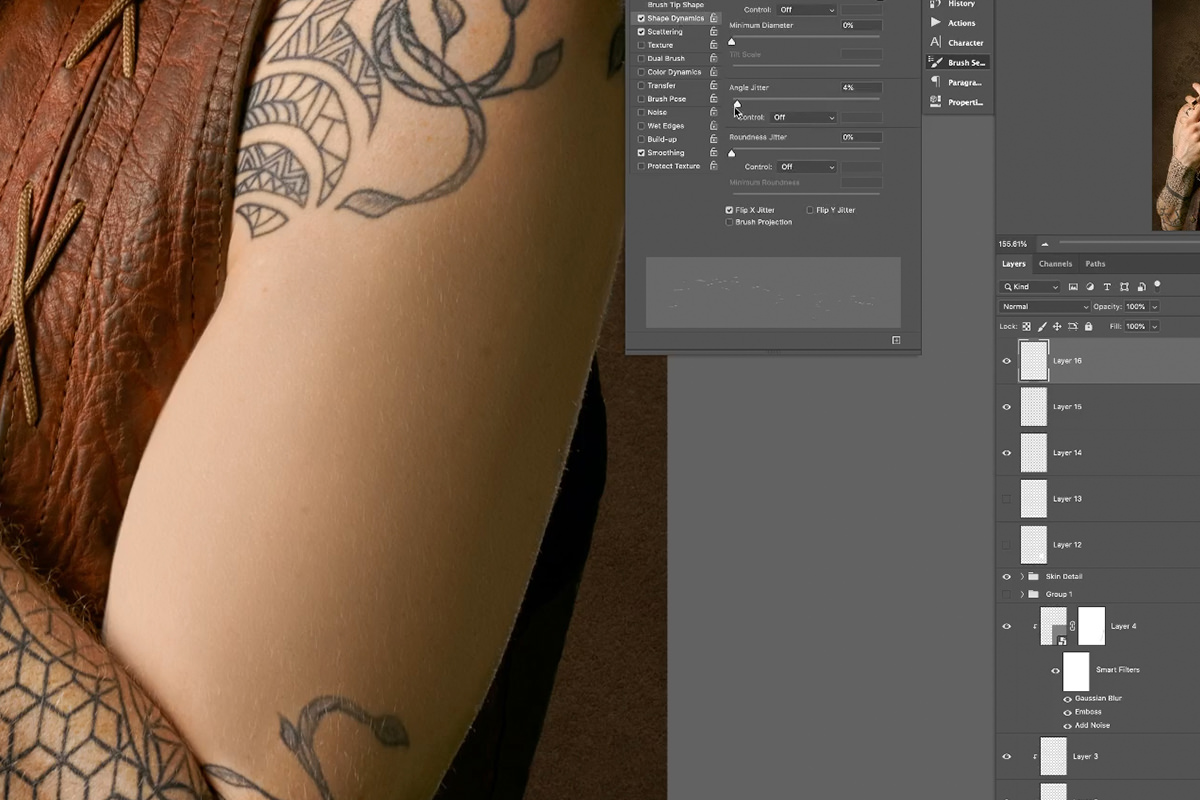
Then apply some fine hairs over top. Make sure to look at other similar areas of the subject’s skin so that you can match the density, color, and thickness of each feature as closely as possible.
We recommend watching the video above to get a complete rundown of all of the techniques you can use to create realistic textures and features with these brushes. Just be sure to always work on new Layers whenever you’re adding a new or different feature, sample colors from the surrounding skin, and use Blending Modes, Opacity, and different Brush sizes to work in as much variation as possible.
You did it! Sit back, zoom out, and take a nice long look at your work. If anything feels wrong or out of place, don’t hesitate to go back in and make changes. We’ve worked non-destructively, using Smart Objects and new Layers which makes it easy to change, add, or remove elements in a snap.
You can also add additional adjustments over the top of everything if you need the colors, highlights, and shadows to be dialed in even further. Some last minute changes to color can also help to tie each of the elements together, creating skin texture that looks unbelievably natural.